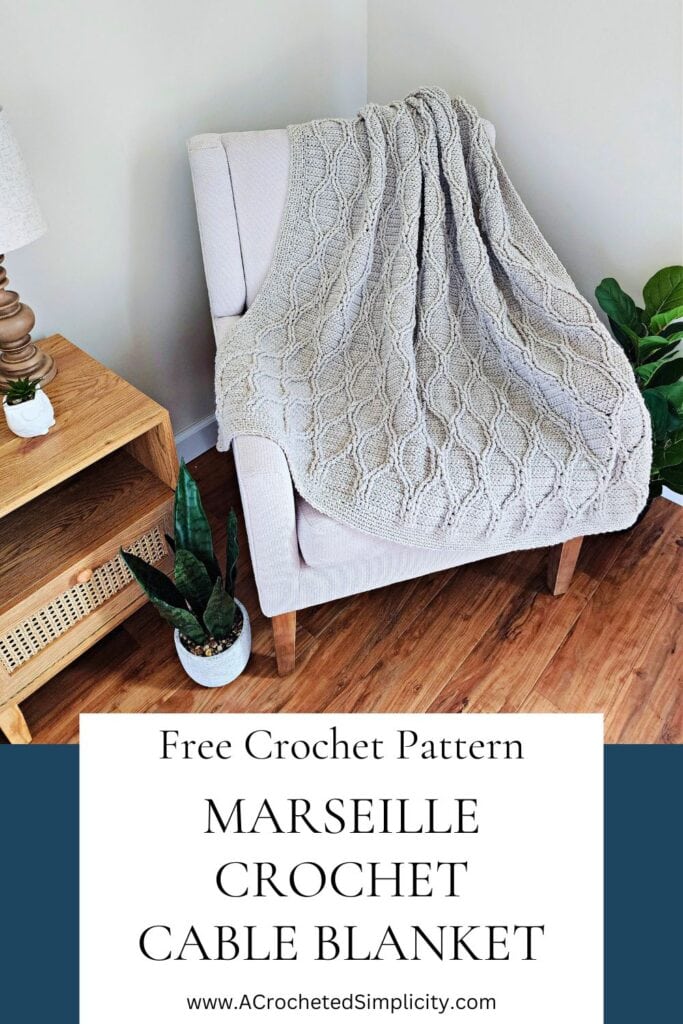
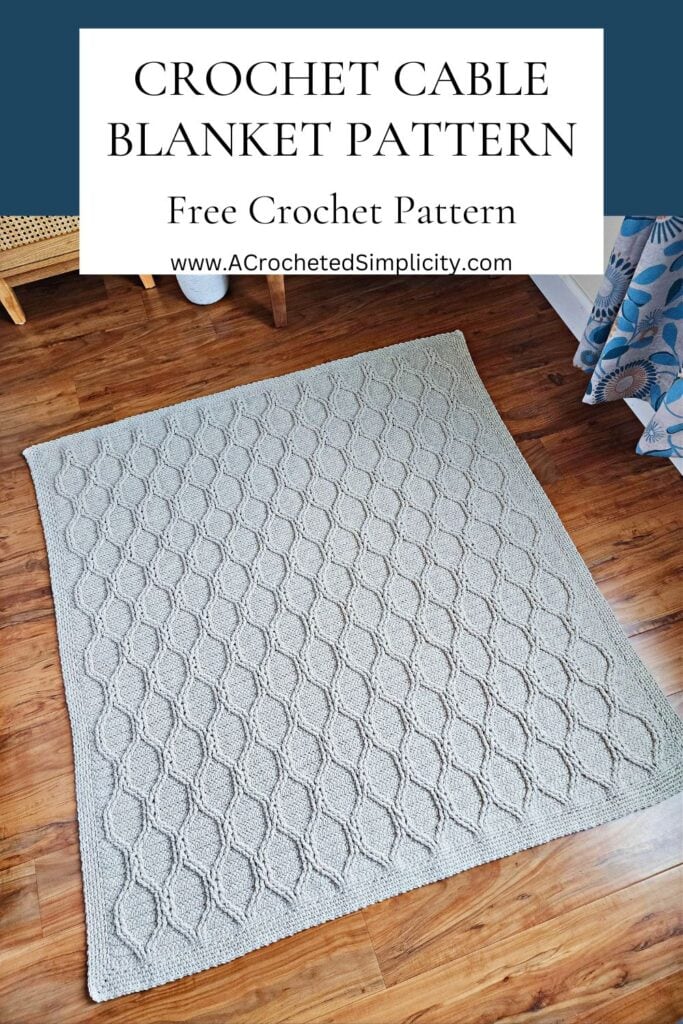
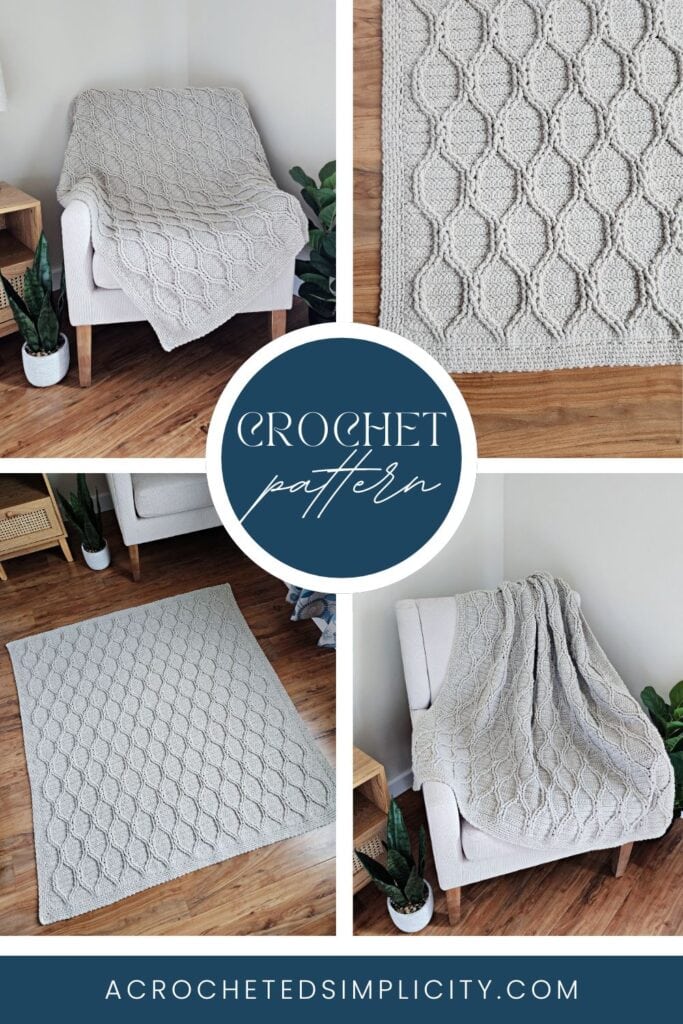
Marseille Crochet Cable Blanket
Learn to crochet a crochet cable blanket that showcases intricate cable stitch patterns that create a captivating visual appeal.
The Marseille Cabled Crochet Blanket blends timeless elegance with cozy comfort. Whether draped over a sofa or folded at the foot of a bed, this blanket brings a cozy, handmade touch to any room.
You’ll find the crochet cable blanket pattern is free below, or an ad-free print friendly PDF (including a BONUS crochet cables stitch chart) on Ravelry, or on Etsy (aff).
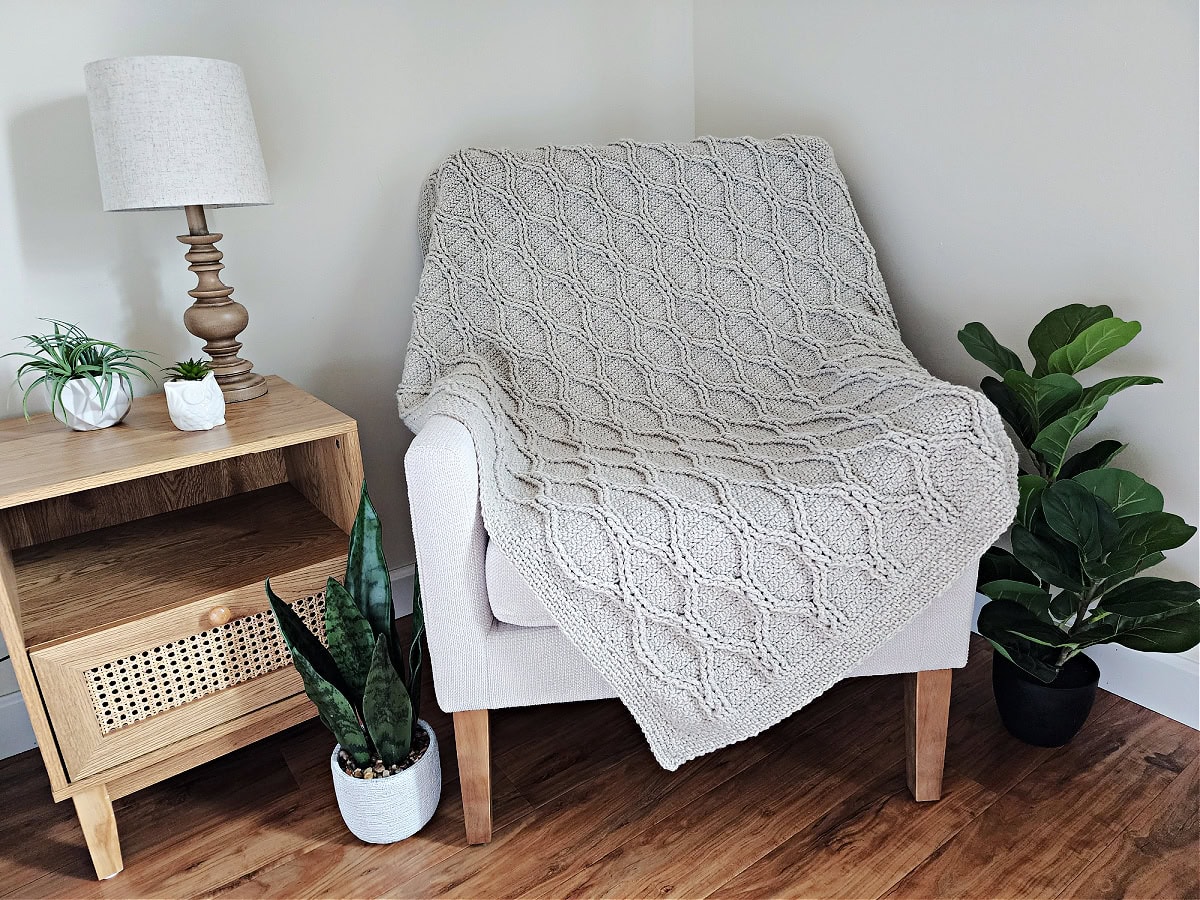
The Marseille Crochet Cable Blanket is a stunning piece of handcrafted artistry, blending warmth, texture, and elegance in perfect harmony. Crafted with meticulous attention to detail, this blanket showcases intricate cable stitch patterns that create a captivating visual appeal.
Inspired by the rich cultural heritage of Marseille, France, this blanket exudes a sense of timeless sophistication. The cable motifs, reminiscent of traditional French craftsmanship, lend a touch of rustic charm and artisanal beauty to any space.
Skills & Techniques You’ll Use
This crochet cable stitch blanket combines crochet post stitches on a background of herringbone half double crochet stitches (Hhdc) with a linen stitch border to create a stunning crochet 3d blanket.
Crochet skills you’ll practice:
- Front post double crochet (fpdc)
- Back post double crochet (bpdc)
- Front post treble crochet (fptr)
- Herringbone half double crochet (Hhdc)
- Two strand cable twist: This crochet video tutorial shows the basic technique used to twist cable stitches. The video shows front post double crochet stitches being twisted, but this pattern twists front post treble crochet stitches.
Related: If you like working from stitch charts, the ad-free PDF includes a BONUS crochet cables chart.
Yarn
For this crochet cable blanket, I chose Lion Brand Yarns Wool Ease. Wool Ease is an 80% acrylic, 20% wool blend worsted weight yarn that is currently available in 31 gorgeous colors.
Although Wool Ease is classified as a Craft Yarn Council 4 / worsted weight yarn, I’ve found that it is on the lighter side of most worsted weight yarns. This makes it the perfect choice for a cable blanket since cables tend to create a more dense crochet fabric.
Wool Ease is the perfect yarn for so many different crochet projects. I personally love it for crochet cardigans, crochet blankets, and warm winter accessories.
Yarn Substitutions
Although Wool Ease is my favorite worsted weight yarn, Lion Brand has several other great worsted weight yarn options such as Pound of Love, Basic Stitch, Vanna’s Choice, and more.
If you’d like to crochet a chunky blanket, Lion Brand Yarns Hue & Me is a great choice. Simply increase your hook size until you achieve the drape of the fabric you prefer.
For help determining what size to make your crocheted blanket, check out my Standard Blanket Size Chart.
How to Crochet a Cable Blanket
Crochet cables are one of many fun ways to add texture and design to a crochet blanket. Cable designs range from very basic crochet cables that only move upward, to more intricate cable designs that move inward and outward as they move upward.
Many crocheters are intimidated by cable stitches at first, but after working a few rows, they soon discover that they’re easier than they thought!
I would classify this cabled stitch crochet pattern somewhere between an easy crochet cable design and an intermediate cable design.
This crochet cable afghan pattern is crocheted back and forth in rows. You’ll use three different post stitches to create the raised cables on top of the herringbone half double crochet stitch background.
The small cable twists are very simple to crochet. First, you’ll skip a post stitch and work a post stitch around the next stitch. Then, working in front or behind the first post stitch, you’ll work a post stitch around the skipped stitch. That’s it!
After crocheting the cabled portion of the blanket, you’ll crochet a border on a blanket using the crochet linen stitch pattern.
Related: If you love crochet cables and making blankets with crocheted squares, you’ll love my Cabled Blooms Blanket!
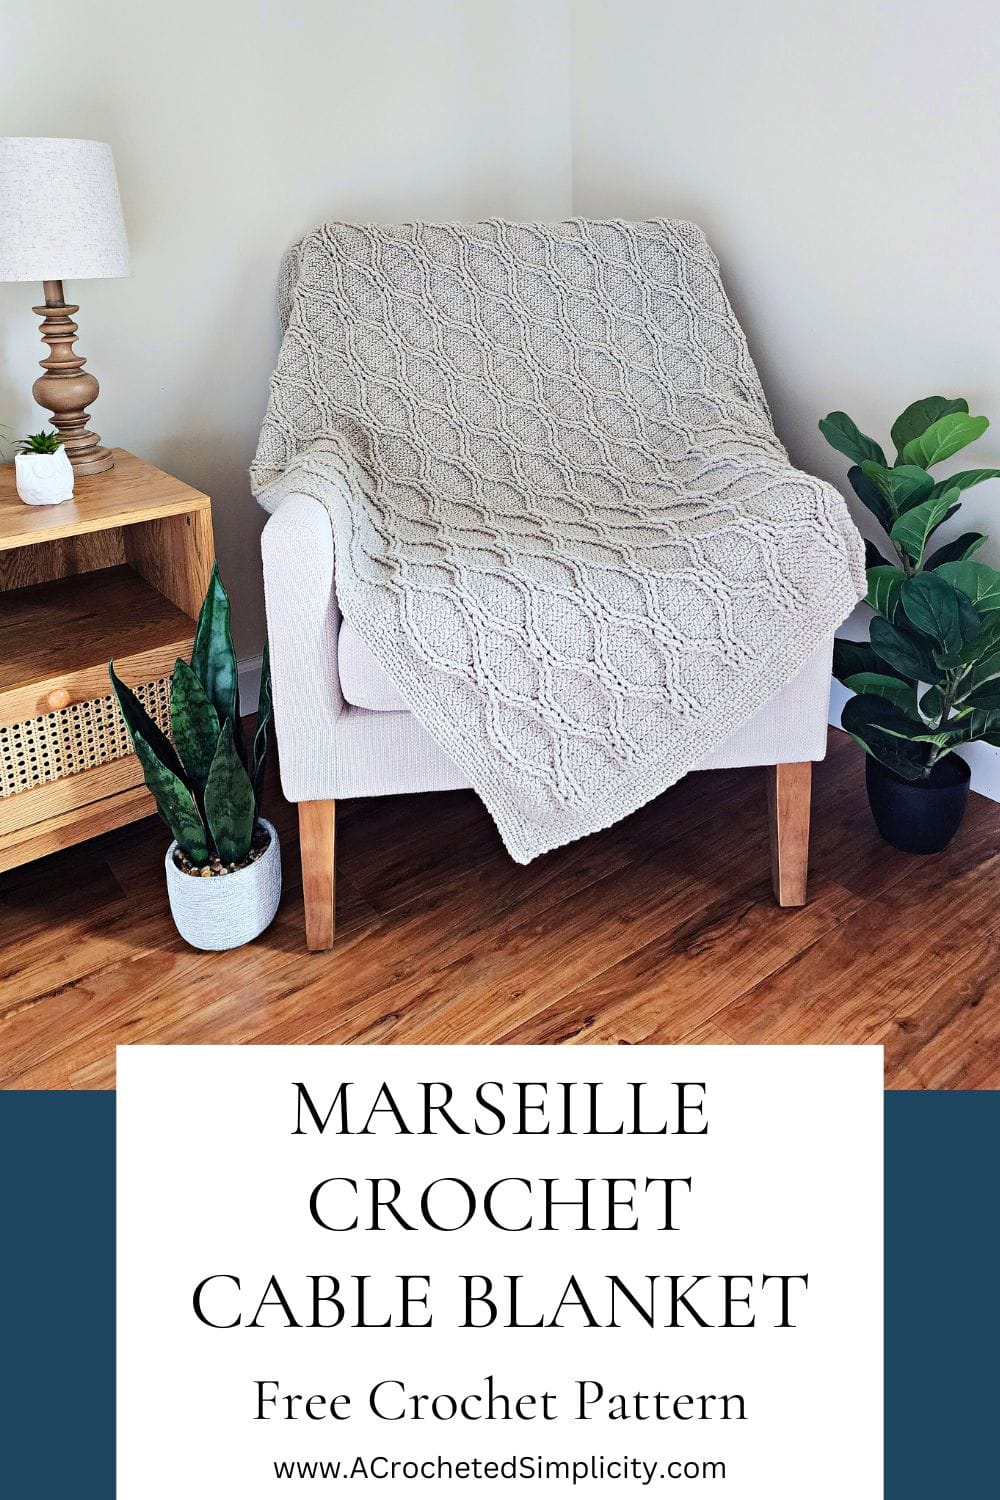
Marseille Crochet Cable Blanket – Free Pattern
The cable knit-look throw blanket is free below, but if you love to work offline, or need to order your yarn, I’ve got a couple other great options for you.
Purchase the ad-free, printable PDF (including a BONUS crochet cables stitch chart) on Ravelry, or Etsy (aff).
Purchase the crochet blanket kit! Lion Brand also has a full kit of the Marseille Crochet Cable Blanket, available on their website. The blanket crochet kit includes your choice of colors and a digital copy of the crochet pattern.
This post contains affiliate links.
Materials
- Yarn: Worsted Weight / 4 yarn, Lion Brand Yarns Wool Ease was used for the cable throw blanket shown in the photos (85 g / 3 oz / 197 yards / 180 meters / 80% acrylic / 20% wool) per ball.
- Linen: #620-096A – see size chart below for yardage
- Crochet Hooks: J/ 10 / 6.00mm; K/10.5/6.50mm (My favorite crochet hooks are the Clover Amour Hooks, I’ve never had an ache in my hand since switching)
- Scissors
- Yarn Needle
- Locking Stitch Markers
Skill Level
- Intermediate
Gauge
- With a 6.00 mm crochet hook, in Hhdc: 29 sts = 8″; 18 rows = 6.5″
Size
- Baby 36″ W x 42″ L
- Lapghan 43″ W x 48″ L
- Large Throw 49″ W x 74″ L
- Check out my Blanket Size Chart, for standard blanket sizes.
Abbreviations (U.S. Terms)
- ch(s): chain(s)
- sl st(s): slip stitch(es)
- st(s): stitch(es)
- sp(s): space(s)
- sc: single crochet
- Hhdc: herringbone half double crochet
- fpdc: front post double crochet
- bpdc: back post double crochet
- fptr: front post treble crochet
- bptr: back post treble crochet
- Join yarn with a standing single crochet
- yo: yarn over
- sp(s): space(s)
- Rep: repeat
- Rnd: round
- SM: stitch marker
- RS: right side
- WS: wrong side
Special Stitches
- Herringbone Half Double Crochet (Hhdc): Yo, insert hook into stitch indicated, yo, pull up a loop and pull it thru 1 loop on hook, yo, pull thru remaining loops.
- Front Post Double Crochet (fpdc): Yo, insert hook from front to back to front around the post of the designated stitch, yo, pull up a loop, yo, pull thru 2 loops, yo, pull thru remaining 2 loops.
- Front Post Treble Crochet (fptr): Yo 2 twice, insert hook from front to back to front around the post of the designated stitch, yo, pull up a loop, (yo, pull thru 2 loops) 3 times.
- Back Post Double Crochet (bpdc): Yo, insert hook from back to front to back around the post of the designated stitch, yo, pull up a loop, yo, pull thru 2 loops, yo, pull thru remaining 2 loops.
- Back Post Treble Crochet (bptr): Yo 2 twice, insert hook from back to front to back around the post of the designated stitch, yo, pull up a loop, (yo, pull thru 2 loops) 3 times.
Pattern Notes
- I tend to crochet on the tighter side. You may need to go down a hook size (or two) to meet gauge if you crochet on the looser side.
- Beginning chain(s) are not included in stitch count, unless noted otherwise.
- Each ch-1 space worked within a round in the crochet border is counted as a stitch.
- The first stitch of each row is worked into the same stitch as the beginning chain, unless stated otherwise.
- Lion Brand Yarns Wool Ease worsted weight yarn, was used for the sample shown in the photos. 80% Acrylic / 20% Wool, (85 g / 3 oz / 197 yards / 180 meters)
- Yarns similar in fiber and weight can be substituted.
- Yardage & Colors
- Linen: #620-096A – see size chart below for yardage
- Changes for Sizes as follows: Baby (Lapghan, Large Throw)
- Changes for Stitch Counts: (Baby, Lapghan, Large Throw)
- Standard Blanket Sizes can be found in my Blanket Size Chart.
- How to crochet a throw blanket: This cabled crochet blanket is crocheted back and forth in rows. After crocheting the cabled portion of the blanket, a simple linen stitch border is then added.
- The ad-free PDF includes a BONUS crochet stitch chart for the crochet cable stitches.
Size Chart & Yardage
| Size | Measurements | Yardage | # of Balls |
| Baby | 36″ W x 42″ L | 1,850 yards | 10 |
| Lapghan | 43″ W x 48″ L | 2,500 yards | 13 |
| Large Throw | 49″ W x 74″ L | 4,450 yards | 23 |
Crochet Cable Blanket Pattern
Gauge: In Hhdc: 29 sts = 8″; 18 rows = 6.5″
Set-up: With yarn & a 6.50mm crochet hook, ch 125 (149, 173). (125, 149, 173 chs)
Row 1 (WS): Switch to a 6.00mm crochet hook, working into the back humps of the foundation ch, sc in the 2nd ch from your hook and in each ch across. Turn. (124, 148, 172 sts)
Important Row 2 Tip: Row 2 is the cable set-up row. If you’re struggling with knowing exactly where the post of the stitch is that you need to work a post stitch around, make sure to check out my 2 Tips for Proper Post Stitch Placement. There is a quick video and a photo tutorial that will not only help you with the Marseille Cable Blanket, it will help you with all other crochet cable patterns.
Row 2 (RS): Ch 1, Hhdc in each of the first 6 sts, (fpdc around each of the next 4 sts, Hhdc in each of the next 8 sts) work from ( to ) 9 (11, 13) times, fpdc around each of the next 4 sts, Hhdc in each of the last 6 sts. Turn. (124, 148, 172 sts)
Row 3: Ch 1, Hhdc in each of the first 5 sts, (skip the next Hhdc, bpdc around each of the next 2 post sts, Hhdc in the top of the same post st as the bpdc just worked, Hhdc in the top of the next post st, bpdc around the same post st as the Hhdc just worked, bpdc around the next post st, skip the next Hhdc, Hhdc in each of the next 6 sts) work from ( to ) 9 (11, 13) times, then, skip the next Hhdc, bpdc around each of the next 2 post sts, Hhdc in the top of the same post st as the bpdc just worked, Hhdc in the top of the next post st, bpdc around the same post st as the Hhdc just worked, bpdc around the next post st, skip the next Hhdc, Hhdc in each of the last 5 sts. Turn. (124, 148, 172 sts)
Row 4: Ch 1, Hhdc in each of the first 4 sts, (skip the next Hhdc, fpdc around each of the next 2 post sts, Hhdc in the top of the same post st as the fpdc just worked, Hhdc in each of the next 2 sts, Hhdc in the top of the next post st, fpdc around the same post st as the Hhdc just worked, fpdc around the next post st, skip the next Hhdc, Hhdc in each of the next 4 sts) work from ( to ) 9 (11, 13) times, then, skip the next Hhdc, fpdc around each of the next 2 post sts, Hhdc in the top of the same post st as the fpdc just worked, Hhdc in each of the next 2 sts, Hhdc in the top of the next post st, fpdc around the same post st as the Hhdc just worked, fpdc around the next post st, skip the next Hhdc, Hhdc in each of the last 4 sts. Turn. (124, 148, 172 sts)
Row 5: Ch 1, Hhdc in each of the first 3 sts, (skip the next Hhdc, bpdc around each of the next 2 post sts, Hhdc in the top of the same post st as the bpdc just worked, Hhdc in each of the next 4 sts, Hhdc in the top of the next post st, bpdc around the same post st as the Hhdc just worked, bpdc around the next post st, skip the next Hhdc, Hhdc in each of the next 2 sts) work from ( to ) 9 (11, 13) times, then, skip the next Hhdc, bpdc around each of the next 2 post sts, Hhdc in the top of the same post st as the bpdc just worked, Hhdc in each of the next 4 sts, Hhdc in the top of the next post st, bpdc around the same post st as the Hhdc just worked, bpdc around the next post st, skip the next Hhdc, Hhdc in each of the last 3 sts. Turn. (124, 148, 172 sts)
Row 6: Ch 1, Hhdc in each of the first 2 sts, (skip the next Hhdc, fpdc around each of the next 2 post sts, Hhdc in the top of the same post st as the fpdc just worked, Hhdc in each of the next 6 sts, Hhdc in the top of the next post st, fpdc around the same post st as the Hhdc just worked, fpdc around the next post st, skip the next Hhdc) work from ( to ) 9 (11, 13) times, then, skip the next Hhdc, fpdc around each of the next 2 post sts, Hhdc in the top of the same post st as the fpdc just worked, Hhdc in each of the next 6 sts, Hhdc in the top of the next post st, fpdc around the same post st as the Hhdc just worked, fpdc around the next post st, skip the next Hhdc, Hhdc in each of the last 2 sts. Turn. (124, 148, 172 sts)
Row 7: Ch 1, Hhdc in each of the first 2 sts, bpdc around each of the next 2 post sts, (Hhdc in each of the next 8 sts, bpdc around each of the next 4 post sts) work from ( to ) 9 (11, 13) times, then, Hhdc in each of the next 8 sts, bpdc around each of the next 2 post sts, Hhdc in each of the last 2 sts. Turn. (124, 148, 172 sts)
Row 8: Ch 1, Hhdc in each of the first 2 sts, fpdc around each of the next 2 post sts, (Hhdc in each of the next 8 sts, fpdc around the next post st, skip the next post st, fptr around the next post st, working in front of the fptr just worked, fptr around the skipped post st, fpdc around the next post st) work from ( to ) 9 (11, 13) times, then, Hhdc in each of the next 8 sts, fpdc around each of the next 2 post sts, Hhdc in each of the last 2 sts. Turn. (124, 148, 172 sts)
Row 9: Rep Row 7.
Row 10: Rep Row 8.
Row 11: Rep Row 7.
Row 12: Ch 1, Hhdc in each of the first 2 sts, Hhdc in the top of the next post st, fpdc around the same post st as the Hhdc just worked, fpdc around the next post st, (skip the next Hhdc, Hhdc in each of the next 6 sts, skip the next Hhdc, fpdc around each of the next 2 post sts, Hhdc in the top of the same post st as the fpdc just worked, Hhdc in the top of the next post st, fpdc around the same post st as the Hhdc just worked, fpdc around the next post st) work from ( to ) 9 (11, 13) times, then, skip the next Hhdc, Hhdc in each of the next 6 sts, skip the next Hhdc, fpdc around each of the next 2 post sts, Hhdc in the top of the same post st as the fpdc just worked, Hhdc in each of the last 2 sts. Turn. (124, 148, 172 sts)
Row 13: Ch 1, Hhdc in each of the first 3 sts, Hhdc in the top of the next post st, bpdc around the same post st as the Hhdc just worked, bpdc around the next post st, (skip the next Hhdc, Hhdc in each of the next 4 sts, skip the next Hhdc, bpdc around each of the next 2 post sts, Hhdc in the top of the same post st as the bpdc just worked, Hhdc in each of the next 2 sts, Hhdc in the top of the next post st, bpdc around the same post st as the Hhdc just worked, bpdc around the next post st) work from ( to ) 9 (11, 13) times, then, skip the next Hhdc, Hhdc in each of the next 4 sts, skip the next Hhdc, bpdc around each of the next 2 post sts, Hhdc in the top of the same post st as the bpdc just worked, Hhdc in each of the last 3 sts. Turn. (124, 148, 172 sts)
Row 14: Ch 1, Hhdc in each of the first 4 sts, Hhdc in the top of the next post st, fpdc around the same post st as the Hhdc just worked, fpdc around the next post st, (skip the next Hhdc, Hhdc in each of the next 2 sts, skip the next Hhdc, fpdc around each of the next 2 post sts, Hhdc in the top of the same post st as the fpdc just worked, Hhdc in each of the next 4 sts, Hhdc in the top of the next post st, fpdc around the same post st as the Hhdc just worked, fpdc around the next post st) work from ( to ) 9 (11, 13) times, then, skip the next Hhdc, Hhdc in each of the next 2 sts, skip the next Hhdc, fpdc around each of the next 2 post sts, Hhdc in the top of the same post st as the fpdc just worked, Hhdc in each of the last 4 sts. Turn. (124, 148, 172 sts)
Row 15: Ch 1, Hhdc in each of the first 5 sts, Hhdc in the top of the next post st, bpdc around the same post st as the Hhdc just worked, bpdc around the next post st, (skip each of the next 2 Hhdc, bpdc around each of the next 2 post sts, Hhdc in the top of the same post st as the bpdc just worked, Hhdc in each of the next 6 sts, Hhdc in the top of the next post st, bpdc around the same post st as the Hhdc just worked, bpdc around the next post st) work from ( to ) 9 (11, 13) times, then, skip each of the next 2 Hhdc, bpdc around each of the next 2 post sts, Hhdc in the top of the same post st as the bpdc just worked, Hhdc in each of the last 5 sts. Turn. (124, 148, 172 sts)
Row 16: Ch 1, Hhdc in each of the first 6 sts, fpdc around each of the next 4 post sts, (Hhdc in each of the next 8 sts, fpdc around each of the next 4 post sts) work from ( to ) 9 (11, 13) times, then, Hhdc in each of the last 6 sts. Turn. (124, 148, 172 sts)
Row 17: Ch 1, Hhdc in each of the first 6 sts, (bpdc around the next post st, skip the next post st, bptr around the next post st, working behind the bptr just worked, bptr around the skipped post st, bpdc around the next post st, Hhdc in each of the next 8 sts) work from ( to ) 9 (11, 13) times, then, bpdc around the next post st, skip the next post st, bptr around the next post st, working behind the bptr just worked, bptr around the skipped post st, bpdc around the next post st, Hhdc in each of the last 6 sts. Turn. (124, 148, 172 sts)
Row 18: Rep Row 16.
Row 19: Rep Row 17.
Continue on to the instructions for the size you’re making.
Baby
Rows 20 – 109: Rep Rows 2 – 19. (124 sts)
Row 110 (RS): Rep Row 2. (124 sts)
Row 111 (WS): Ch 1, sc in each st across. (124 sts)
Do not fasten off. Continue on to Prepare Perimeter for Border. Blanket should be approximately 34″ W x 40″ L before border.
Lapghan
Rows 20 – 127: Rep Rows 2 – 19. (148 sts)
Row 128 (RS): Rep Row 2. (148 sts)
Row 129 (WS): Ch 1, sc in each st across. (148 sts)
Do not fasten off. Continue on to Prepare Perimeter for Border. Blanket should be approximately 41″ W x 46″ L before border.
Large Throw
Rows 20 – 199: Rep Rows 2 – 19. (172 sts)
Row 200 (RS): Rep Row 2. (172 sts)
Row 201 (WS): Ch 1, sc in each st across. (172 sts)
Do not fasten off. Continue on to Prepare Perimeter for Border. Blanket should be approximately 47.5″ W x 72″ L before border.
Prepare Edges for Border
After working the last row of your blanket, turn to begin to prepare the edges for the border.
Rnd 1 (RS): Ch 1, (sc, ch 2, sc) in the first st to create corner #1, work 1 sc into each st across to the last st of the row, (sc, ch 2, sc) in the last st to create corner #2, rotate to work along the next edge, work 1 sc into the side of each Hhdc to the next corner, work (sc, ch 2, sc) in the next corner to create corner #3, rotate to work along the bottom of the foundation chain, sc in each st across to the last st, work (sc, ch 2, sc) in the last st to create corner #4, rotate to work along the last edge, work 1 sc into the side of each Hhdc to the next corner, to first st of the rnd. Join with a sl st to the 1st st. Stitch count isn’t crucial. Place a SM in the ch-2 sp’s to mark each corner.
Do not fasten off. Continue on to Linen Stitch Border.
Linen Stitch Border
Tip: As you’re crocheting around the perimeter of your blanket, if your edges are becoming wavy, go down a hook size or two. If your edges begin to cinch inward, go up a hook size or two. This will help to ensure that the edges of your blanket lay flat.
Rnd 1: Sl st into the BLO of the first st (to move over to the ch-2 sp), [ (sc, ch 2, sc) in the next ch-2 sp, ch 1, skip the next st, (sc in the next st, ch 1, skip the next st) rep from ( to ) across to the next ch-2 sp ] work from [ to ] 4 times. Do not join. After completing the round, place a SM in the ch-2 at each corner, if needed.
Use a SM or scrap piece of yarn to mark the end of the round and move it up as you complete each round.
Rnd 2: [ (sc, ch 2, sc) in the next ch-2 sp, ch 1, skip the next st, (sc in the next ch-1 sp, ch 1, skip the next st) rep from ( to ) across to the next ch-2 sp ] work from [ to ] 4 times. Do not join.
Rnds 3 – 5: Rep Rnd 2. At the end of Rnd 5, join with a sl st to the first ch-2 sp.
Fasten off. Weave in ends. Block, if desired.
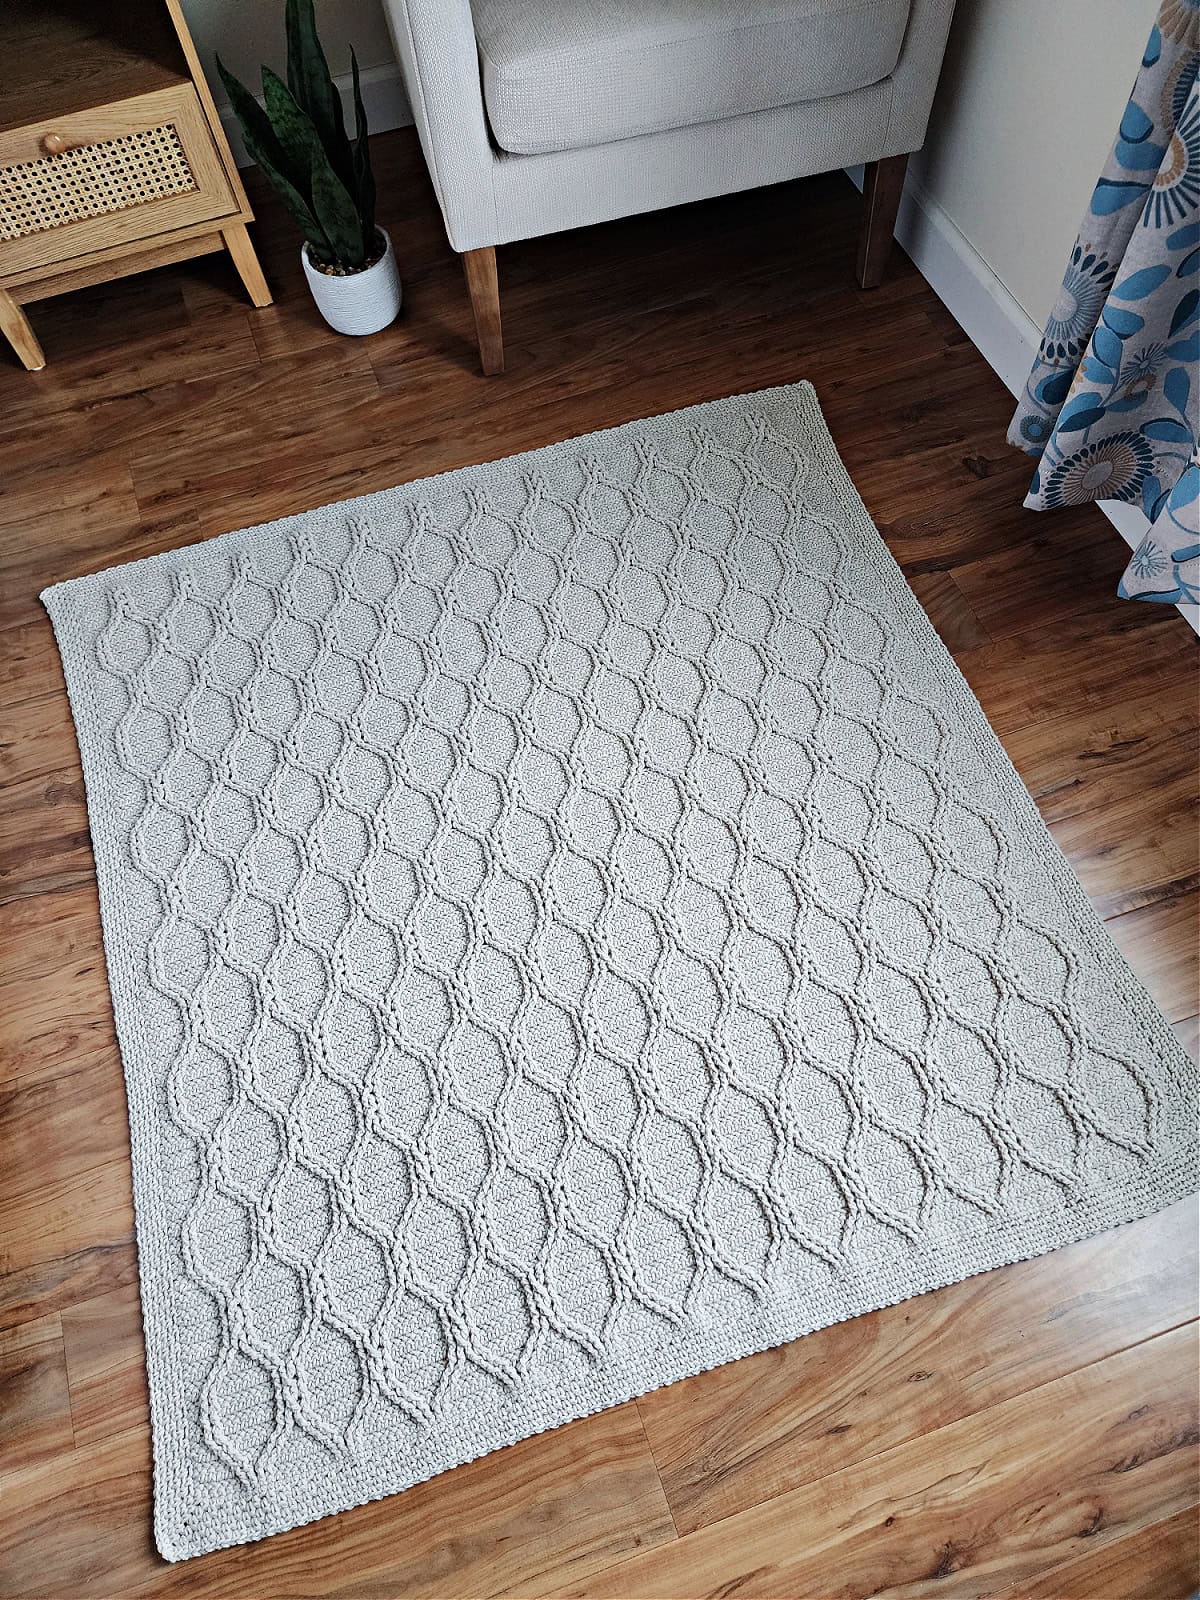
I MADE IT! NOW WHAT?
Pin this post! Save this crochet cable blanket pattern to your Pinterest boards so that you can come back and make it again.
Leave a comment below: We love to hear your feedback.
Share Your Finished Projects on Facebook or Instagram: I love to see your finished projects! Share with us on social media and tag me @acrochetedsimplicity or use the hashtag #ACrochetedSimplicity so I can find your posts.
JOIN US IN THE FACEBOOK COMMUNITY GROUP!
Come share your finished projects with us in the A Crocheted Simplicity Crochet Community Group on Facebook. Join us for fun community events such as crochet alongs, join in on crochet conversations, ask questions, get advice, and share your love for crochet!

More Crochet Blanket Patterns I Think You’ll Love
More Crochet Blanket Patterns Free
Are you looking for more free crochet blanket patterns? We have several more free crochet patterns for a crochet throw blanket pattern, hexagon crochet blanket, crochet baby blanket patterns, and more.
If you’re looking for how to crochet a granny square, you’ll also find several crochet squares for blanket.

