Crochet Christmas Cookie Ornaments
Christmas is a time for warm memories, sweet treats, and festive decorations. What better way to combine these holiday joys than by making your own crochet Christmas cookie ornaments?
These adorable decorations look like freshly baked treats, complete with icing and sprinkles, but they’re calorie-free and last for years to come. We also have a Milk for Santa Ornament pattern and it’s calorie-free too.
The Christmas cookie ornament patterns are free in the post below, or you can find an ad-free print friendly version (PDF also includes our Milk for Santa Ornament Pattern) on Ravelry, or on Etsy (aff).
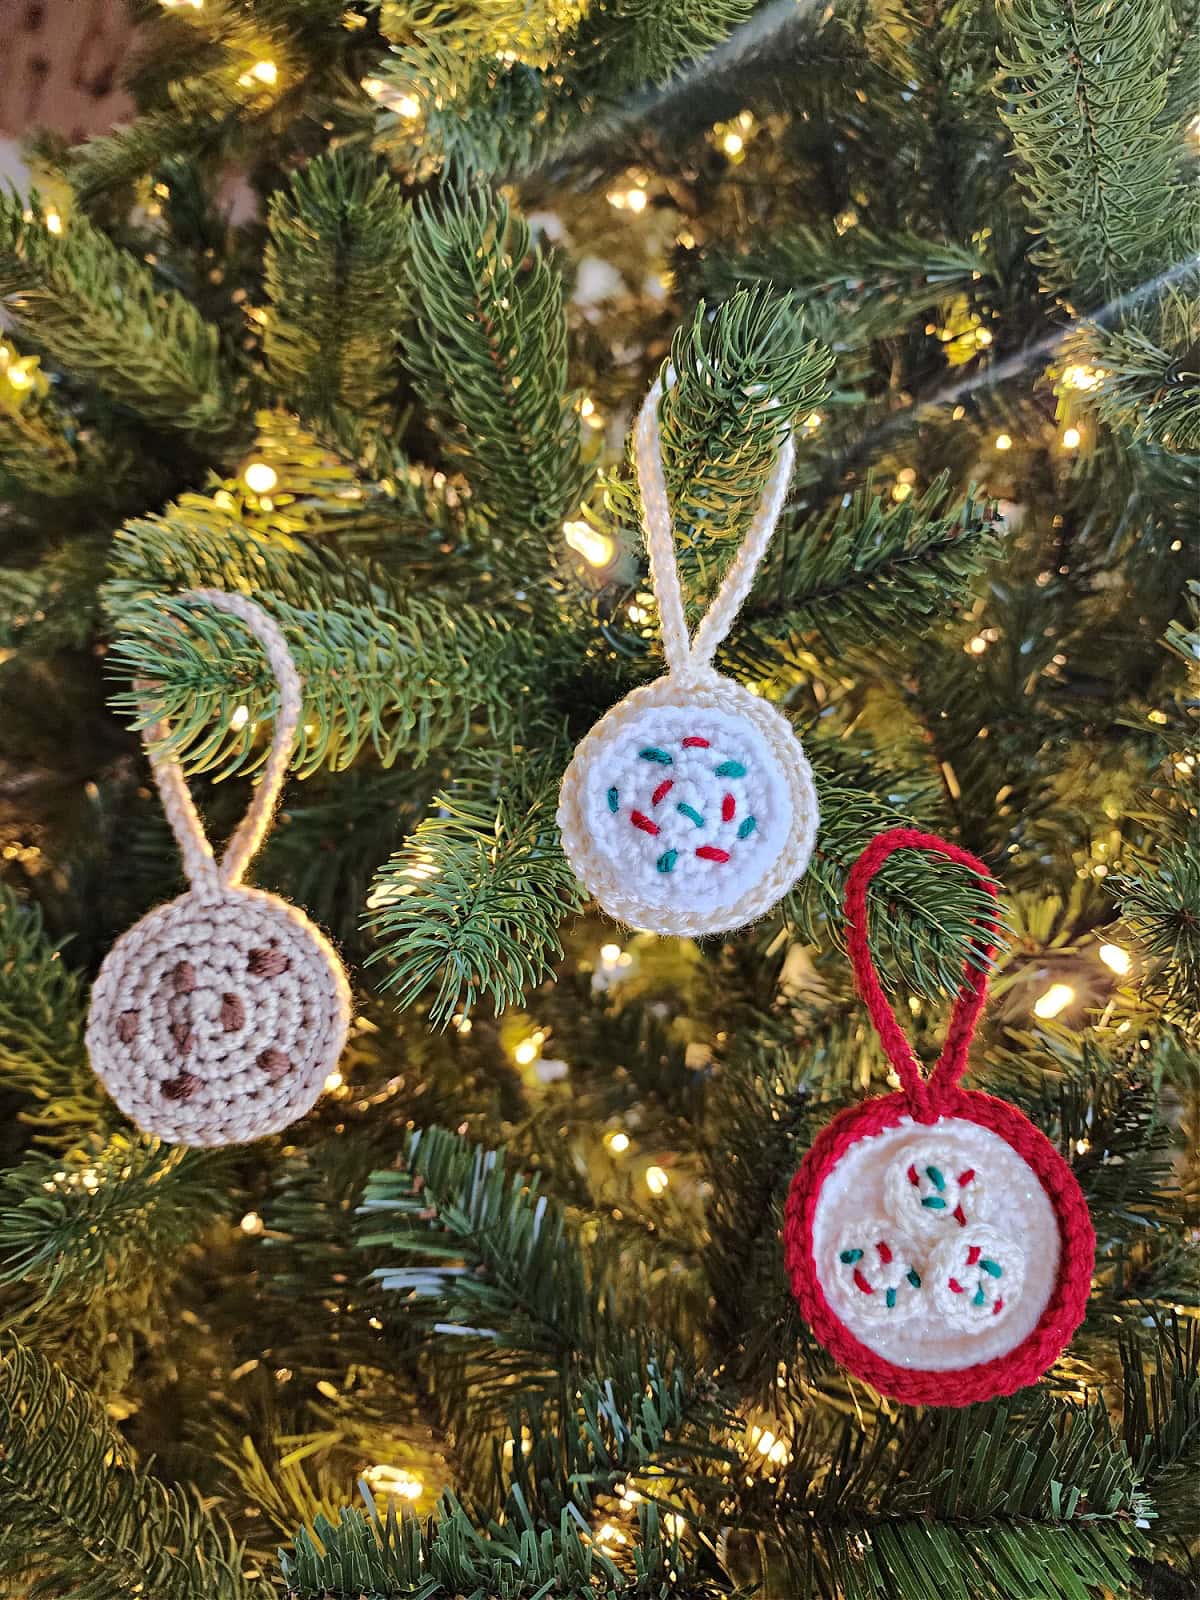
If you’re looking for a unique and delightful holiday craft idea, Crochet Christmas cookie ornaments are the perfect blend of creativity, charm, and nostalgia.
Whether you’re decking out your Christmas tree or searching for handmade gift ideas, these Christmas ornaments are sure to be a hit.
Related: Xmas crochet ornaments also make perfect DIY handmade gift tags.
Why Handmade Ornaments Are Special
Crafting your own decorations brings a sense of accomplishment and allows you to express your personal style. Plus, every time you see your crochet cookie ornament on the tree, it’ll remind you of the love and effort you put into making it.
Why Make a Crochet Chocolate Chip Cookie Ornament?
- Personal Touch: Handmade ornaments add a special charm to your holiday decor.
- Beginner-Friendly: Even if you’re new to crochet, these simple crochet Christmas ornaments are easy to follow.
- Great for Gifting: A crochet cookie ornament makes a thoughtful and unique gift for friends and family.
- Eco-Friendly: Skip store-bought plastic decorations and create something reusable and sustainable.
- Holiday party favors: Impress your guests with unique and memorable take-home goodies.
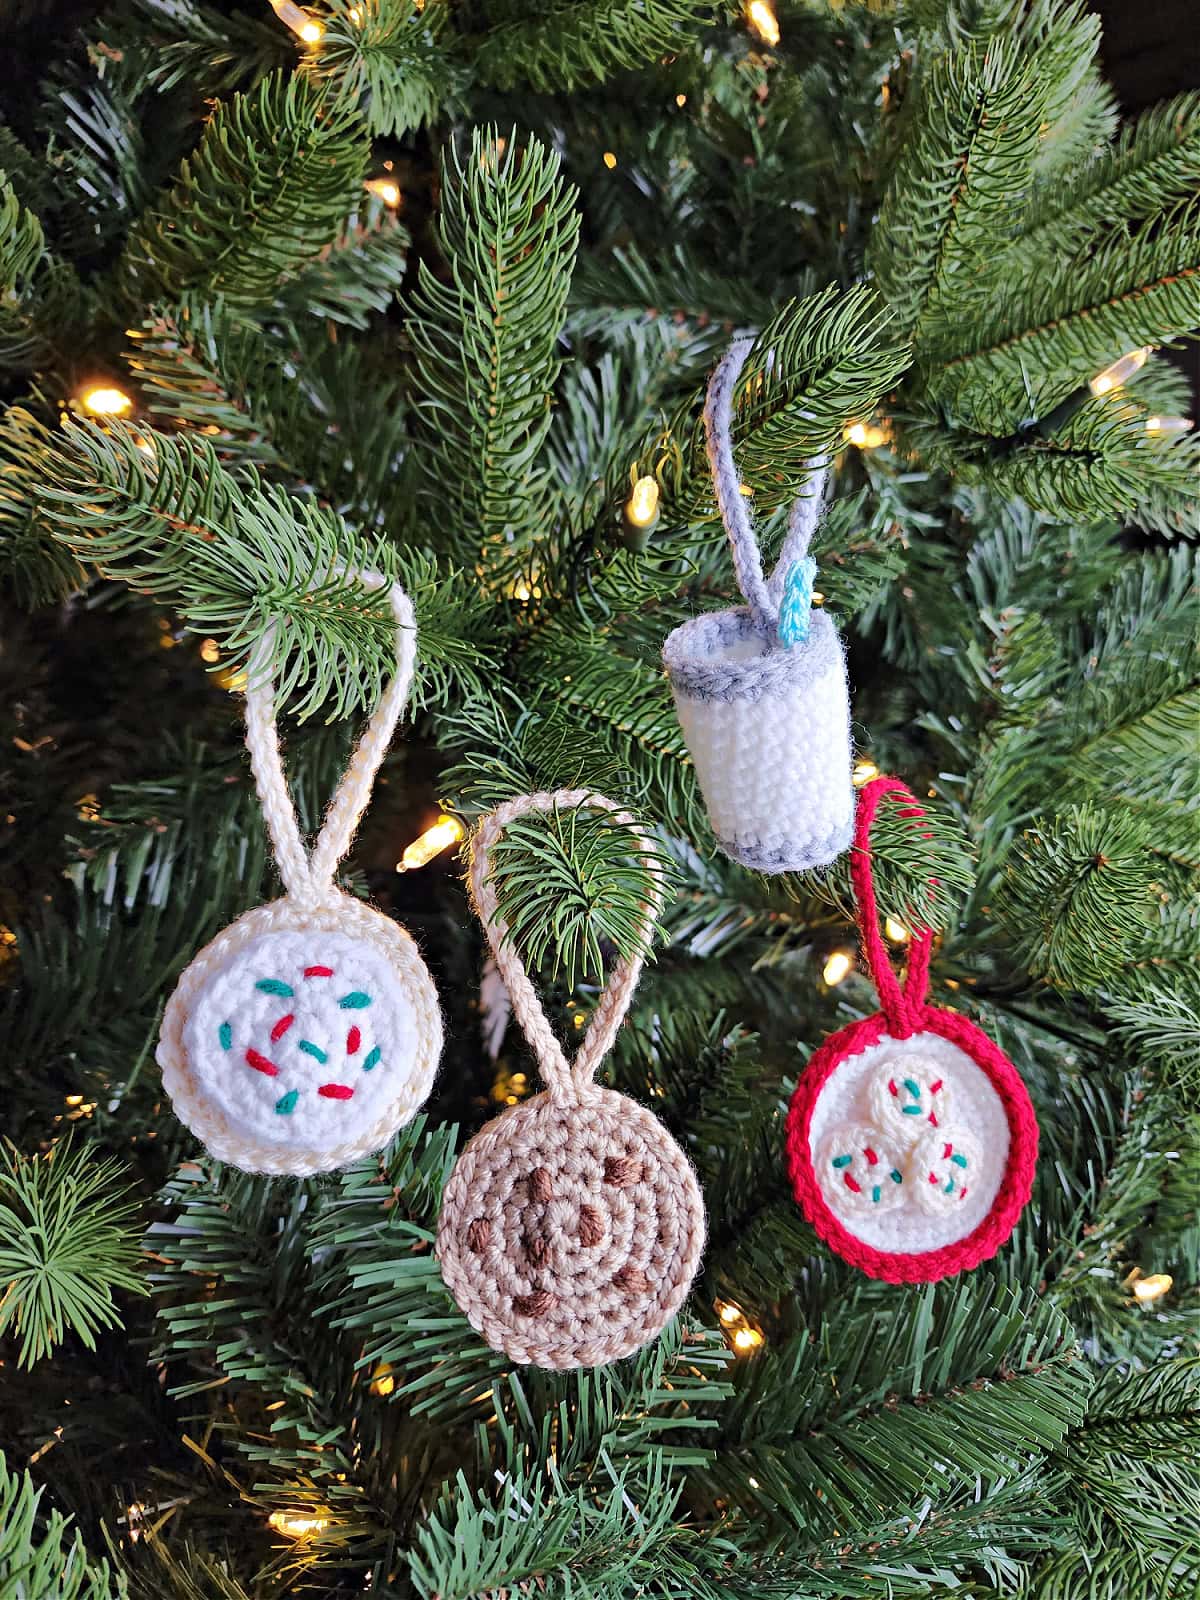
How to Get The
Milk & Cookies for Santa Christmas Ornament Patterns
Option 1: Scroll down for the free crochet cookie ornament patterns right here in this blog post.
Option 2: Purchase the ad-free printable PDF from one of my shops:
Customization Ideas
- Add Sprinkles: Use colorful embroidery thread to create “sprinkles” on your cookie.
- Make It Sparkle: Incorporate metallic or glittery yarn for a festive touch.
- Create a Cookie Set: Crochet a variety of cookies (sugar cookies, gingerbread, etc.) for a complete ornament set.
- Personalize It: Add initials or names using embroidery.
The crochet Christmas cookie ornaments set was designed as part of the 2024 Ultimate 12 Days of Christmas Ornament Crochet Along & Giveaway hosted by myself and Blackstone Designs!
Crochet Along with other crocheters in our community Right HERE.
Yarn
I used Lion Brand Yarn Pound of Love & Basic Stitch for my crochet Christmas cookie ornaments. Both yarns are worsted weight, 100% acrylic yarns. The main reason I chose these yarns is because the colors were perfect for crocheted cookies.
Other worsted weight yarns can be substituted.
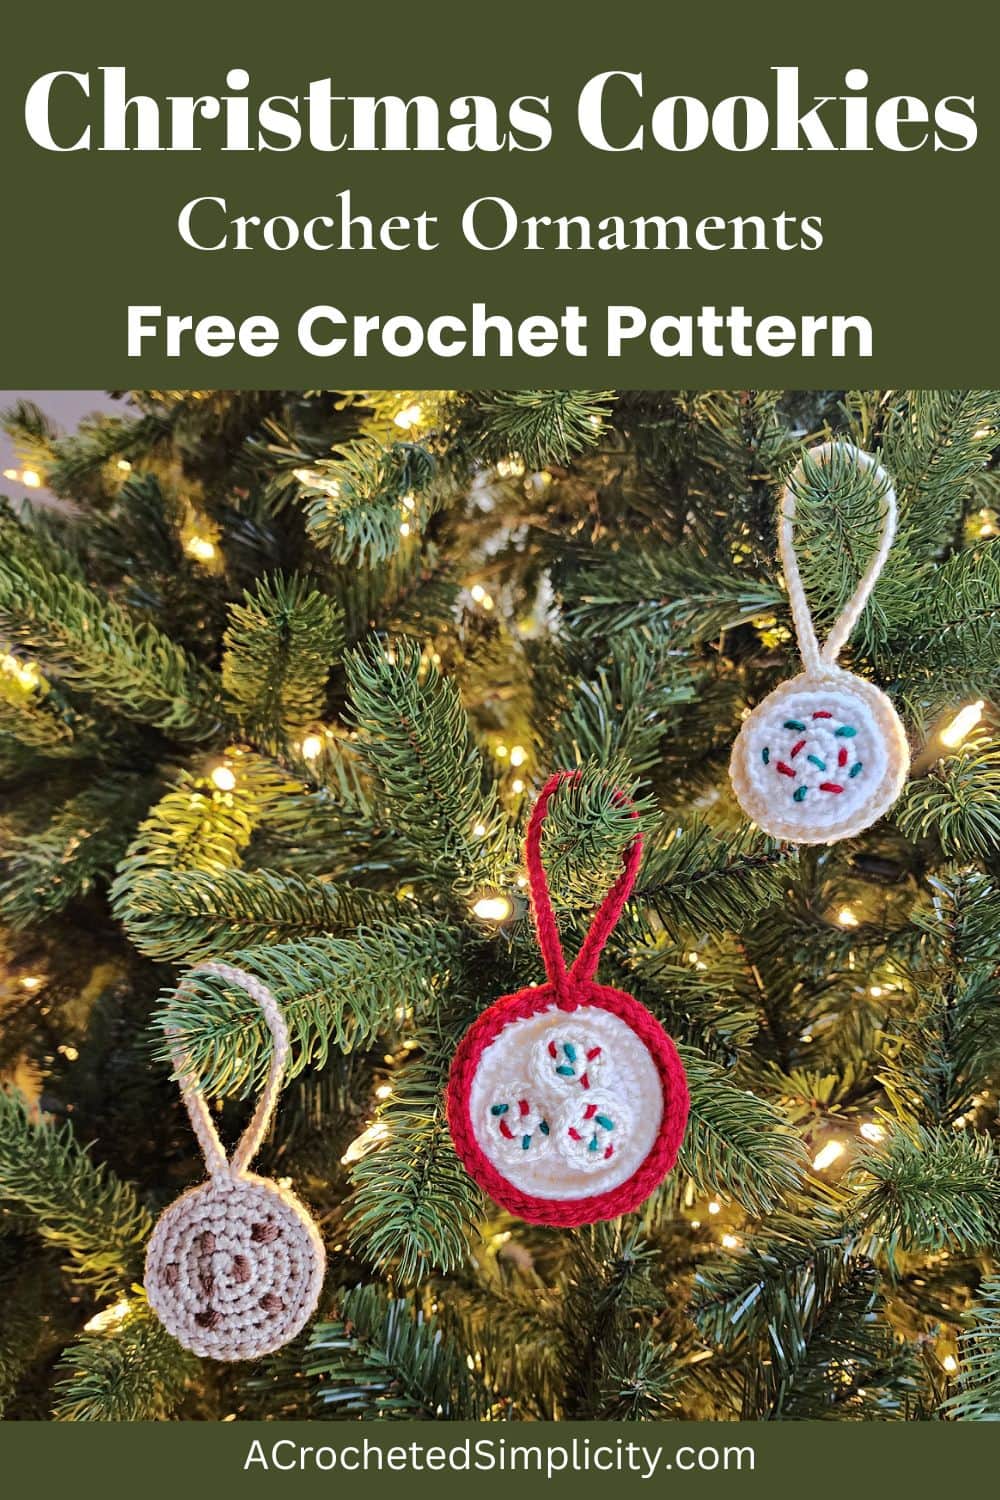
Crochet Christmas Cookie Ornaments – Free Patterns
The free crochet patterns for Christmas ornaments are below, but if you love to work offline, I’ve got a couple other great options for you.
Purchase the ad-free, printable PDF, including all photo tutorials on Ravelry, or on Etsy (aff).
Save this pattern to your Ravelry favorites.
Subscribe to my YouTube channel!
This post contains affiliate links.
Materials
- Yarn: Worsted Weight / 4 / Yarn, Lion Brand Yarn Pound of Love & Basic Stitch were used for the samples in the photos.
- See Pattern Notes below for exact yardage of each color.
- Crochet Hook: G/6/4.00mm; or size needed to obtain gauge (My favorite crochet hooks are the Clover Amour Crochet Hooks, I’ve never had an ache in my hands since switching).
- Locking Stitch Markers
- Scissors
- Yarn Needle
Abbreviations (US Terms)
- ch(s): chain(s)
- sl st(s): slip stitch(es)
- st(s): stitch(es)
- sc: single crochet
- Rnd: round
- RS: right side
- SM: stitch marker
- BLO: back loop only
- yo: yarn over
- Join yarn with a standing single crochet
Gauge
- Measurements are given throughout the pattern.
Size
- Cookies: 2.25″ diameter
- Plate of Cookies 2.75″ diameter
Special Stitches
- Join yarn with a standing single crochet: Begin with a slip knot on your hook, insert your hook into the stitch or space indicated, yo, pull up a loop, yo and draw thru both loops on hook.
Pattern Notes
- Turning chains are not included in stitch count unless noted otherwise.
- Yarn Notes: Lion Brand Yarn Pound of Love & Basic Stitch were used for the samples pictured in the photos. Pound of Love Yarn 100% Premium Acrylic, (1,020 yards / 454 g / 16 oz / 932 m).
- Another comparable worsted weight yarn may be used as long as gauge is met.
- Chocolate Chip Cookie Yardage
- Basic Stitch Almond (MC): 12 yards
- Basic Stitch Nutmeg (CC): 1 yard
- Sugar Cookie Yardage
- Basic Stitch Ivory (MC): 12 yards
- Pound of Love White: 5 yards
- Pound of Love Cherry (Red): 15″
- Pound of Love Wintergreen (green): 15″
- Cookie Plate with Mini-Cookies Yardage
- Basic Stitch Ivory: 6 yards
- Wool Ease White Multi: 7 yards
- Pound of Love Cherry (Red): 3.5 yards
- Pound of Love Wintergreen (green): 1 yard
- Crochet Cookie Ornament Construction: This Christmas cookie ornament is crocheted in a few pieces, then assembled. First, you’ll crochet circles for the cookies, or the plate. Next, you’ll decorate your cookies with chocolate chips or sprinkles. Lastly, you’ll join two cookie halves together and add a hanging loop.
Crochet Christmas Cookie Ornaments
This crochet ornament pattern includes three separate ornament patterns. Each cookie ornament is posted separately below. Scroll to the instructions for the Christmas ornament you’d like to make: Chocolate Chip Cookie Ornament, Frosted Sugar Cookie Ornament, or Plate of Cookies for Santa Ornament.
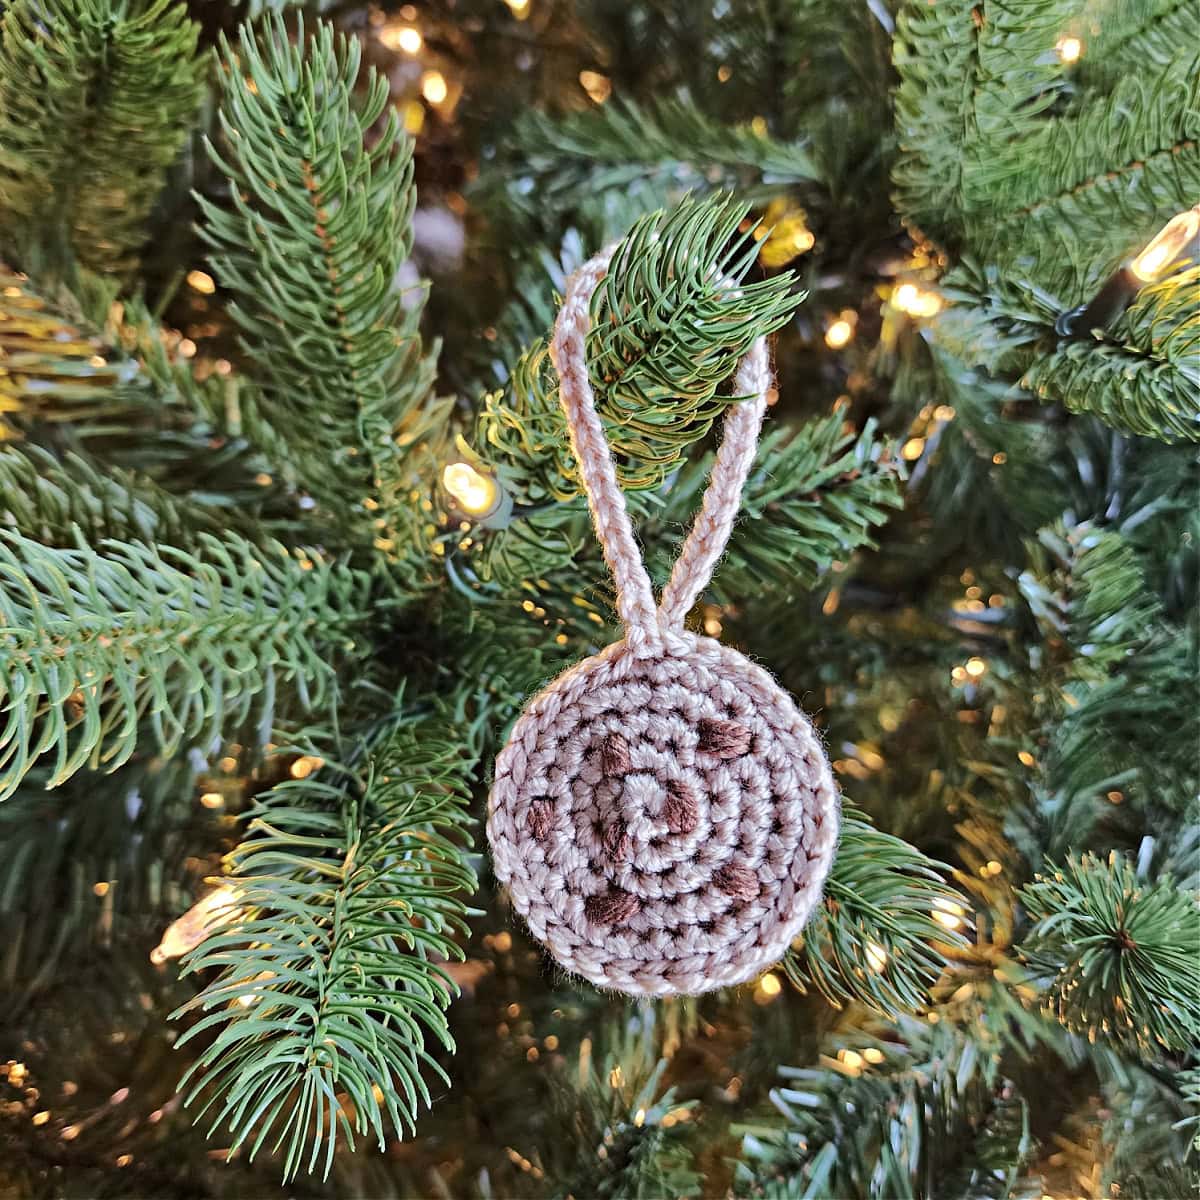
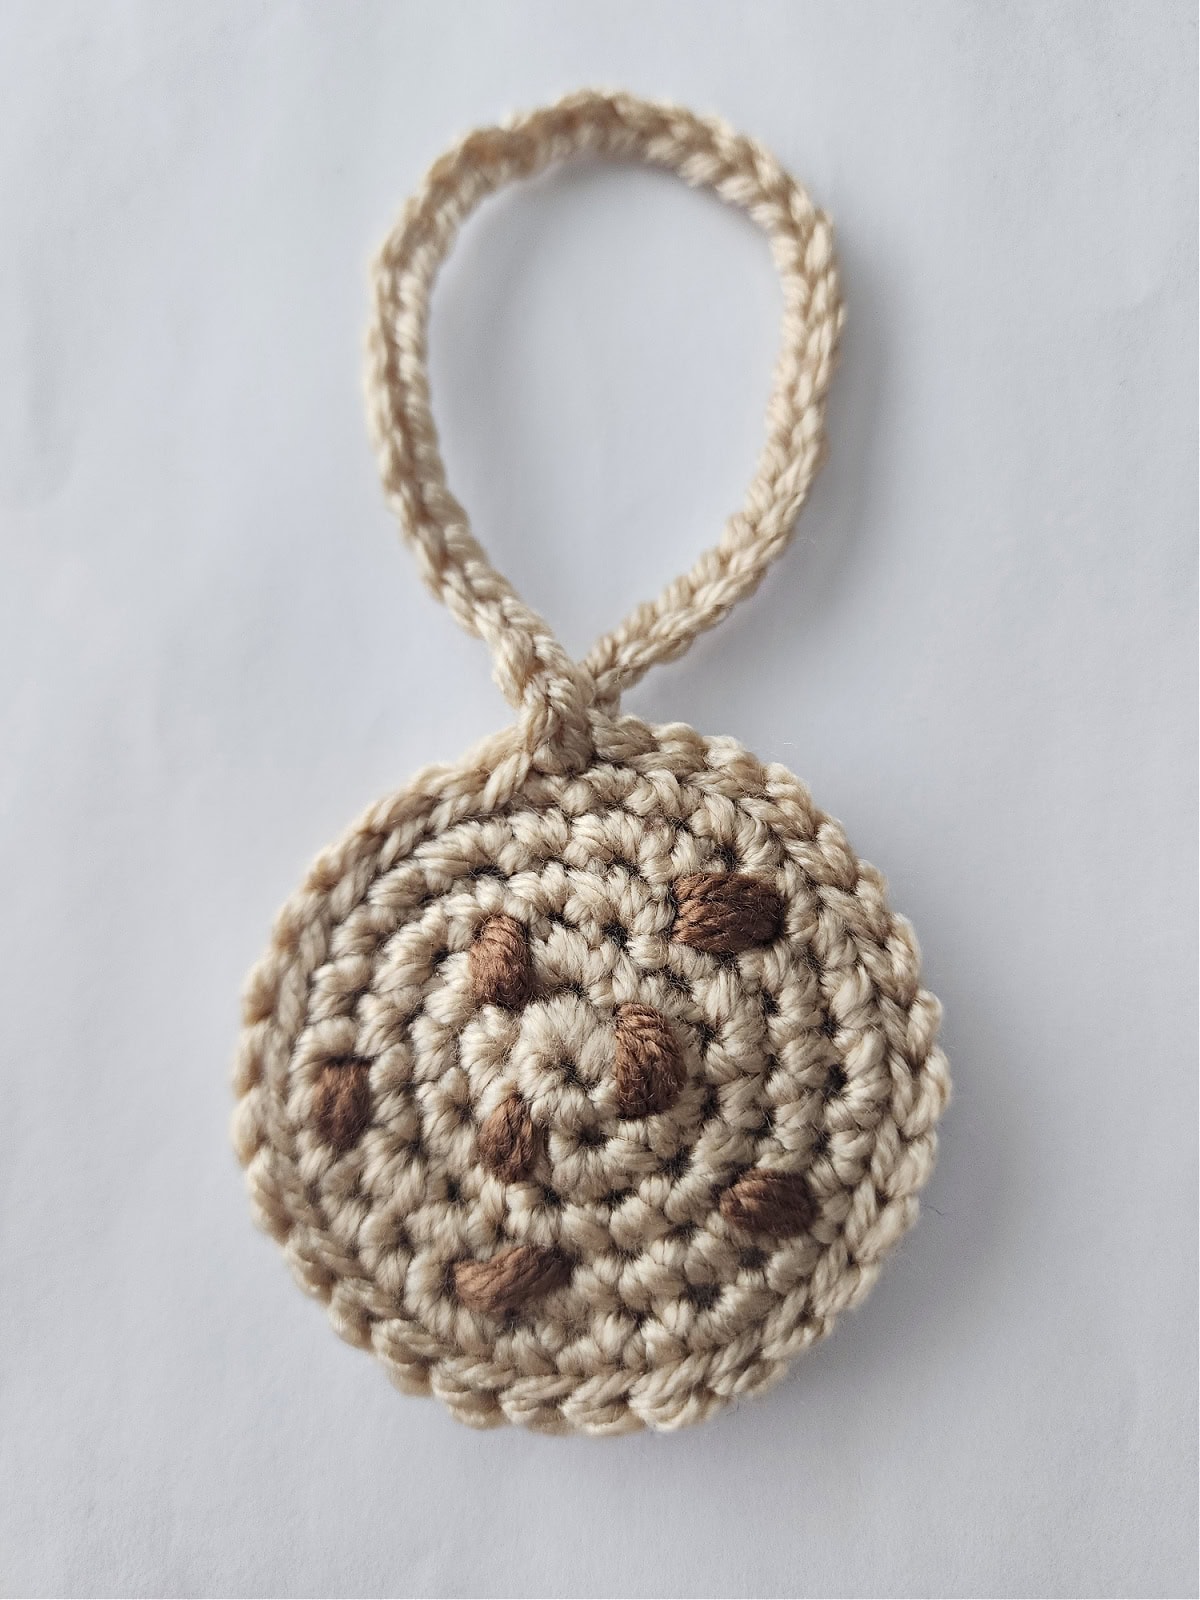
Chocolate Chip Cookie Ornament
Cookie (Make 2)
Note: The cookie is worked in continuous rounds to keep from having an unsightly seam. Do not join at the end of each round, instead use a scrap piece of yarn to keep track of the beginning of each round. Move the scrap of yarn up as you complete each round.
Rnd 1 (RS): With MC yarn & a 4.00mm crochet hook, ch 2, work 6 sc into the 2nd ch from your hook. Do not join. (6 sts)
Rnd 2: 2 sc in each st around. (12 sts)
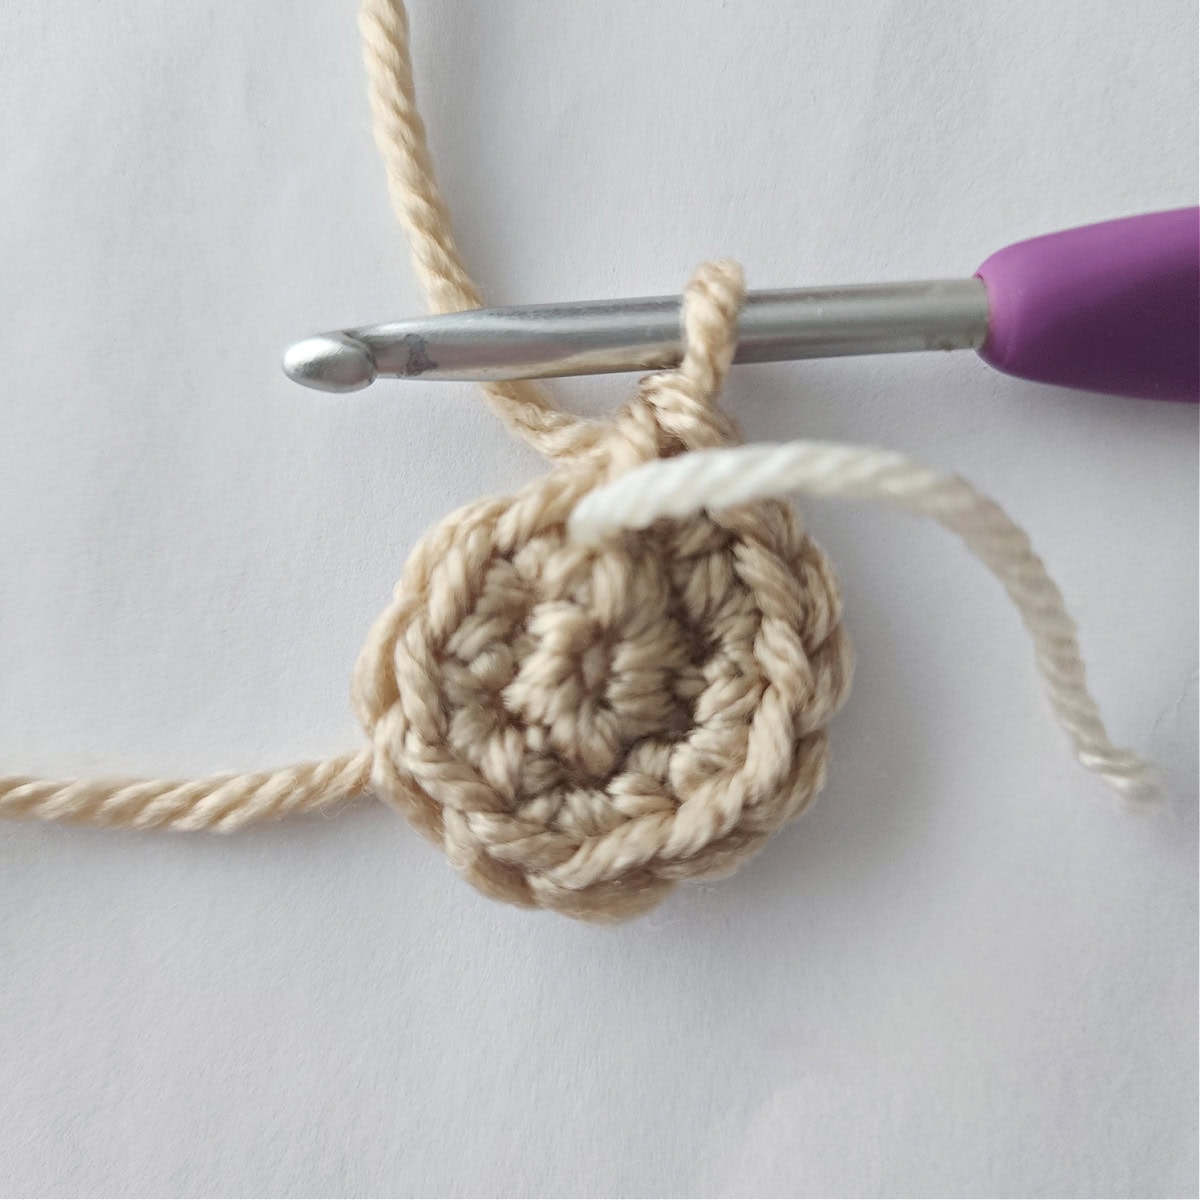
Rnd 3: (2 sc in the next st, sc in the next st) 6 times. (18 sts)
Rnd 4: Sc in the next st, (2 sc in the next st, sc in each of the next 2 sts) 5 times, 2 sc in the next st, sc in the next st. (24 sts)
Rnd 5: (2 sc in the next st, sc in each of the next 3 sts) 6 times. (30 sts)
Fasten off the first cookie and weave in ends. Make a second cookie, but do not fasten off. Instead, place a locking SM to hold the working yarn until seaming. Continue on to Adding Chocolate Chips.
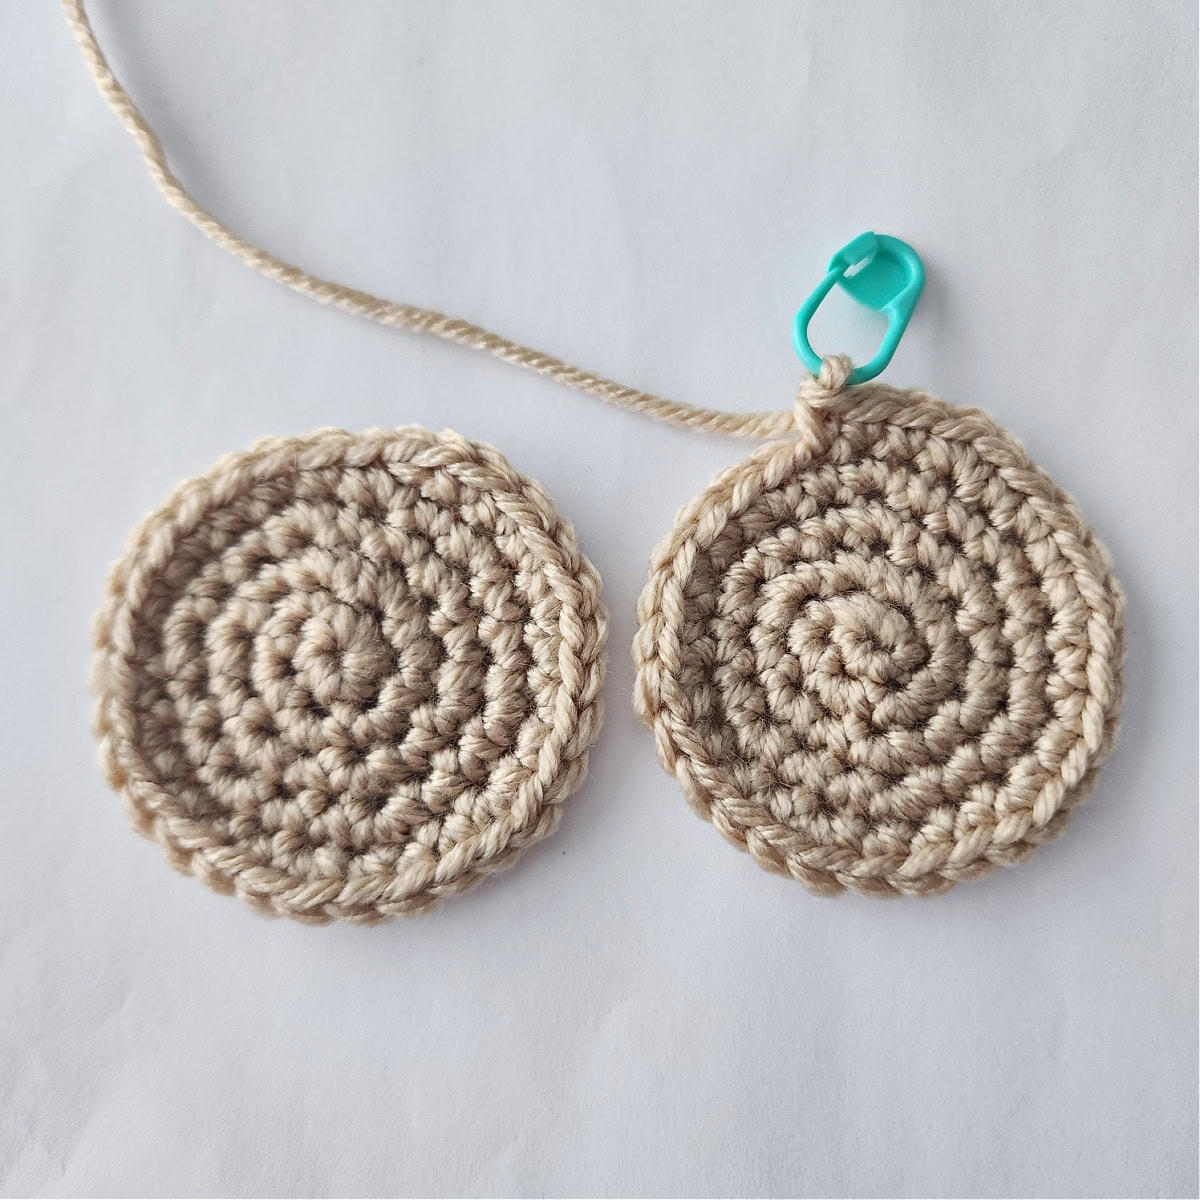
Adding Chocolate Chips
Add the chocolate chips to the cookie that has the working yarn attached.
With approximately 1 yard of CC yarn & a yarn needle, add chocolate chips by sewing around one stitch on the cookie. Work around the same stitch 3 – 4 times, or until your chocolate chip is the size you prefer.
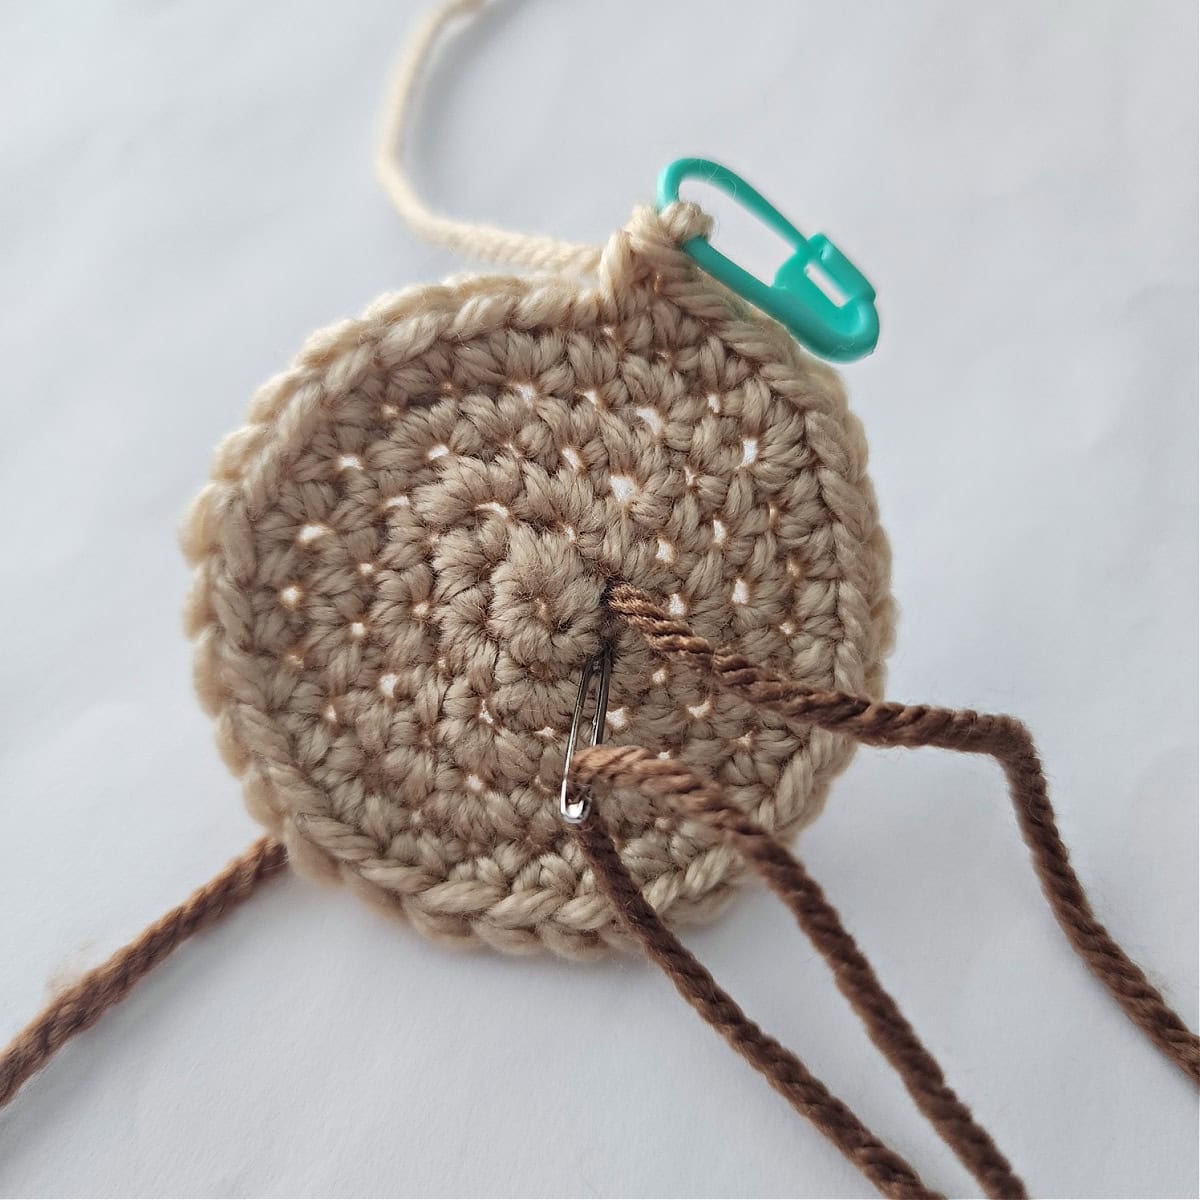
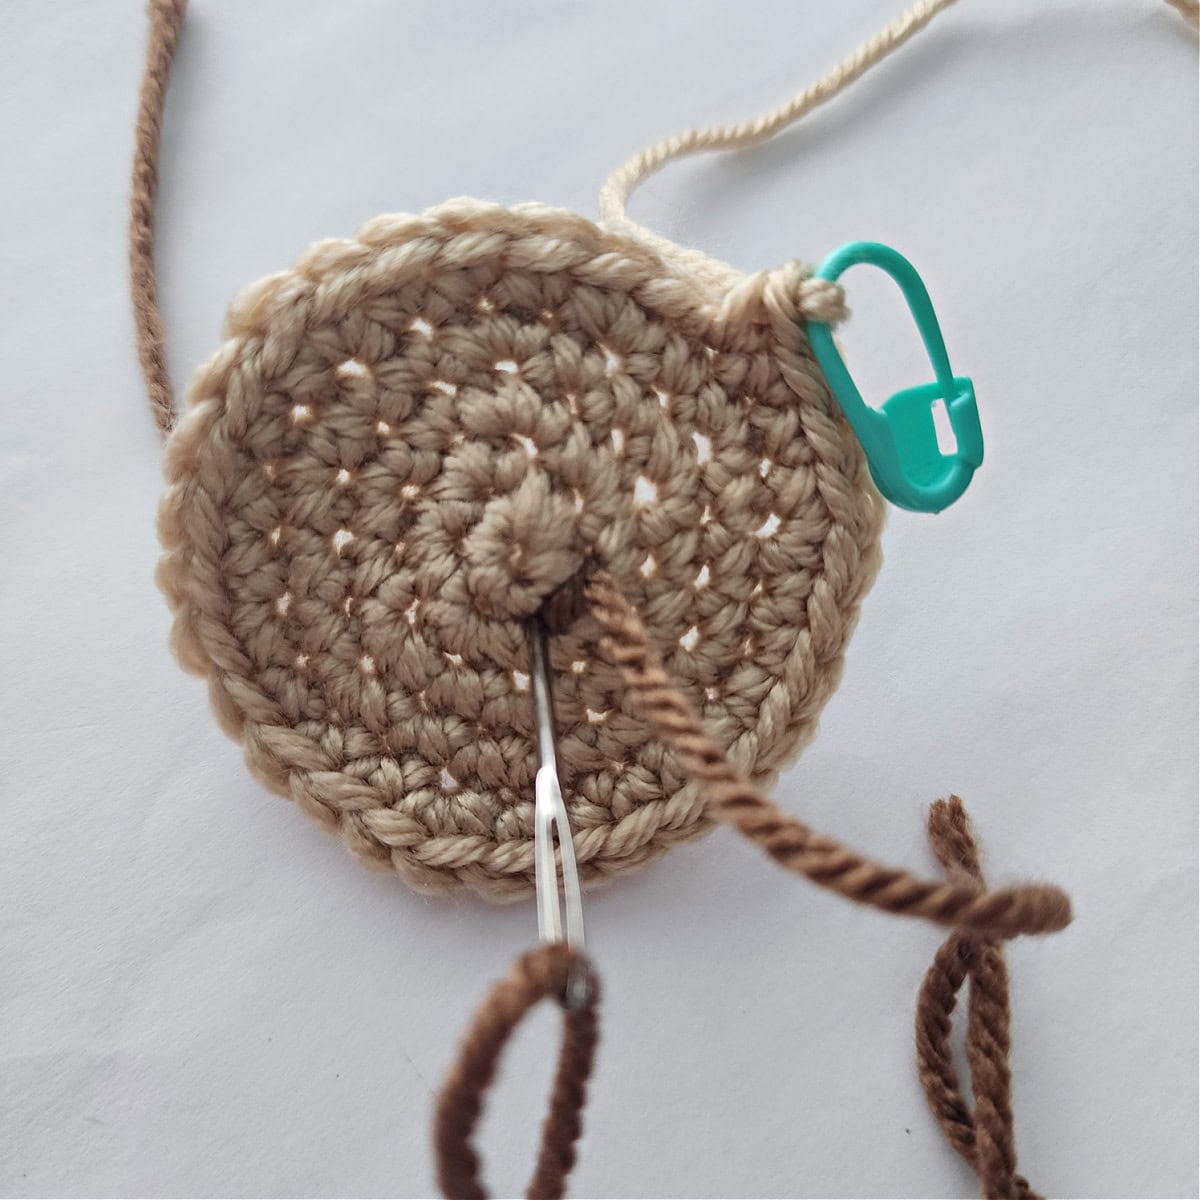
Randomly space chocolate chips on your cookie. I prefer to add things in odd numbers so I added 7 chocolate chips to mine.
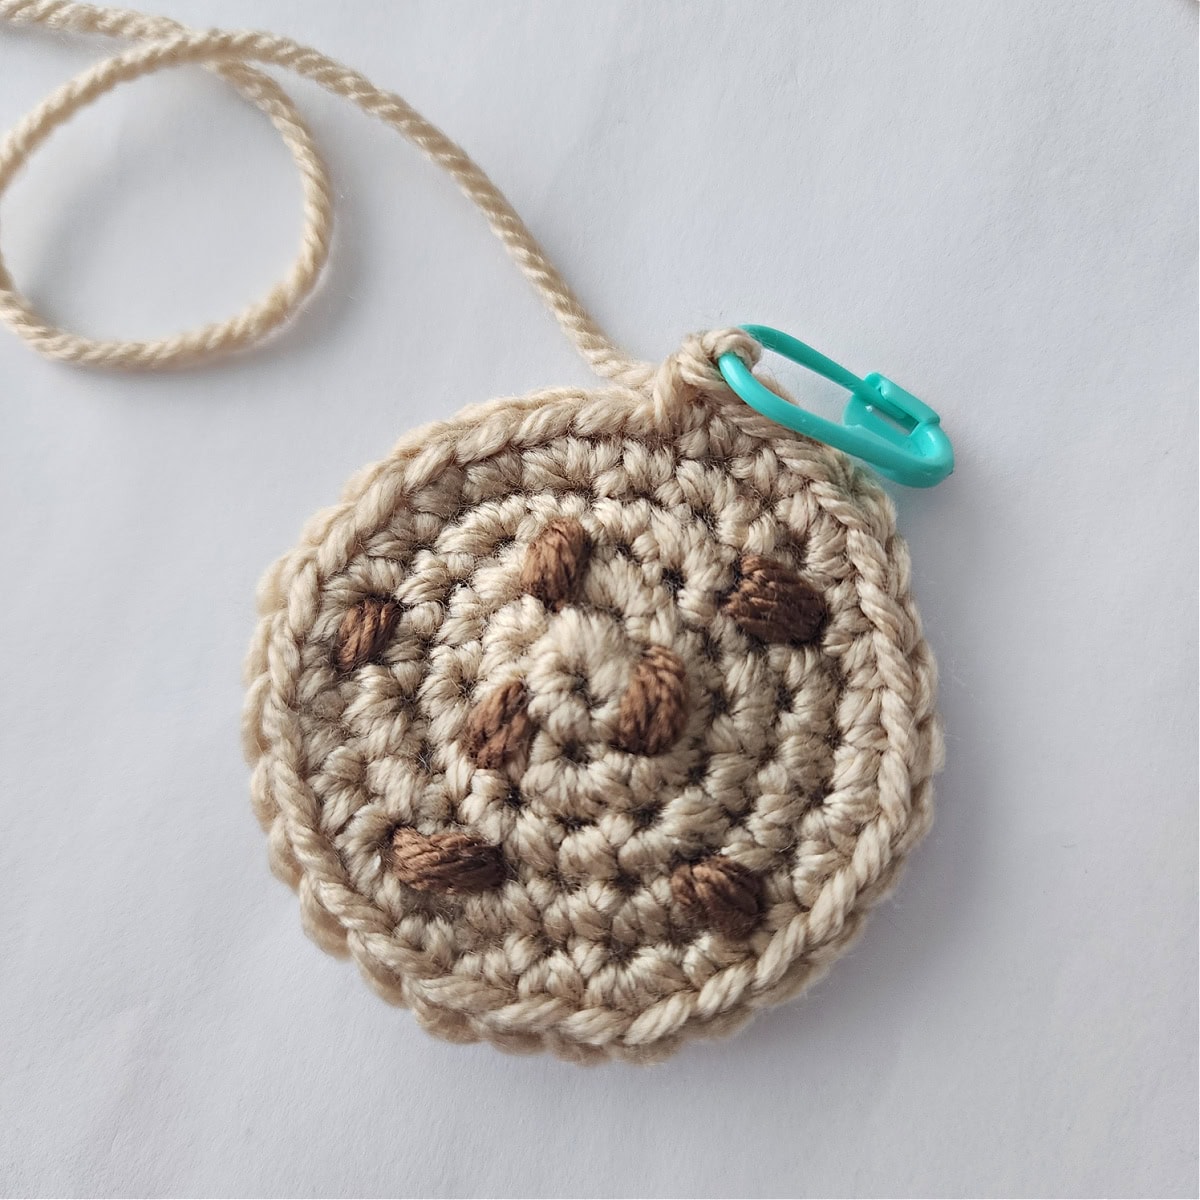
Knot the ends of yarn to secure. Trim the ends so that they’ll fit inside the two cookie layers (no need to weave them in).
Continue on to Joining the Two Cookie Layers.
Joining the Two Cookie Layers
Place the chocolate chip layer on top, with both RS facing out, use a locking stitch marker (or two) to hold the layers while you seam them together.
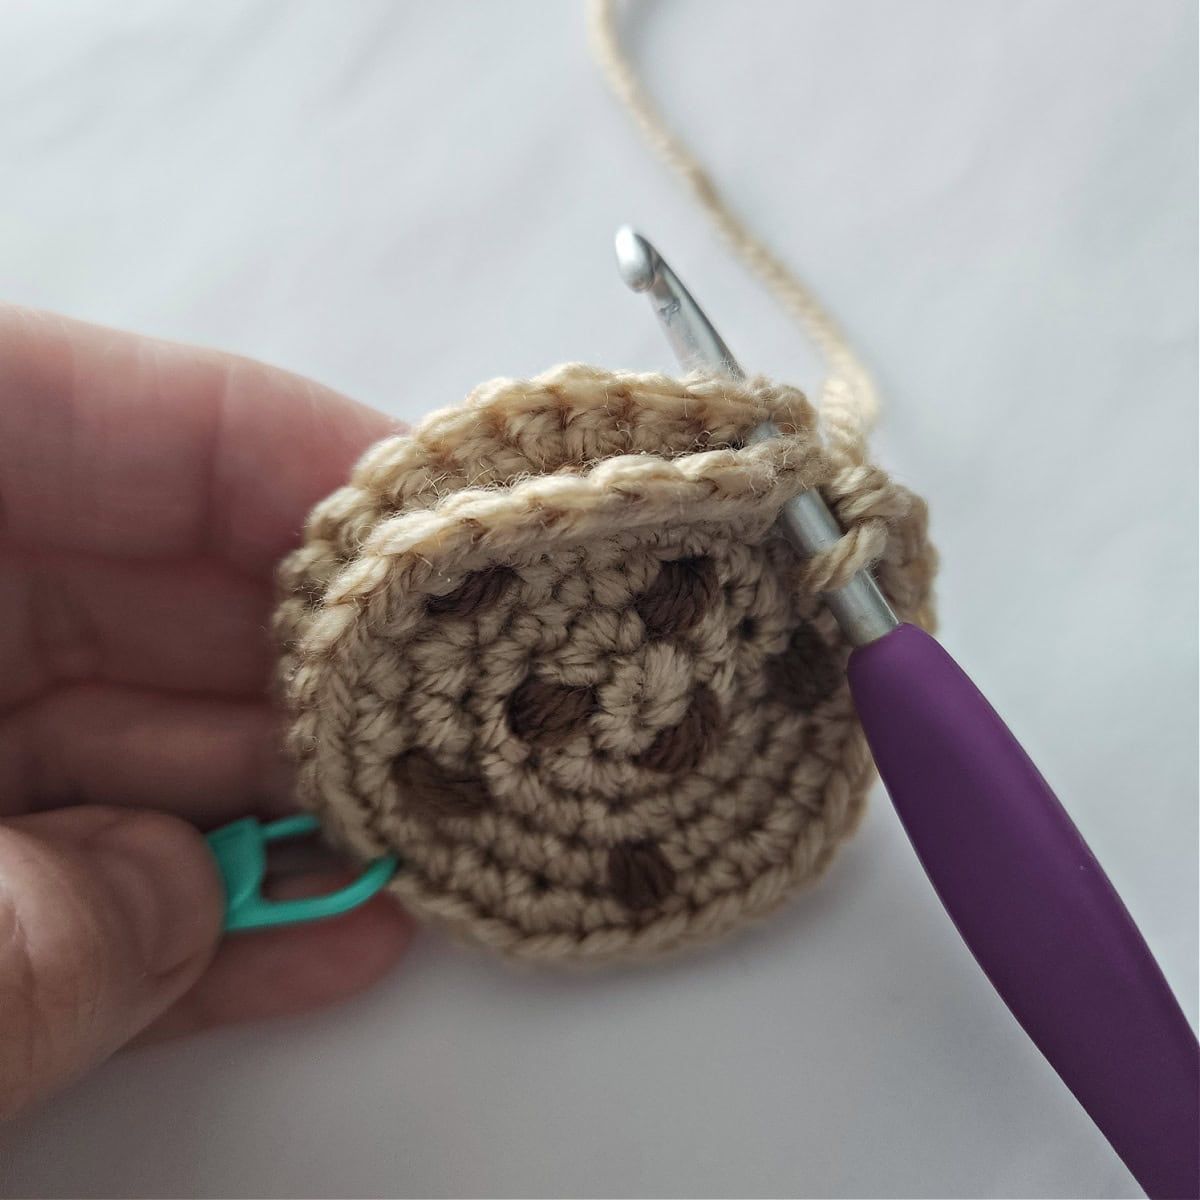
With a 4.00mm crochet hook and the working yarn you left attached to one cookie, join the two cookies by sl st in each stitch around the perimeter of the cookie.
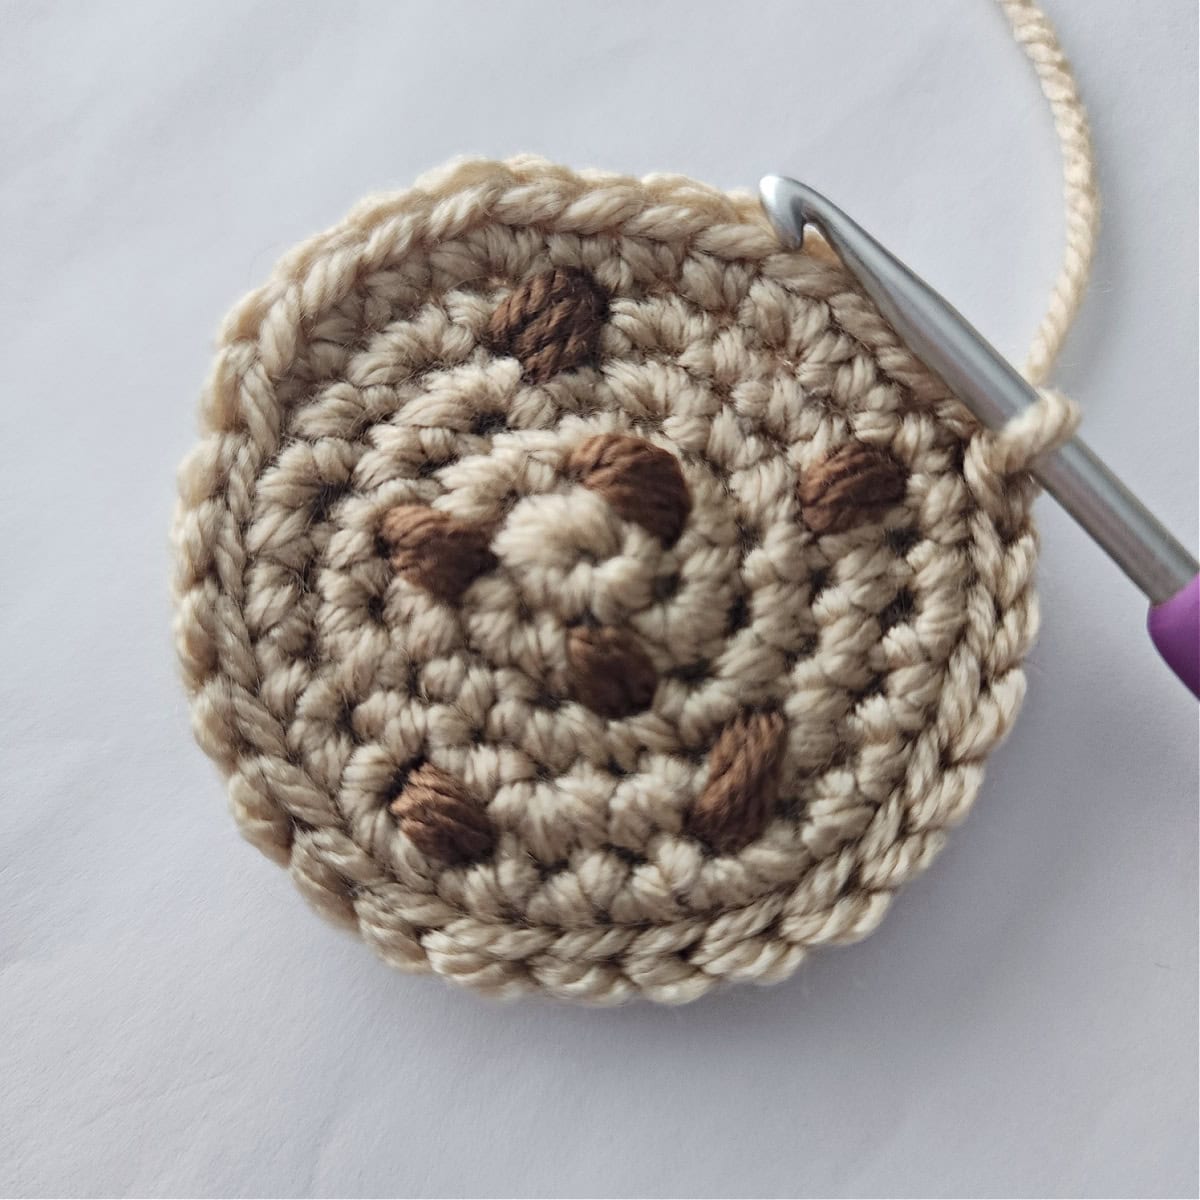
After you have slip stitched in each stitch around the cookie, make a hanging loop by creating a chain that is 6″ long.
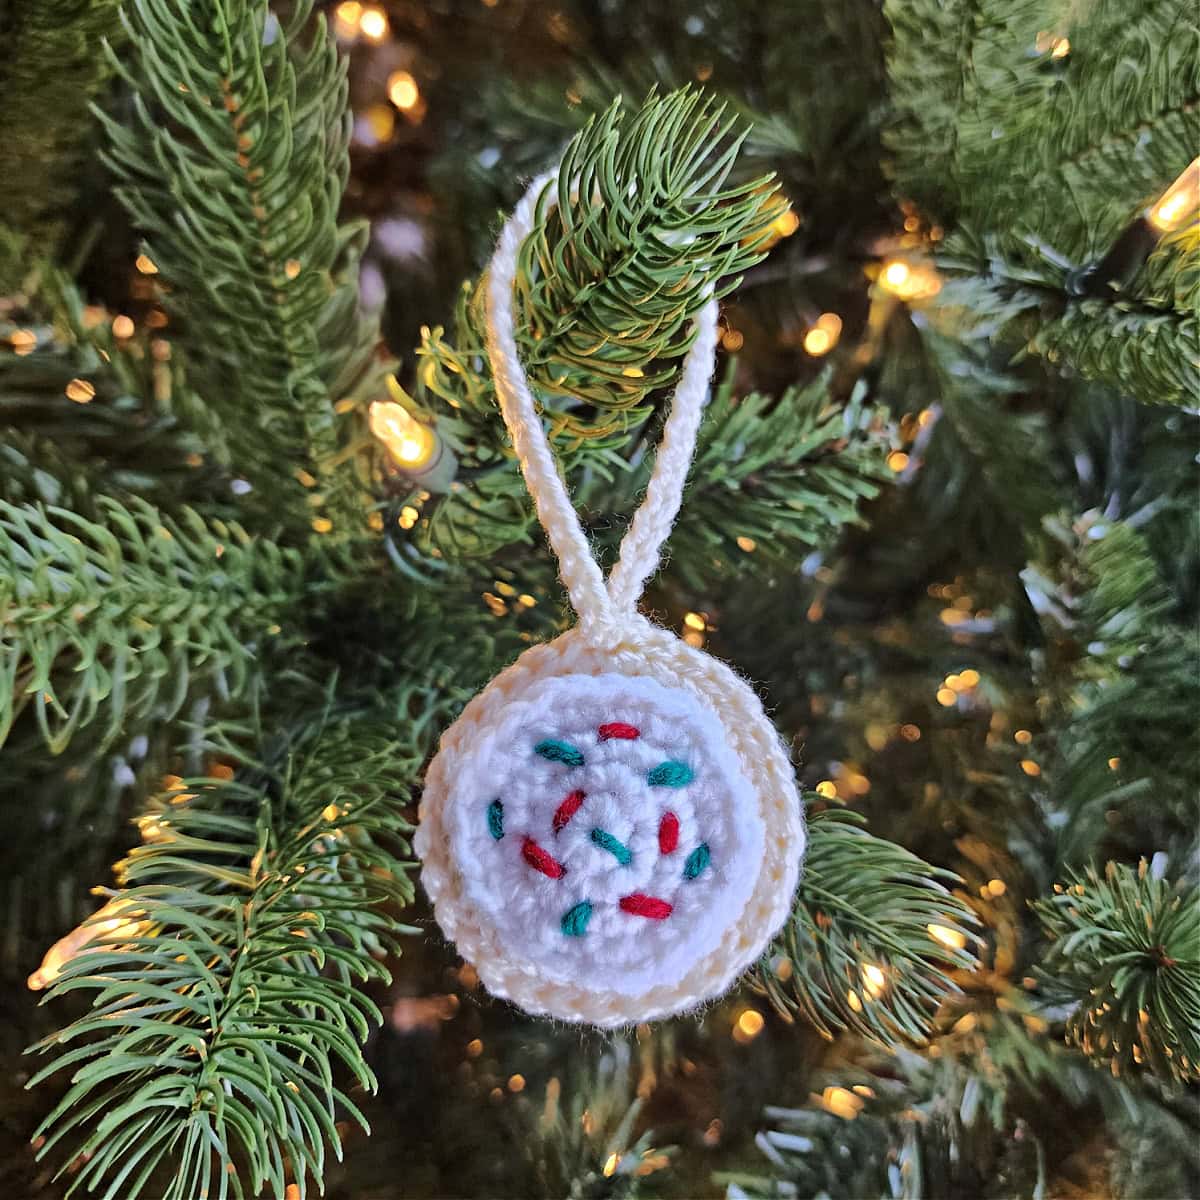
Frosted Sugar Cookie Ornament
Cookie (Make 2)
Note: The cookie is worked in continuous rounds to keep from having an unsightly seam. Do not join at the end of each round, instead use a scrap piece of yarn to keep track of the beginning of each round. Move the scrap of yarn up as you complete each round.
Rnd 1 (RS): With MC yarn & a 4.00mm crochet hook, ch 2, work 6 sc into the 2nd ch from your hook. Do not join. (6 sts)
Rnd 2: 2 sc in each st around. (12 sts) Cookie should measure approximately 1″ in diameter at this point.
Rnd 3: (2 sc in the next st, sc in the next st) 6 times. (18 sts)
Rnd 4: Sc in the next st, (2 sc in the next st, sc in each of the next 2 sts) 5 times, 2 sc in the next st, sc in the next st. (24 sts)
Rnd 5: (2 sc in the next st, sc in each of the next 3 sts) 6 times. (30 sts)
Fasten off the first cookie and weave in ends. Make a second cookie, but do not fasten off. Instead, place a locking SM to hold the working yarn until seaming. Continue on to Frosting.
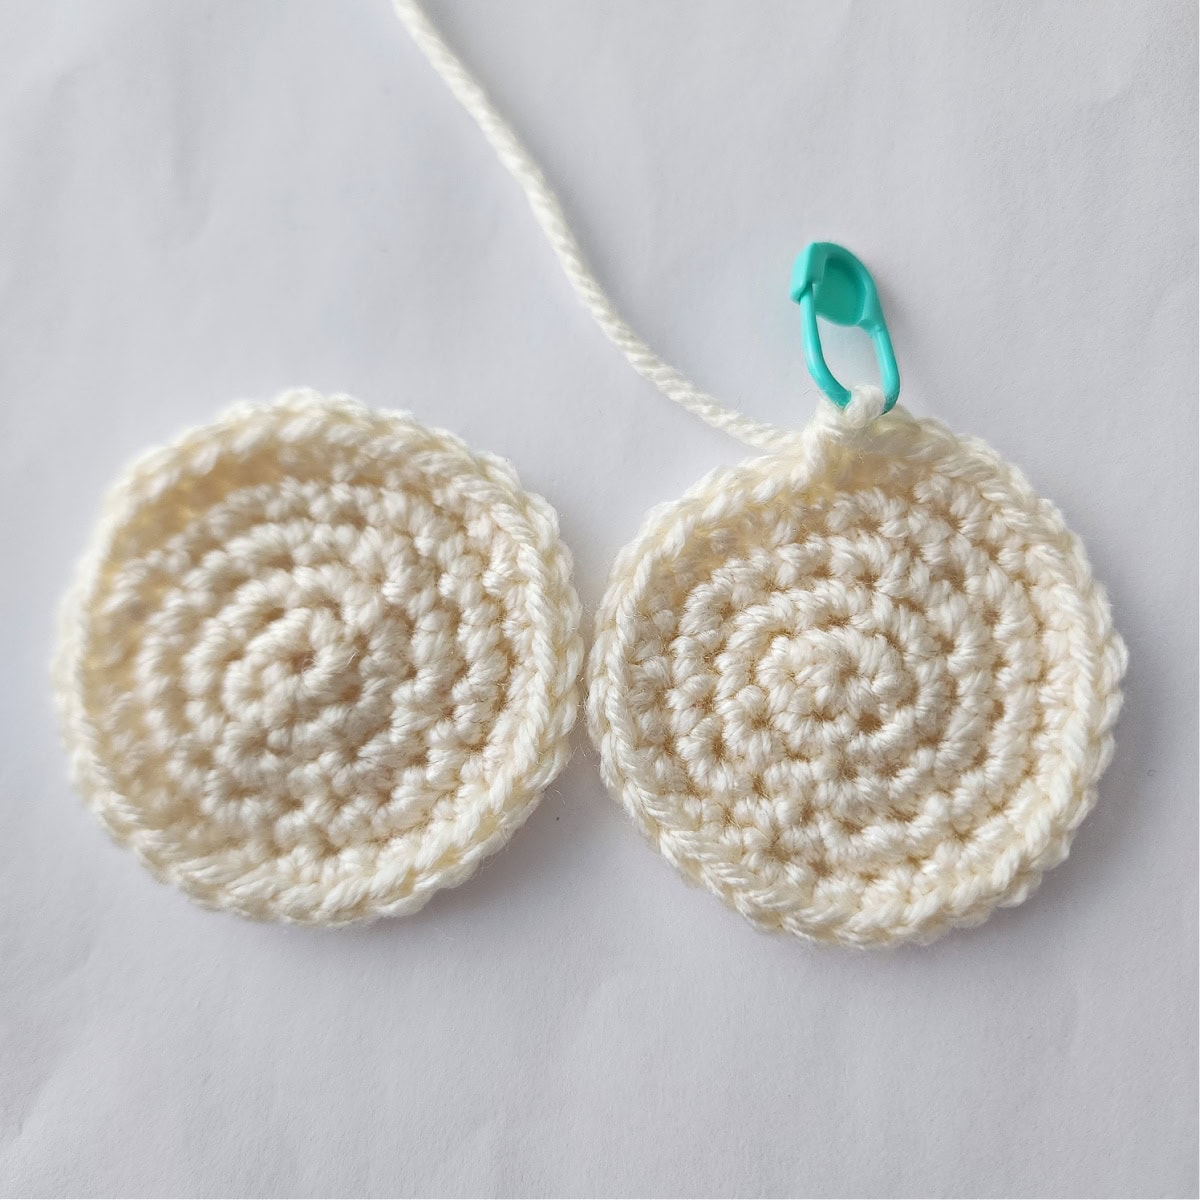
Frosting
Note: The frosting is worked in continuous rounds to keep from having an unsightly seam. Do not join at the end of each round, instead use a scrap piece of yarn to keep track of the beginning of each round. Move the scrap of yarn up as you complete each round.
Rnd 1 (RS): With white yarn & a 4.00mm crochet hook, ch 2, work 6 sc into the 2nd ch from your hook. Do not join. (6 sts)
Rnd 2: 2 sc in each st around. (12 sts) Frosting should measure approximately 1″ in diameter at this point.
Rnd 3: (2 sc in the next st, sc in the next st) 6 times. (18 sts)
Rnd 4: Sc in the next st, (2 sc in the next st, sc in each of the next 2 sts) 5 times, 2 sc in the next st, sc in the next st. Join with a sl st to the 1st st. (24 sts)
Fasten off, leaving a tail of yarn long enough to sew frosting onto the cookie later. Continue on to Adding Sprinkles.
Frosting should measure approximately 1.625″ in diameter.
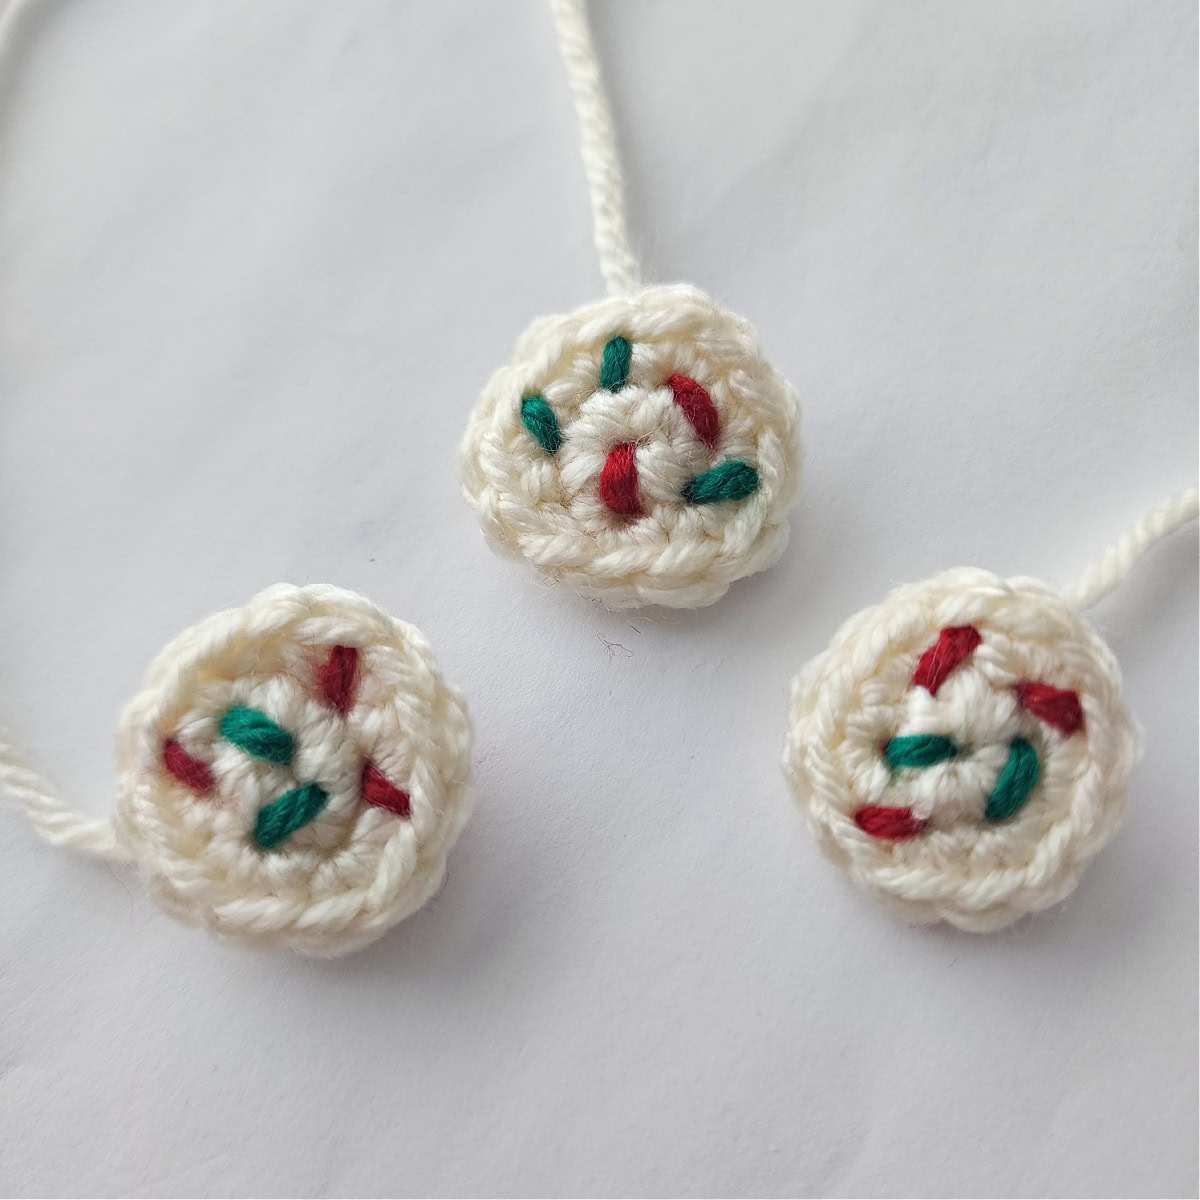
Adding Sprinkles
Add the sprinkles to the frosting layer.
With approximately 15″ of both red and green yarn & a yarn needle, add sprinkles by sewing around one stitch on the cookie.
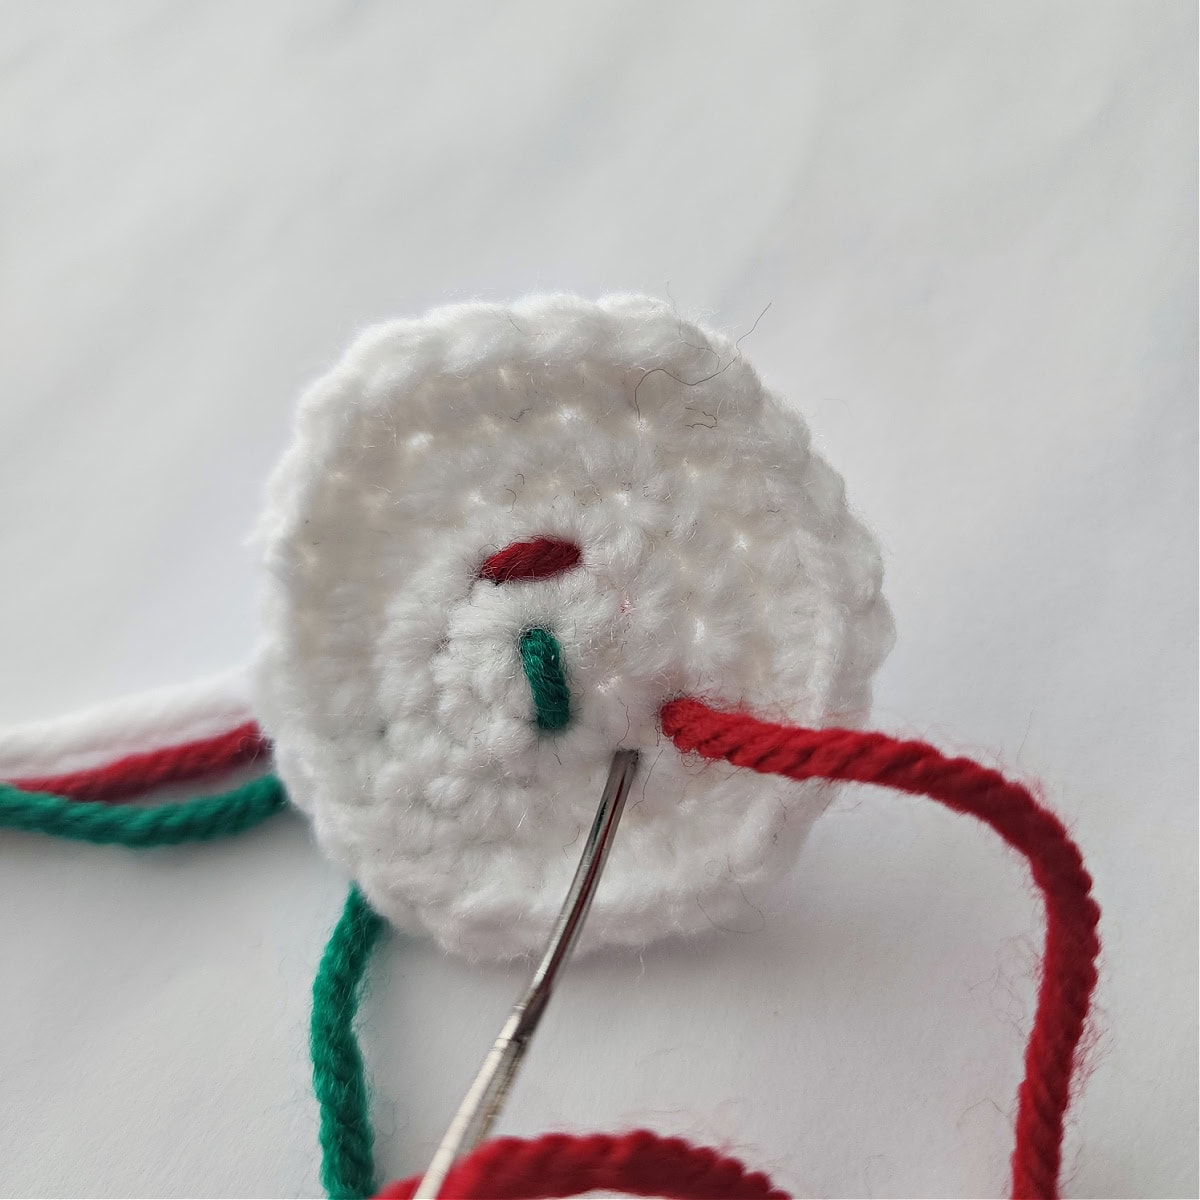
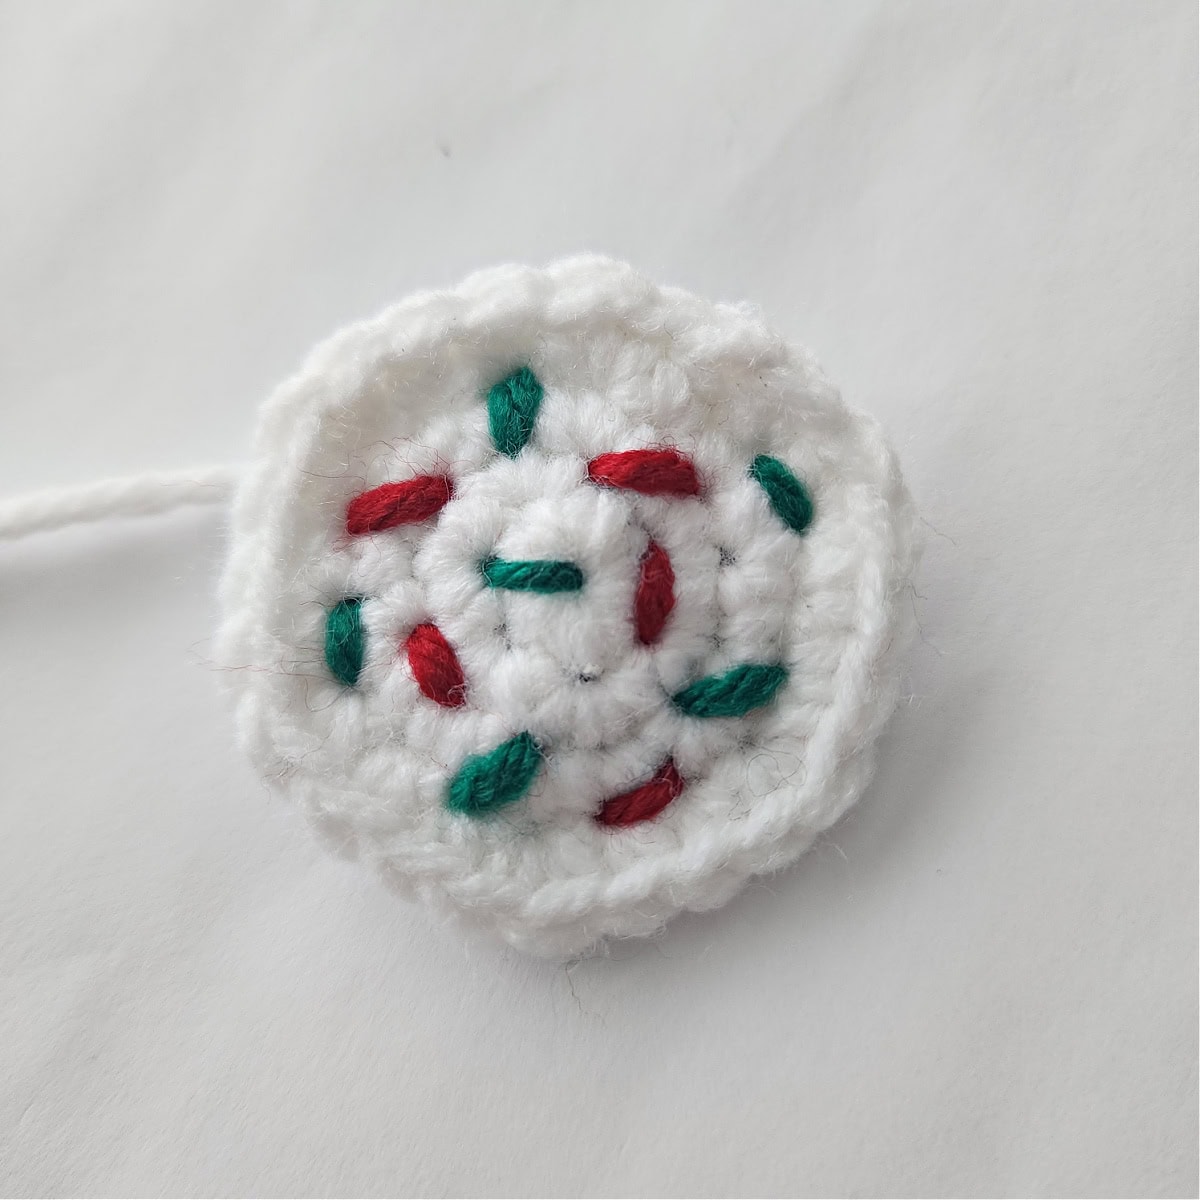
Knot the ends of yarn to secure. Trim the ends so that they’ll fit between the frosting and cookie layer (no need to weave them in).
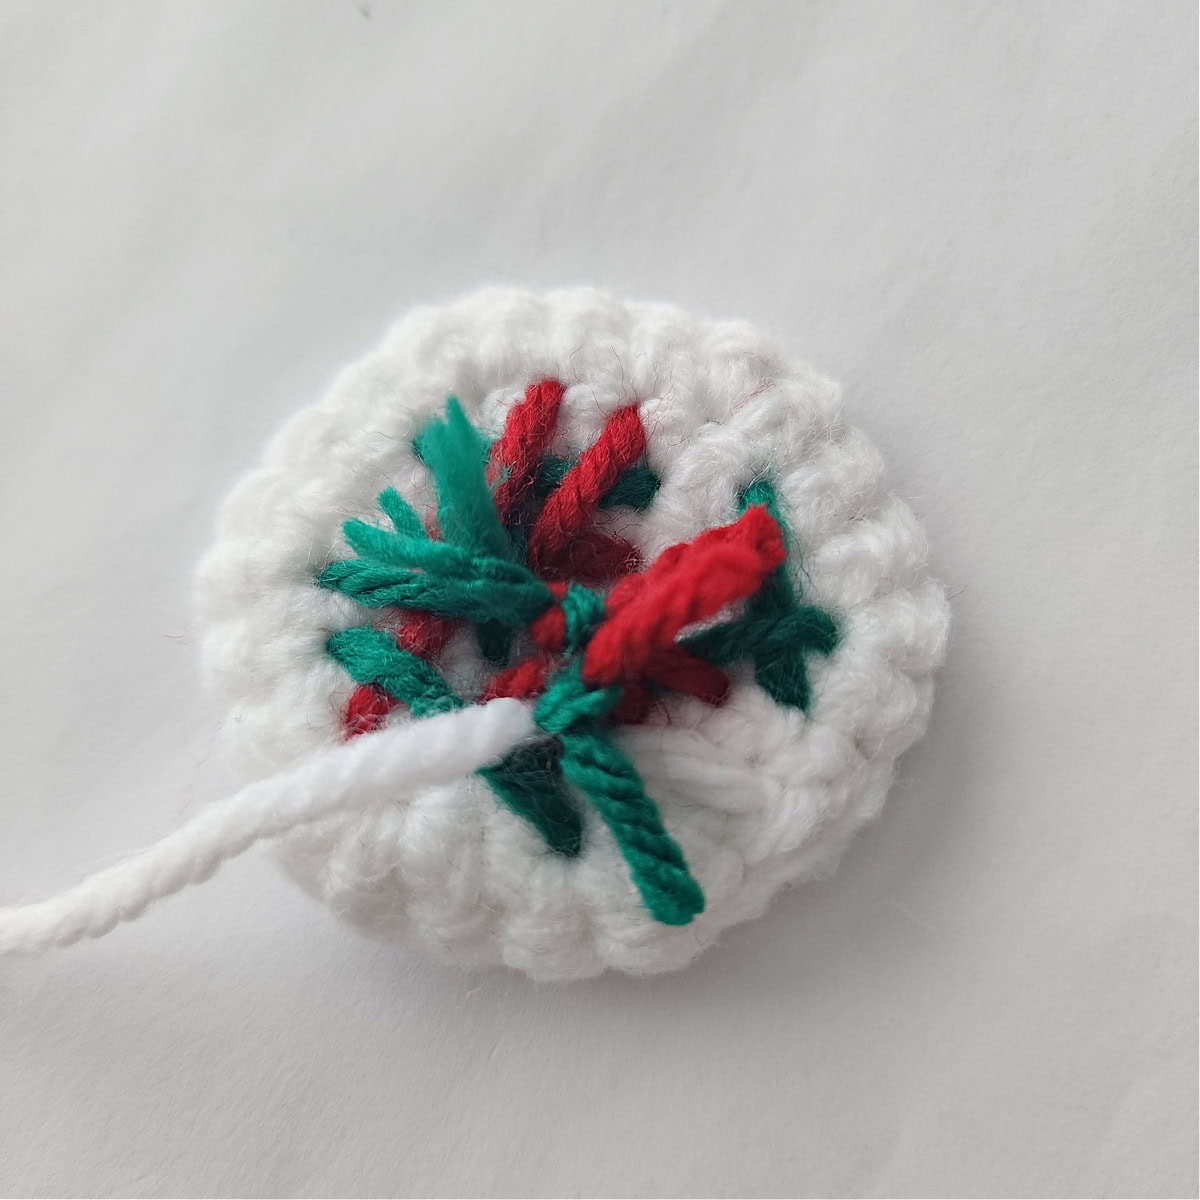
Continue on to Attaching Frosting to Cookie.
Attaching Frosting to Cookie
Add the frosting to the cookie that has the working yarn attached.
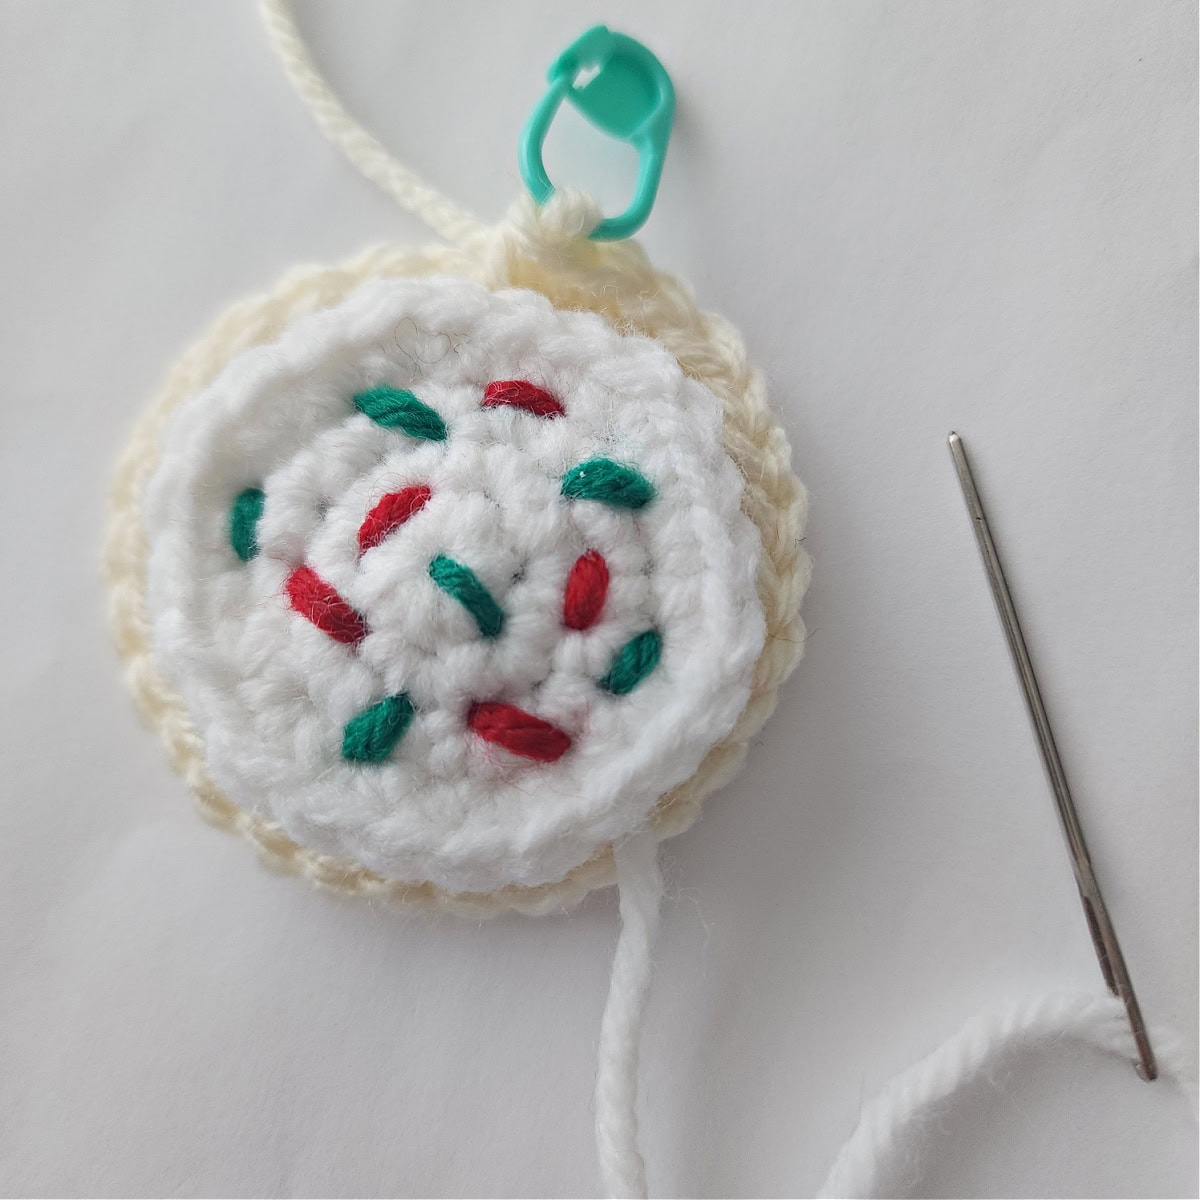
With tail of yarn & a yarn needle, sew the frosting to the RS of the cookie. Make sure not to cover the last round of stitches on the cookie so you easily join the two cookie layers next.
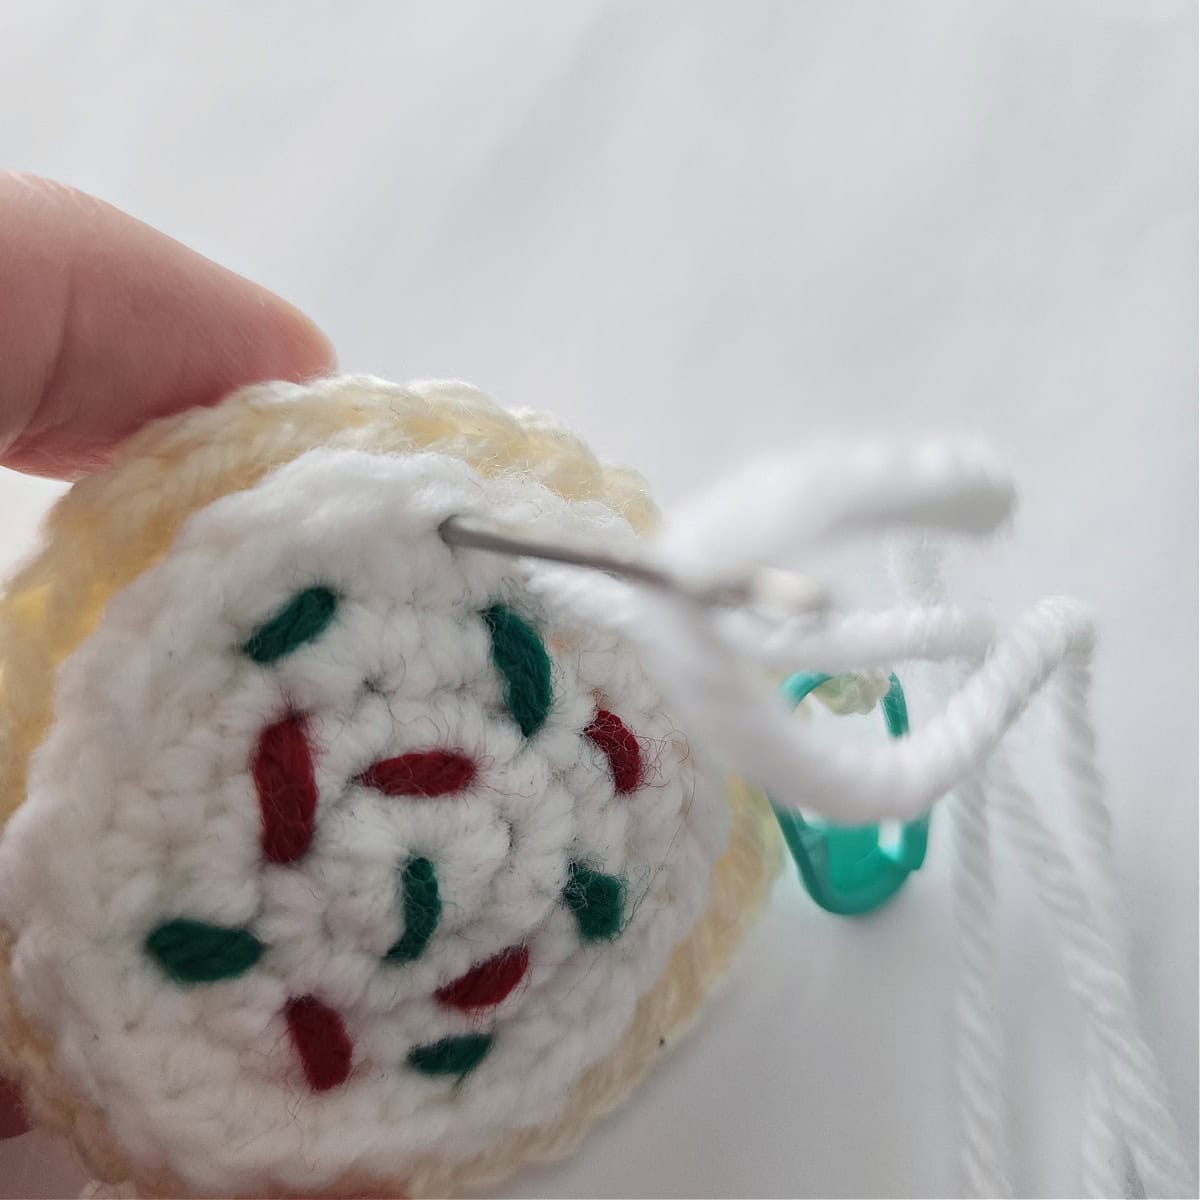
Knot any ends of yarn to secure. Trim the ends so that they’ll fit inside the two cookie layers (no need to weave them in).
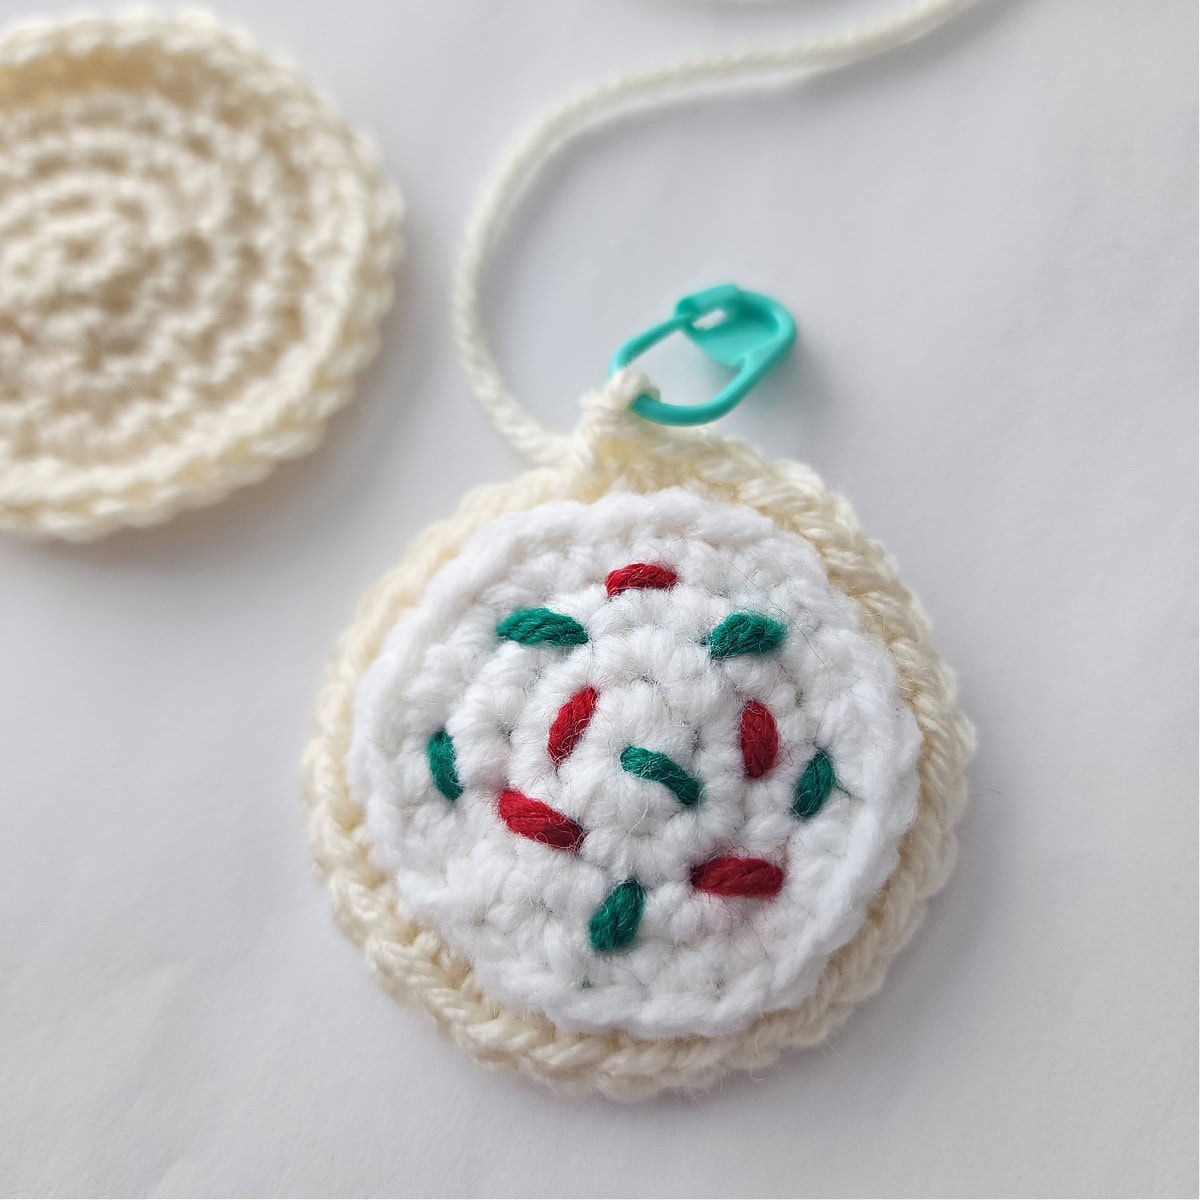
Continue on to Joining the Two Cookie Layers.
Joining the Two Cookie Layers
Place the frosted cookie layer on top, with both RS facing out, use a locking stitch marker (or two) to hold the layers while you seam them together.
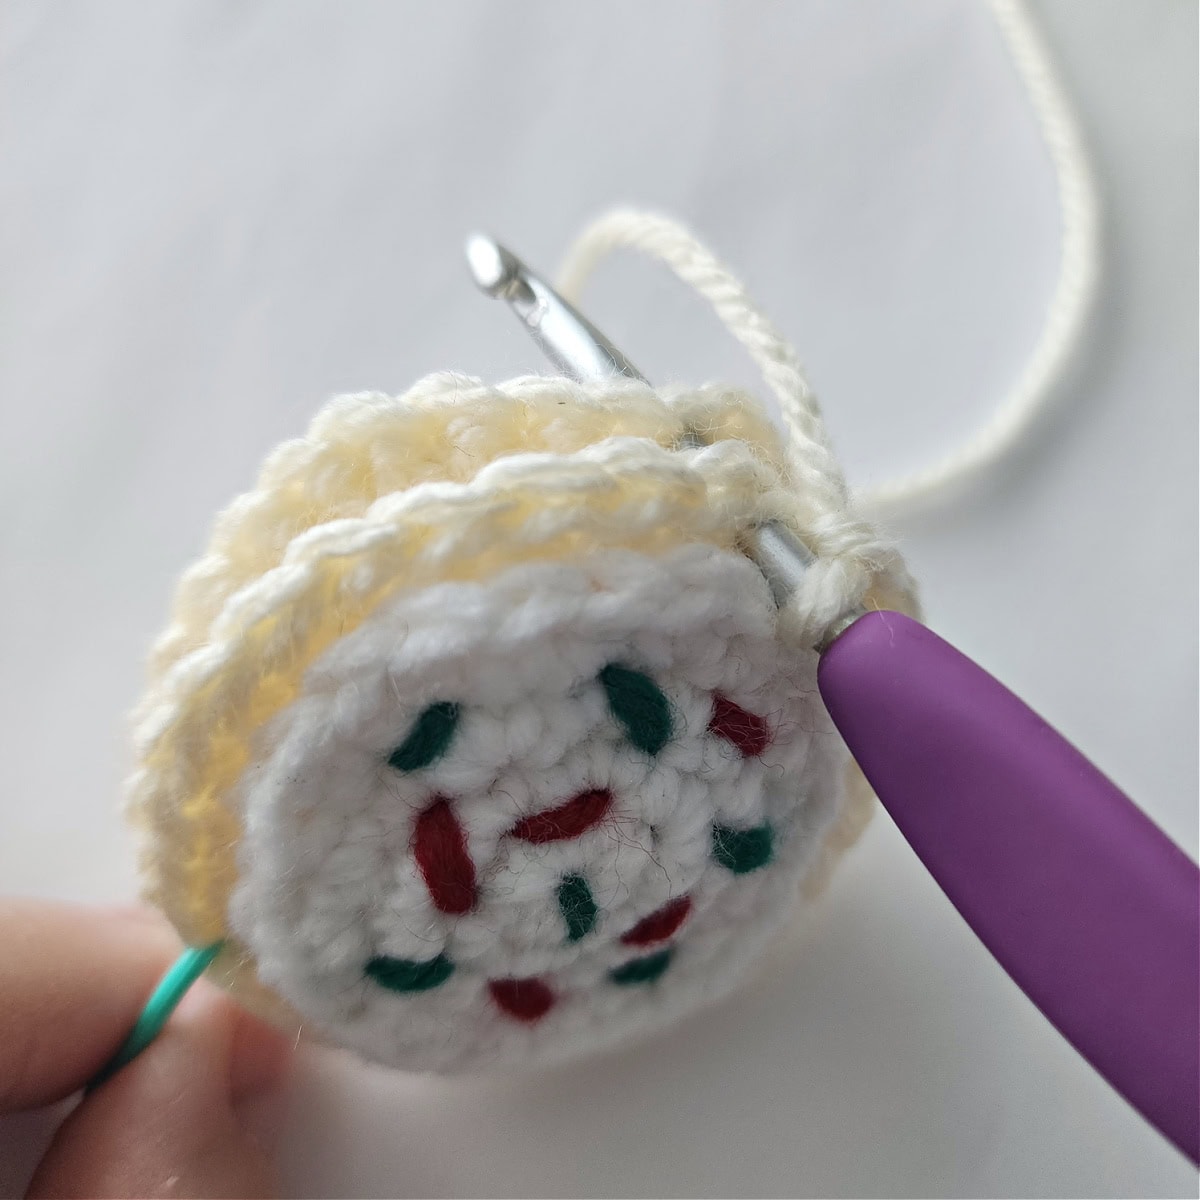
With a 4.00mm crochet hook and the working yarn you left attached to one cookie, join the two cookies by sl st in each stitch around the perimeter of the cookie.
After you have slip stitched in each stitch around the cookie, make a hanging loop by creating a chain that is 6″ long.
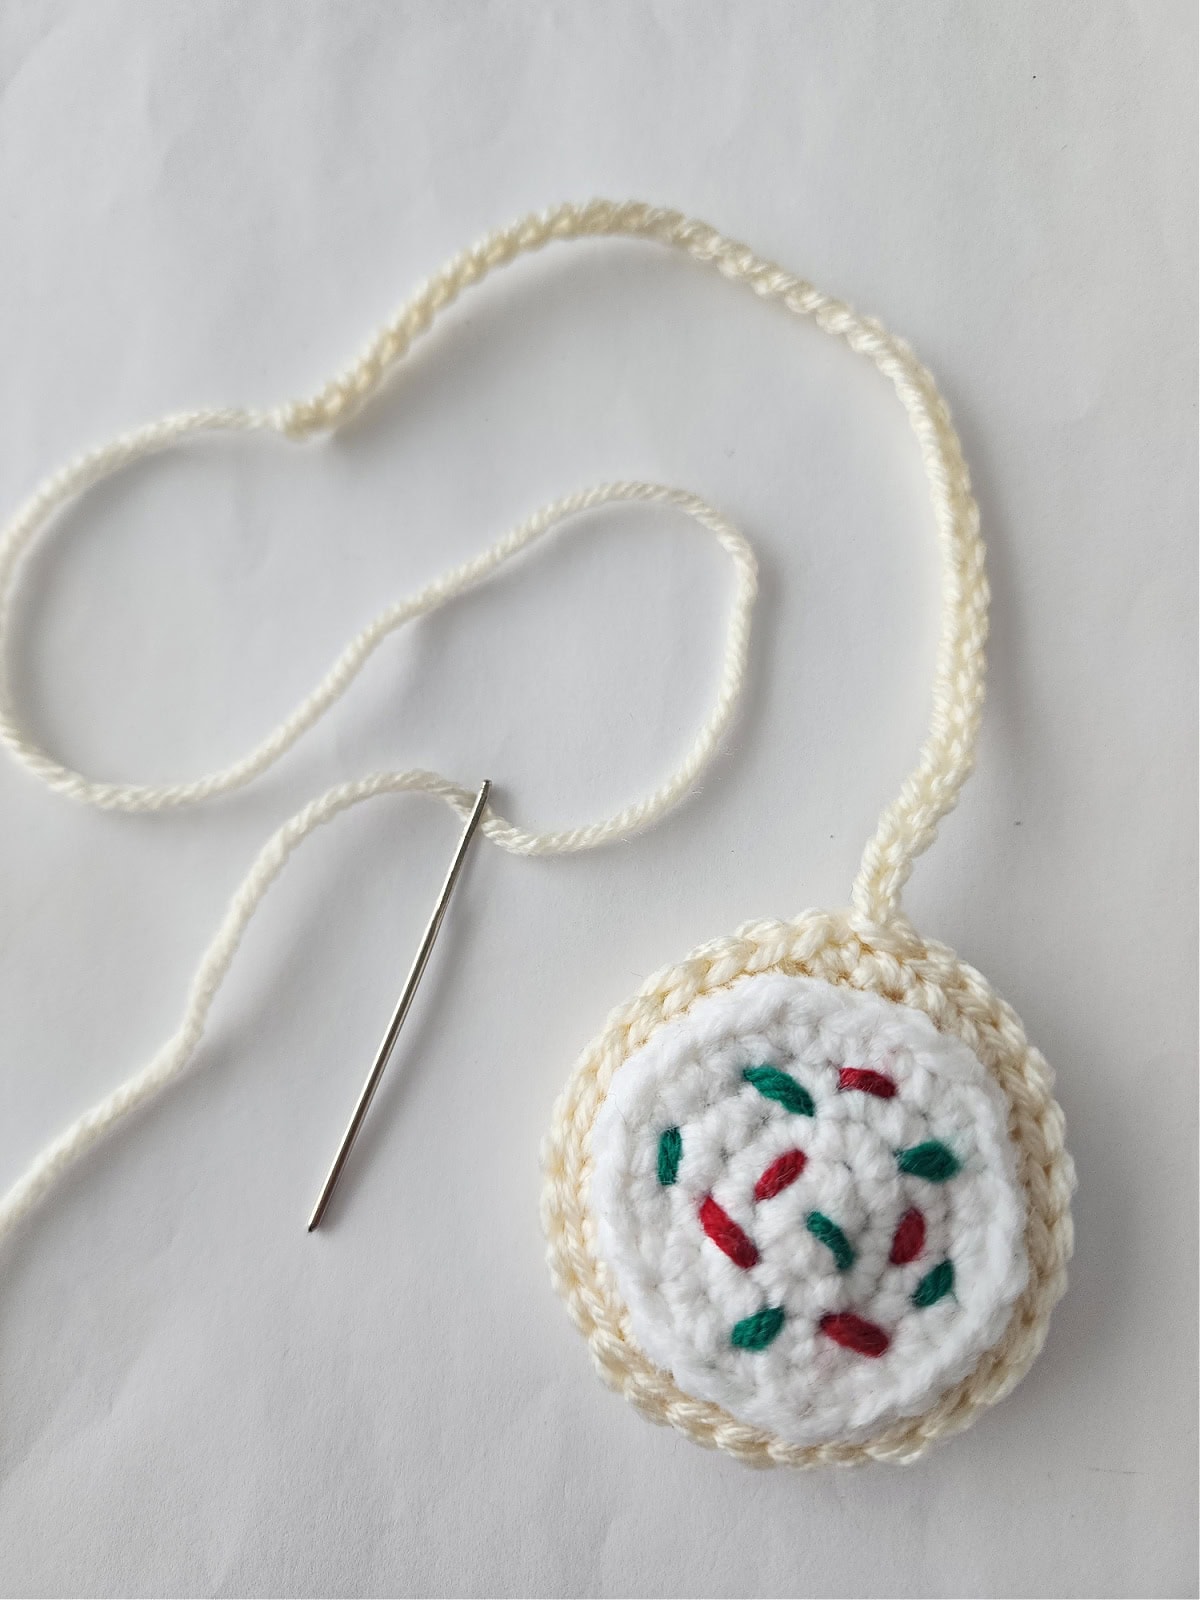
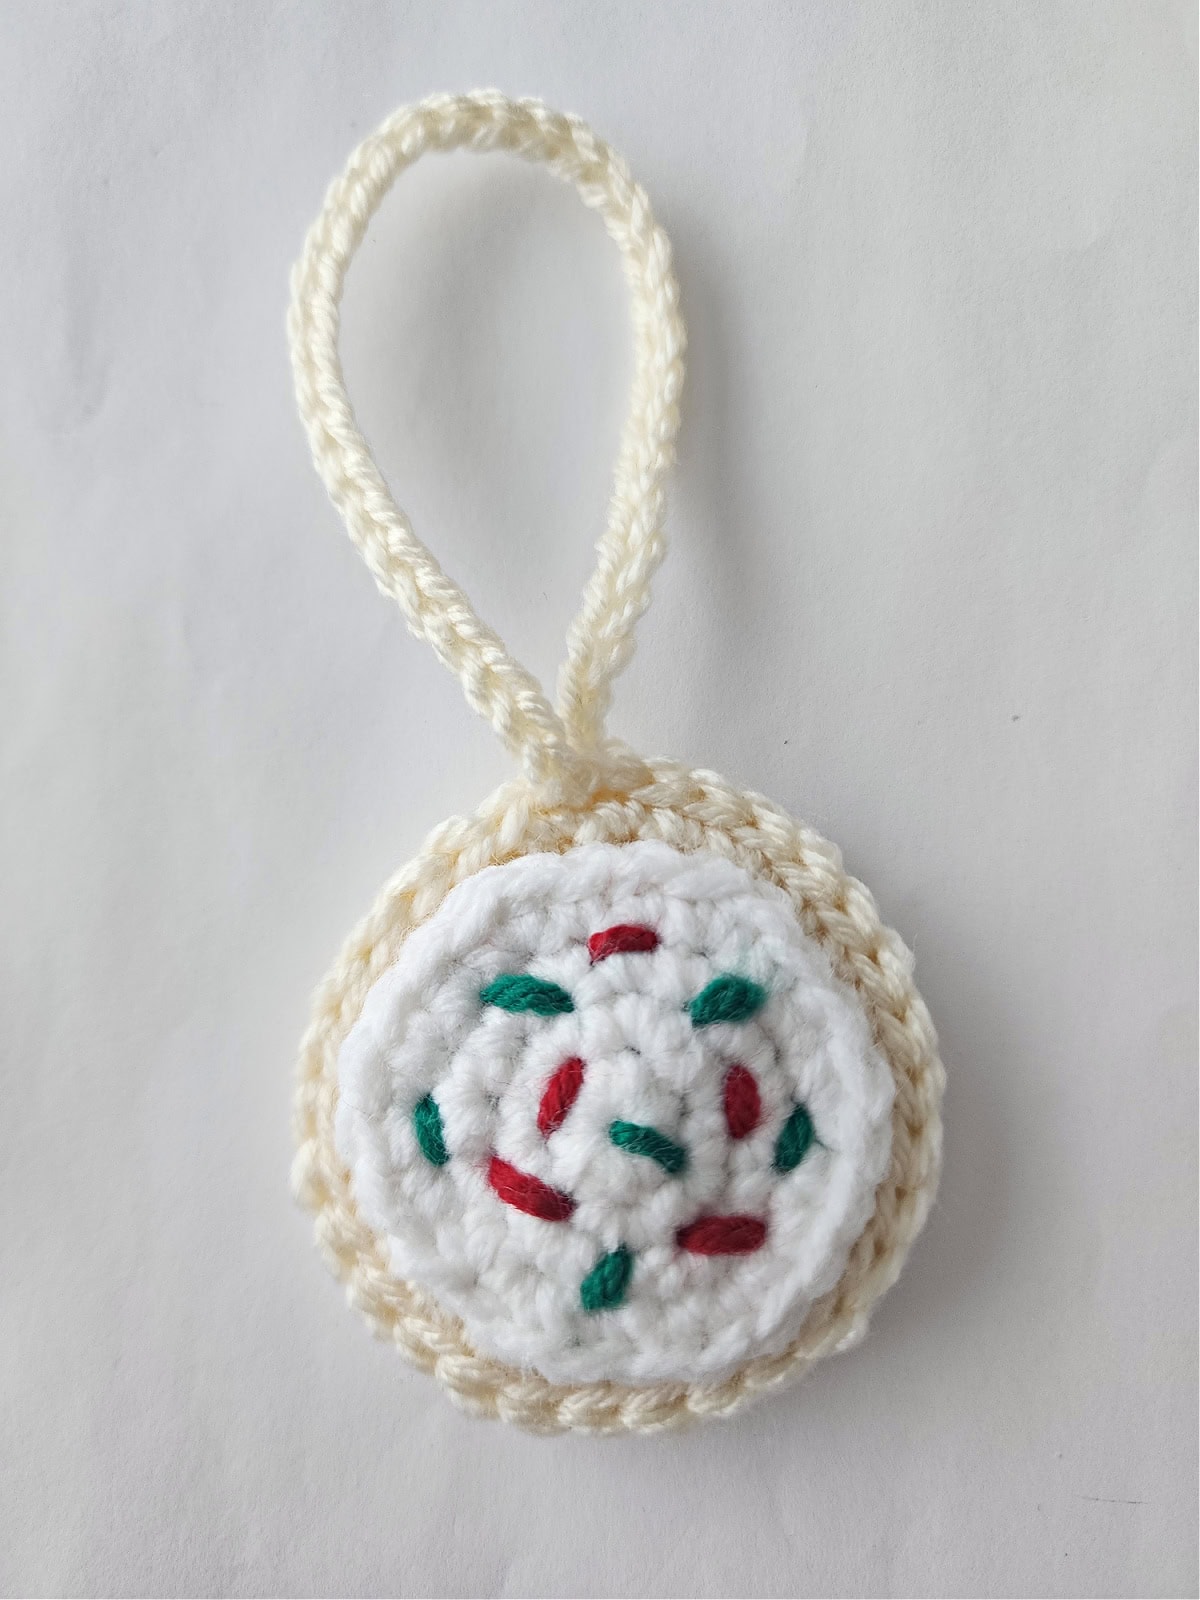
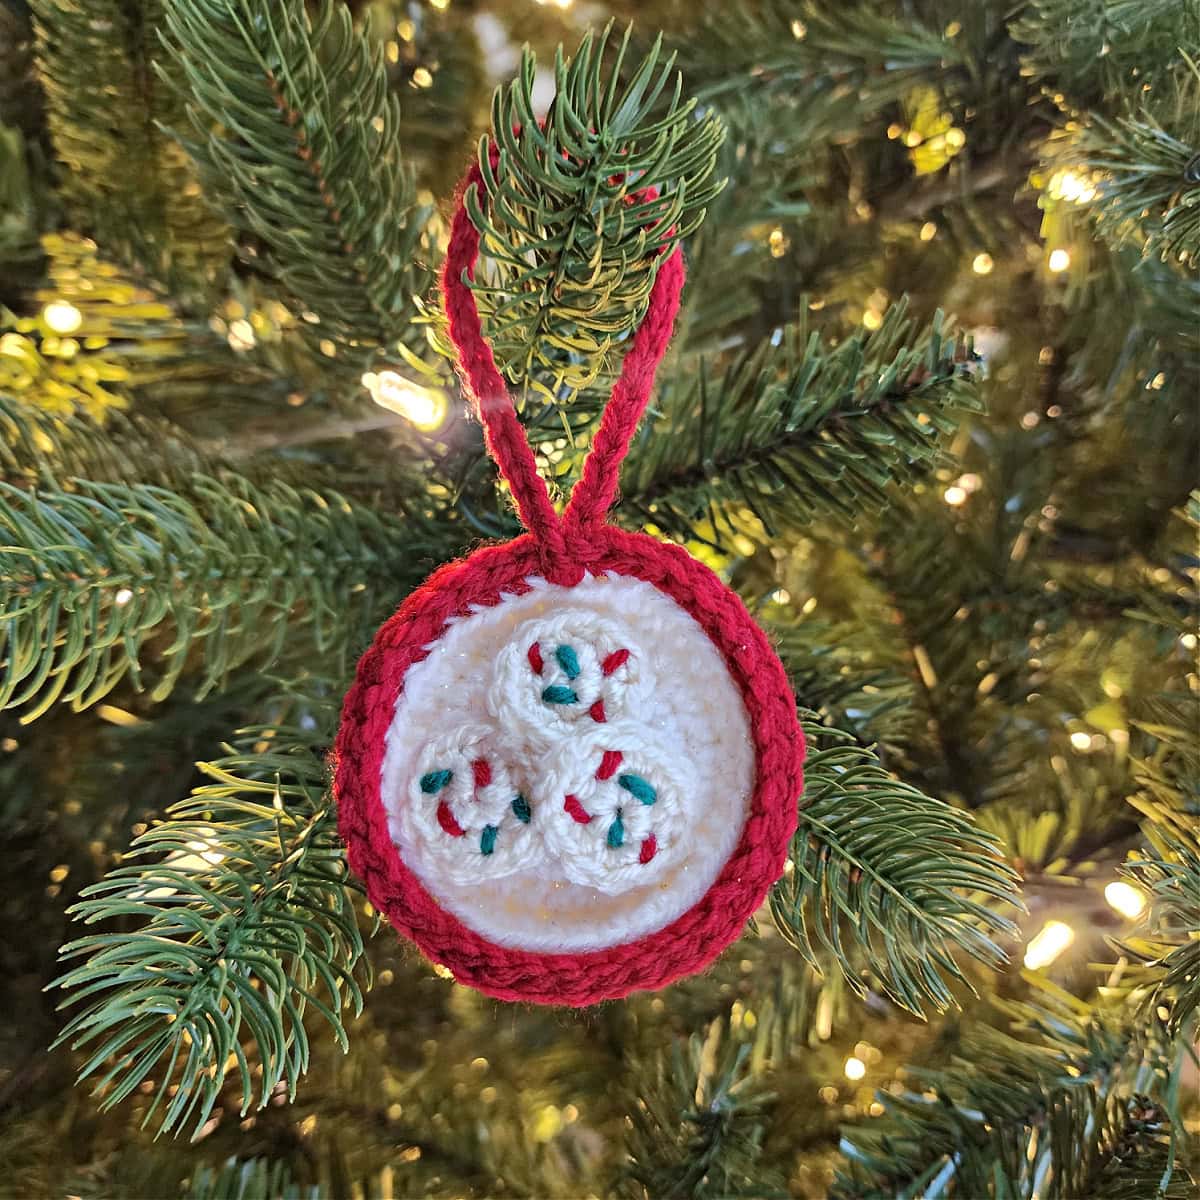
Plate of Cookies for Santa Ornament
Cookie Plate
Note: The cookie plate is worked in continuous rounds to keep from having an unsightly seam. Do not join at the end of each round, instead use a scrap piece of yarn to keep track of the beginning of each round. Move the scrap of yarn up as you complete each round.
Rnd 1 (RS): With white multi yarn & a 4.00mm crochet hook, ch 2, work 6 sc into the 2nd ch from your hook. Do not join. (6 sts)
Rnd 2: 2 sc in each st around. (12 sts) Plate should measure approximately 1″ in diameter at this point.
Rnd 3: (2 sc in the next st, sc in the next st) 6 times. (18 sts)
Rnd 4: Sc in the next st, (2 sc in the next st, sc in each of the next 2 sts) 5 times, 2 sc in the next st, sc in the next st. (24 sts)
Rnd 5: (2 sc in the next st, sc in each of the next 3 sts) 6 times. (30 sts) Plate should measure approximately 2″ in diameter.
Rnd 6: Sc in each of the next 3 sts, (2 sc in the next st, sc in each of the next 4 sts) 5 times, 2 sc in the next st, sc in the next st. (36 sts)
Fasten off. Weave in ends. Continue on to Plate Edging.
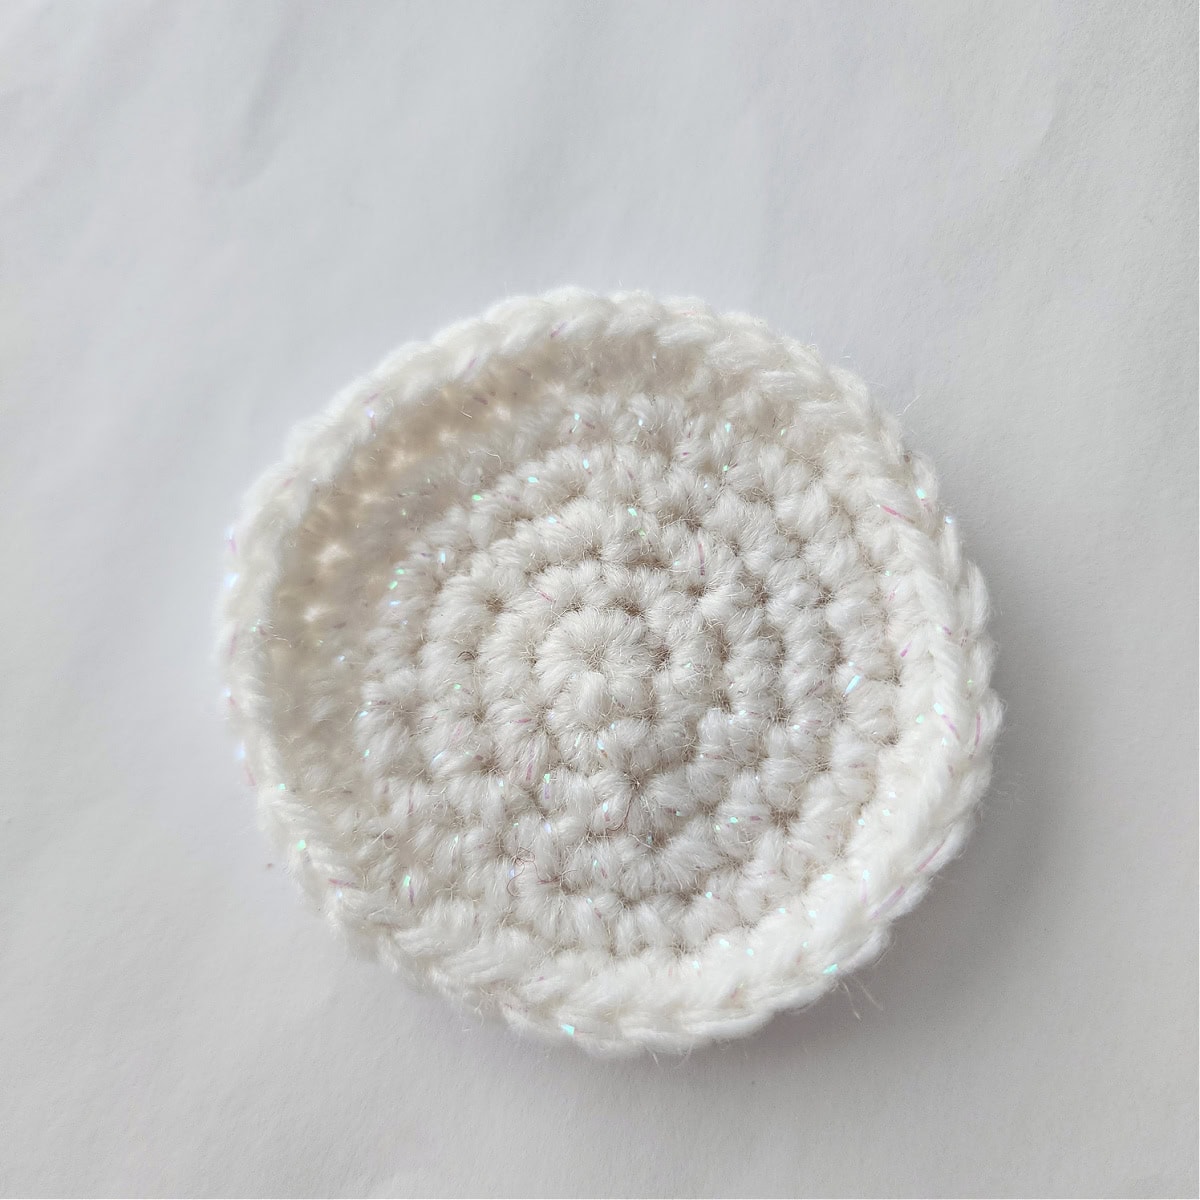
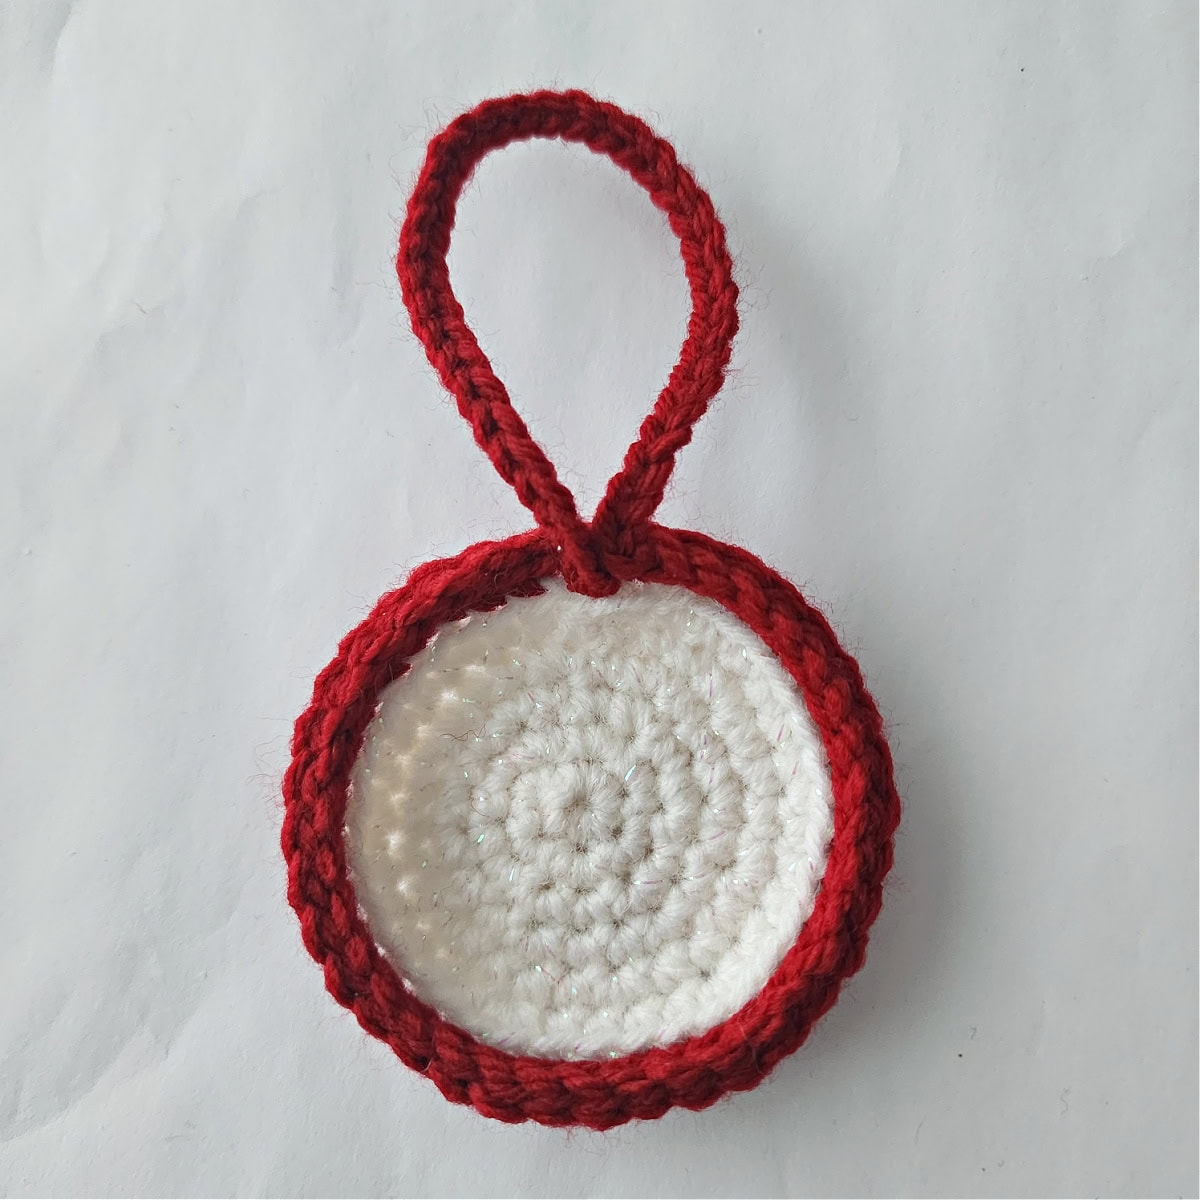
Plate Edging
Rnd 1 (RS): With red yarn & a 4.00mm crochet hook, join yarn in the BLO of a st near where you fastened off the plate, BLO sc in each remaining st around. Do not join. (36 sts)
Rnd 2: Sl st in each st around. (36 sts)
After you have slip stitched in each stitch around the plate, make a hanging loop by creating a chain that is 6″ long.
Fasten off. Use a yarn needle and tail of yarn and join the free end of the hanging loop to the plate in the same stitch as the beginning of the hanging loop. Weave in ends. Continue on to Mini Sugar Cookies.
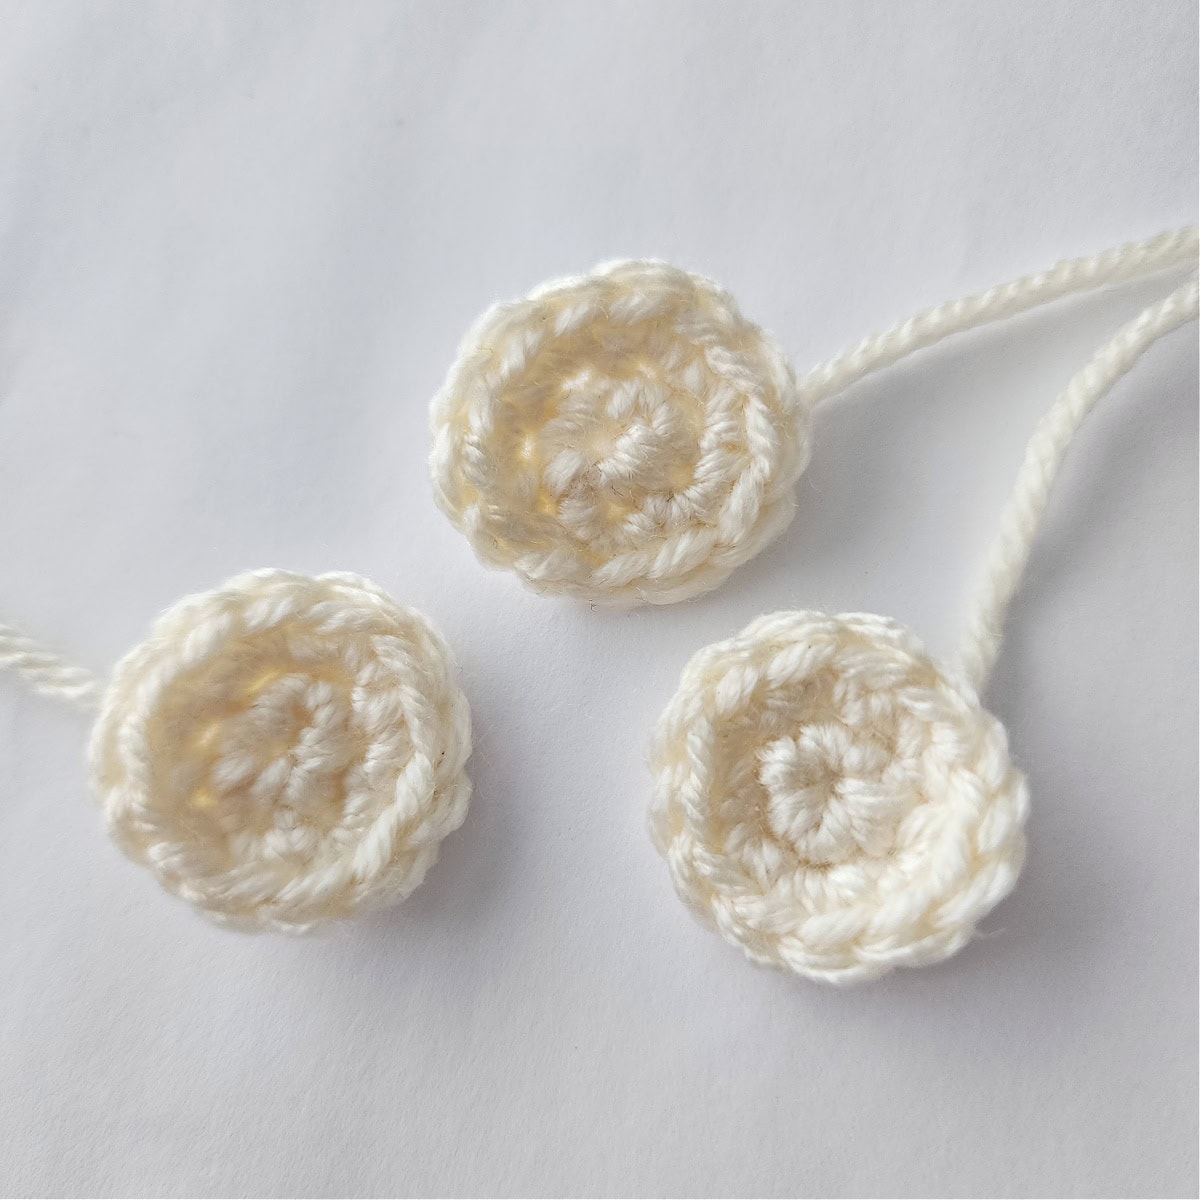
Mini Sugar Cookies (Make 3)
Note: The cookie is worked in continuous rounds to keep from having an unsightly seam. Do not join at the end of each round, instead use a scrap piece of yarn to keep track of the beginning of each round. Move the scrap of yarn up as you complete each round.
Rnd 1 (RS): With ivory yarn & a 4.00mm crochet hook, ch 2, work 6 sc into the 2nd ch from your hook. Do not join. (6 sts)
Rnd 2: 2 sc in each st around. (12 sts)
Fasten off the first 2 cookies and weave in ends. Fasten off the 3rd cooking leaving a 24″ tail of yarn for attaching all 3 cookies to the plate. Continue on to Adding Sprinkles to Cookies.
Adding Sprinkles to the Mini Sugar Cookies
Add the sprinkles to the RS of the cookies.
With approximately 10″ of both red and green yarn & a yarn needle, add sprinkles by sewing around one stitch on the cookie.
Randomly space sprinkles on your cookie. I prefer to add things in odd numbers so I added a total of 5 sprinkles to each cookie.
Knot the ends of yarn to secure. Trim the ends so that they’ll fit between the cookie and the plate (no need to weave them in).
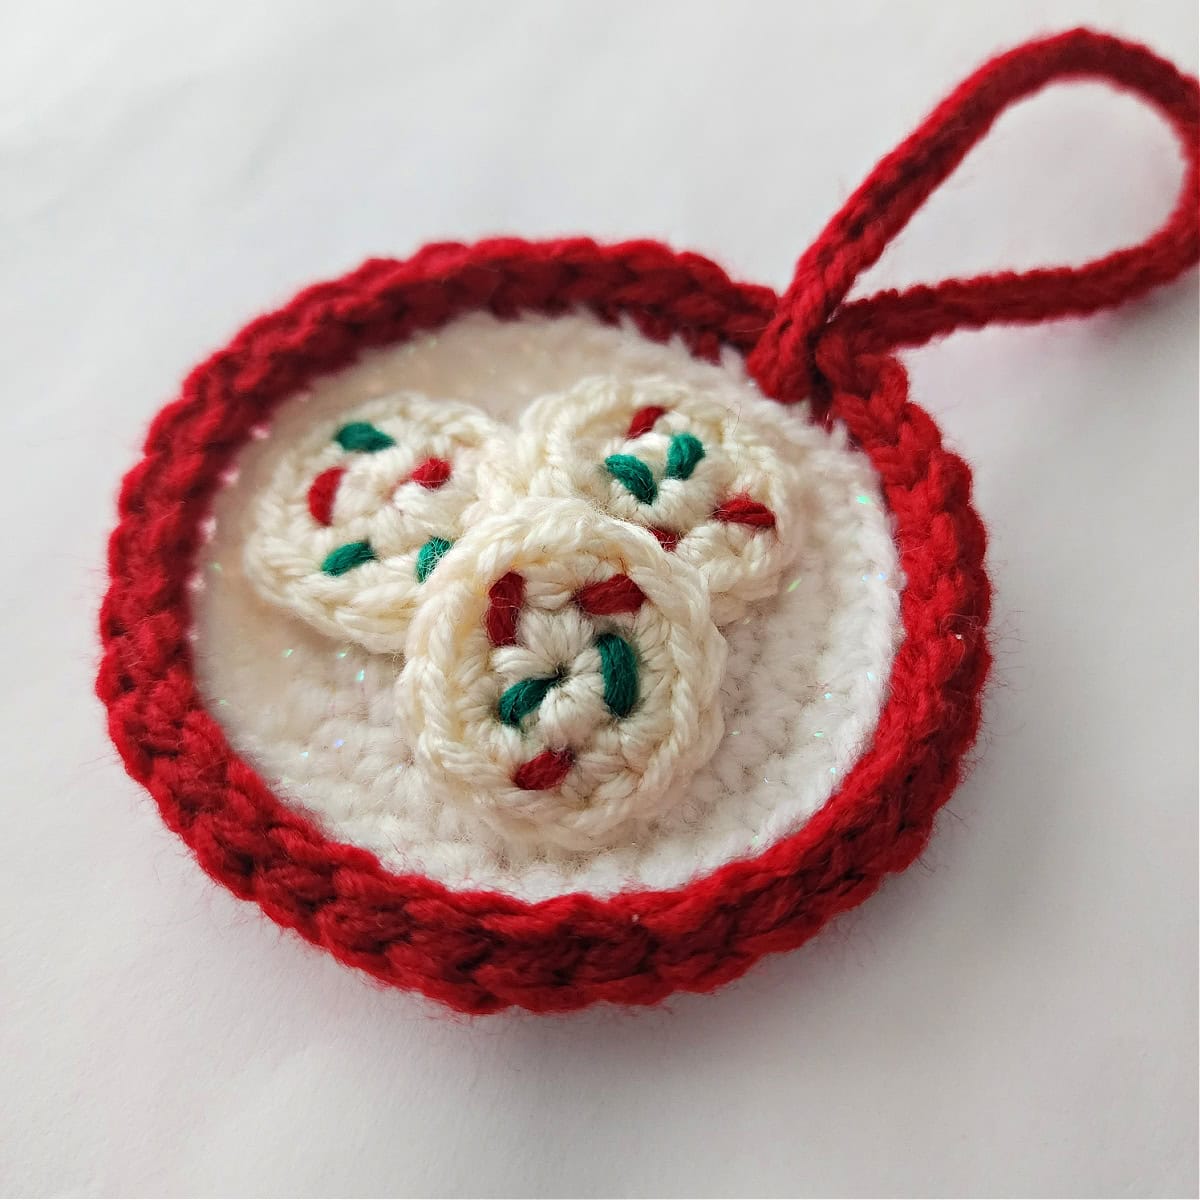
Attaching Cookies to the Plate
You can sew them on with the tail of yarn left on one of the mini-cookies, or hot glue them on. If you choose to sew them on, it’s a little trickier to sew them on without being able to see the yarn on the back side of the plate, but it’s doable. If you hot glue the cookies onto the plate, you don’t have to worry about yarn showing on the backside.
With tail of yarn on one cookie & a yarn needle, attach this cookie to the plate. Then attach remaining two cookies to the plate as shown in the photos.
Weave in ends.
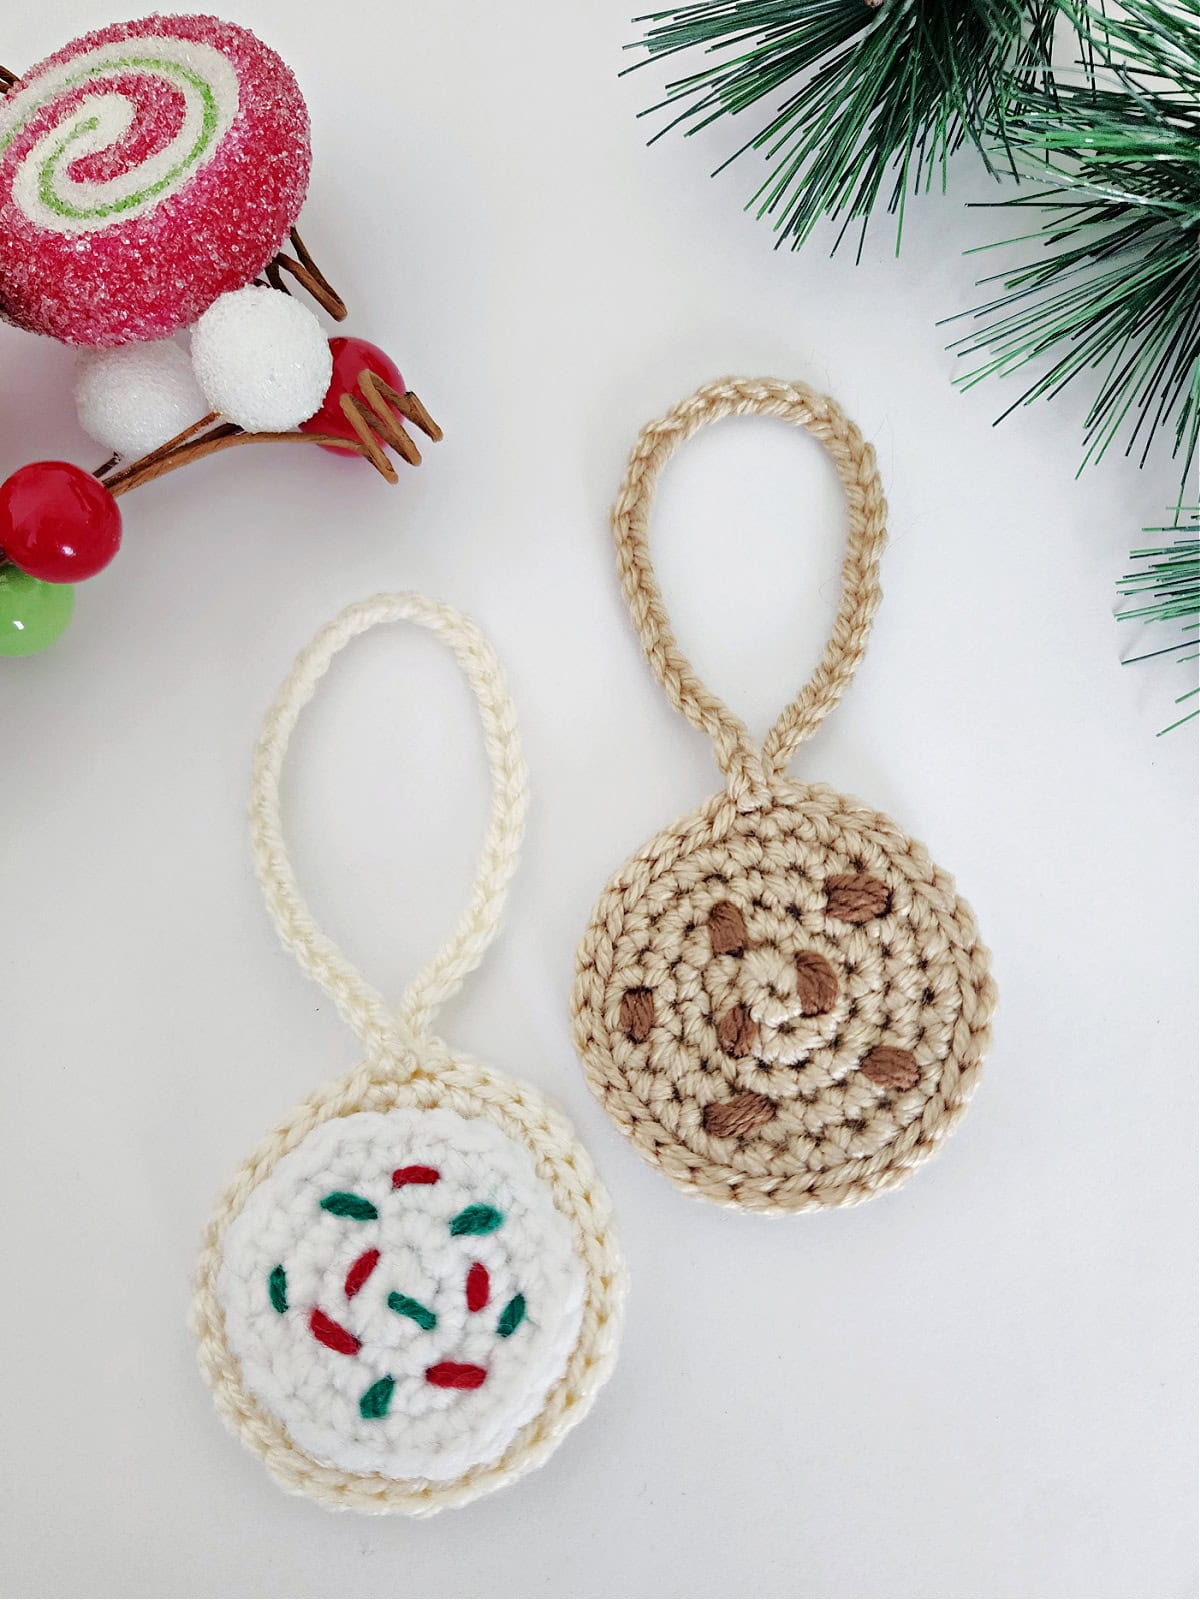
Don’t forget the milk! Our Milk for Santa Ornament coordinates with our Christmas Cookie Ornaments for a cute set!
I Made It! Now What?
Pin this post! Save these crochet Christmas cookie ornaments to your Pinterest boards so that you can come back and make it again.
Leave a comment below: We love to hear your feedback.
Share Your Finished Projects on Facebook or Instagram: I love to see your finished projects! Share with us on social media and tag me @acrochetedsimplicity or use the hashtag #ACrochetedSimplicity so I can find your posts.
Join us in the Facebook Community Group!
I hope you’ve enjoyed these crochet Christmas cookie ornaments and will make many for crocheted Christmas gifts!
Come share your finished projects with us in the A Crocheted Simplicity Crochet Community Group on Facebook. Join us for fun community events such as crochet alongs, join in on crochet conversations, ask questions, get advice, and share your love for crochet!

More Crochet Ideas for Christmas I Think You’ll Love
- Crochet Santa Boot Ornament
- Crochet Mrs Claus Jingle Bell Ornament
- Snowman Kitchen Towel
- Crochet Gingerbread Man Hot Pad
- O’ Christmas Tree Crochet Mason Jar Cozy
- O’ Christmas Tree Crochet Hand Towel
More Crochet Xmas Ornaments
Do you LOVE making crochet ornaments like I do? If so, make sure to pop over and see all of our crocheted ornaments.
