Knit-Look Crochet Ear Warmer
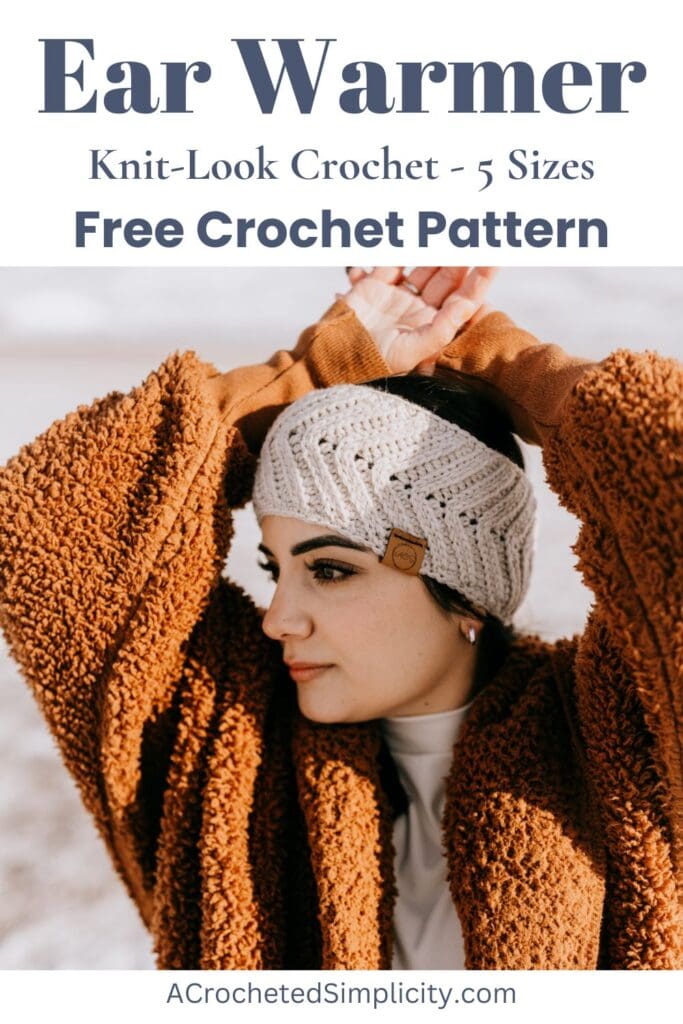
Create a cozy and stylish accessory that combines the warmth of crochet and the sleek texture of knitting, with the Adelaide knit-look crochet ear warmer.
With just a few supplies and an easy-to-follow pattern, you’ll have a chic ear warmer that looks knit but is 100% crocheted.
You’ll find the crochet ear warmer pattern in the post below for free, or you can find an ad-free printable PDF (that includes all photo tutorials), on Ravelry, or Etsy (aff).
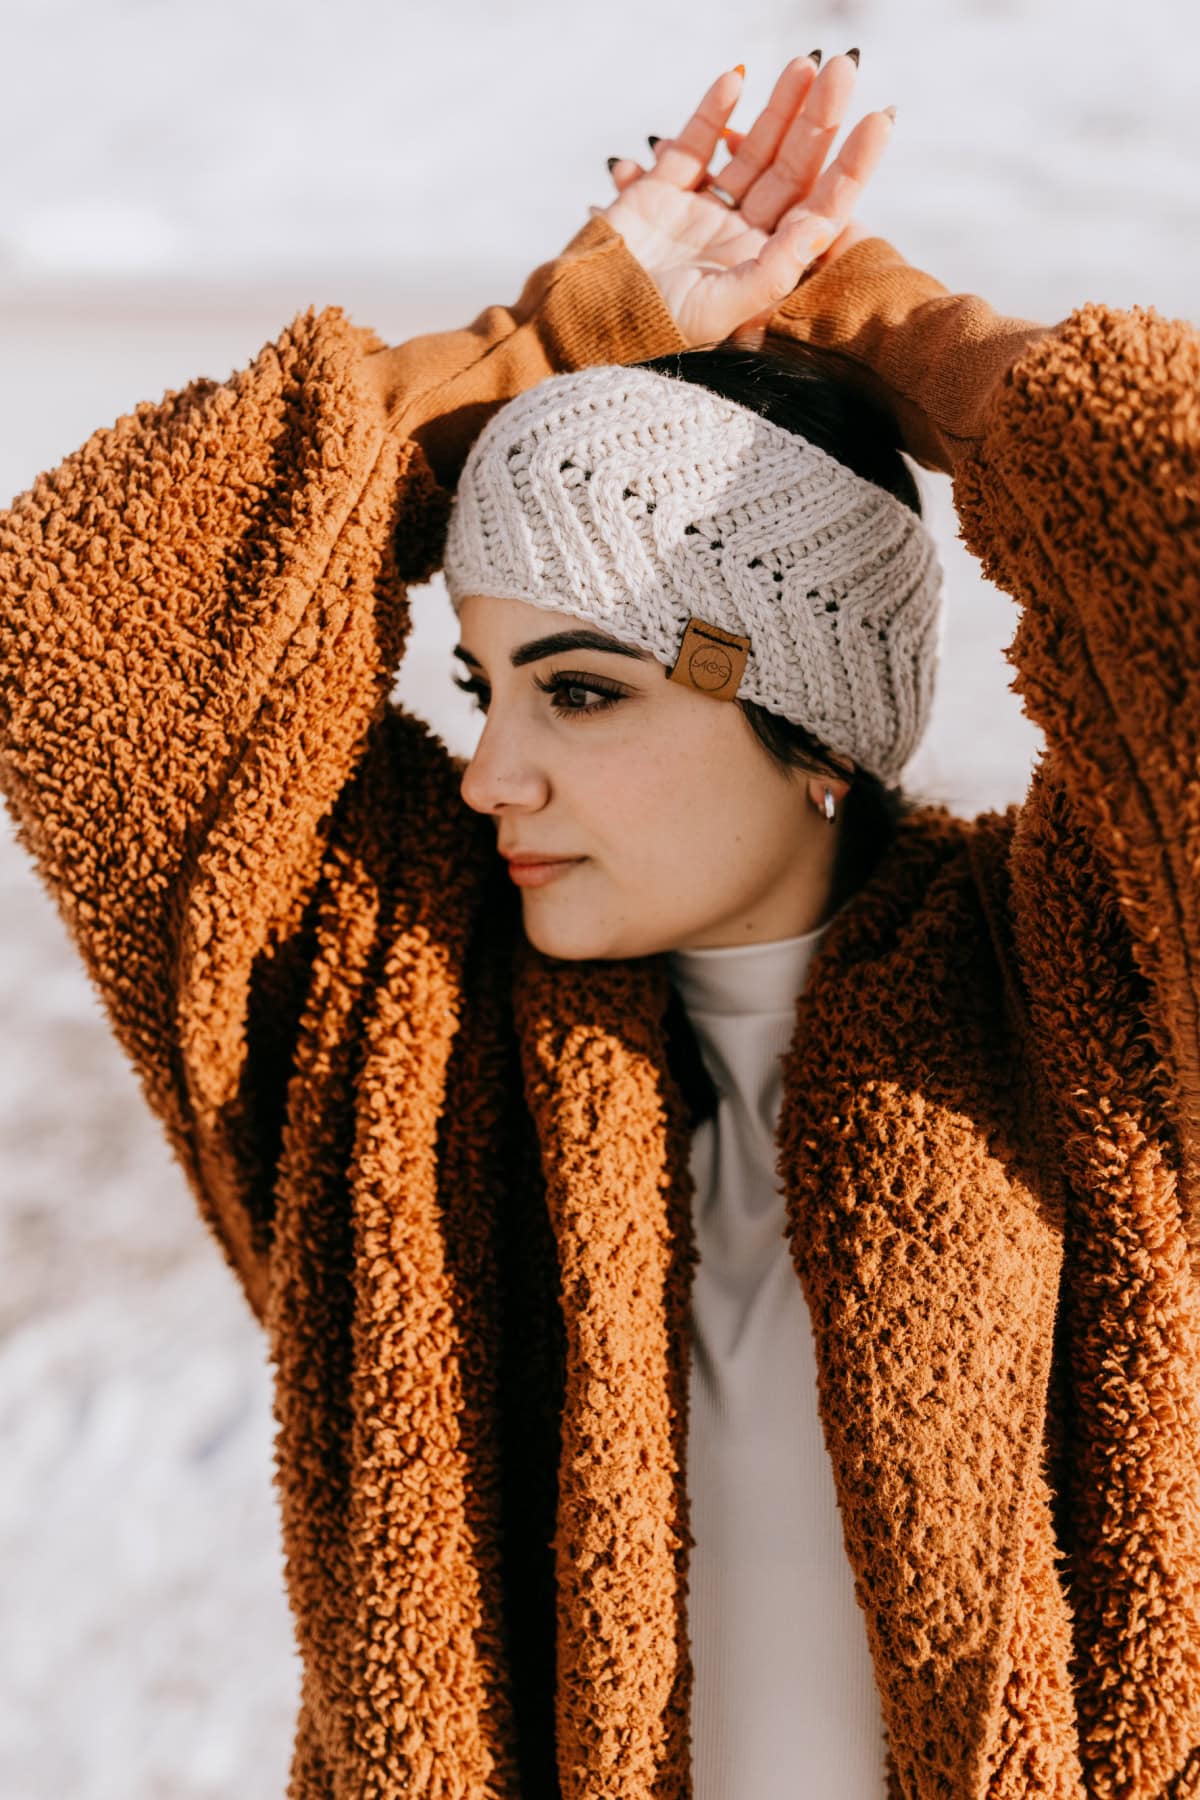
Crochet ear warmers make the perfect, budget-friendly DIY gift idea because they use small amounts of yarn. This also makes them great for stash-busting and craft fairs!
And since they work up quickly, they’re also great last-minute gifts for family, friends, teachers, co-workers, and more!
Why Choose a Knit-Look Crochet Ear Warmer?
Knit-look crochet ear warmers are trendy and practical. They provide the classic, stretchy ribbed texture of knitting but are made using simple crochet techniques. This project is perfect for:
- Beginners wanting to expand their skills.
- Quick handmade gifts.
- Stylish winter accessories that stand out.
- Last, but not least, crocheters who love knit-look crochet.
Tips for Success:
- Tension Matters: The special stitch can be tight, so crochet loosely to make it easier to keep your gauge in check.
- Customize: Play with different yarn colors, add stripes, or incorporate faux fur for a trendy look.
- Gameday ear Warmers: Make them in your favorite sports team colors and add embroidered patches. I found these patches on Amazon that were the perfect size.
- Gauge Check: Ensure your stitches are consistent to maintain a polished appearance. Use the included gauge swatch instructions to practice the special stitch and make sure your ear warmer will fit.
Styling Your Knit-Look Crochet Ear Warmer
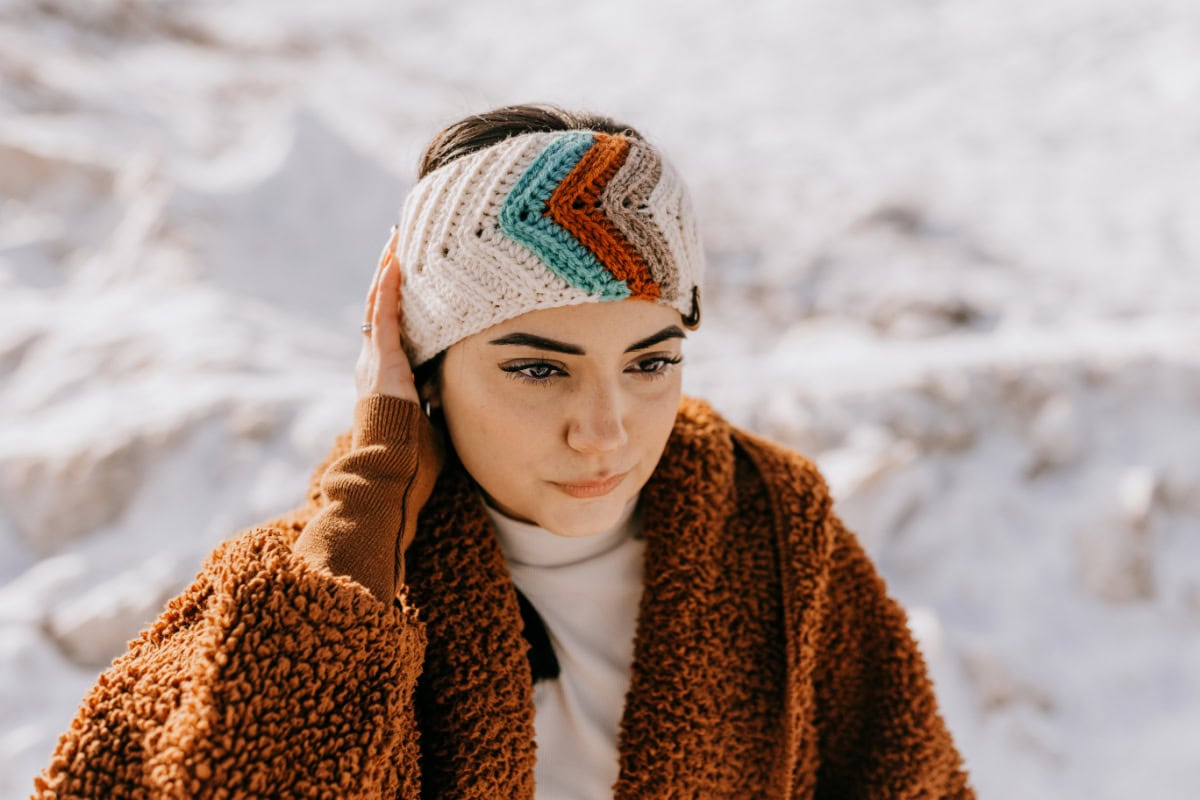
Pair your handmade ear warmer with your favorite winter coat, a chunky scarf, and boots for a cozy yet chic look. Crochet ear warmers also make thoughtful gifts for friends, family during the holiday season.
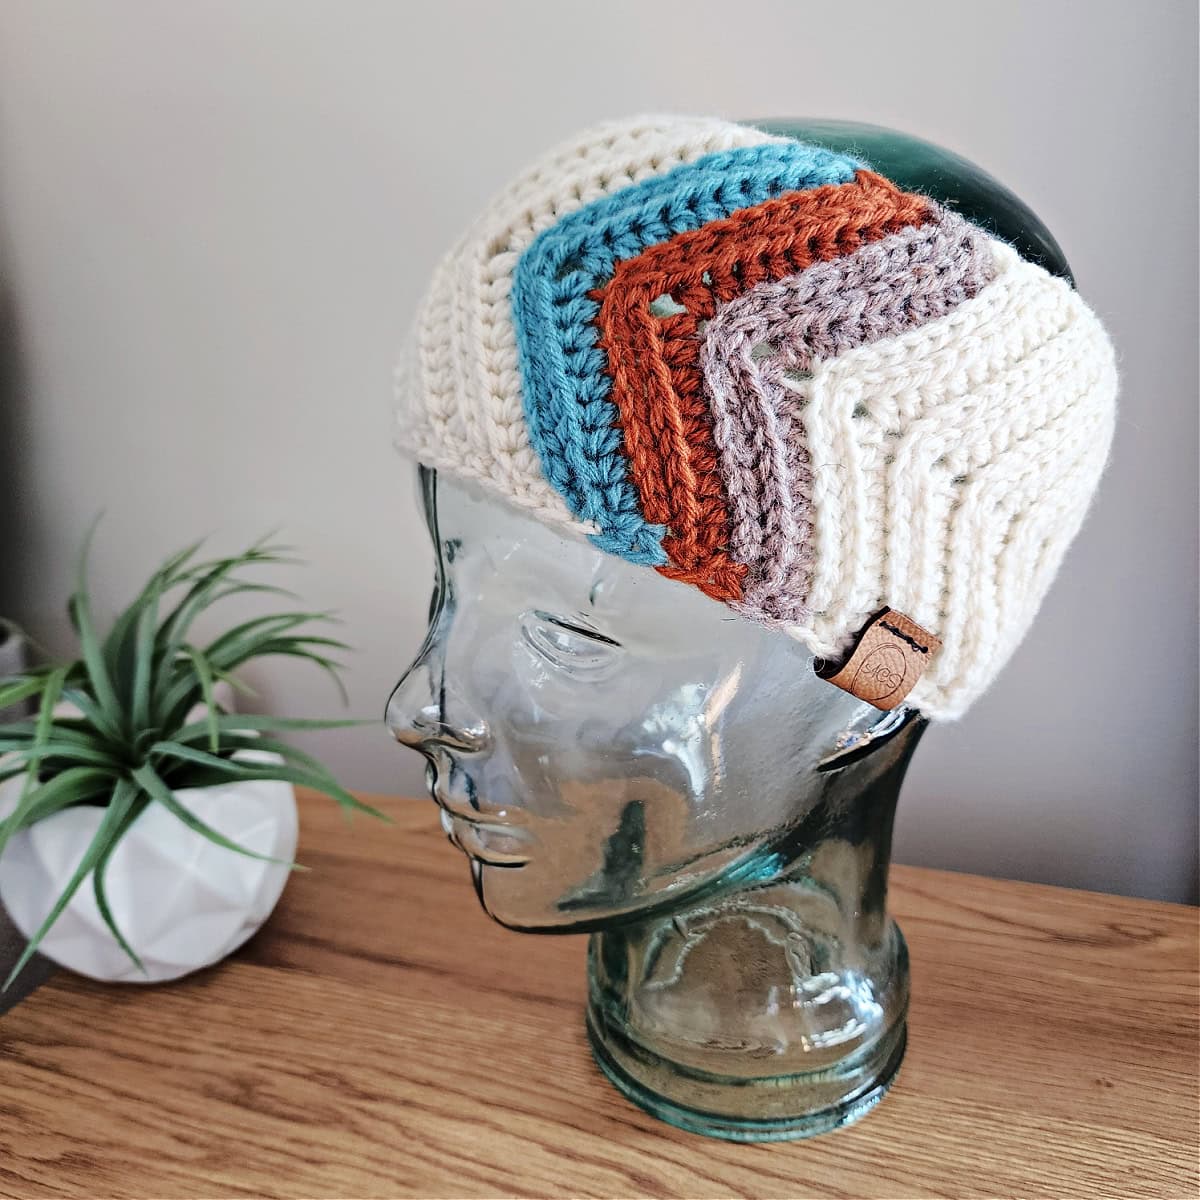
How To Get The
Adelaide Crochet Ear Warmer Pattern
Option 1: Scroll down for the free crochet ear warmer pattern right here in this blog post.
Option 2: Purchase the ad-free printable PDF from one of my shops:
Yarn
I used Lion Brand Yarns Wool Ease for my crochet ear warmers pattern. Wool Ease is a worsted weight acrylic wool blend yarn that’s currently available in 31 colors.
Other comparable yarns can be substituted such as Lion Brand Pound of Love, Heartland, Basic Stitch, Vanna’s Choice, and more.
A note about fiber content: The fiber content of the yarn you choose may affect the stretchiness of your ear warmer. Depending on the yarn you’ve chosen, you may need to make your ear warmer longer or shorter, than the measurements stated in the written pattern, to get the proper fit. See the note about adjusting size at the beginning of the Seam instructions.
The Adelaide Crochet Ear Warmer Pattern is my contribution to the 2025 Gift to Myself Crochet Along hosted by Marie from Underground Crafter. Marie has gathered 23 fabulous and free crochet patterns from your favorite designers.
Find out how to join the Gift to Myself Crochet Along and enter to win several great prizes in Marie’s blog post.

Free Crochet Ear Warmers Pattern
The free ear warmer pattern crochet is below, but if you love to work offline, I’ve got a couple other great options for you.
Purchase the ad-free, printable PDF, including all photo tutorials, on Ravelry, or on Etsy (aff).
This post contains affiliate links.
Materials
- Yarns: Worsted weight 4 yarn was used for this knit-look crochet ear warmer.
- Worsted Weight / 4 / Yarn, Lion Brand Wool Ease, worsted weight / 4 yarn, 80% Acrylic / 20% Wool (197 yds / 180 m / 85 g / 3 oz)
- Yardage: See Sizes & Yardage Below
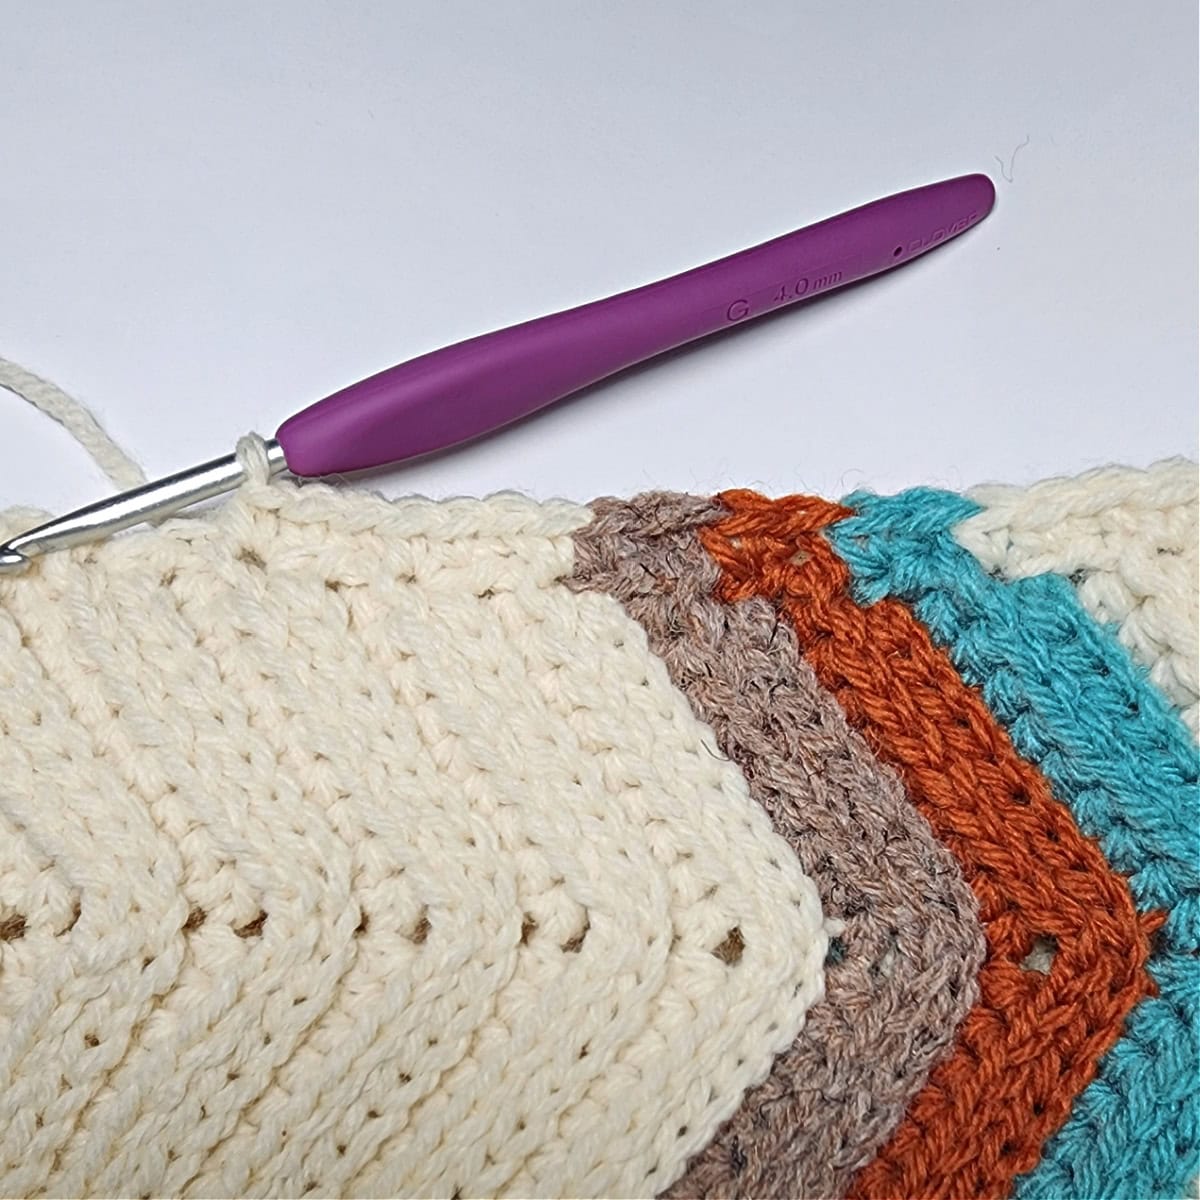
- Crochet Hook: G/6/4.00mm; or size needed to obtain gauge (My favorite crochet hooks are the Clover Amour Crochet Hooks, I’ve never had an ache in my hand since switching).
- Locking Stitch Markers (can be helpful when seaming)
- Scissors
- Yarn Needle
Abbreviations (U.S. Terms)
- ch(s): chain(s)
- sl st(s): slip stitch(es)
- st(s): stitch(es)
- yo: yarn over
- sc: single crochet
- hdc: half double crochet
- BLO: back loop only
- FLO: front loop only
- RS: right side
- Rep: repeat
- SM: stitch marker
- Join yarn with a standing single crochet
- Mslst2tog: Modified Slip Stitch 2 Together (photo & video tutorial)
Experience Level
- Easy / Intermediate
- Step-by-step photos included to make it easier
Gauge
- See gauge & gauge swatch instructions below.
Sizes
- Baby: 16″ – 17.5″ circumference; (70 yards)
- Toddler: 17″ – 19″ circumference; (80 yards)
- Child: 19″ – 21″ circumference; (90 yards)
- Teen / Adult Small: 21″ – 22″ circumference; (100 yards)
- Adult Medium / Large: 22.5″ – 24″ circumference; (110 yards)
Special Stitches
- Modified Slip Stitch 2 Together (Mslst2tog): Insert hook into same st as last st worked, yo, pull up a loop, insert hook into next st, yo, pull up loop and pull that loop thru both loops on your hook. If you’re a visual person, have a photo & video tutorial for this crochet stitch. Note: It will seem as though you’re working these sts along the backside of the previous row of stitches.
- Join yarn with a standing single crochet: Begin with a slip knot on your hook, insert your hook into the stitch or space indicated, yo, pull up a loop, yo and draw thru both loops on hook.
Pattern Notes
- Turning chains are not counted as stitches, unless noted otherwise.
- Yarn Notes: Lion Brand Yarns Wool Ease was used for the samples. Other comparable yarns may be used as long as gauge is met.
- Lion Brand Wool Ease, worsted weight / 4 yarn, 80% Acrylic / 20% Wool (197 yds / 180 m / 85 g / 3 oz).
- Yarn Note: The fiber content of the yarn you choose will affect the stretchiness of your ear warmer. Depending on the yarn you’ve chosen, you may need to make your ear warmer longer or shorter, than the measurements stated above, to get the proper fit. See the note about adjusting size at the beginning of the Seam instructions.
- Changes for Sizes Written as Follows: Baby (Toddler, Child, Teen/Adult Small, Adult Medium/Large)
- Changes for Stitch Counts as Follows: (Baby, Toddler, Child, Teen/Adult Small, Adult Medium/Large)
- Colors of Samples Shown in photos:
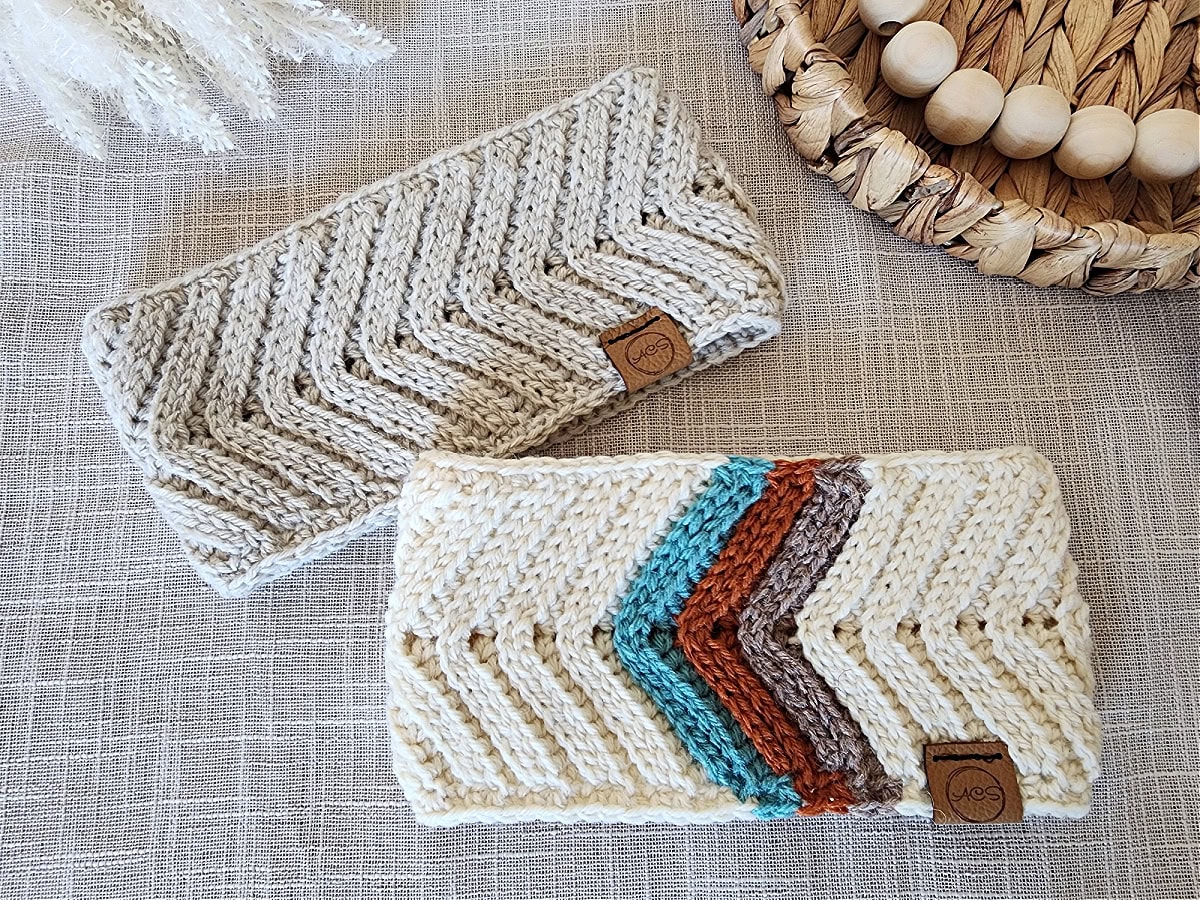
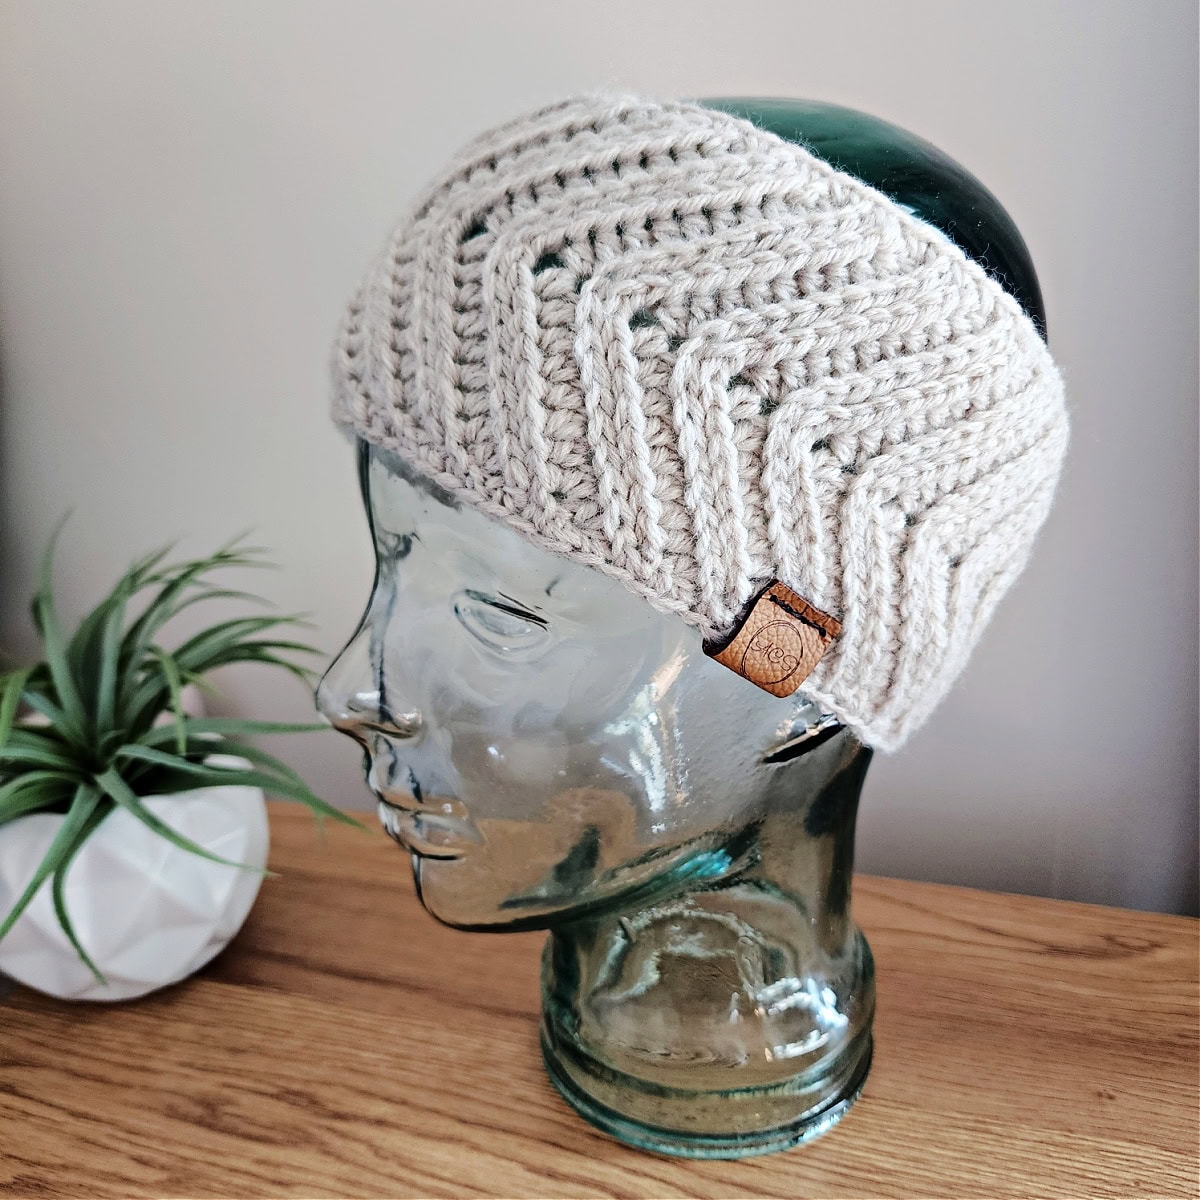
- Solid Ear Warmer: Linen
- Striped Ear Warmer: Fishermen (cream), Succulent, Oatmeal, Rust (I used scraps of Vanna’s Choice Yarn that I had on hand)
- Ear Warmer Construction: This crochet ear warmer is worked flat and then seamed. After seaming the first and last rows, a simple single crochet edging is added.
Video Tutorial: Are you more of a visual learner? If so, I have a video tutorial of the Mslst2tog that will help!
Gauge Swatch Instructions
Gauge: In stitch pattern as written below: 13 sts = 2.75″; 10 rows = 3″ (stitch height isn’t crucial)
Tip: The stitch pattern for this ear warmer uses a slip stitch technique. As with all slip stitch crochet, it is very easy to tighten up your gauge as you work. When I’m working these stitches I am constantly reminding myself to keep an even tension. If I do not, my work ends up way too small. Making a mental note as you crochet really helps.
Row 1 (RS): With yarn & a 4.00mm crochet hook, ch 14, working into the back hump of the foundation ch, hdc in 2nd ch from hook, hdc in each ch across. Turn. (13 sts)
Row 2: Ch 1, sl st in the first st, beginning in same st as the sl st just work 12 Mslst2tog. Turn. (12 Mslst2tog + 1 sl st)
Row 3: Ch 1, BLO hdc in each st across. Turn. (13 sts)
Row 4: Ch 1, skip 1st st, sl st in the next st, beginning in same st as sl st just work 11 Mslst2tog, sl st in last st. Turn. (11 Mslst2tog + 2 sl sts)
Row 5: Ch 1, BLO hdc in each st across. Turn. (13 sts)
Row 6: Ch 1, sl st in the first st, beginning in same st as sl st just work 12 Mslst2tog. Turn. (12 Mslst2tog + 1 sl st)
Rows 7 thru 10: Repeat Rows 3 thru 6. (13 sts)
Finished Swatch Dimensions: 2.75″ W X 3″ H.
Knit-Look Crochet Ear Warmer Pattern
Changes for Sizes Written as Follows: Baby (Toddler, Child, Teen/Adult Small, Adult Medium/Large)
Changes for Stitch Counts as Follows: (Baby, Toddler, Child, Teen/Adult Small, Adult Medium/Large)
Striped Ear Warmer: To add a few accent stripes to your ear warmer like one of my samples, change colors at the end of a Row 2 repeat. With the new color, work a Row 3 repeat followed by a Row 2 repeat, then switch colors again.
Row 1 (RS): With yarn & a 4.00mm crochet hook, ch 18 (18, 20, 22, 22), working into the back hump of the foundation chain, hdc in the 2nd ch from your hook, hdc in each of the next 7 (7, 8, 9, 9) chs, (hdc, ch 3, hdc) in the next ch, hdc in each of the last 8 (8, 9, 10, 10) chs. Turn. (18, 18, 20, 22, 22 hdc + 1 ch-3)
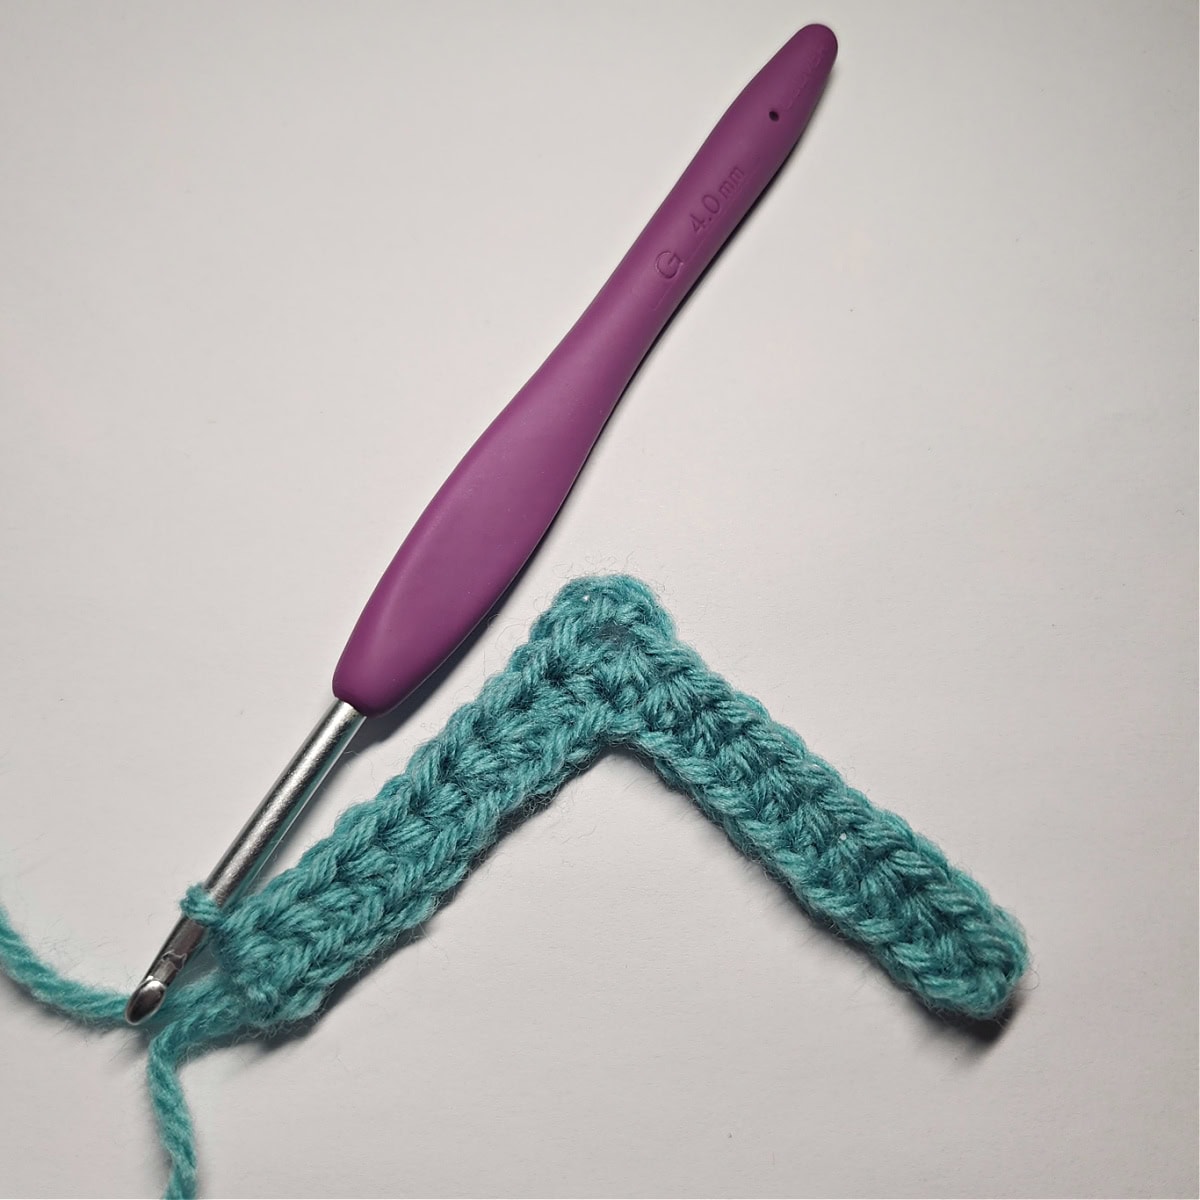
Note: When working the Mslst2tog in the next row, work them into the 3 chains from the previous row the same as if you were working into hdc stitches.
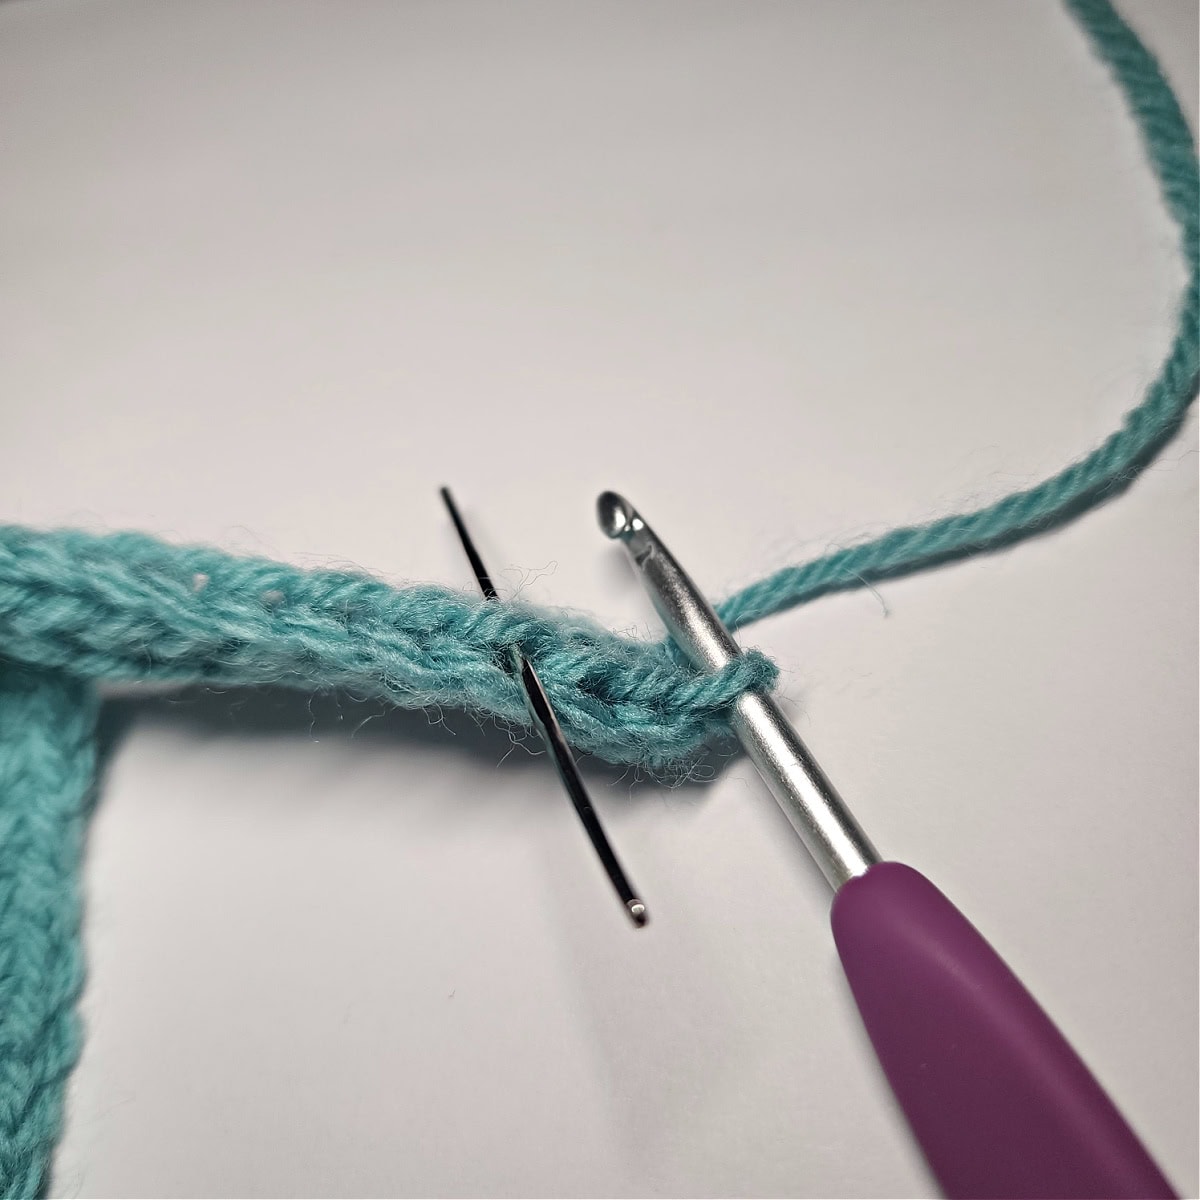
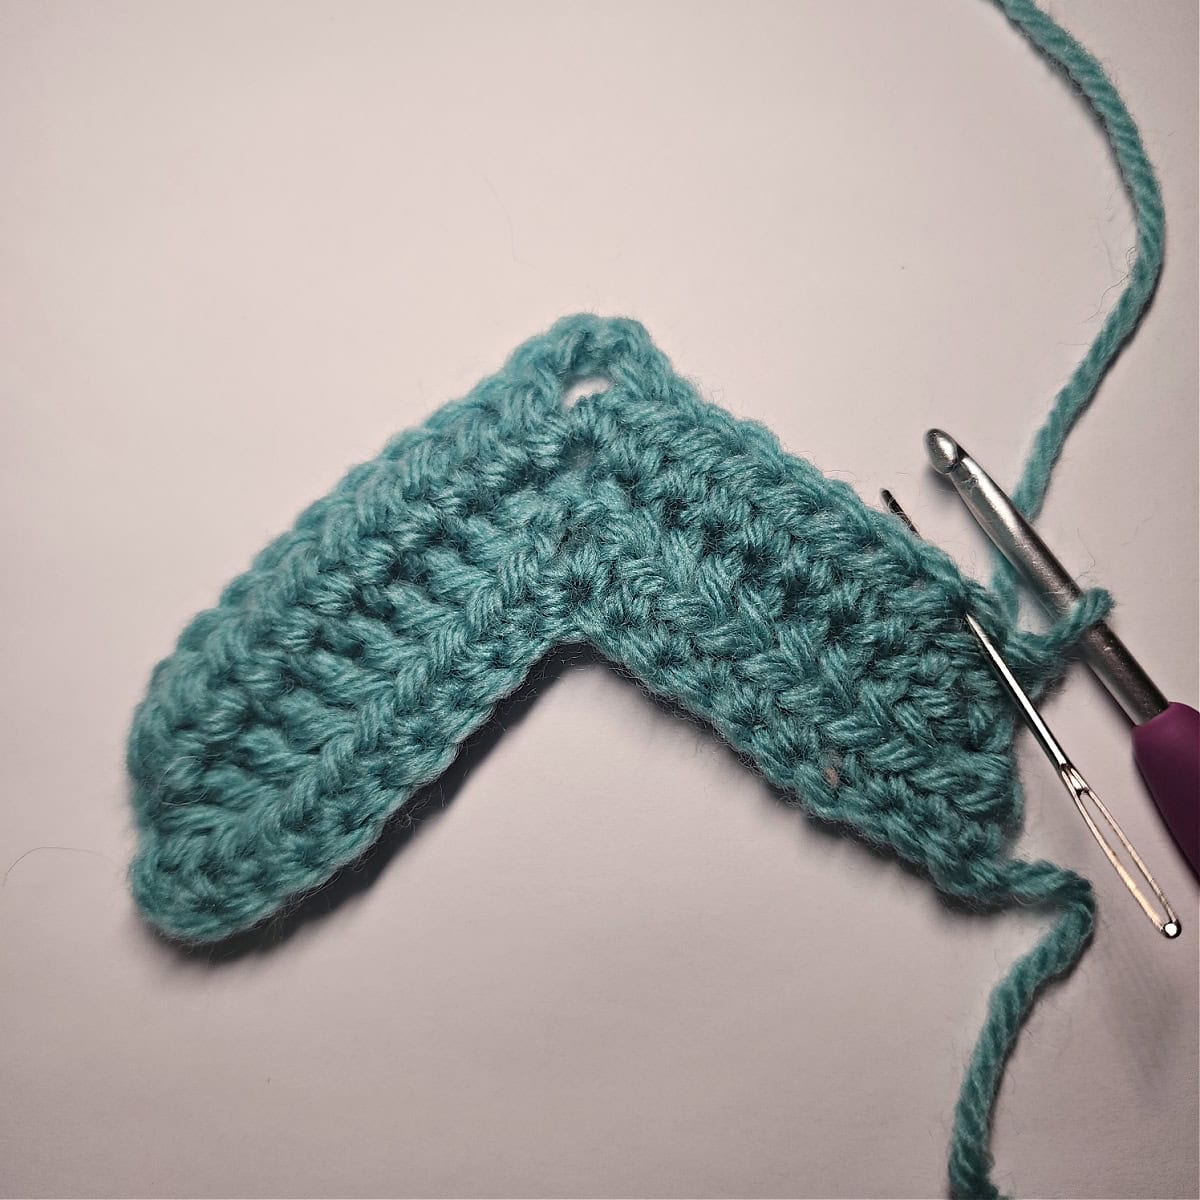
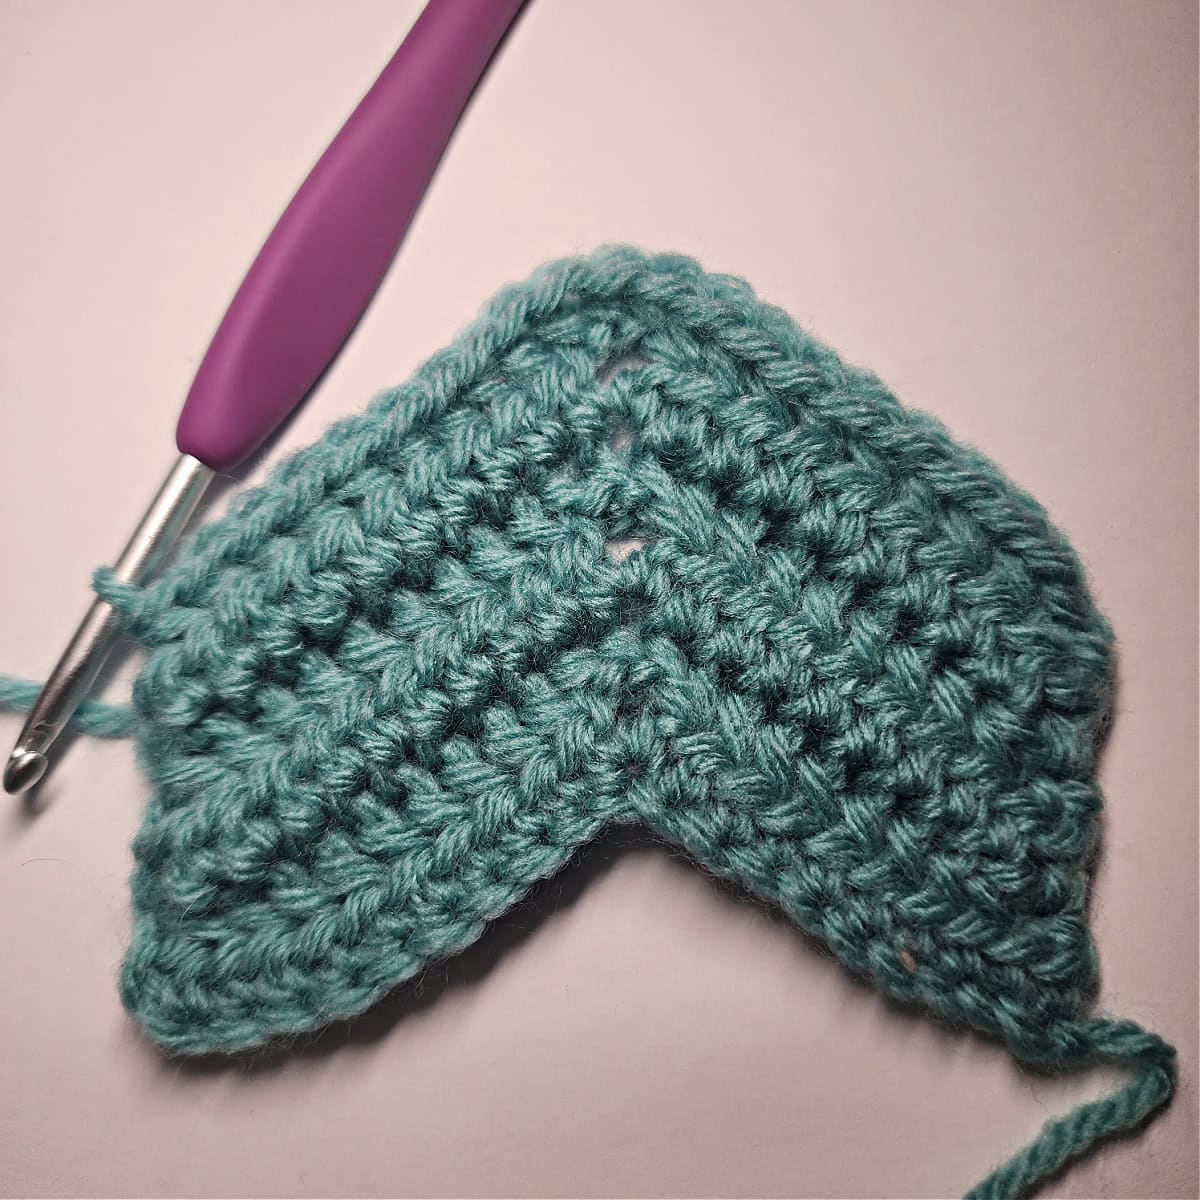
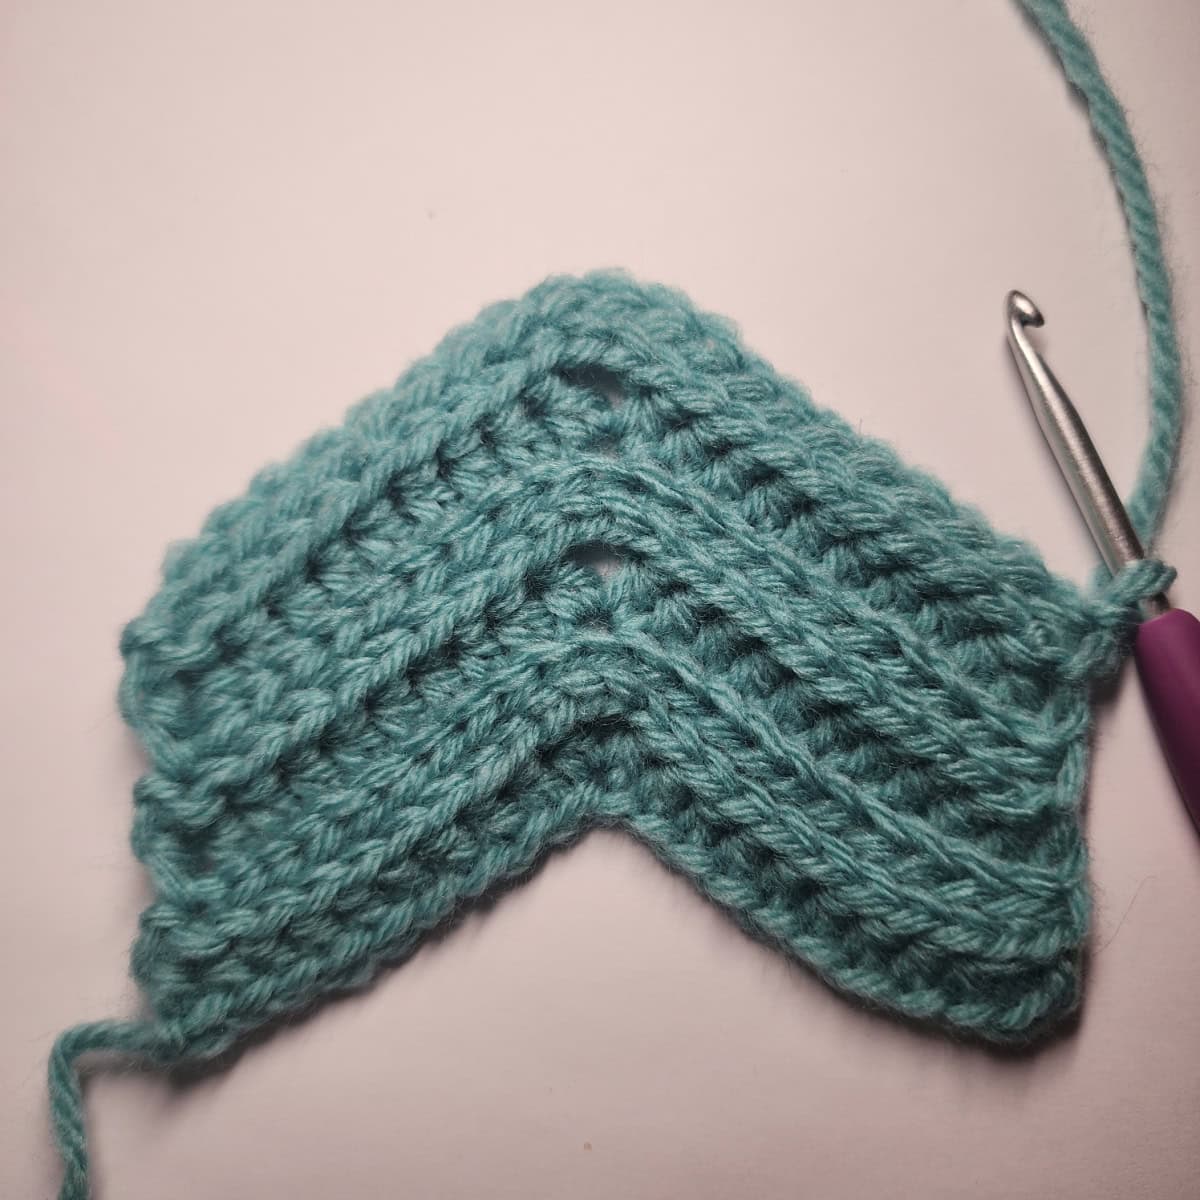
Row 2: Ch 1, skip the first st, sl st in the next st, work 17 (17, 19, 21, 21) Mslst2tog (this will leave two stitches remaining), work 1 more Mslst2tog beginning in the same st as the previous st and ending in the last st of the row (skipping over the second to last stitch). Turn. (19, 19, 21, 23, 23 sts)
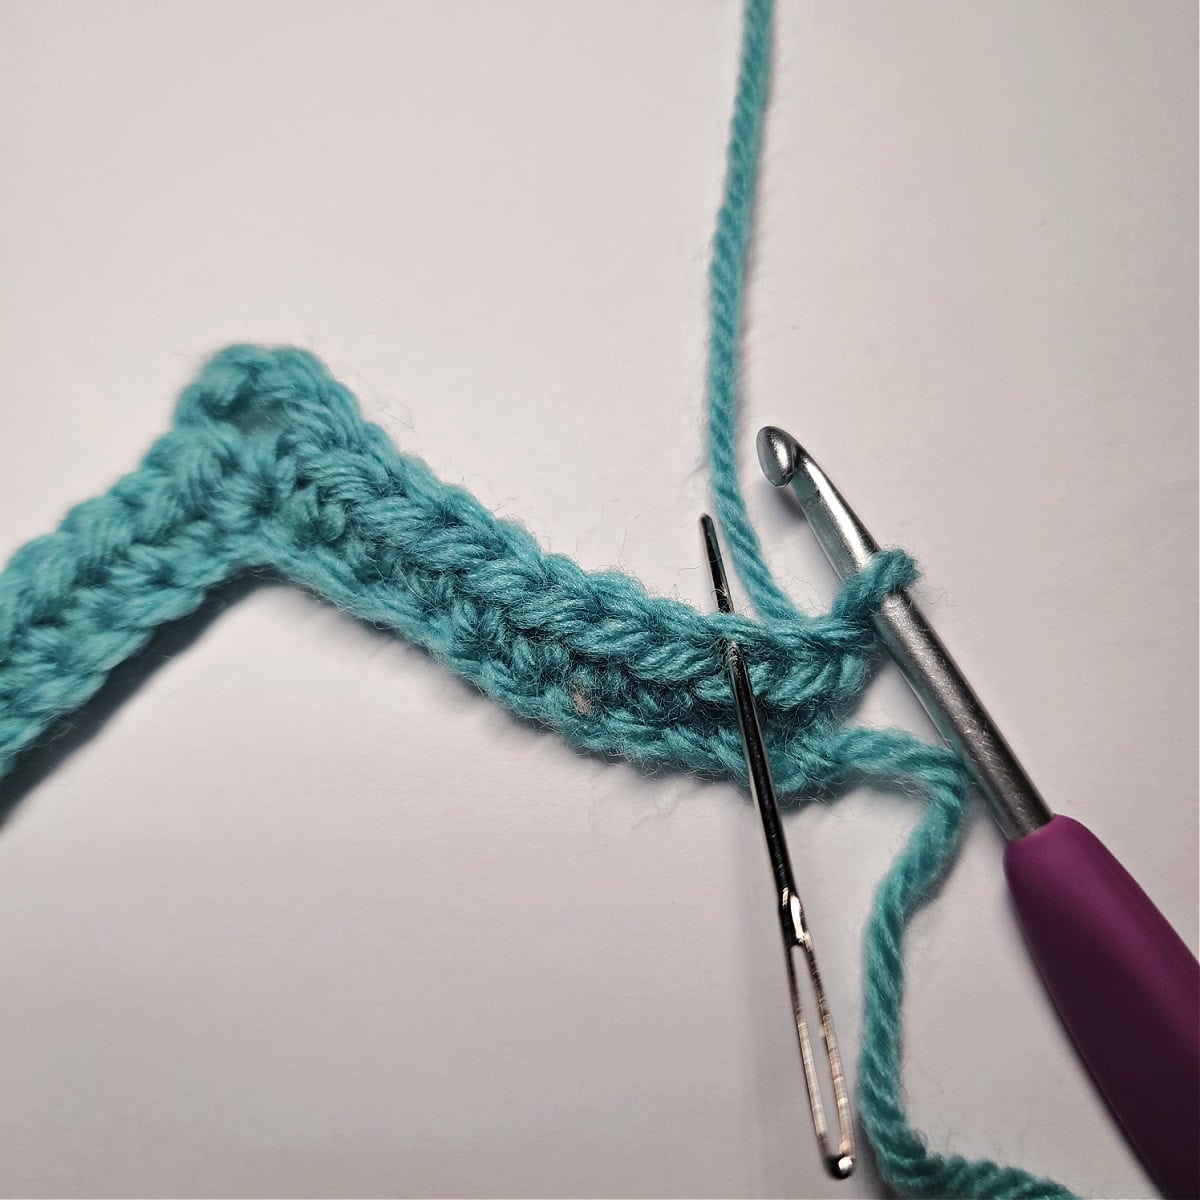
stitch. The yarn needle is marking the stitch to sl st into.
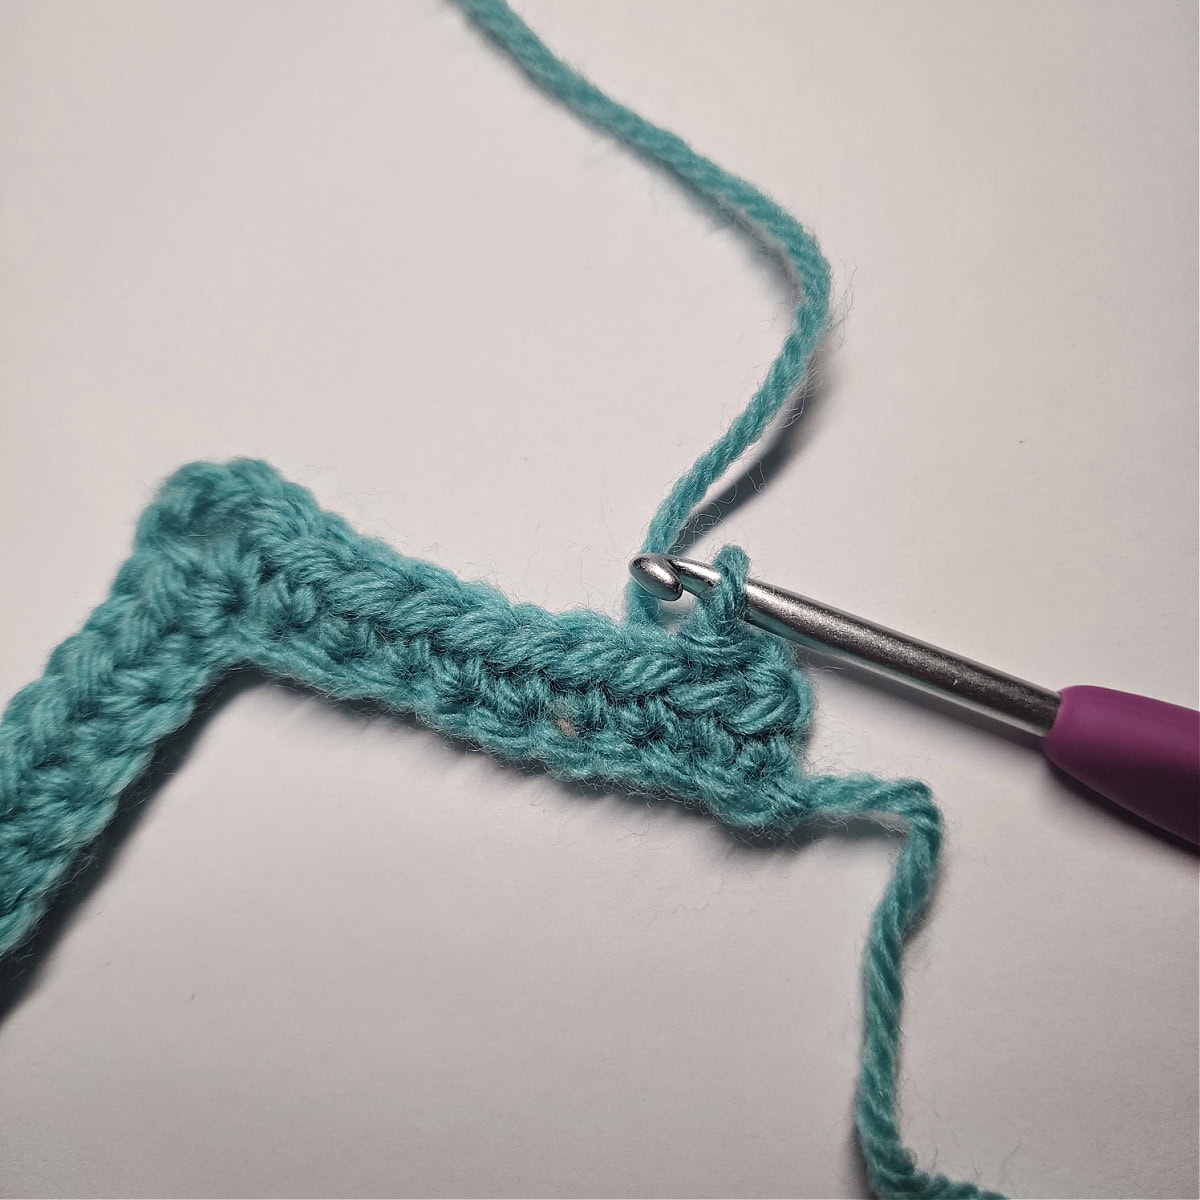
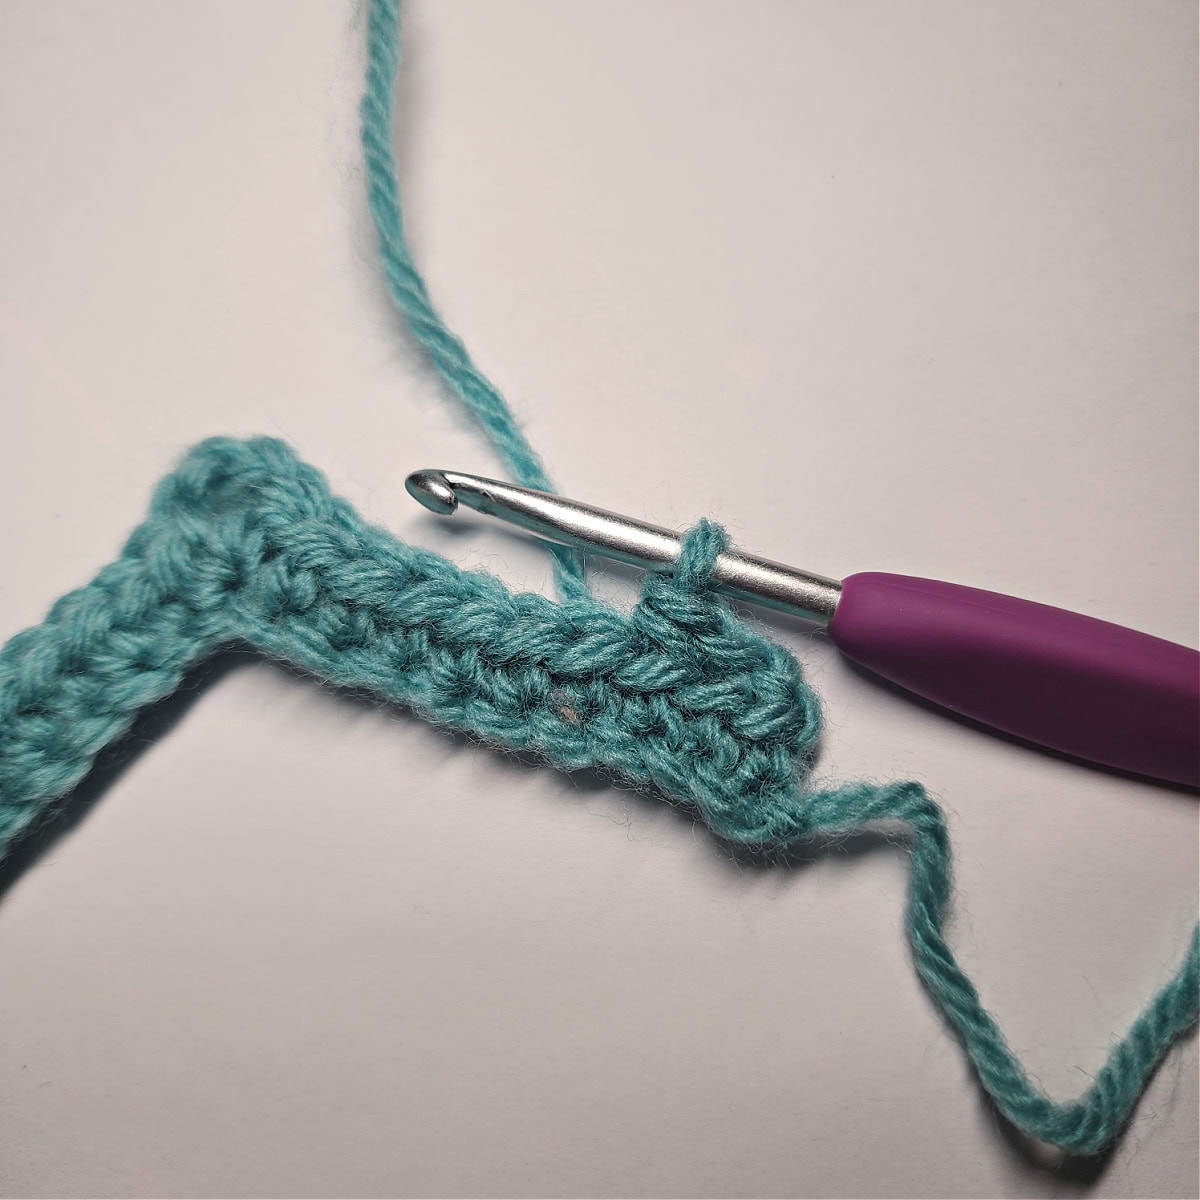
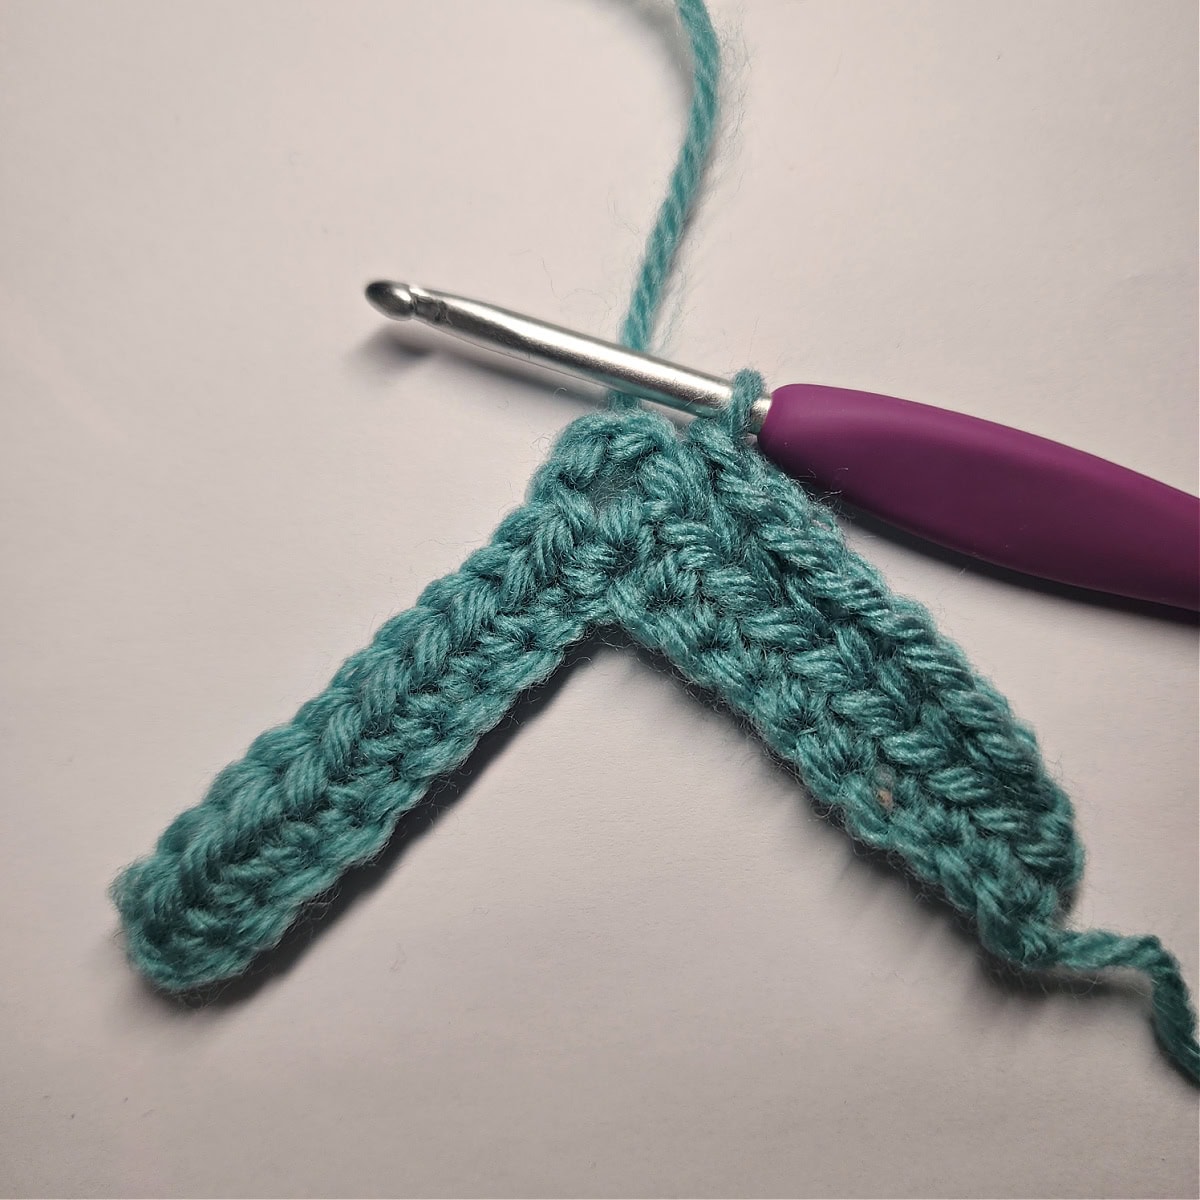
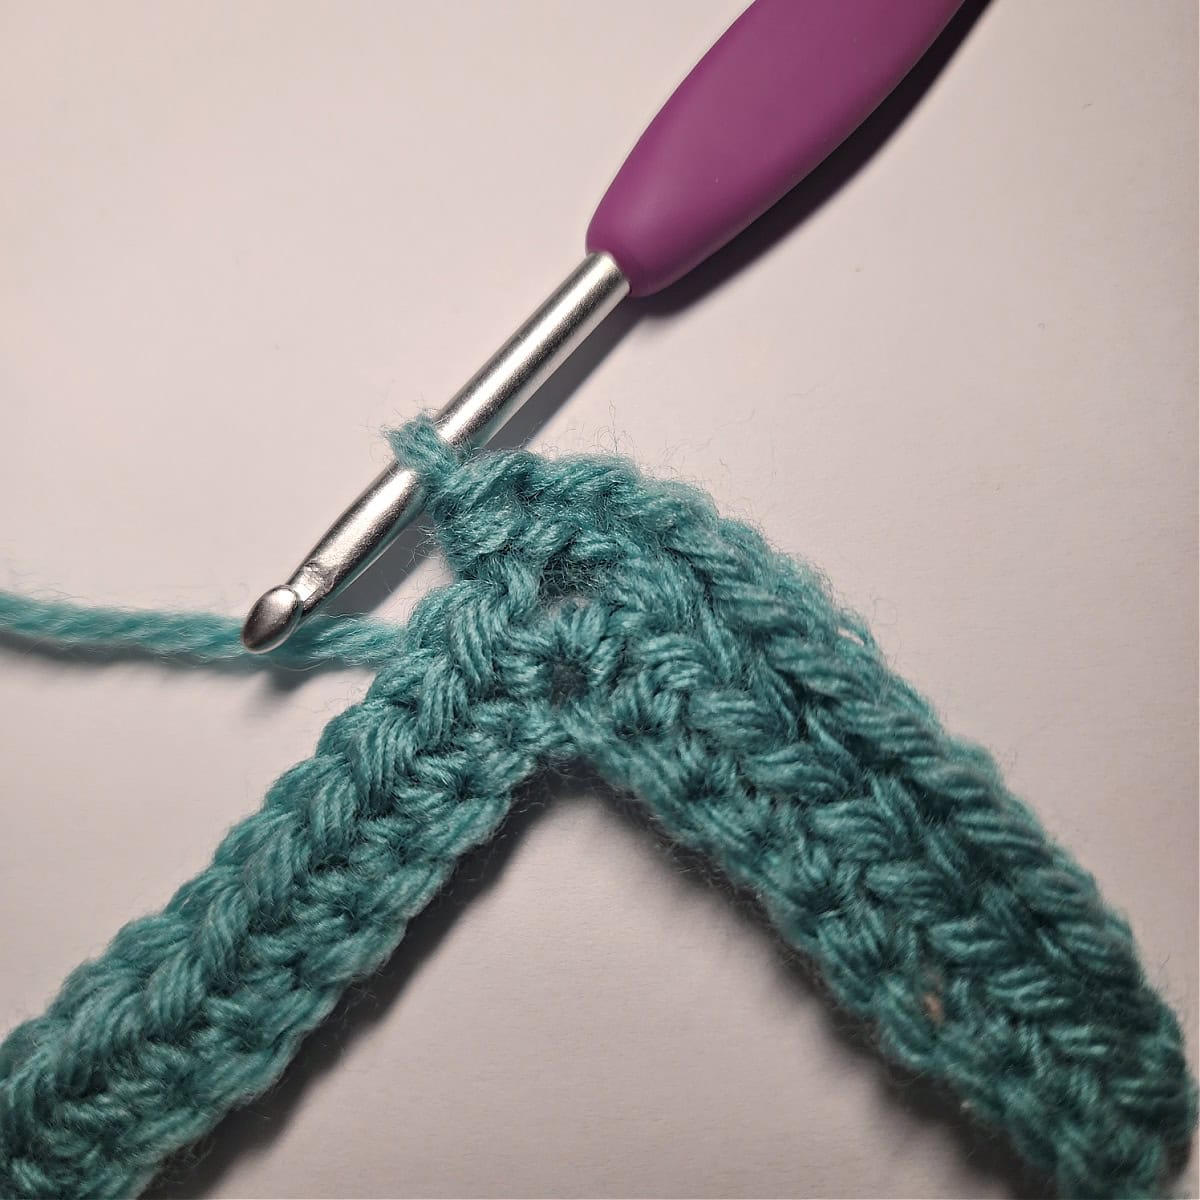
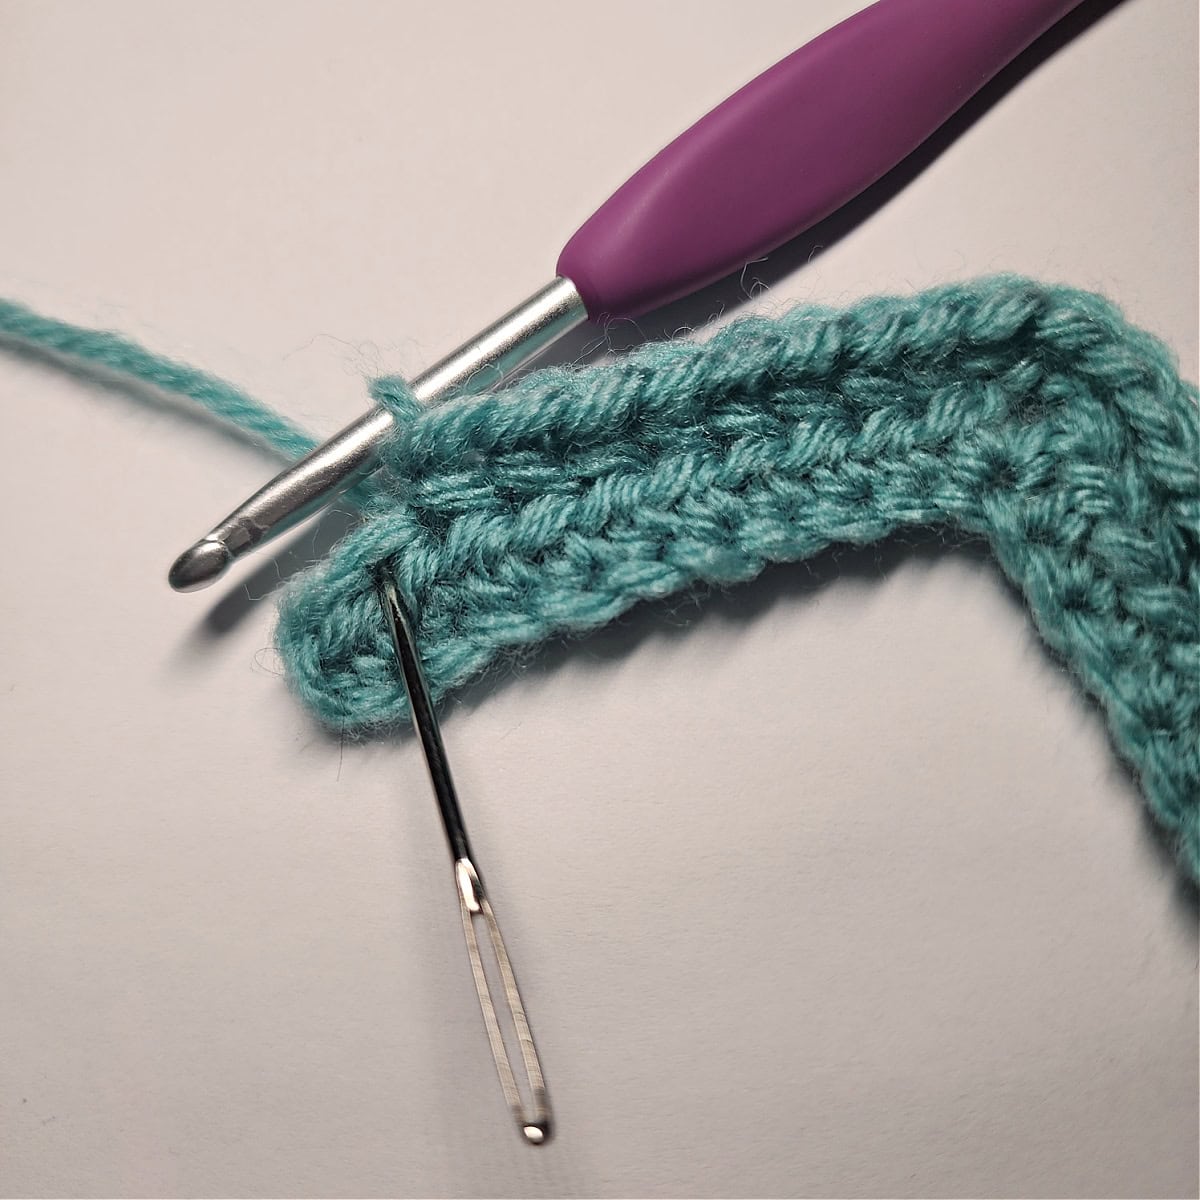
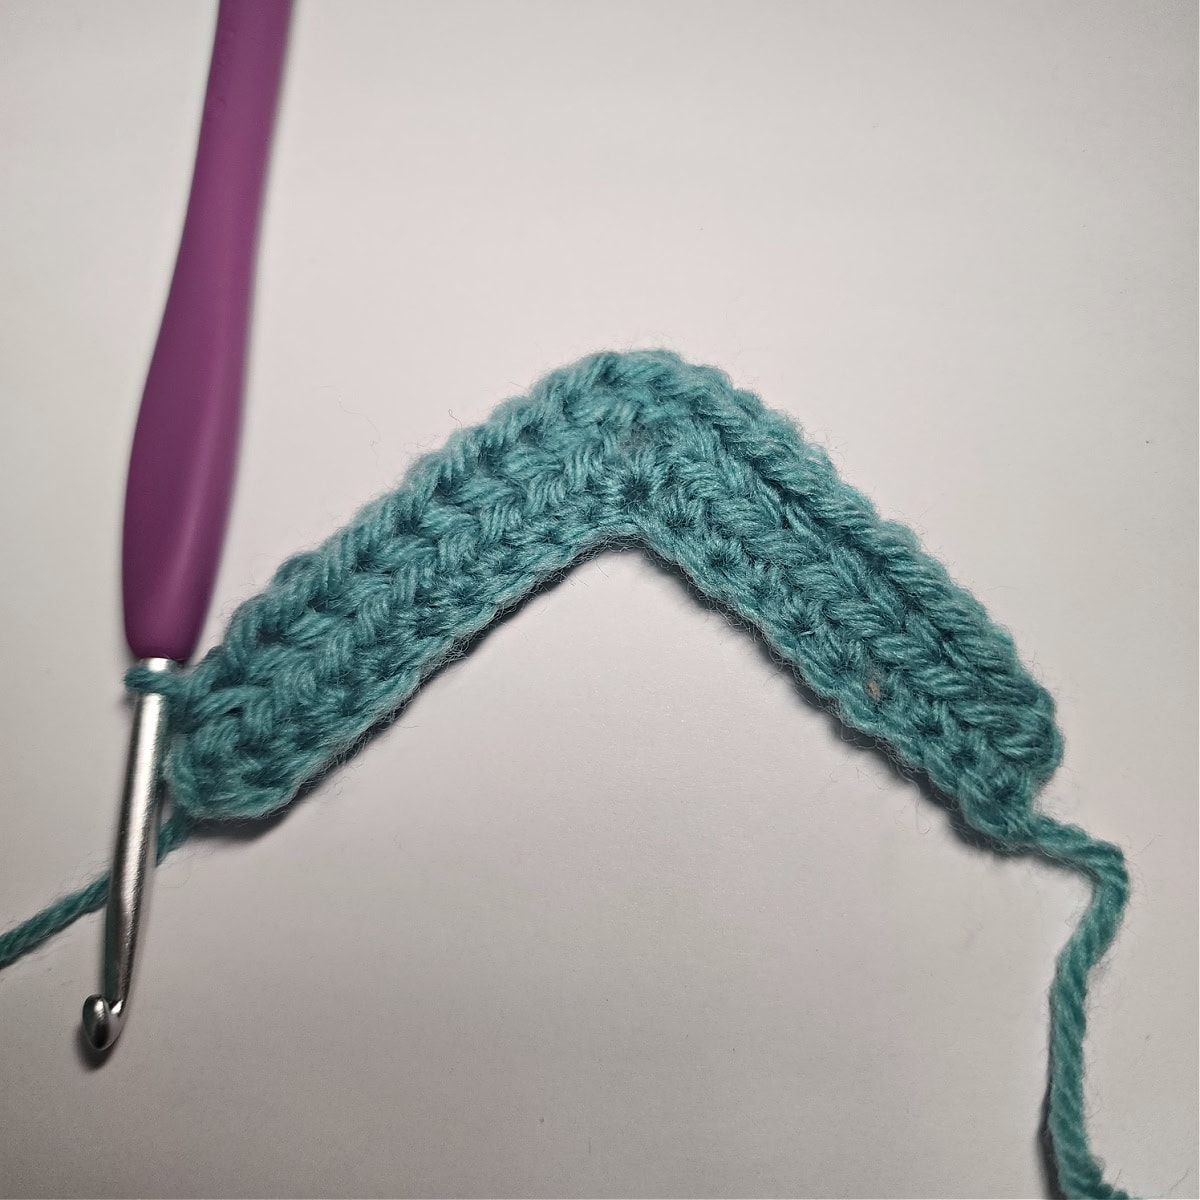
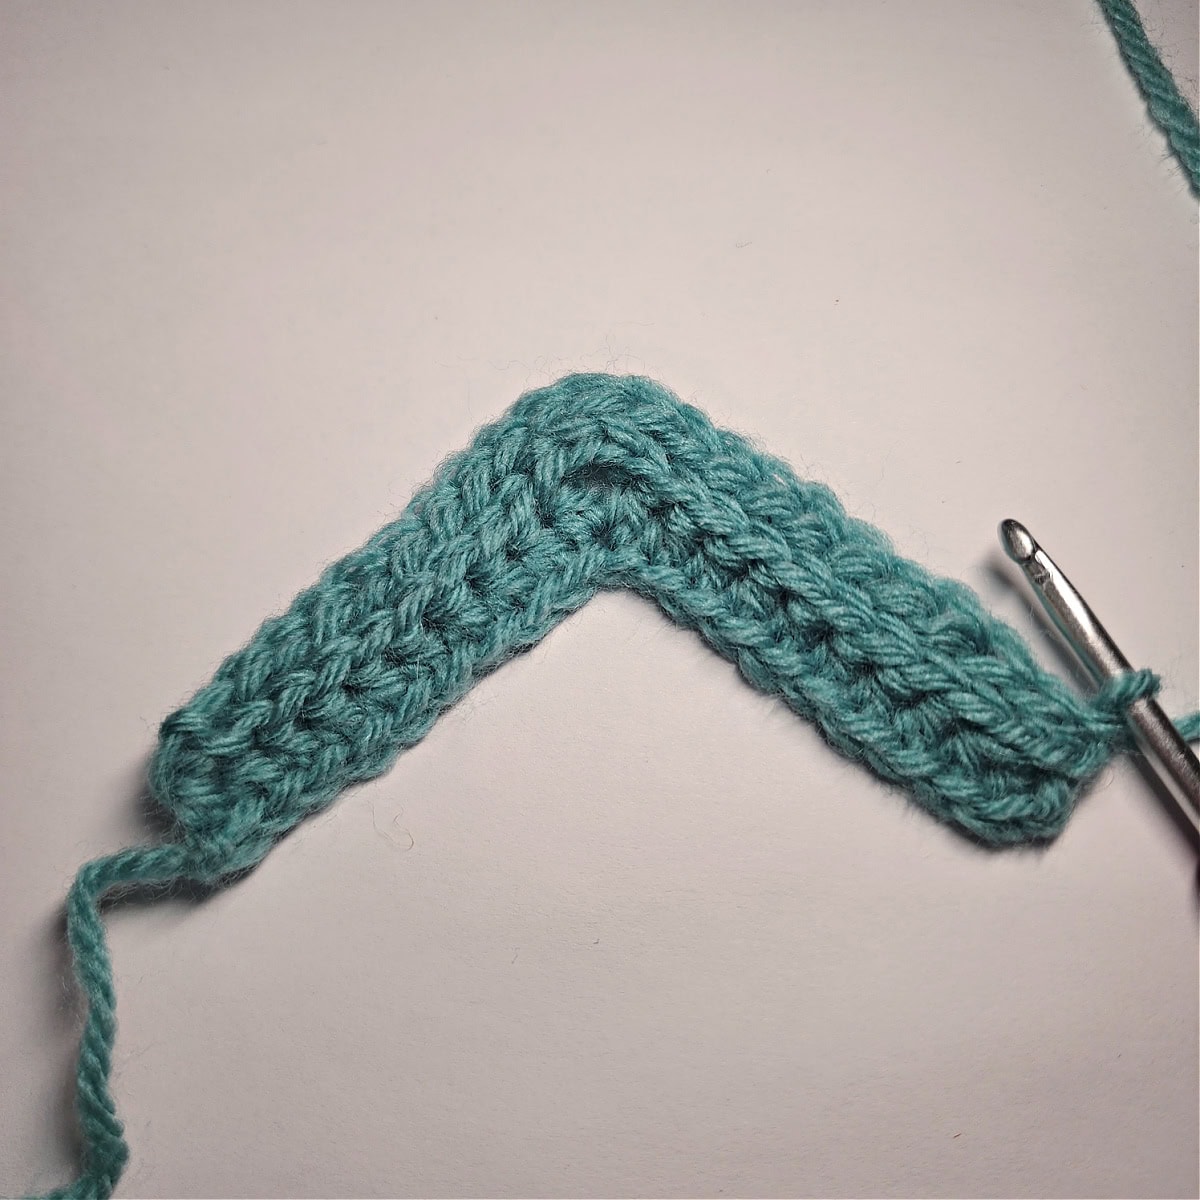
Row 3: Ch 1, skip the first st, BLO hdc in each of the next 8 (8, 9, 10, 10) sts, BLO (hdc, ch 3, hdc) in the next st, BLO hdc in each of the next 7 (7, 8, 9, 9) sts, skip the next st, BOTH LOOPS hdc in the last st. Turn. (18, 18, 20, 22, 22 hdc + 1 ch-3)
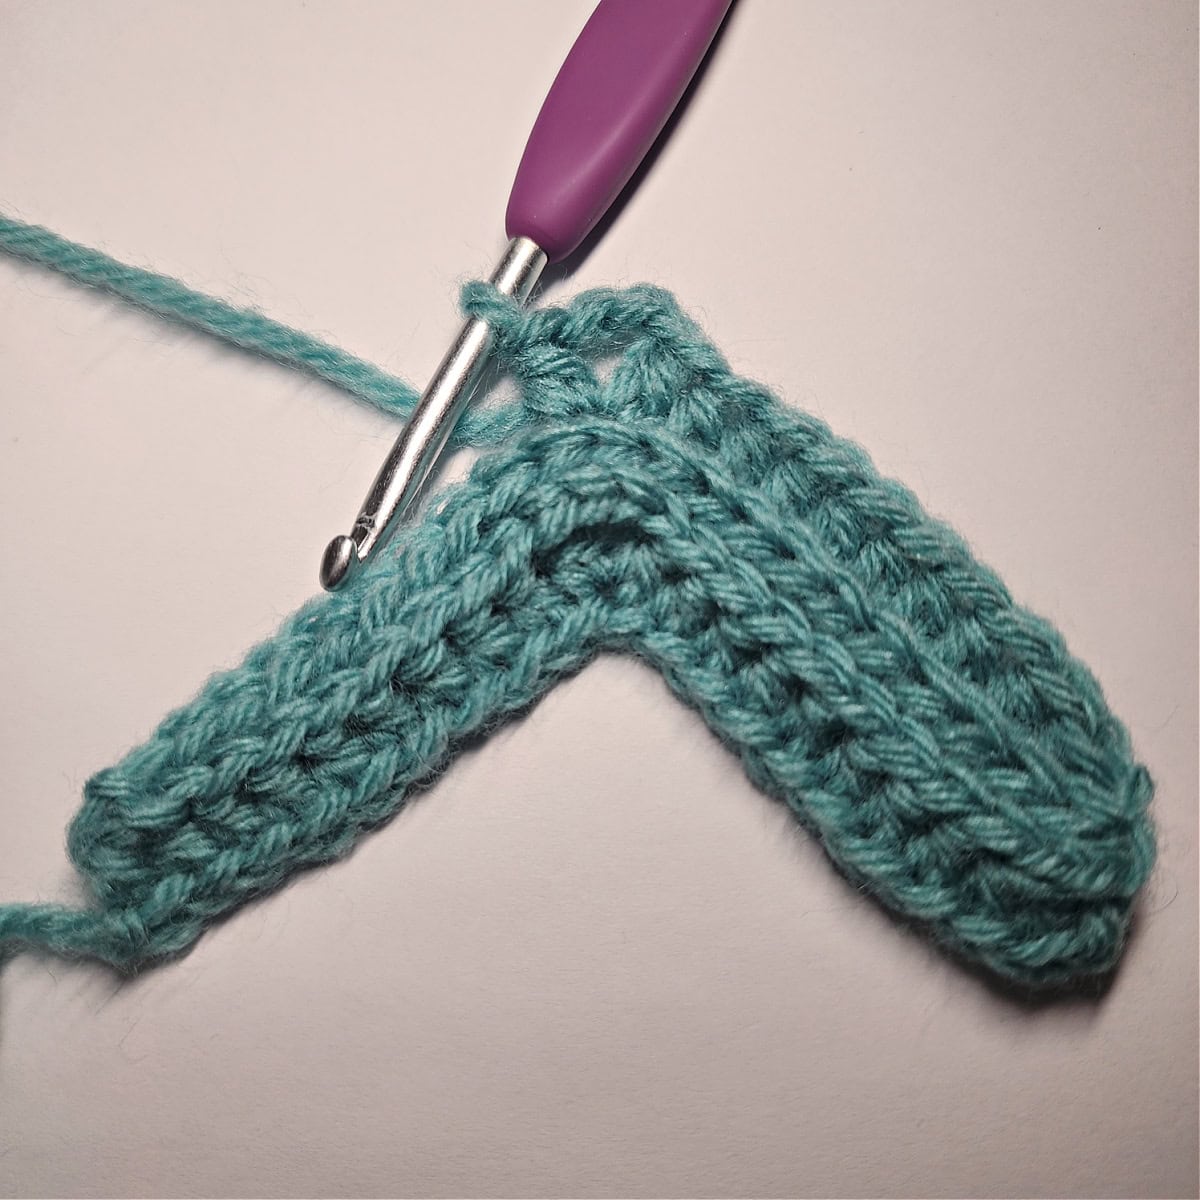
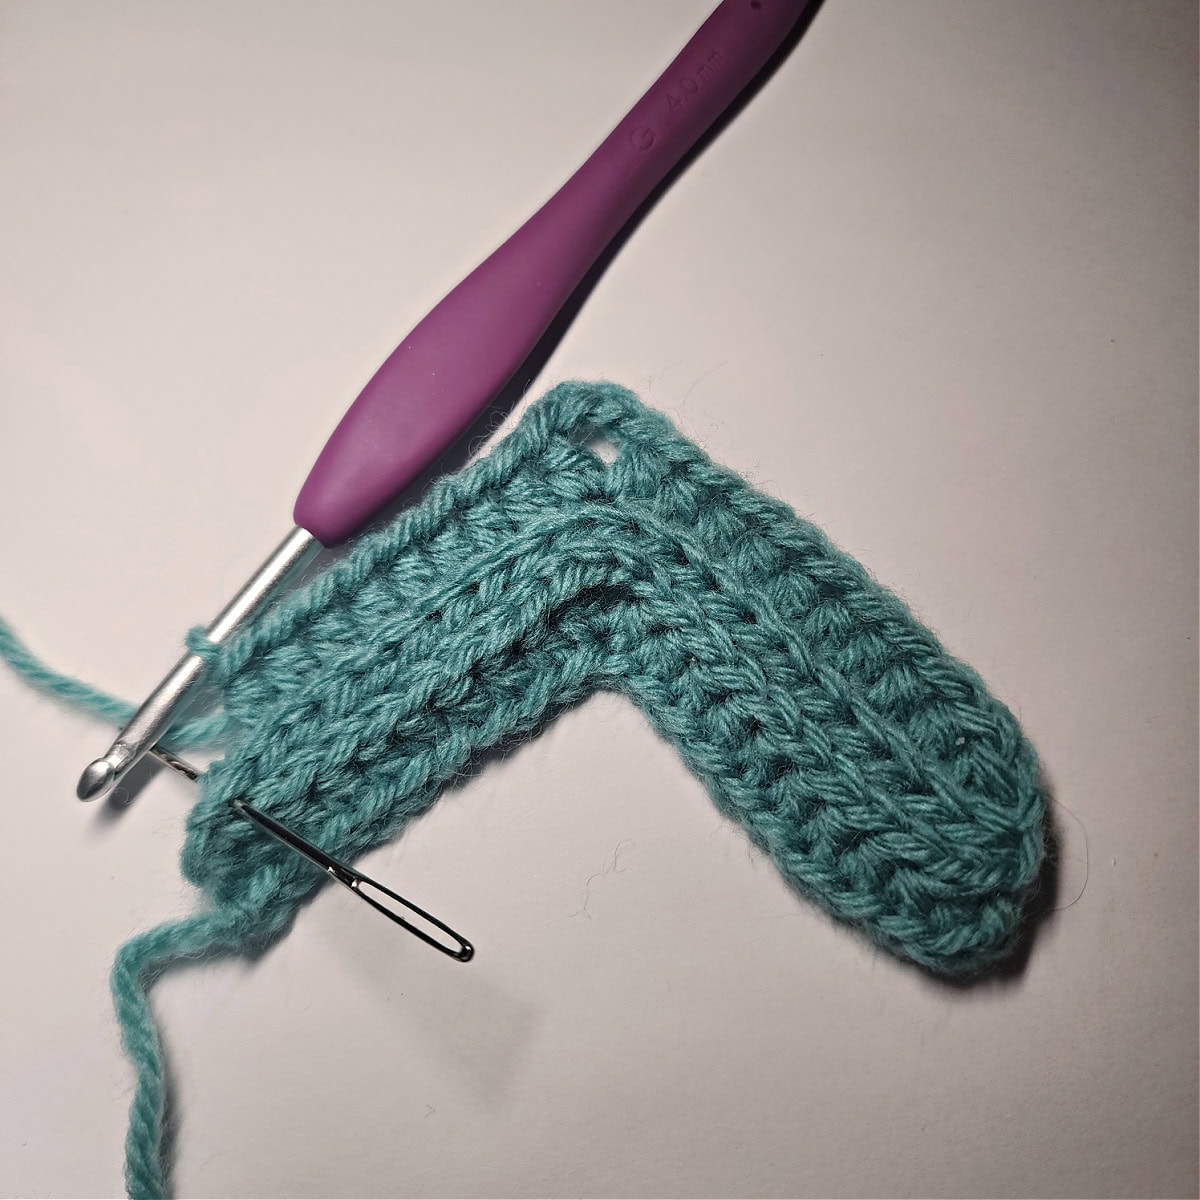
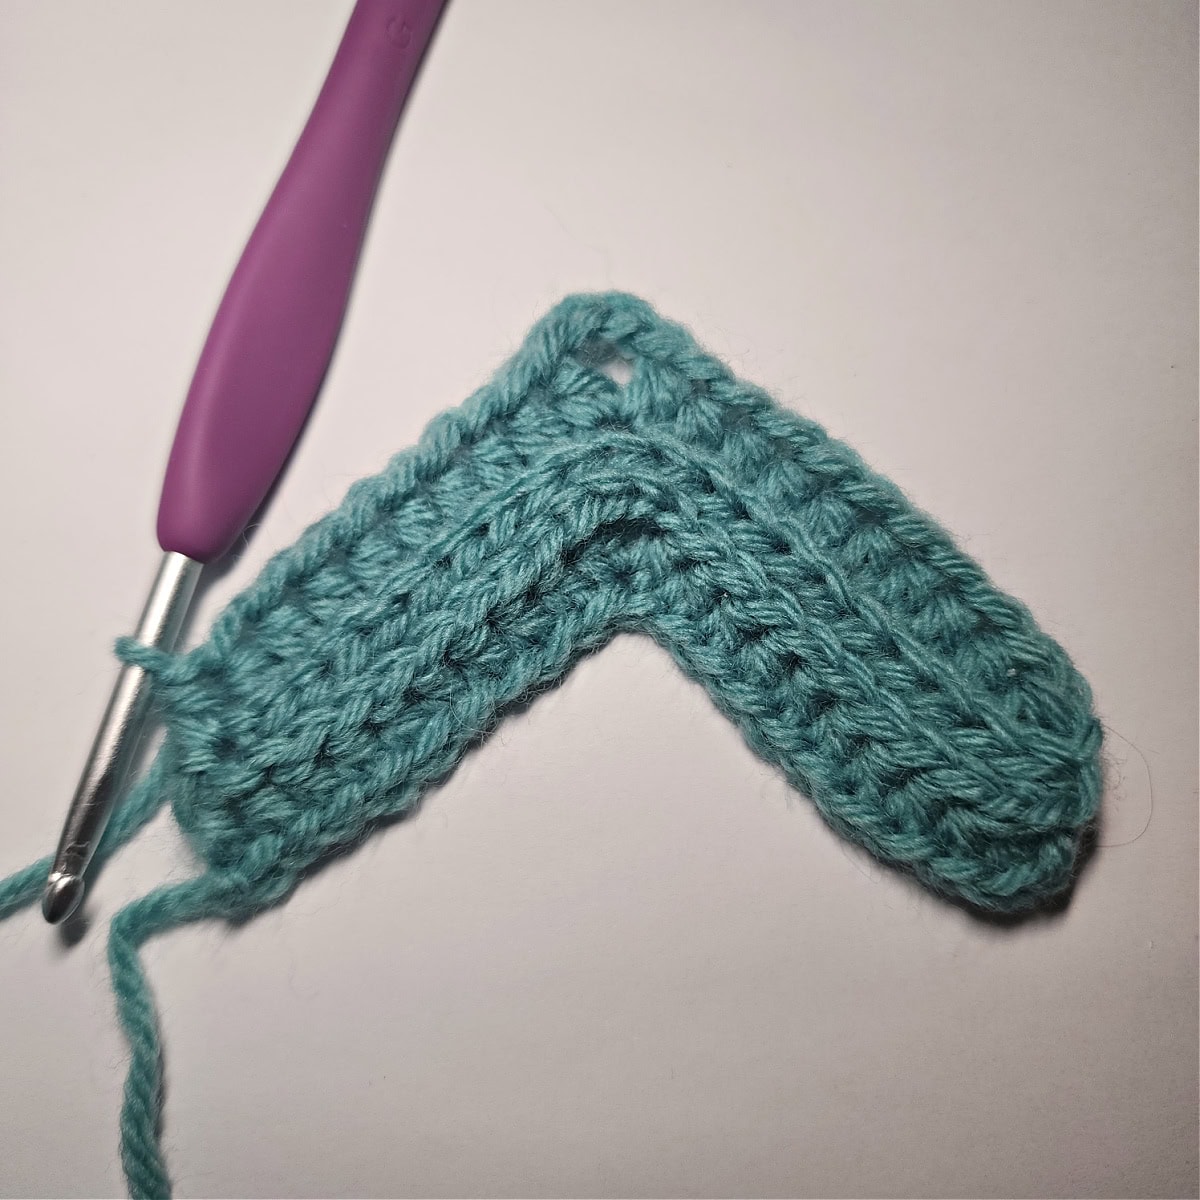
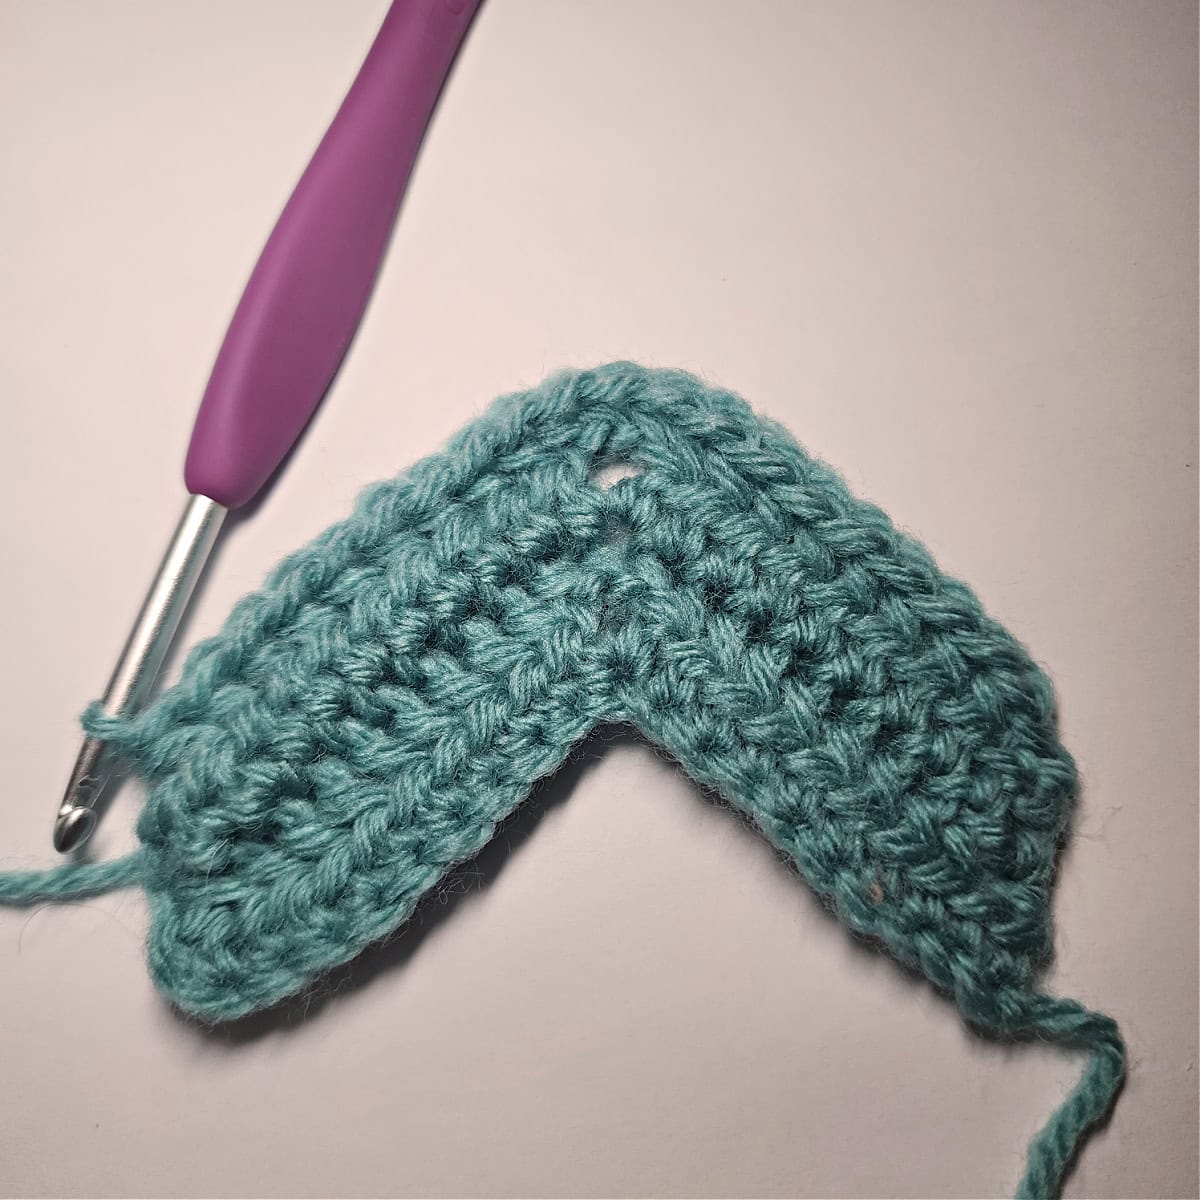
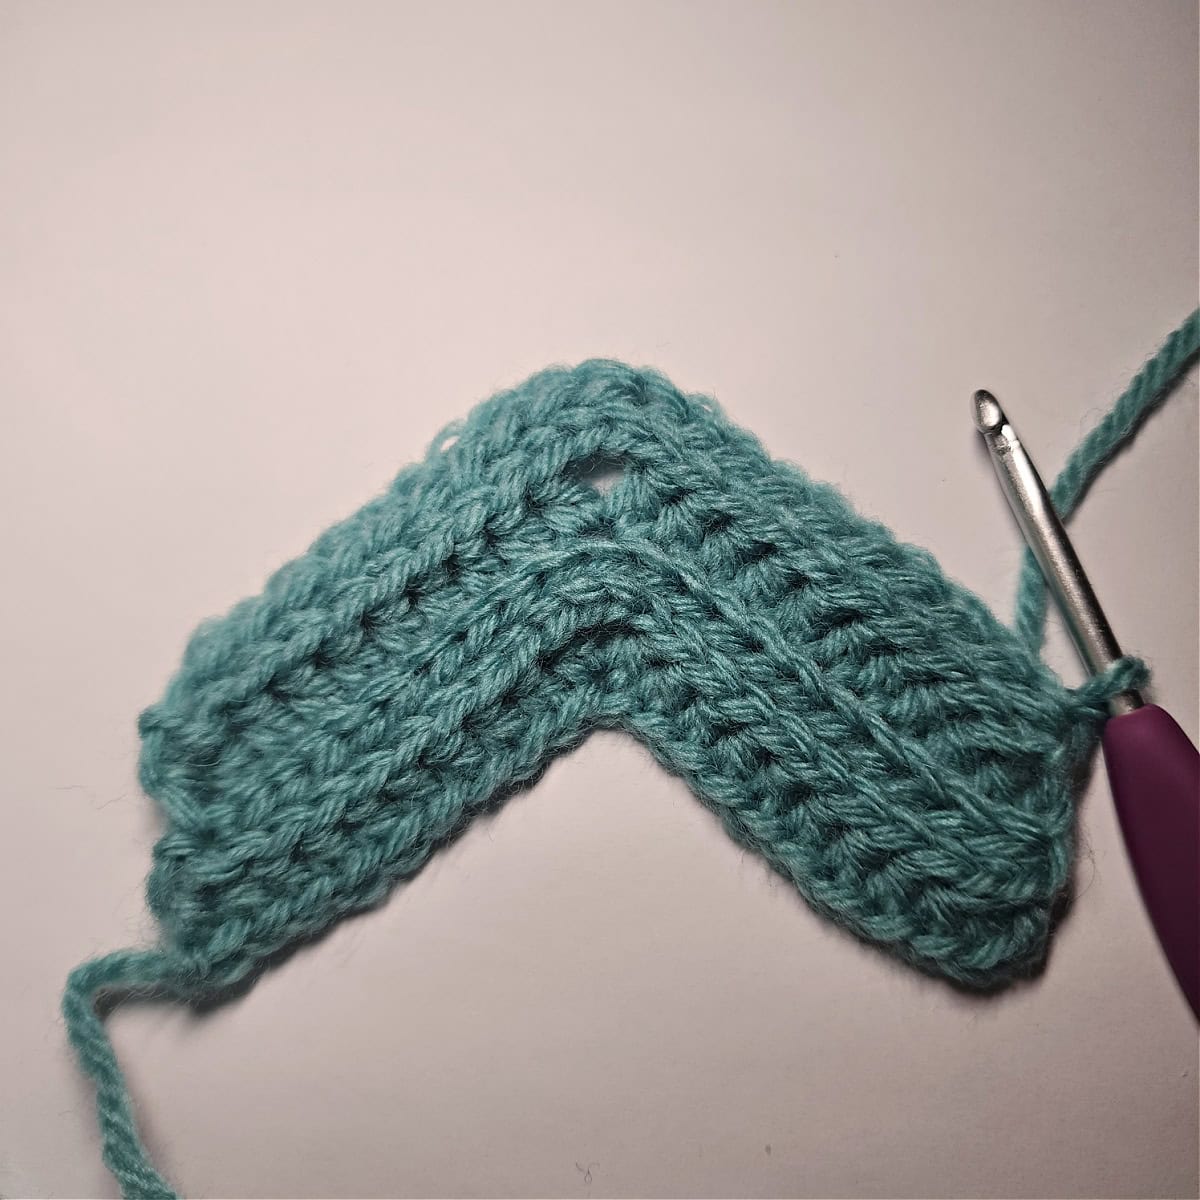
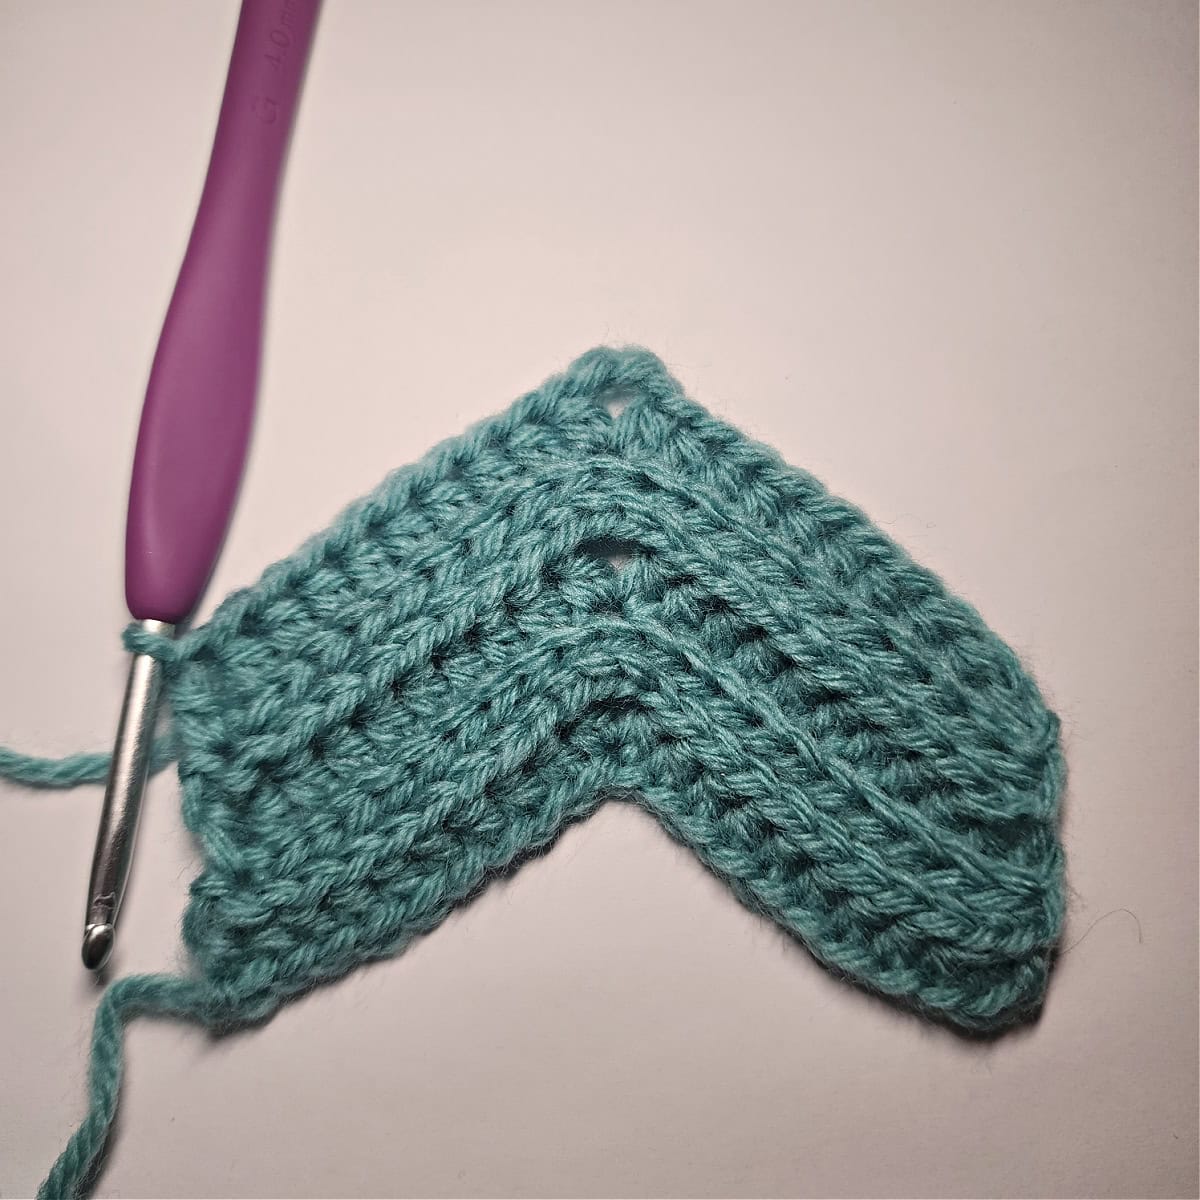
Repeat Rows 2 – 3, ending with a Row 2, until your ear warmer measures 15” (16”, 16.5”, 17”, 18”) UNSTRETCHED between the furthest points of the first and last rows.
Fasten off, leaving an 18″ tail of yarn. Continue on to the Seam. The width of your ear warmer at this point should be approximately 3” (3”, 3.5”, 4”, 4″).
The following are a few more progression photos as you crochet the ear warmer. Scroll down for the Seam instructions.
Seam
Adjusting Size: If after the seam, the ear warmer is too tight or too loose, remove the seam and add or remove rows in multiples of 2. Then, complete the seam and move on to the Edging.
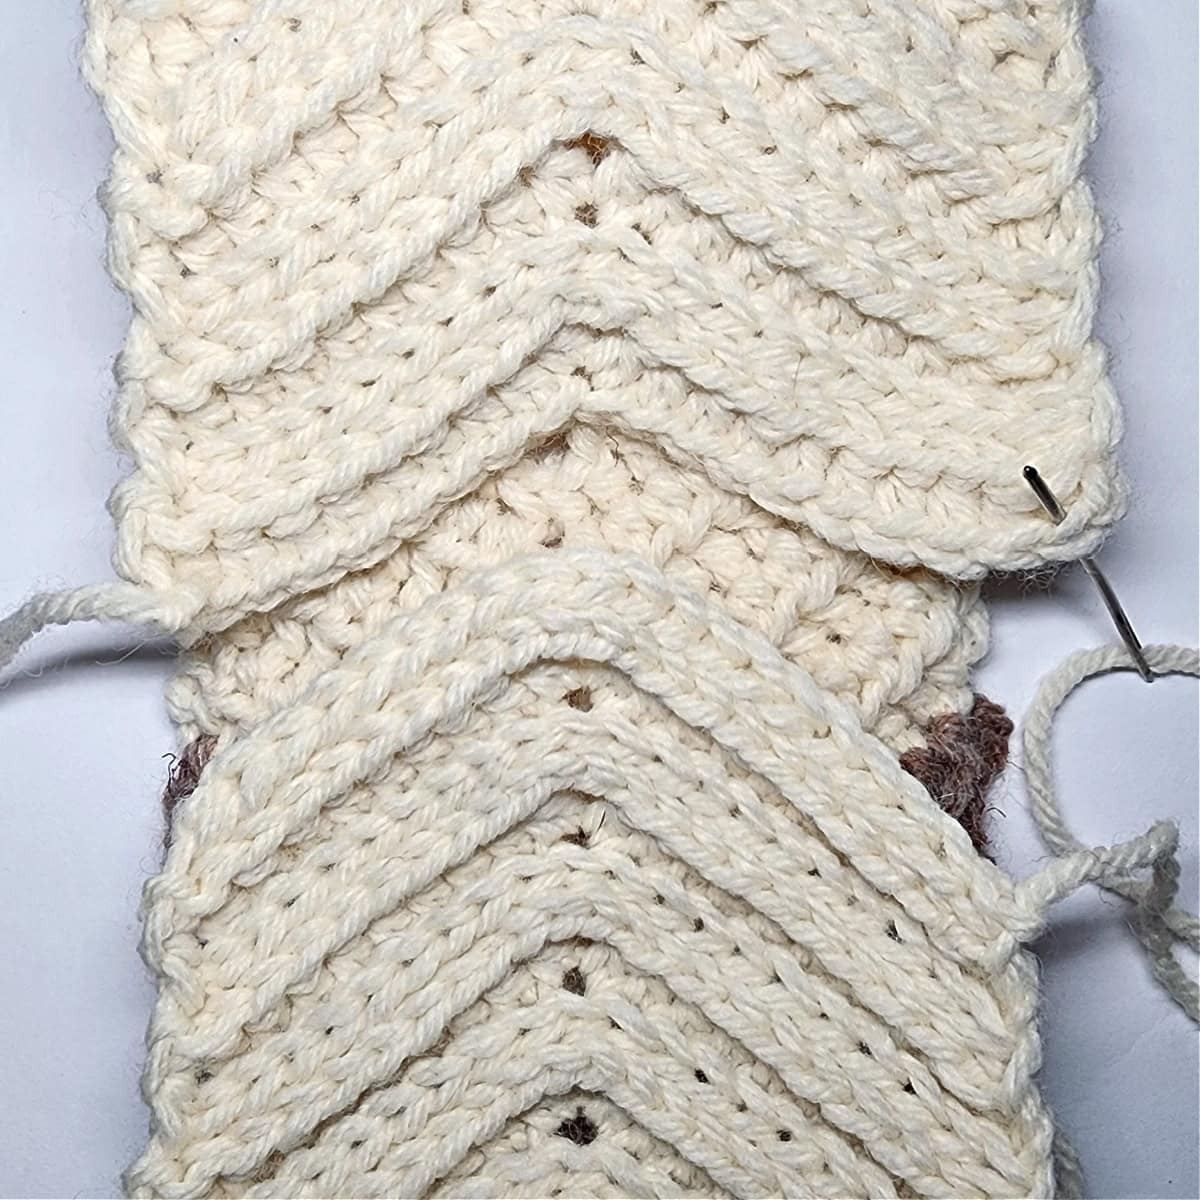
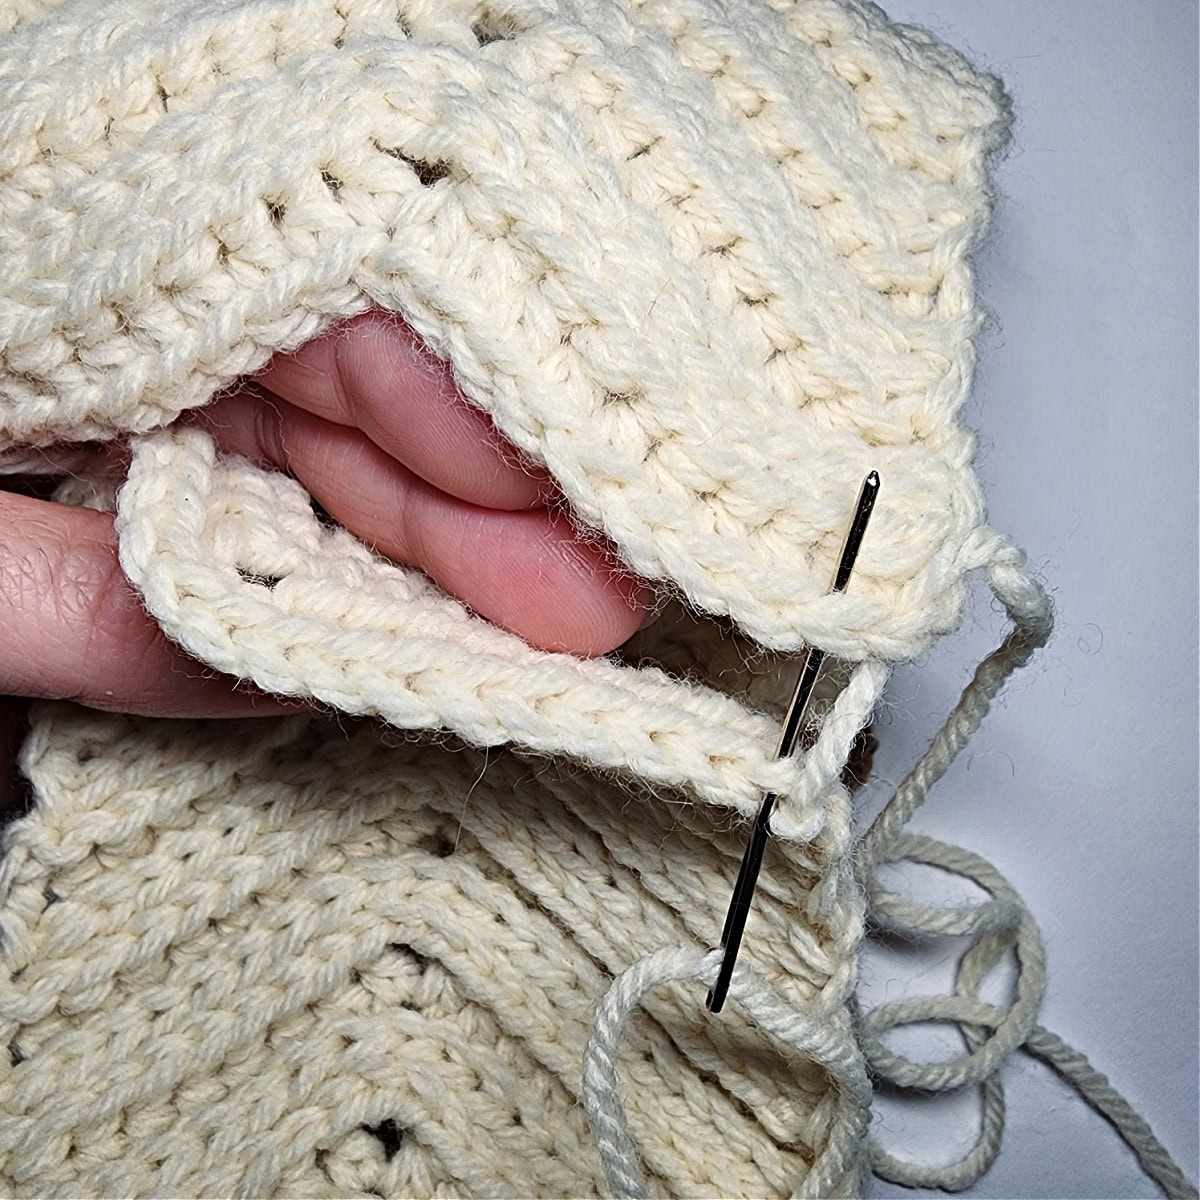
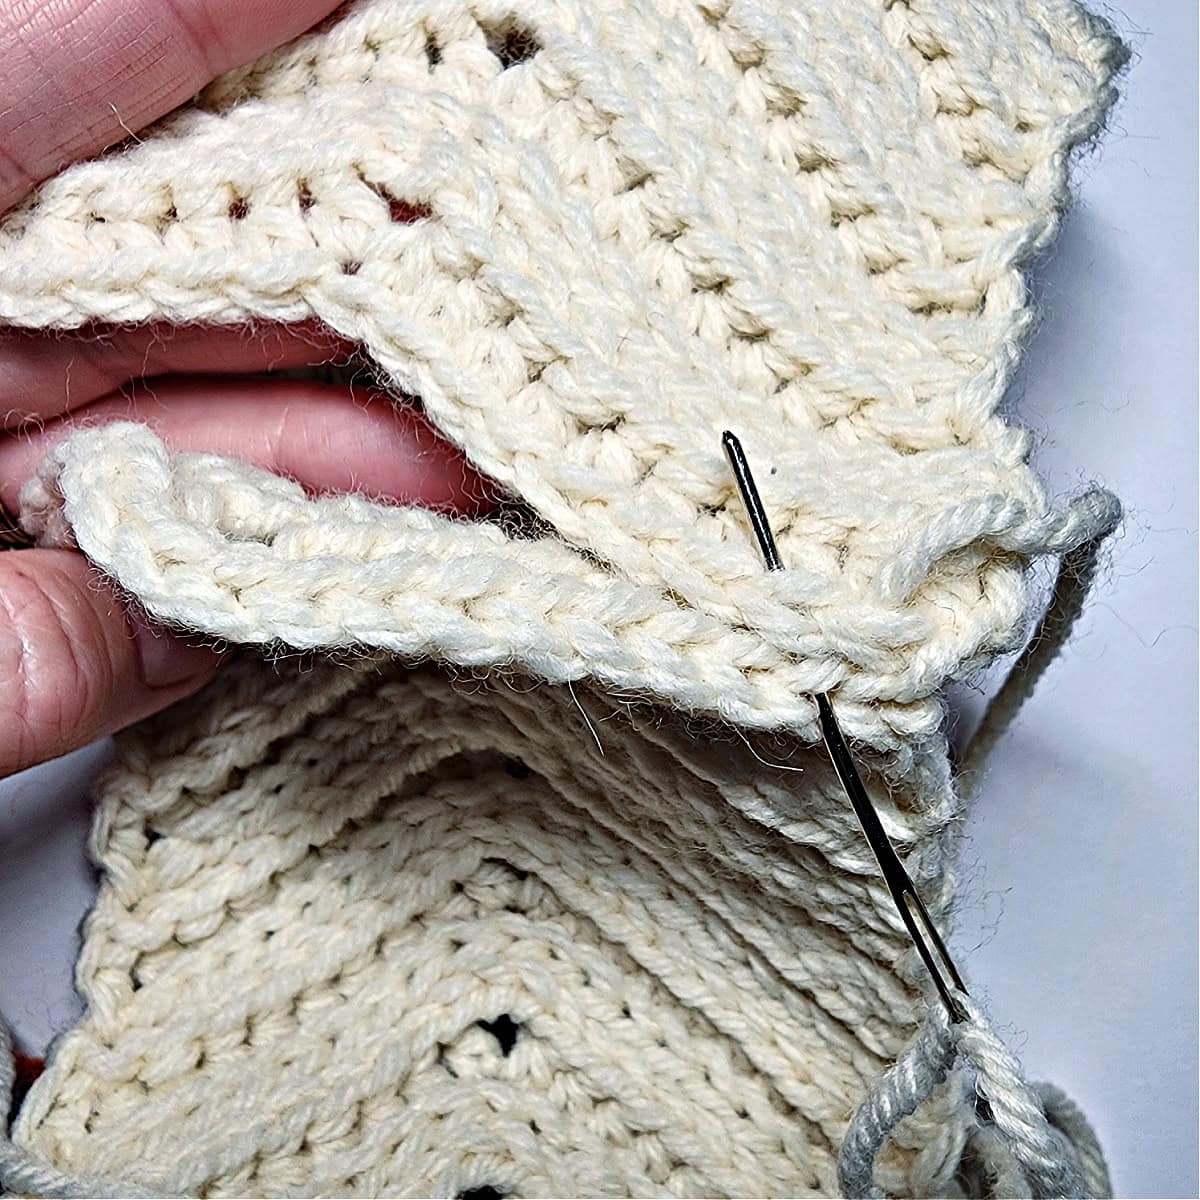
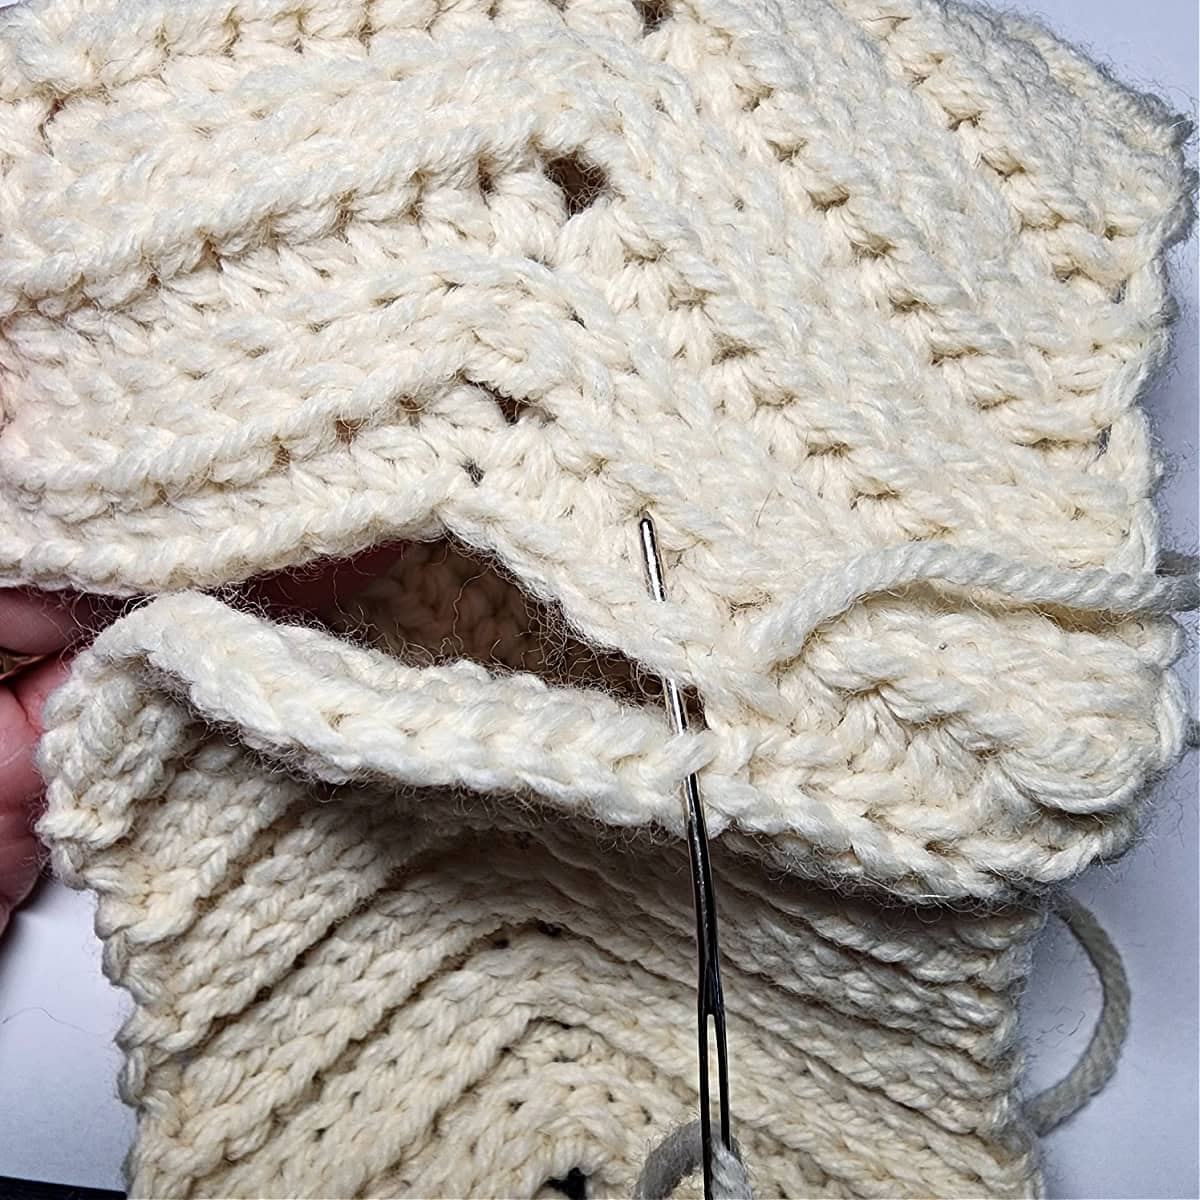
Whipstitch all three stitches from the peak of the last row to the center stitch in the valley of the first row.
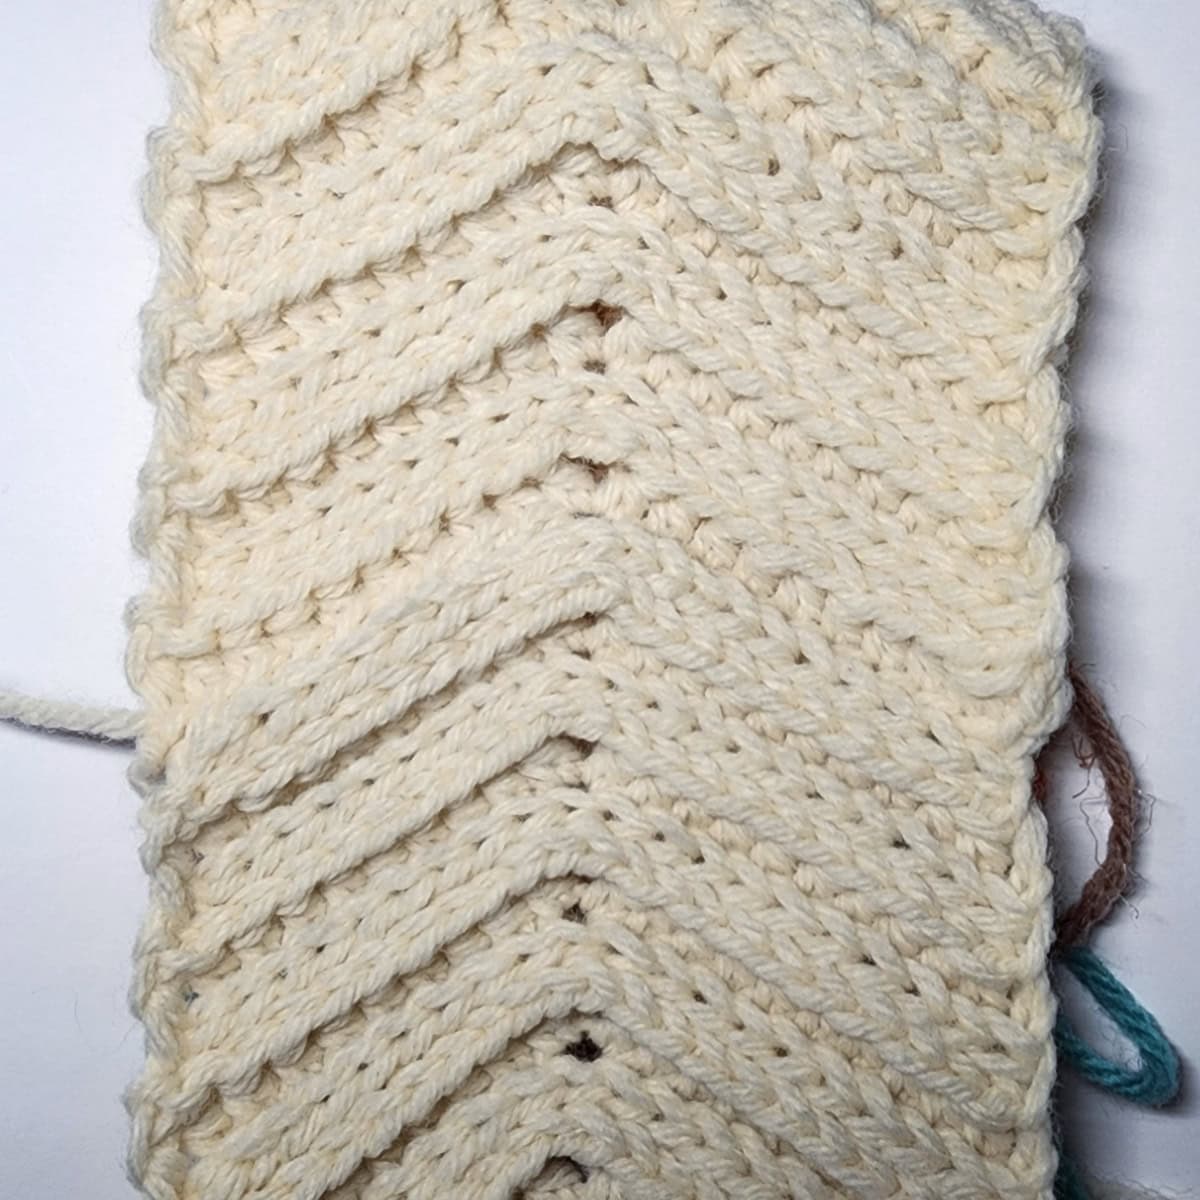
Edging
Tip: If your edging starts to become wavy, go down a hook size or two. If your edging begins to pucker, go up a hook size or two. Make sure not to work the edging stitches too tightly, or it will restrict the stretchiness of the ear warmer and may affect fit.
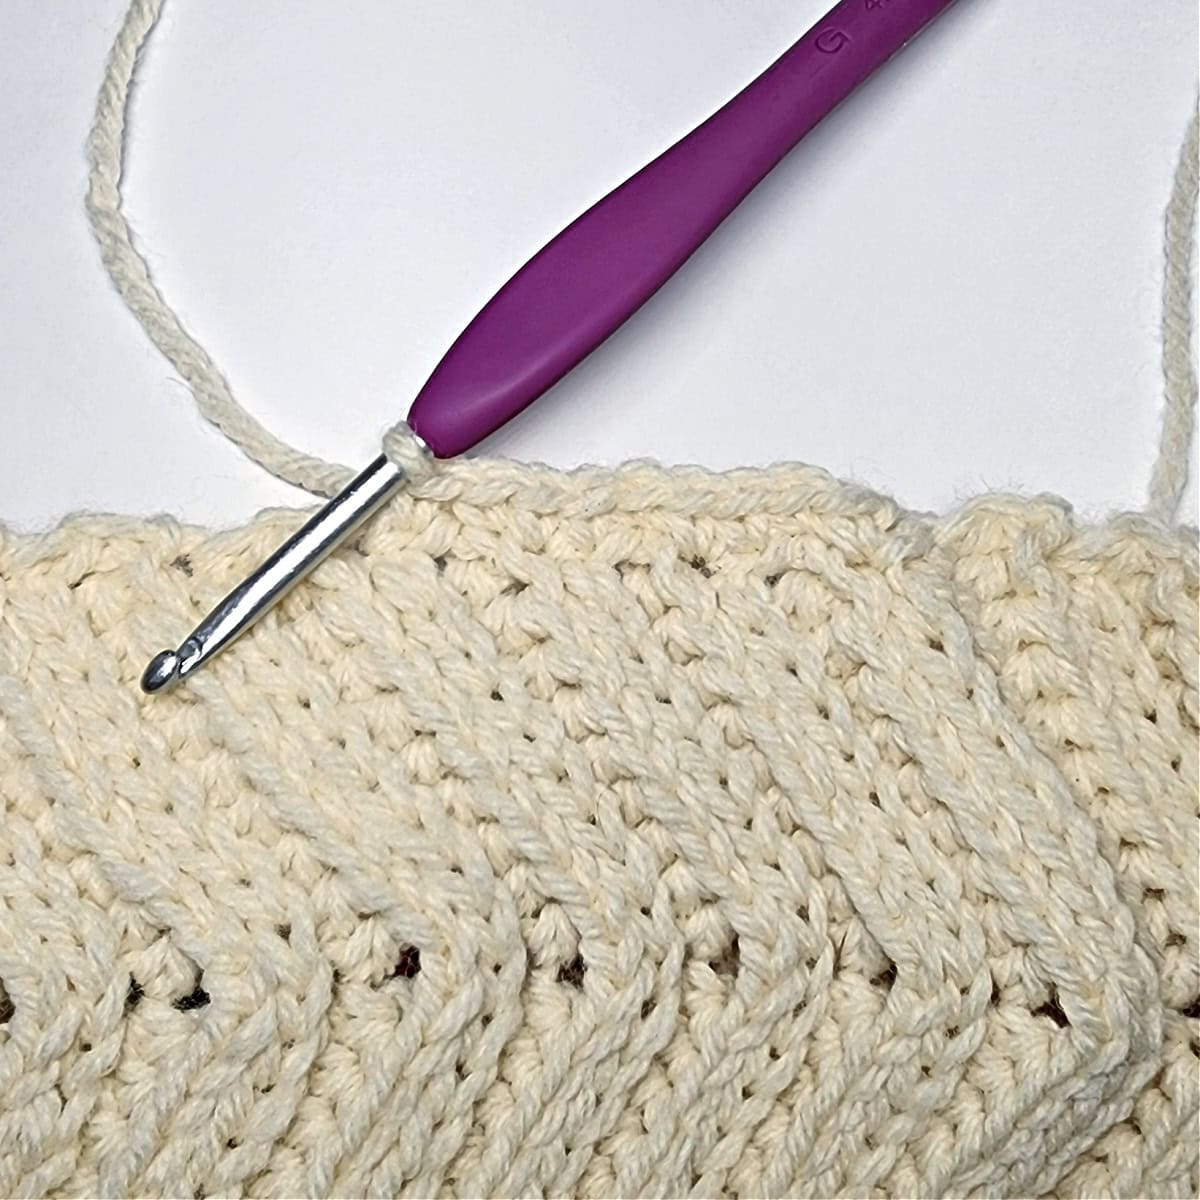
Fasten off. Weave in ends. Repeat for the opposite edge.
I MADE IT! NOW WHAT?
Pin this post!: Save this crochet ear warmer free pattern to your Pinterest boards so that you can come back and make it again.
Leave a comment below: We love to hear your feedback.
Share Your Finished Projects on Facebook or Instagram: I love to see your finished projects! Share with us on social media and tag me @acrochetedsimplicity or use the hashtag #ACrochetedSimplicity so I can find your posts.
Join us in the Facebook Community Group!
Come share your finished projects with us in the A Crocheted Simplicity Crochet Community Group on Facebook. Join us for fun community events such as crochet alongs, join in on crochet conversations, ask questions, get advice, and share your love for crochet!

More Free Crochet Accessory Patterns
Are you looking for more winter crochet accessories patterns? We have several more free crochet patterns you’ll love! We have several crochet beanies & headwarmers, crochet scarves, shawls, & cowls, and crochet patterns for mittens to help keep you toasty warm this winter.

Love the ear warmer. Where can I get the little leather piece that’s sewn on the front edge?
Hi Lian,
I purchased mine here: https://tidd.ly/3EgfTPS
Happy Crocheting,
Jennifer
Is the swatch in the beginning just to check for sizing?
It’s just to check your gauge before you begin.