Crochet Gingerbread Girl Jingle Bell Ornament
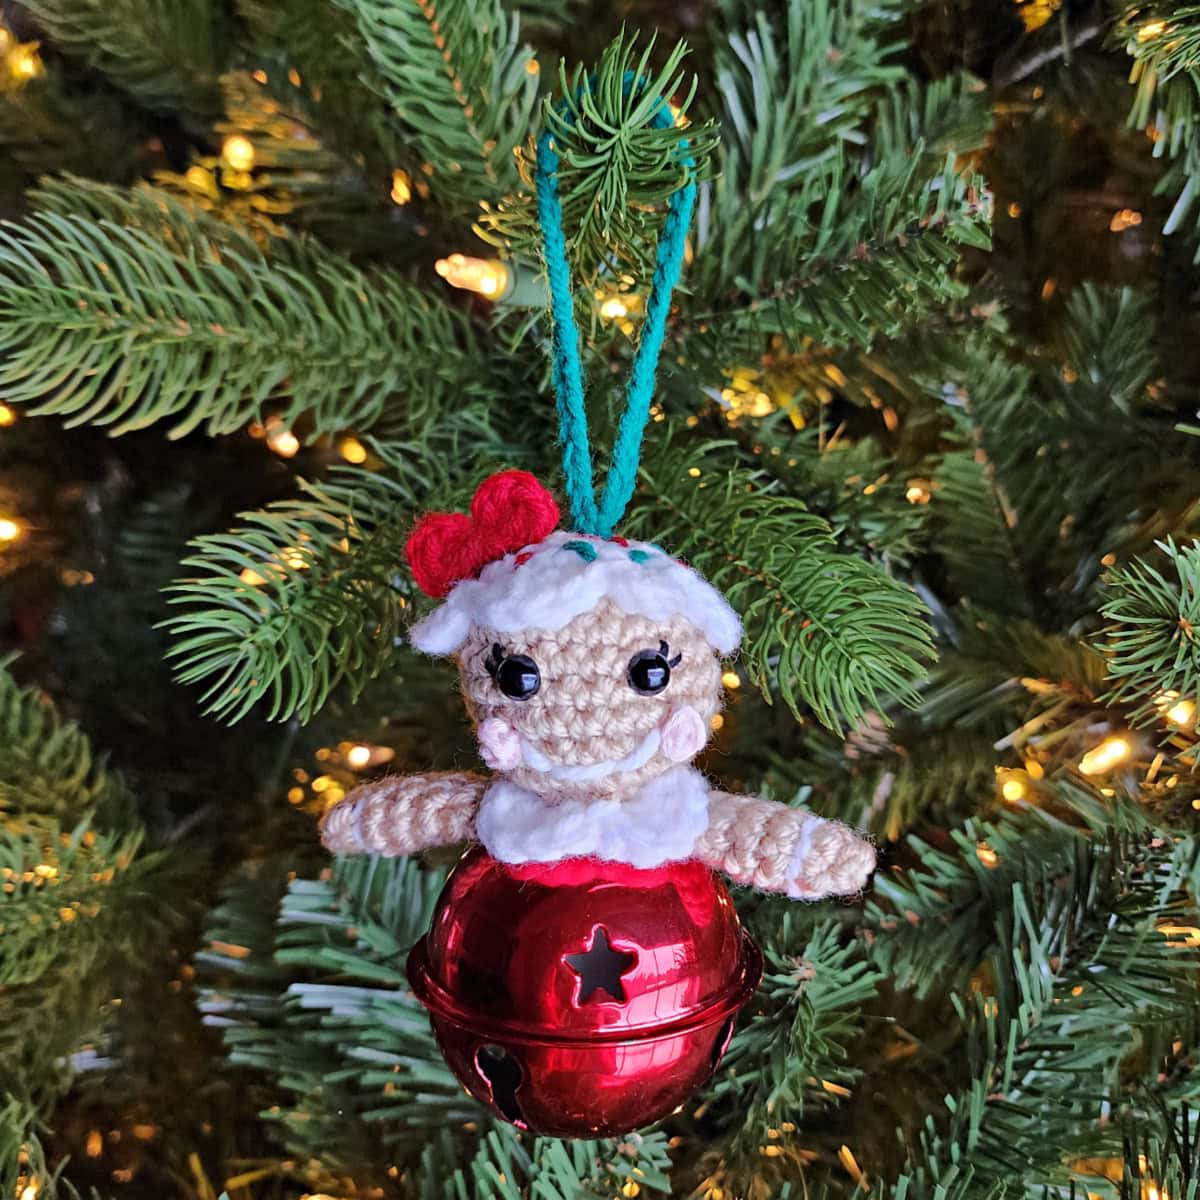
A crochet gingerbread girl jingle bell ornament is the perfect way to add a touch of festive magic to your tree while showcasing your love for crafting.
The holiday season is here, and there’s no better time to bring some handmade charm to your Christmas crochet décor. This crochet ornament combines the warmth of traditional holiday colors with a playful jingle, making it a favorite for both kids and adults.
The gingerbread girl crochet ornament pattern is free in the post below, or you can find an ad-free print friendly version (that includes all photo tutorials) on Ravelry, or on Etsy (aff).
Why Crochet Your Own Christmas Ornaments?
Crocheting Christmas ornaments is a fun and creative way to personalize your decorations.
Handmade ornaments not only make your tree unique but also serve as meaningful keepsakes. Plus, they’re an excellent way to use up leftover yarn from your stash.
A crochet gingerbread girl ornament is beginner-friendly and can be customized with different colors, embellishments, and details to reflect your style.
A Cherished Gift Set: A set of crochet Christmas ornaments would make a wonderful housewarming gift or Christmas gift, combine any of our free crochet ornament patterns to create an heirloom collection.
Jingle Bell Alternatives
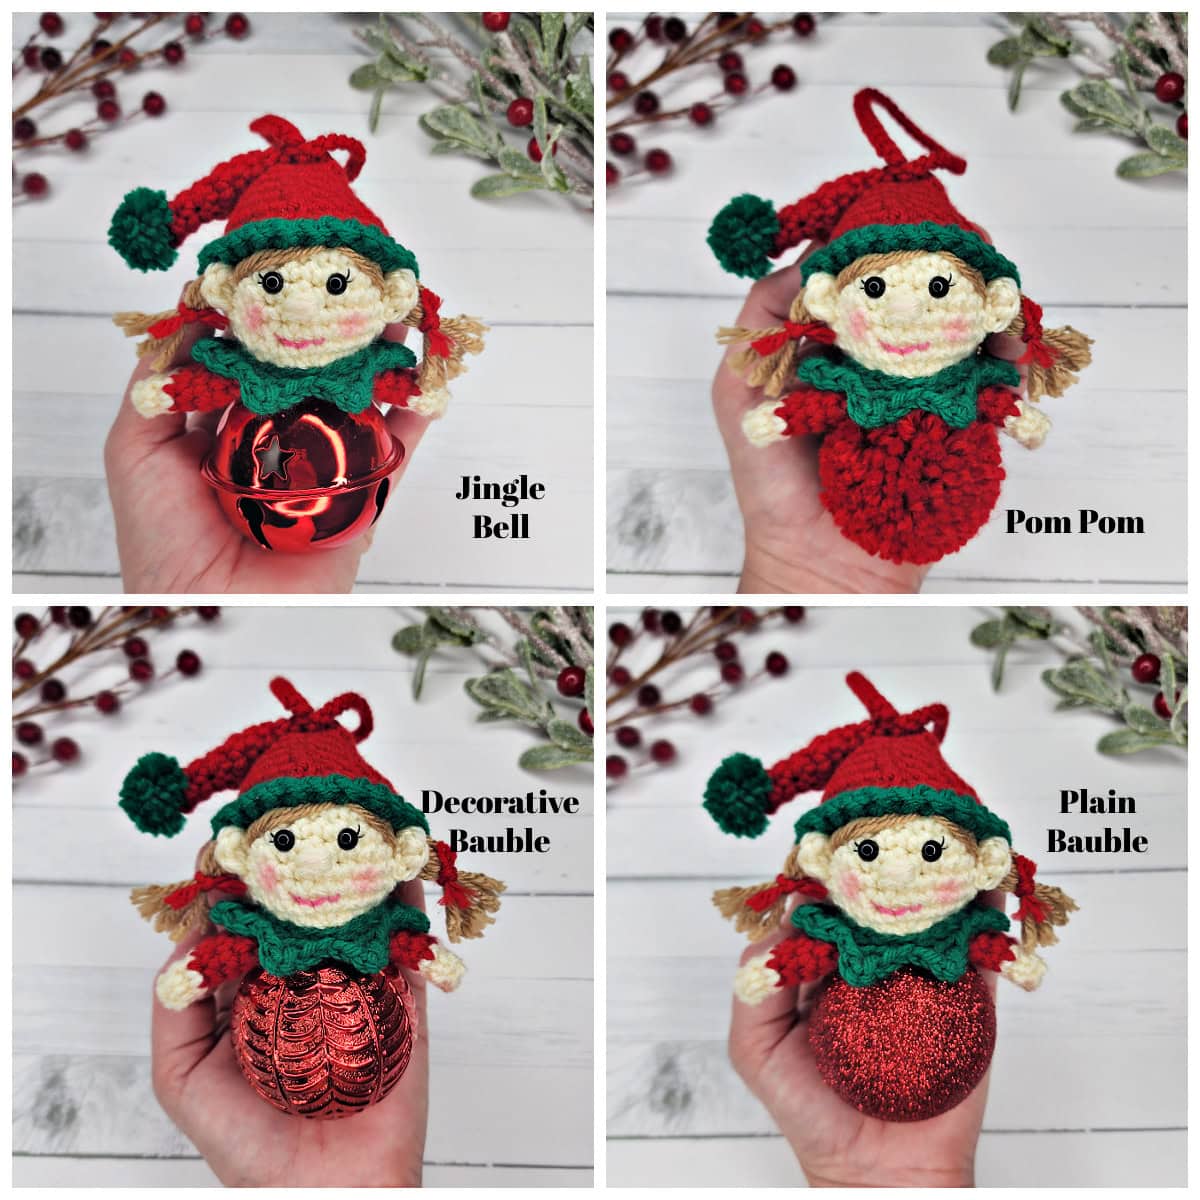
If you don’t have jingle bells and can’t find them anywhere close to you, here are a few great alternatives (see photo collage of all options near the end of this blog post):
- Big Yarn Pom: The cheapest alternative is to make a big yarn pom and they’re super easy to make with the help of yarn pom makers!
- Shatterproof Ornaments (plain): Another great options is to use a small 2.5″ diameter shatterproof ornament and hot glue the crocheted character to the top of it. You can find these ornaments in dollar stores and big box stores. If you have neither, there are lots of options on Amazon too.
- Shatterproof Ornaments (decorative): Same as option 2 above, but these are a little pricier. Amazon has several fun shatterproof ornaments that are more decorative. I think they’ll add a fun twist to the ornaments. Here are a few examples of what I’m referring to: Option 1, Option 2, and Option 3.
Gift Ideas
A crochet gingerbread girl jingle bell ornament makes a thoughtful gift for friends, family, or teachers.
Package it in a small box with tissue paper and include a handwritten note for a personal touch. Handmade ornaments are also wonderful additions to holiday gift baskets.
Customization Ideas
- Colors: Experiment with pastel shades for a whimsical look or stick to traditional holiday hues.
- Elevate your colors: Add sparkle with metallic thread or beads for extra festive flair.
- Faces: Add different facial expressions with embroidery for a unique touch.
- Accessories: Crochet tiny accessories like a candy cane or scarf to give your ornament even more personality.
Care Tips
To keep your crochet ornaments looking fresh for years to come, store them in a cool, dry place away from direct sunlight. Wrap them in tissue paper to prevent dust and tangling with other decorations.
Why This Ornament is a Must-Have
The crochet gingerbread girl jingle bell ornament is a charming blend of tradition and creativity. The soft texture of crochet, combined with the festive jingle of the bell, makes it an irresistible addition to your Christmas decor. Plus, handmade ornaments carry a sentimental value that store-bought decorations can’t match.
How To Get The
Crochet Gingerbread Girl Jingle Bell Ornament Pattern
Option 1: Scroll down for the free crochet ornament pattern right here in this blog post.
Option 2: Purchase the ad-free printable PDF from one of my shops:
This crochet gingerbread girl jingle bell ornament was designed as part of the 2024 Ultimate 12 Days of Christmas Ornament Crochet Along & Giveaway hosted by myself and Blackstone Designs!
Crochet Along with other crocheters in our community Right HERE.
Yarn
I used Lion Brand Yarn Pound of Love & Basic Stitch for my Christmas decor crochet pattern. Both yarns are worsted weight, 100% acrylic yarns. The main reason I chose these yarns is because the colors were perfect for Christmas tree ornaments. Other worsted weight yarns can be substituted.
Crochet Gingerbread Girl Jingle Bell Ornament – Free Pattern
The crochet gingerbread girl jingle bell ornament pattern is free below, but if you love to work offline, I’ve got a couple other great options for you.
Purchase the ad-free, printable PDF, including all photo tutorials on Ravelry, or on Etsy (aff).
This post contains affiliate links.
Materials
- Yarn: Worsted Weight / 4 / Yarn, Lion Brand Yarn Pound of Love & Basic Stitch were used for the samples in the photos.
- See Pattern Notes below for exact yardage of each color.
- Crochet Hook: G/6/4.00mm; or size needed to obtain gauge (My favorite crochet hooks are the Clover Amour Crochet Hooks, I’ve never had an ache in my hands since switching).
- Locking Stitch Markers
- Scissors
- Yarn Needle
- (2) 6mm black safety / craft eyes
- (1) Jingle Bell 2″ – 2.5″ diameter (optional)
- Jingle Bell alternative: make a big yarn pom!
- Shatterproof Ornaments: See the section “Jingle Bell Alternatives” above.
Abbreviations (US Terms)
- ch(s): chain(s)
- sl st(s): slip stitch(es)
- st(s): stitch(es)
- sc: single crochet
- hdc: half double crochet
- dc: double crochet
- invsc2tog: invisible single crochet decrease
- Rnd: round
- RS: right side
- FLO: front loop only
- yo: yarn over
- MC: Main Color
- Join yarn with a standing single crochet
Experience Level
- Easy
Gauge
- In sc with a 4.00mm crochet hook: 4 sts = 1″; 5 rows = 1.125″
Size
- One Size: 3.75″ W (fingertip to fingertip) x 2.75″ H (not including jingle bell or hanging loop)
Special Stitches
- Invisible Single Crochet Decrease (invsc2tog): Insert hook into the FLO of stitch indicated, insert hook into the FLO of the next stitch, yo, pull up a loop, yo, pull thru all loops on hook.
- Join yarn with a standing single crochet: Begin with a slip knot on your hook, insert your hook into the stitch or space indicated, yo, pull up a loop, yo and draw thru both loops on hook.
Pattern Notes
- Yarn Notes: Lion Brand Yarn Pound of Love & Basic Stitch were used for the samples pictured in the photos.
- Pound of Love Yarn: 100% Premium Acrylic, (1,020 yards / 454 g / 16 oz / 932 m).
- Basic Stitch: 100% Acrylic, (185 yards / 100 g / 3.5 oz / 170 m)•
- Another comparable worsted weight yarn may be used as long as gauge is met.
- Colors & Yardage
- Basic Stitch Skein Tone Almond (MC): 30 yards
- Pound of Love Cherry (Red): 2 yards
- Pound of Love Wintergreen: 1 yard
- Pound of Love Black: 12″ (or embroidery floss)
- Pink for cheeks: 1 yard
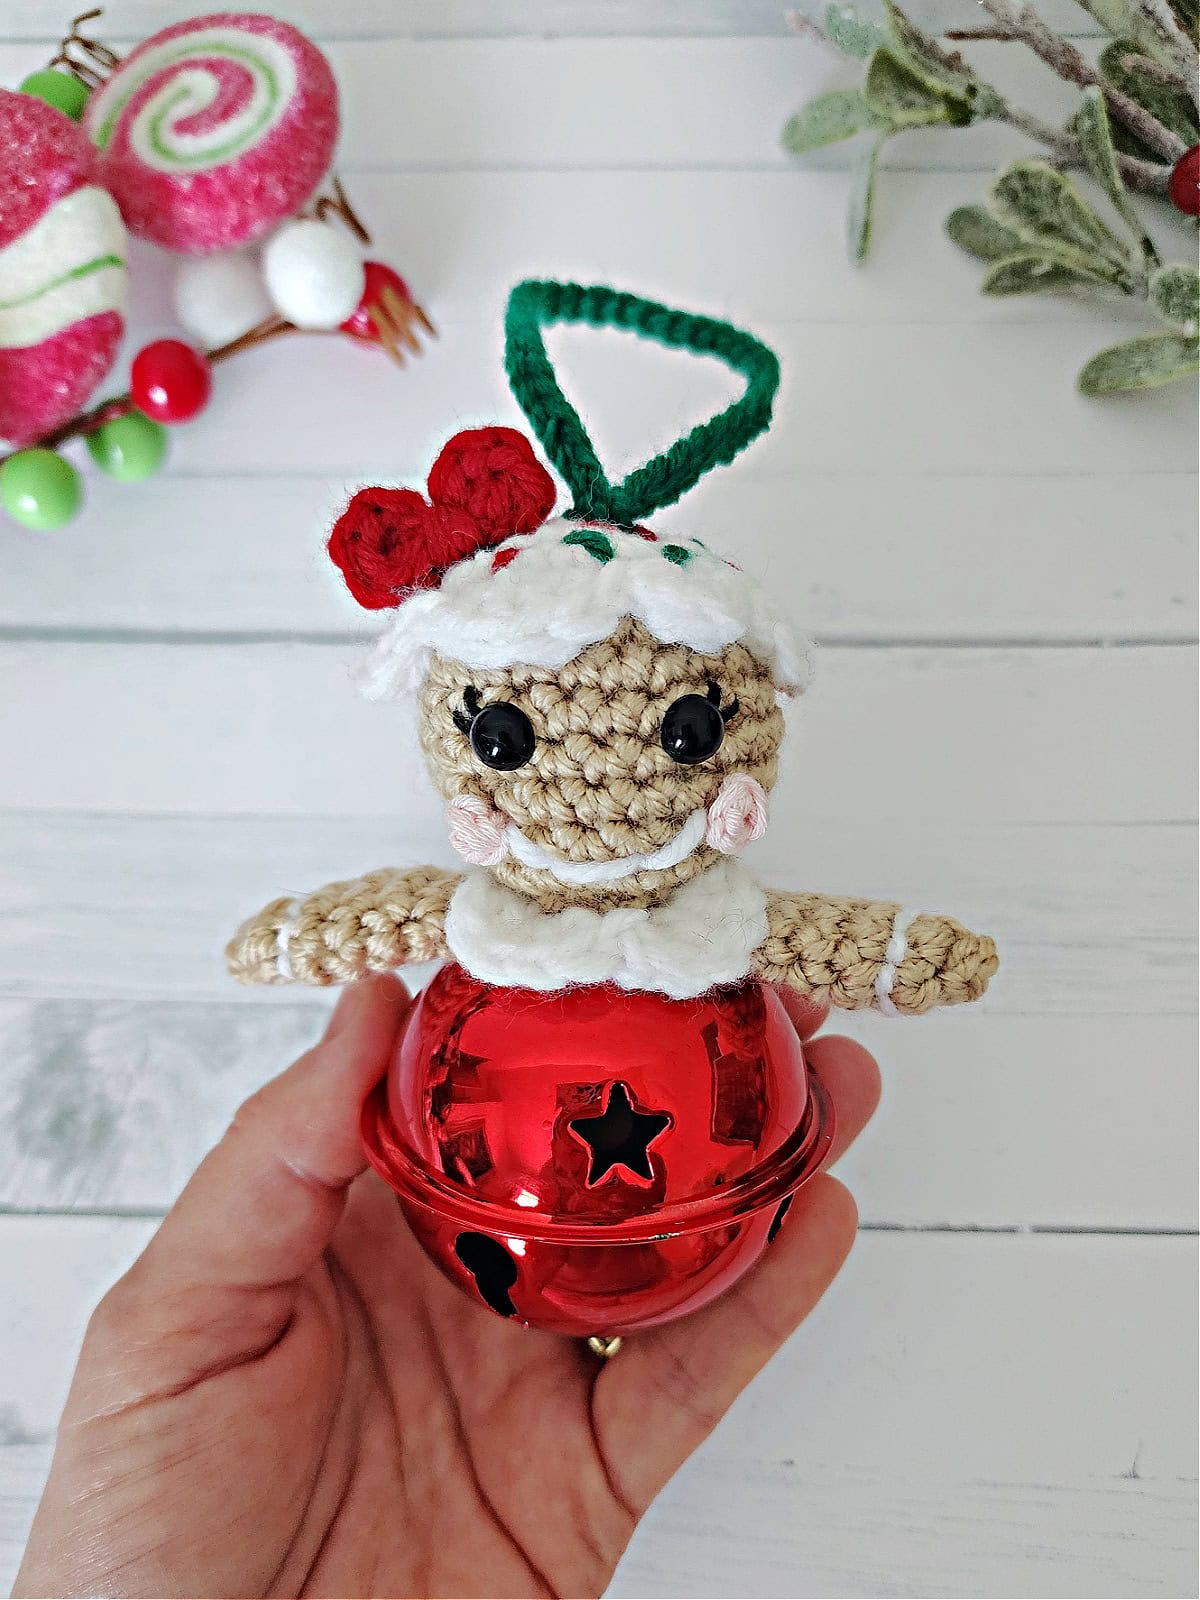
- Crochet Gingerbread Girl Jingle Bell Ornament Construction: This Christmas ornament pattern is crocheted in a few pieces, then assembled. First, you’ll crochet the gingerbread girl’s head and work her arms directly onto it. Next, you’ll crochet her frosting hair, collar, and bow. Then add facial features, attach her hair and bows. After that, make and attach a hanging loop, then stuff her head and cinch it closed. Lastly, attach the gingerbread girl to the top of the jingle bell (or pom pom, or bauble).
- Jingle Bell Alternatives: See the section above with the title “Jingle Bell Alternatives” for a few different options.
Gingerbread Girl Crochet Ornament Pattern
Note: Some of the tutorial photos within this pattern may be worked in different colors to make it easier to see the stitches. Follow your written pattern.
Gingerbread Girl Head
Note: Gingerbread Girl’s head is worked in continuous rounds to keep from having an unsightly seam. Do not join at the end of each round, instead use a scrap piece of yarn to keep track of the beginning of each round. Move the scrap of yarn up as you complete each round.
Rnd 1 (RS): With MC yarn & a 4.00mm crochet hook, ch 2, work 6 sc into the 2nd ch from your hook. Do not join. (6 sts)
Rnd 2: 2 sc in each st around. (12 sts)
Rnd 3: (2 sc in the next st, sc in the next st) 6 times. (18 sts)
Rnd 4: (2 sc in the next st, sc in each of the next 2 sts) 6 times. (24 sts)
Rnds 5 – 10: Sc in each st around. (24 sts)
Rnd 11: (invsc2tog, sc in each of the next 2 sts) 6 times. (18 sts)
Do not fasten off. Continue on to the 1st Arm.
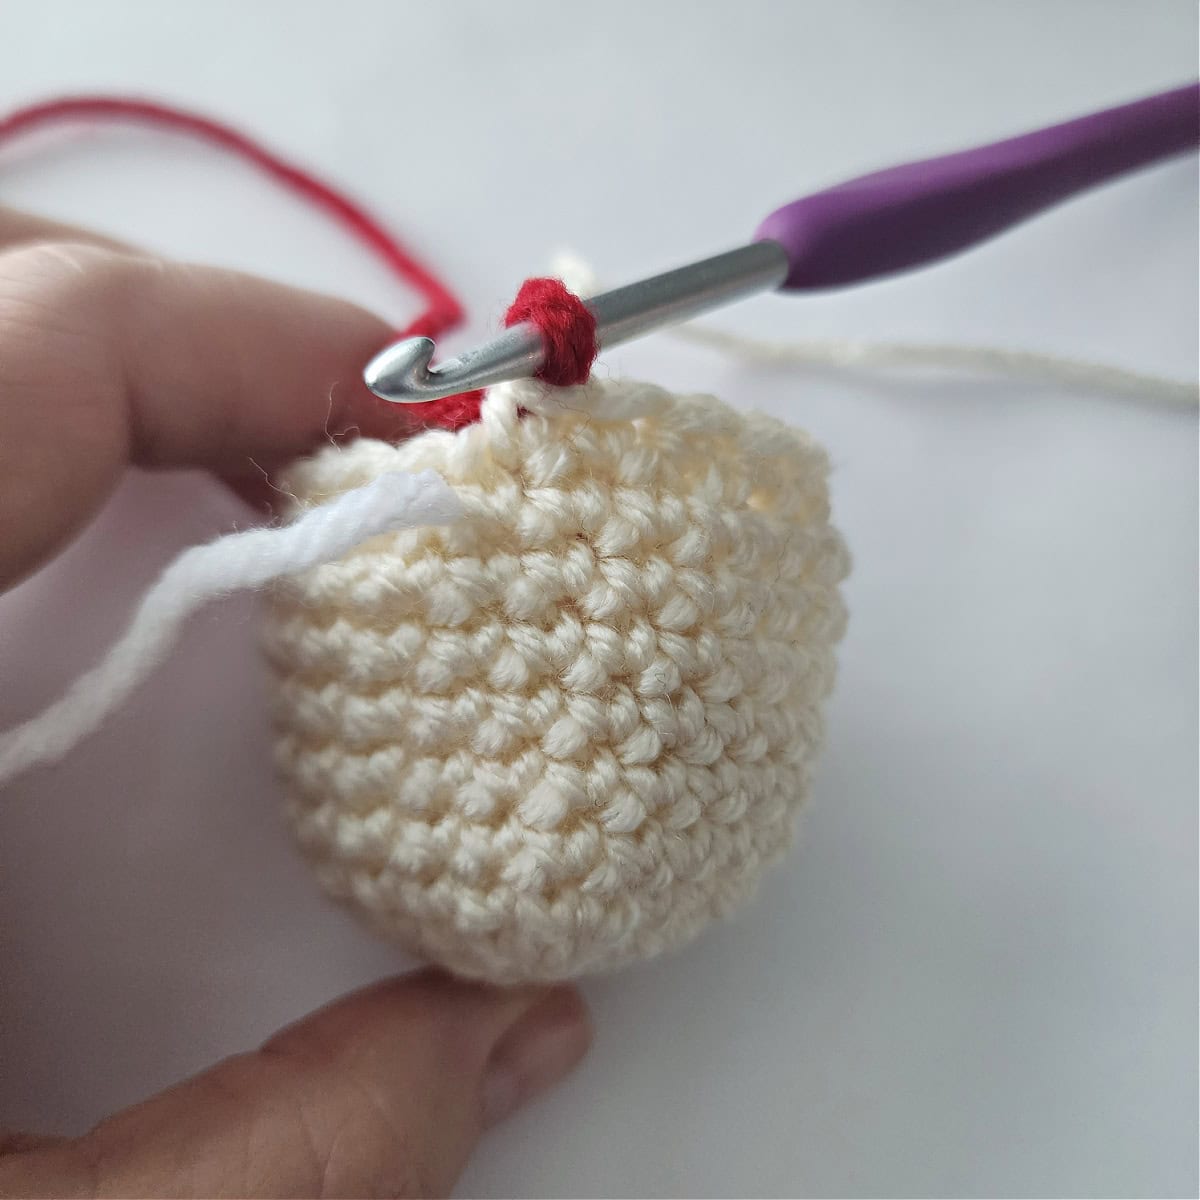
1st Arm
Note: Gingerbread Girl’s arm is worked in continuous rounds to keep from having an unsightly seam. Do not join at the end of each round, instead use a scrap piece of yarn to keep track of the beginning of each round. Move the scrap of yarn up as you complete each round.
Rnd 1 (RS): Continuing on from her head, FLO sc in each of the next 4 sts along the last rnd of the head, ch 4. (4 sc + 4 chs)
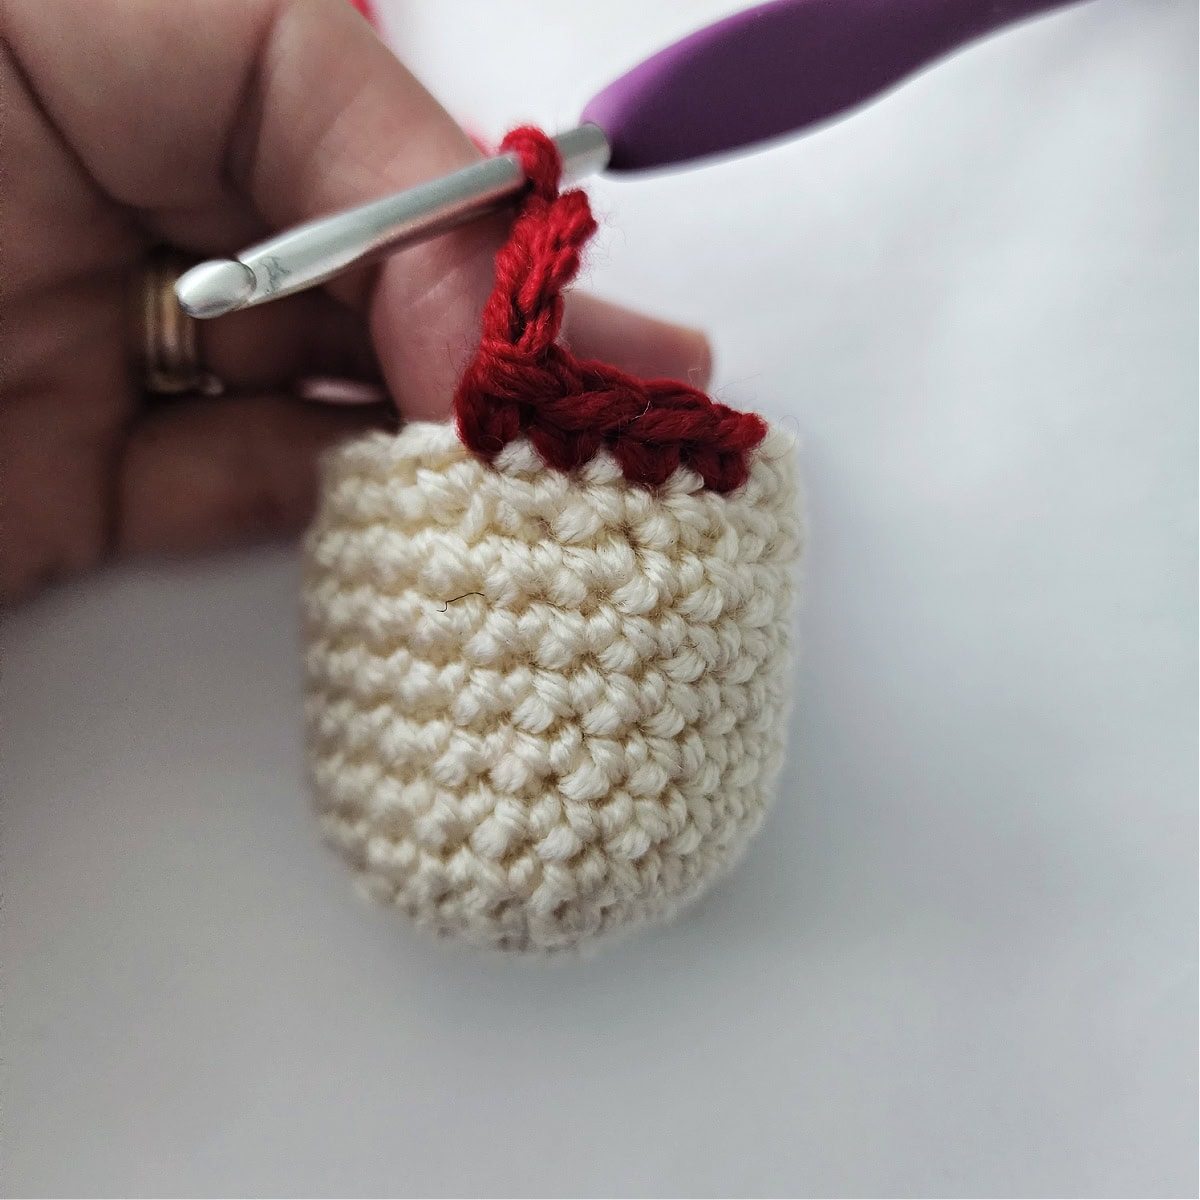
Rnd 2: Connect the ch to the 1st sc of the previous round with a sc in the 1st st, sc in each of the remaining 3 sts and 4 chs around. (8 sts)
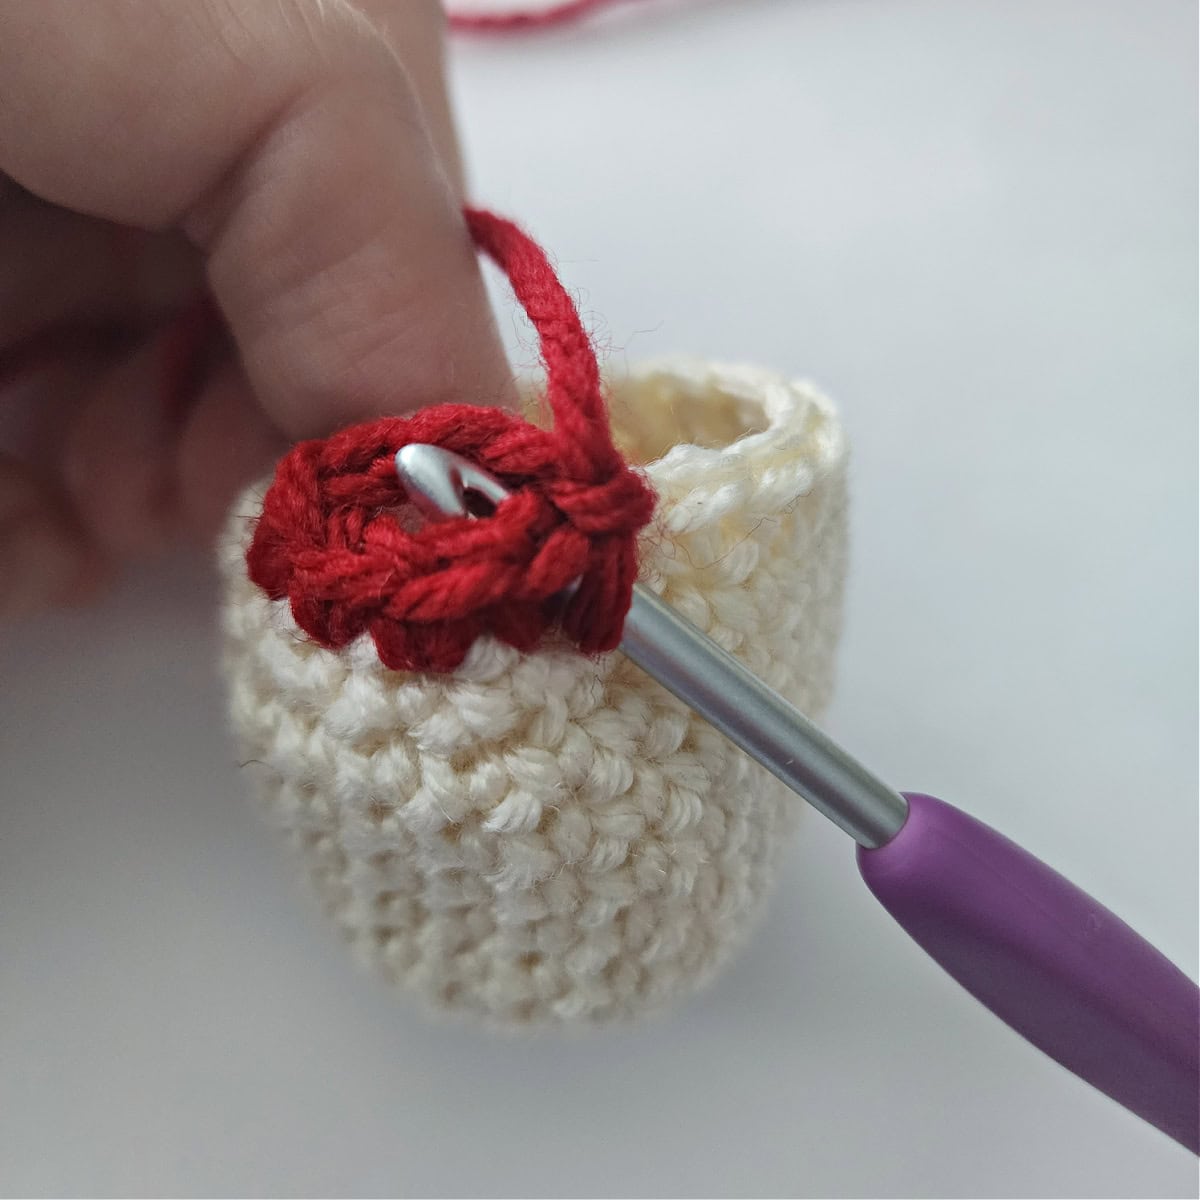
Rnds 3 – 6: Sc in each st around. (8 sts)
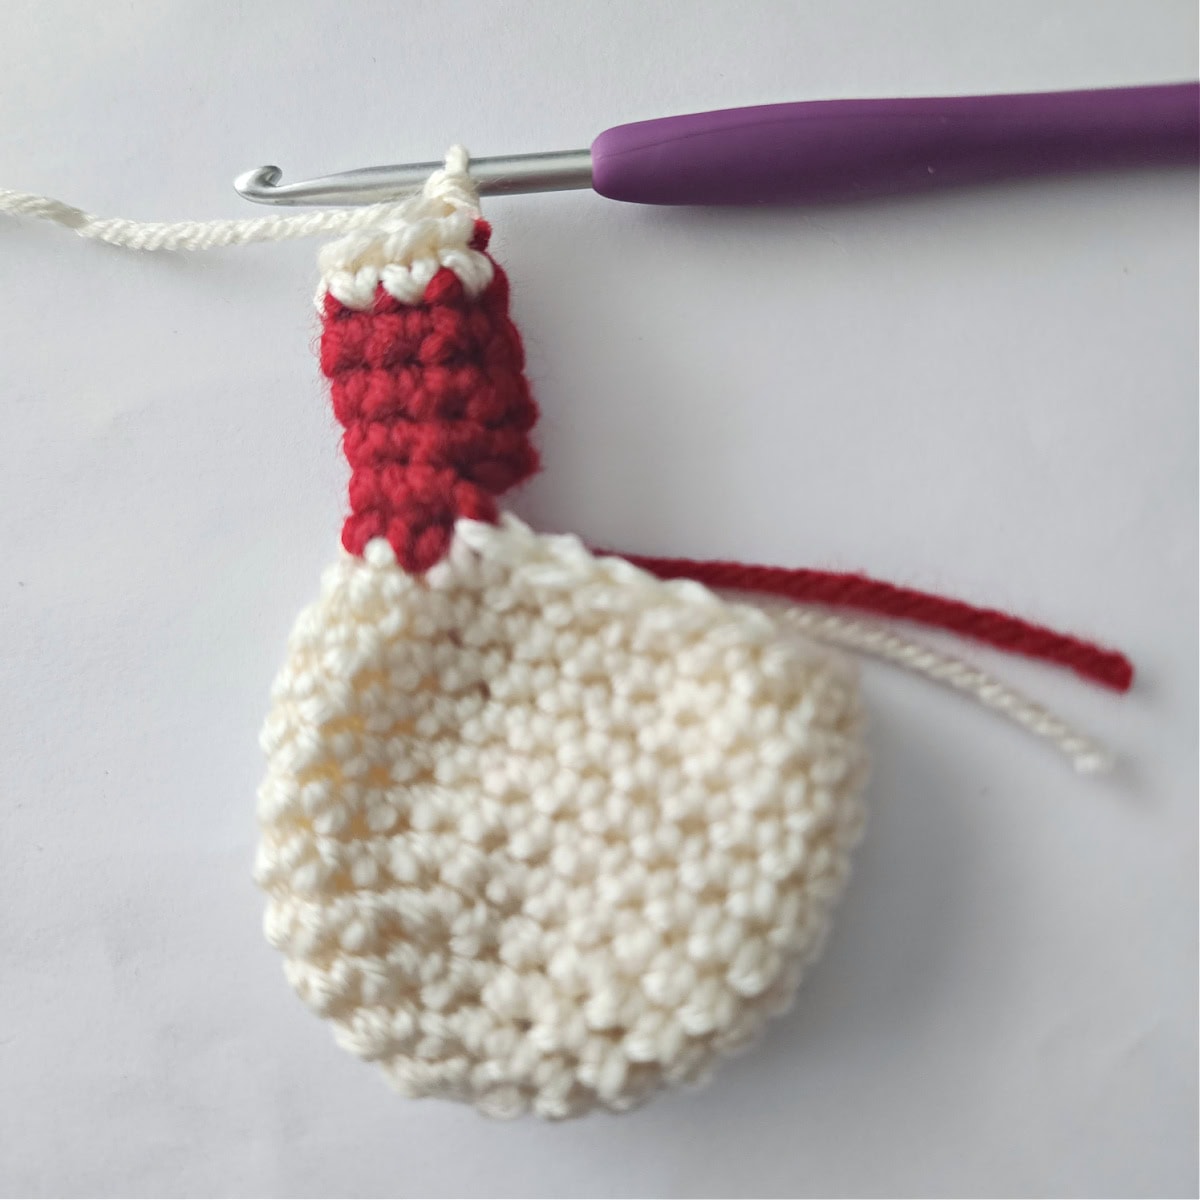
Rnd 7: Invsc2tog 4 times. (4 sts)
Fasten off, leaving a tail yarn of to close the tip of the hand closed. With a yarn needle and tail of yarn, close the top of the hand. Weave in ends Continue on to 2nd Arm.
Arm should measure approximately .75″ W x 1.5″ L (when laid flat).
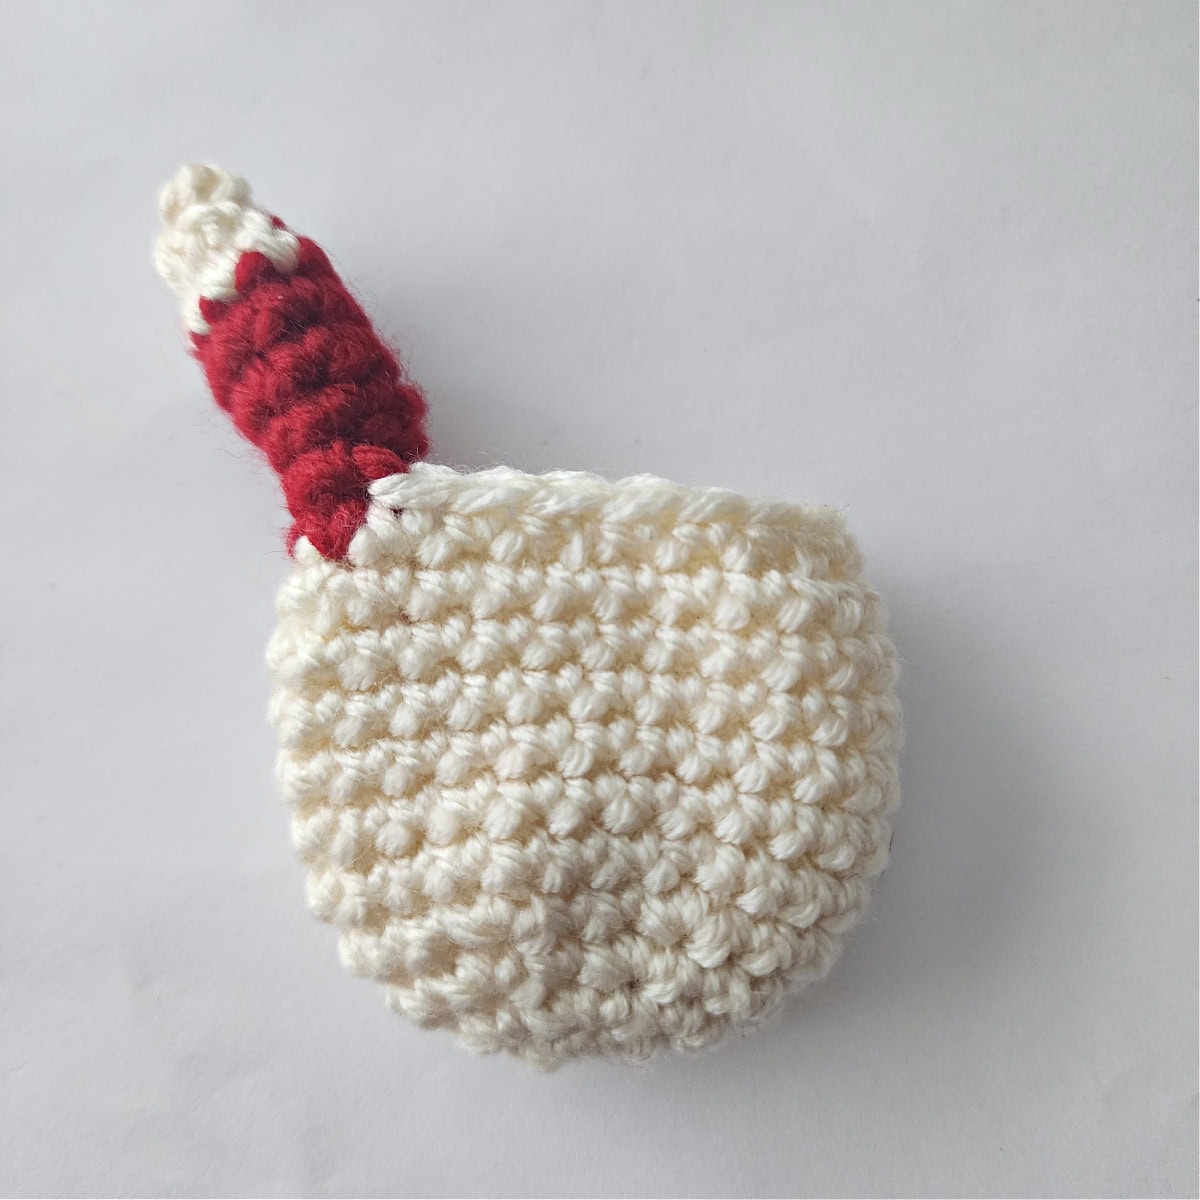
2nd Arm
Note: Gingerbread Girl’s arm is worked in continuous rounds to keep from having an unsightly seam. Do not join at the end of each round, instead use a scrap piece of yarn to keep track of the beginning of each round. Move the scrap of yarn up as you complete each round.
Rnd 1 (RS): Skip 5 sts along the edge of the head, from the 1st arm, then with MC yarn & a 4.00mm crochet hook, join yarn with a standing sc in the FLO of the next st along the edge of the head, FLO sc in each of the next 3 sts, ch 4. (4 sc + 4 chs)
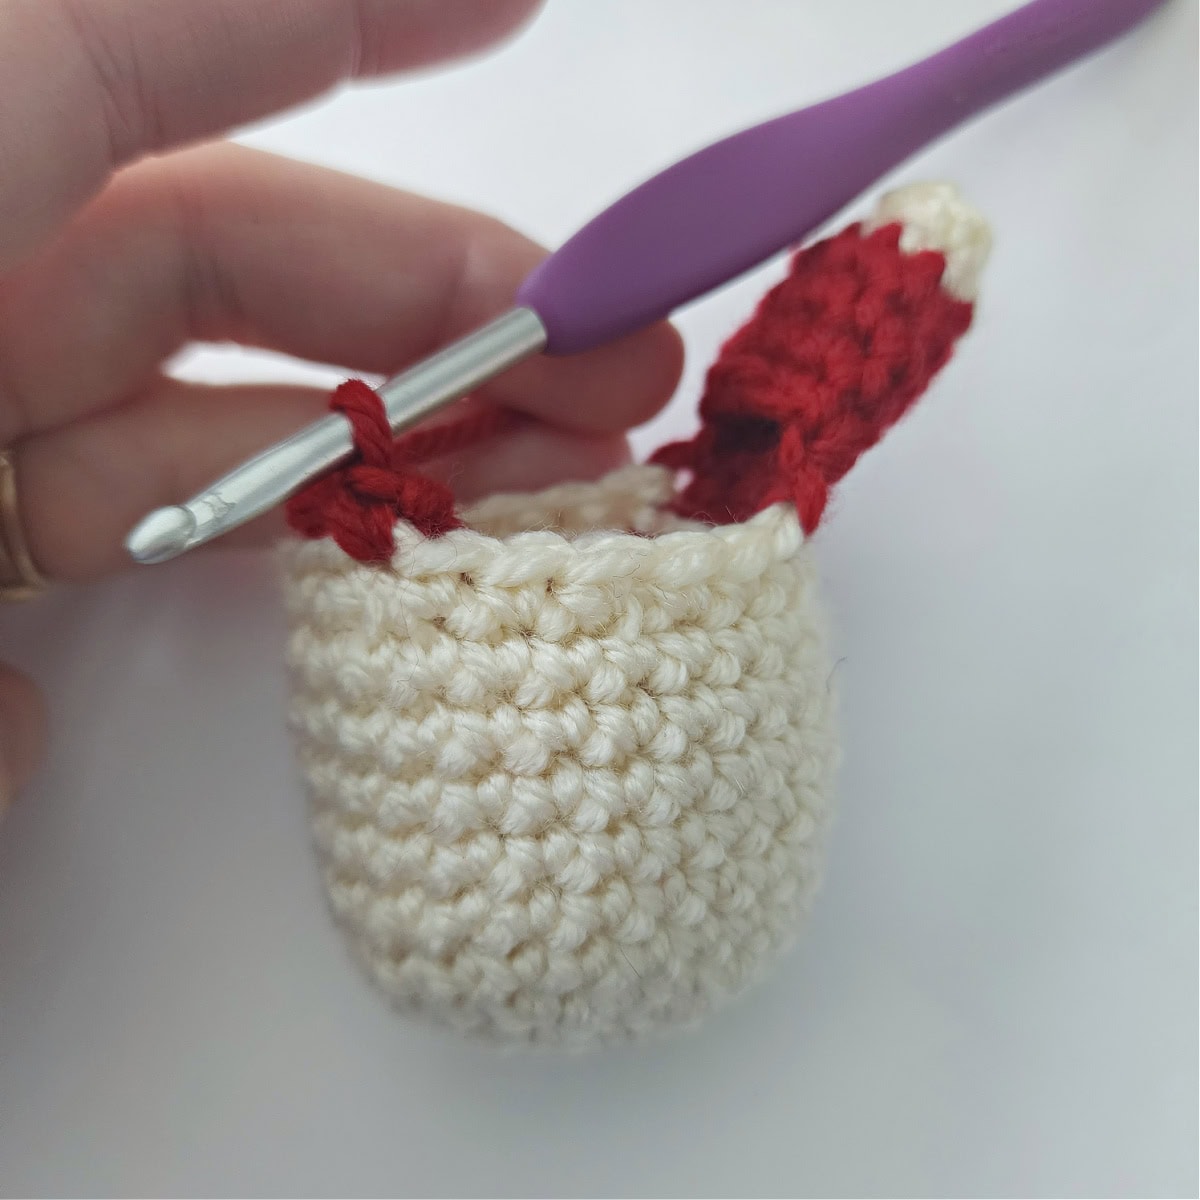
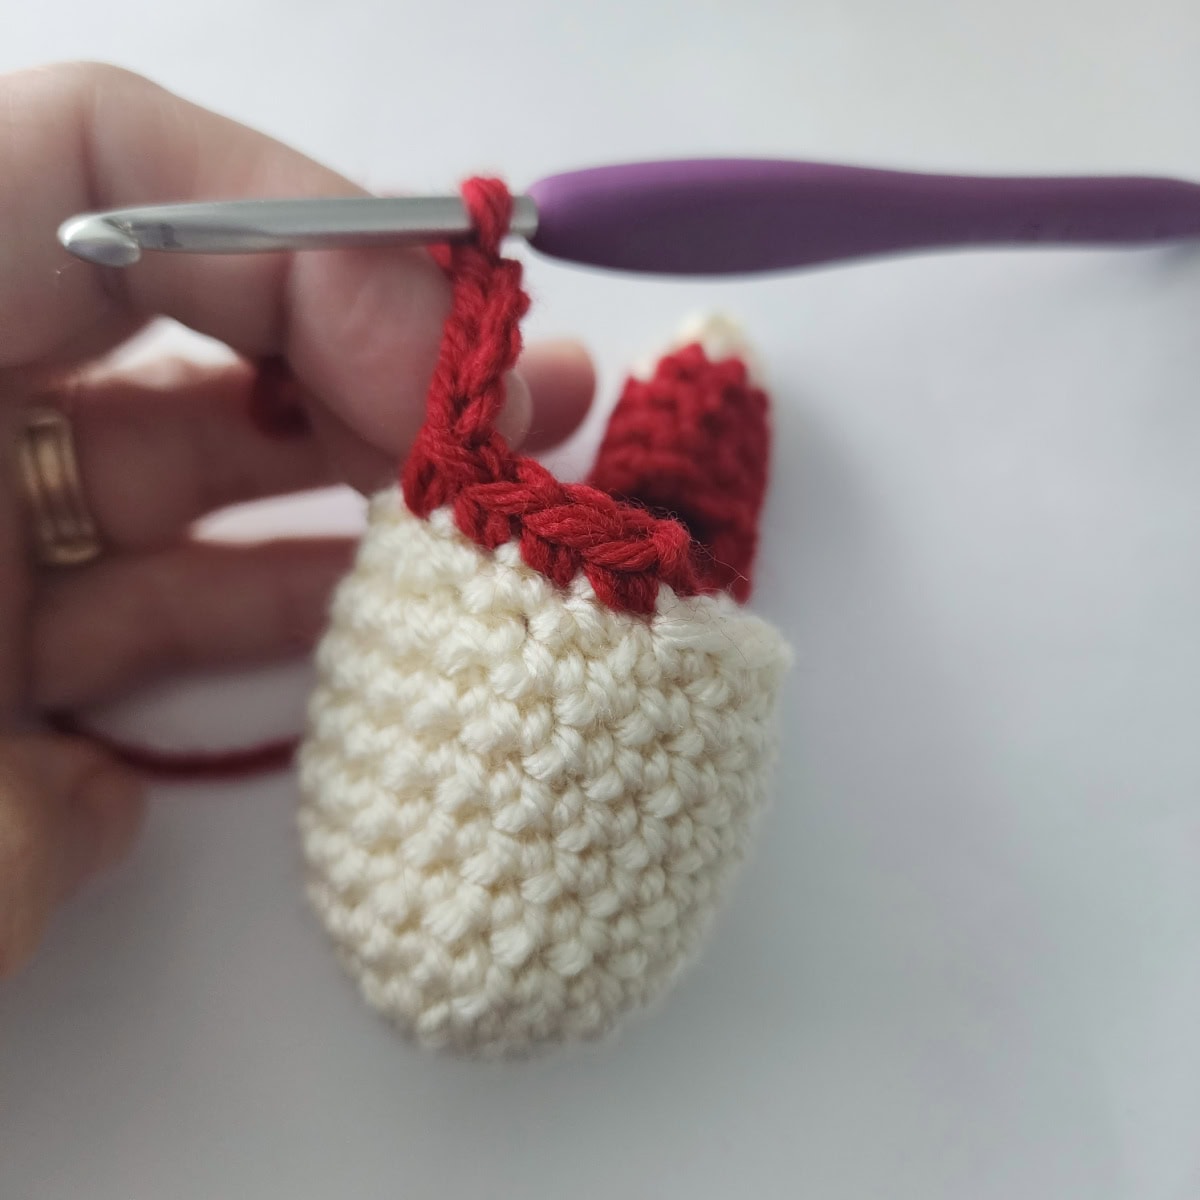
Rnd 2: Connect the ch to the 1st sc of the previous round with a sc in the 1st st, sc in each of the remaining 3 sts and 4 chs around. (8 sts)
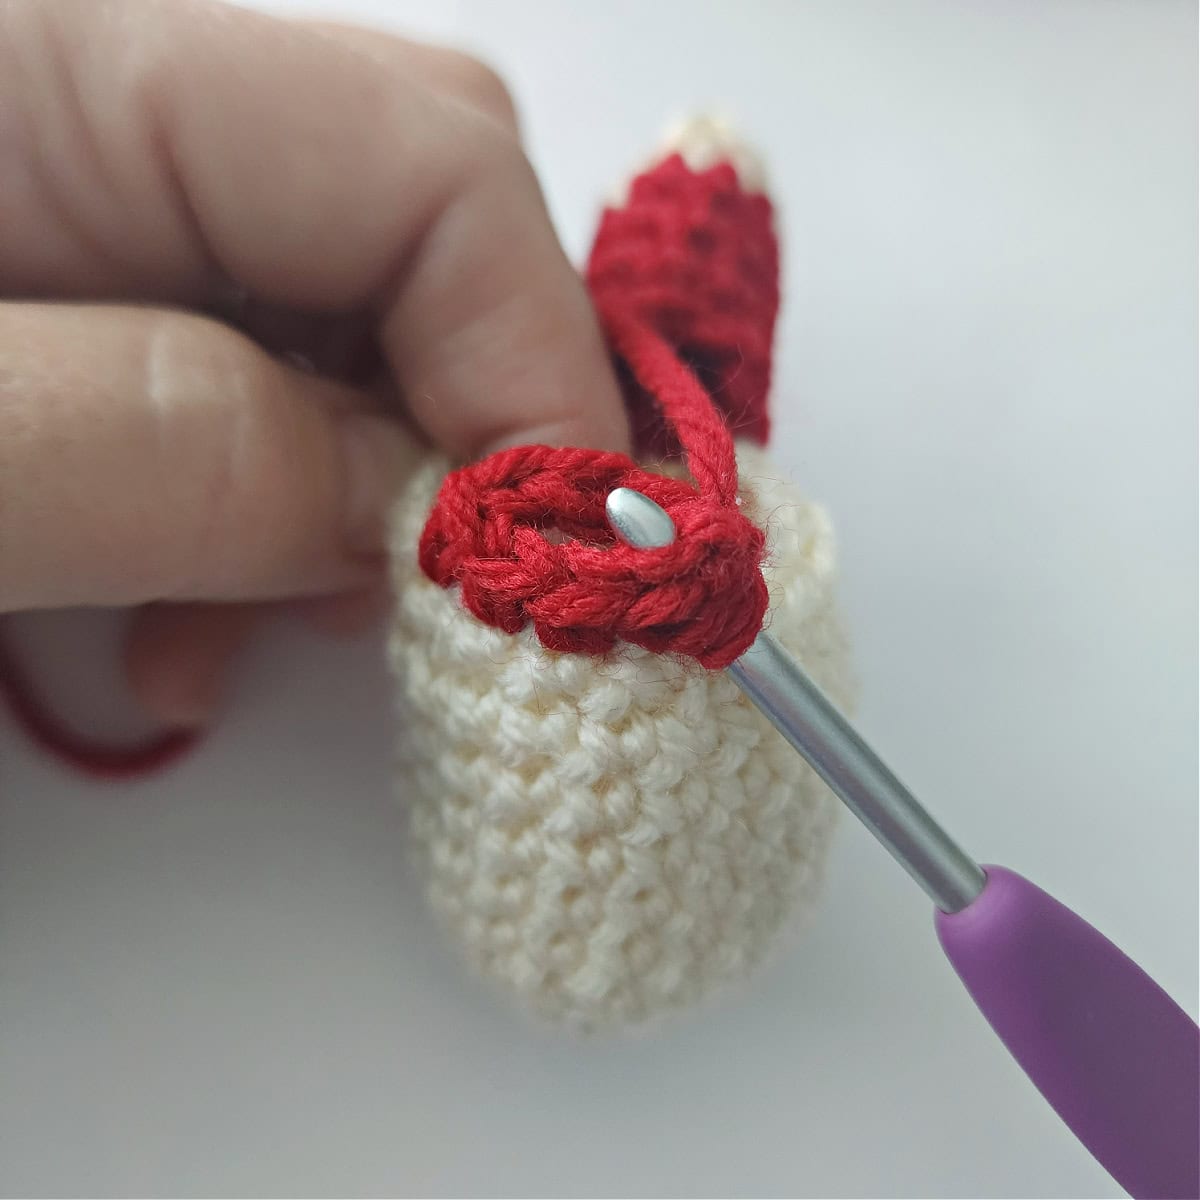
Rnds 3 – 6: Sc in each st around. (8 sts)
Rnd 7: Invsc2tog 4 times. (4 sts)
Fasten off, leaving a tail yarn of to close the tip of the hand closed. With a yarn needle and tail of yarn, close the top of the hand. Weave in ends Continue on to Gingerbread Girl’s Collar.
Arm should measure approximately .75″ W x 1.5″ L (when laid flat).
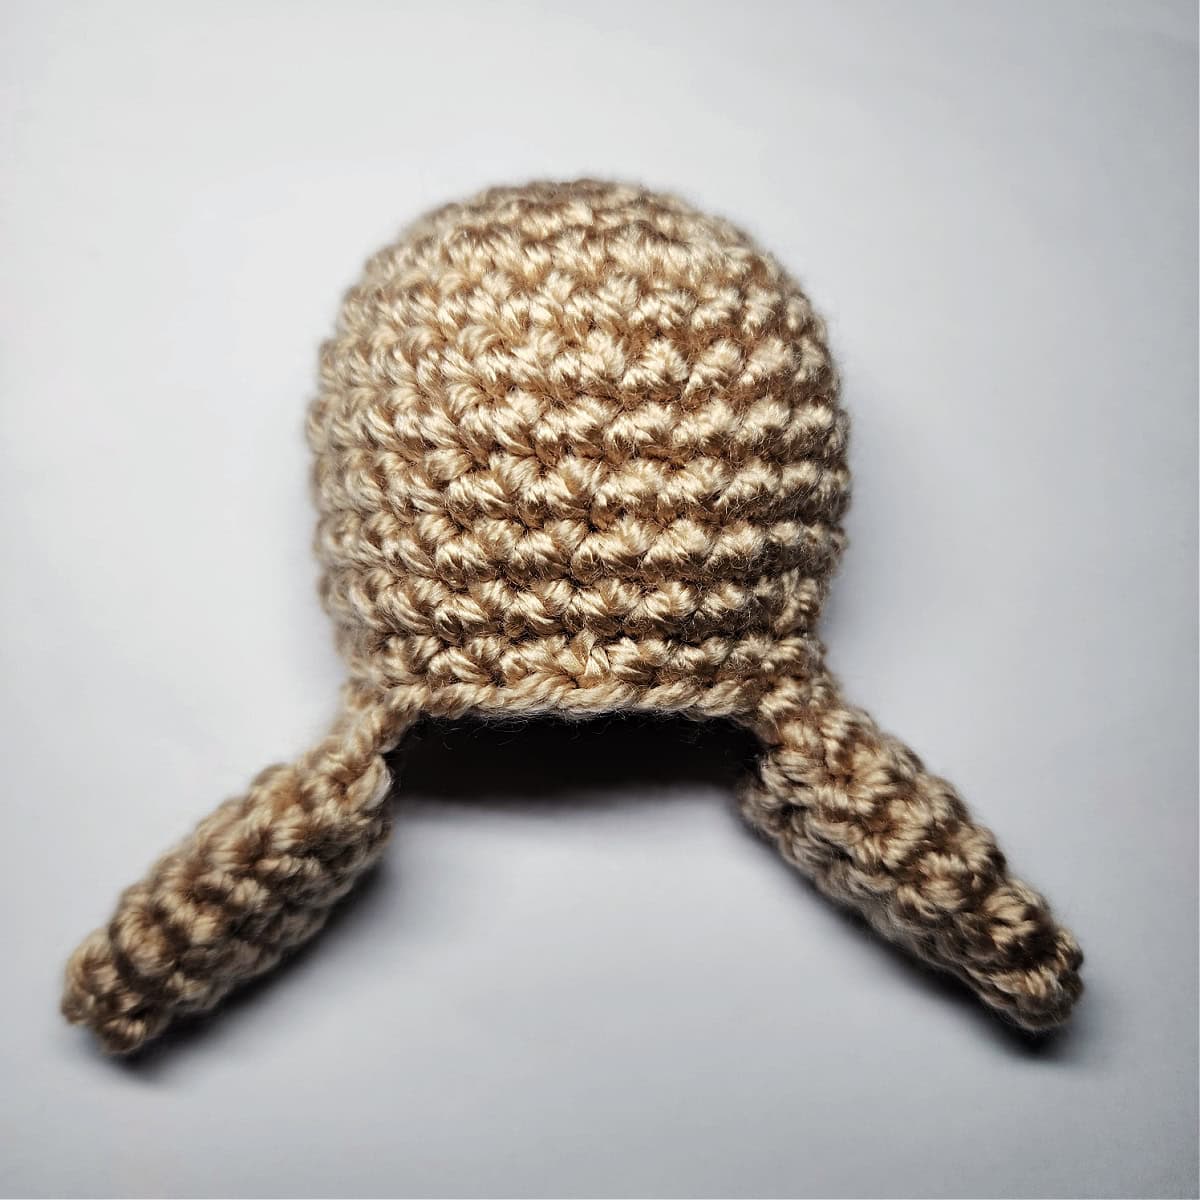
Gingerbread Girl’s Collar
Rnd 1 (RS): With white yarn & a 4.00mm crochet hook, join yarn with a standing sc in the FLO of a st to the left of one of her arms, FLO sc in each of the next 4 sts, ch 3, skip over the arm (this creates a little apron strap), FLO sc in the next st past the arm, FLO 2 dc in the same st, FLO 3 dc in the next st, FLO sl st in the next st, FLO 3 dc in the next st, FLO (2 dc, sc) in the next st, ch 3, skip over the next arm. Join with a sl st to the 1st st. (16 sts + 2 ch-3’s)
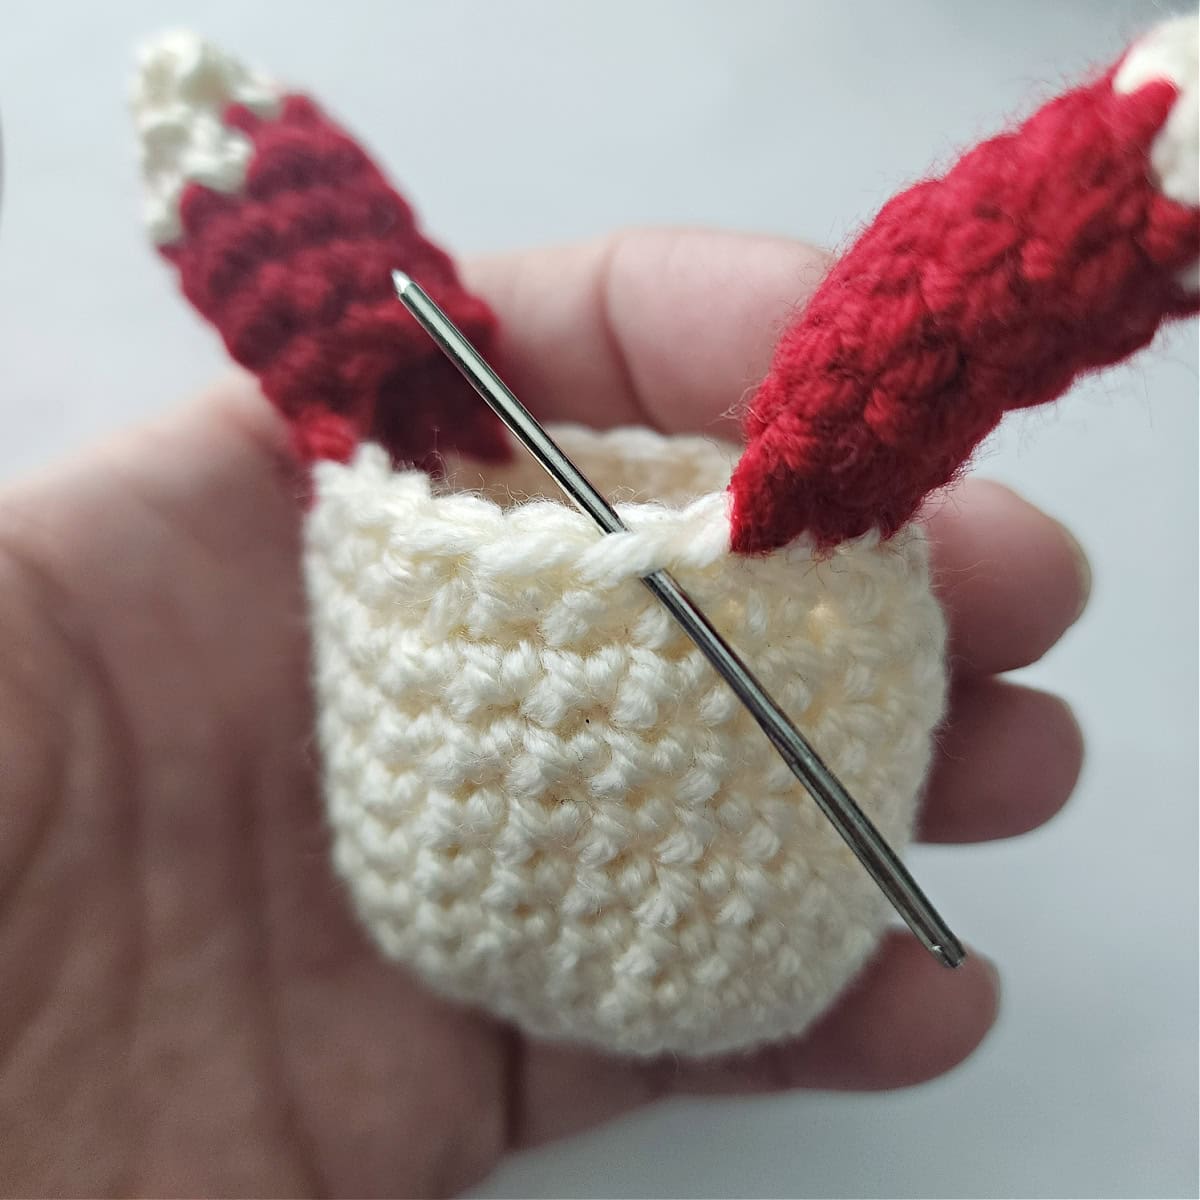
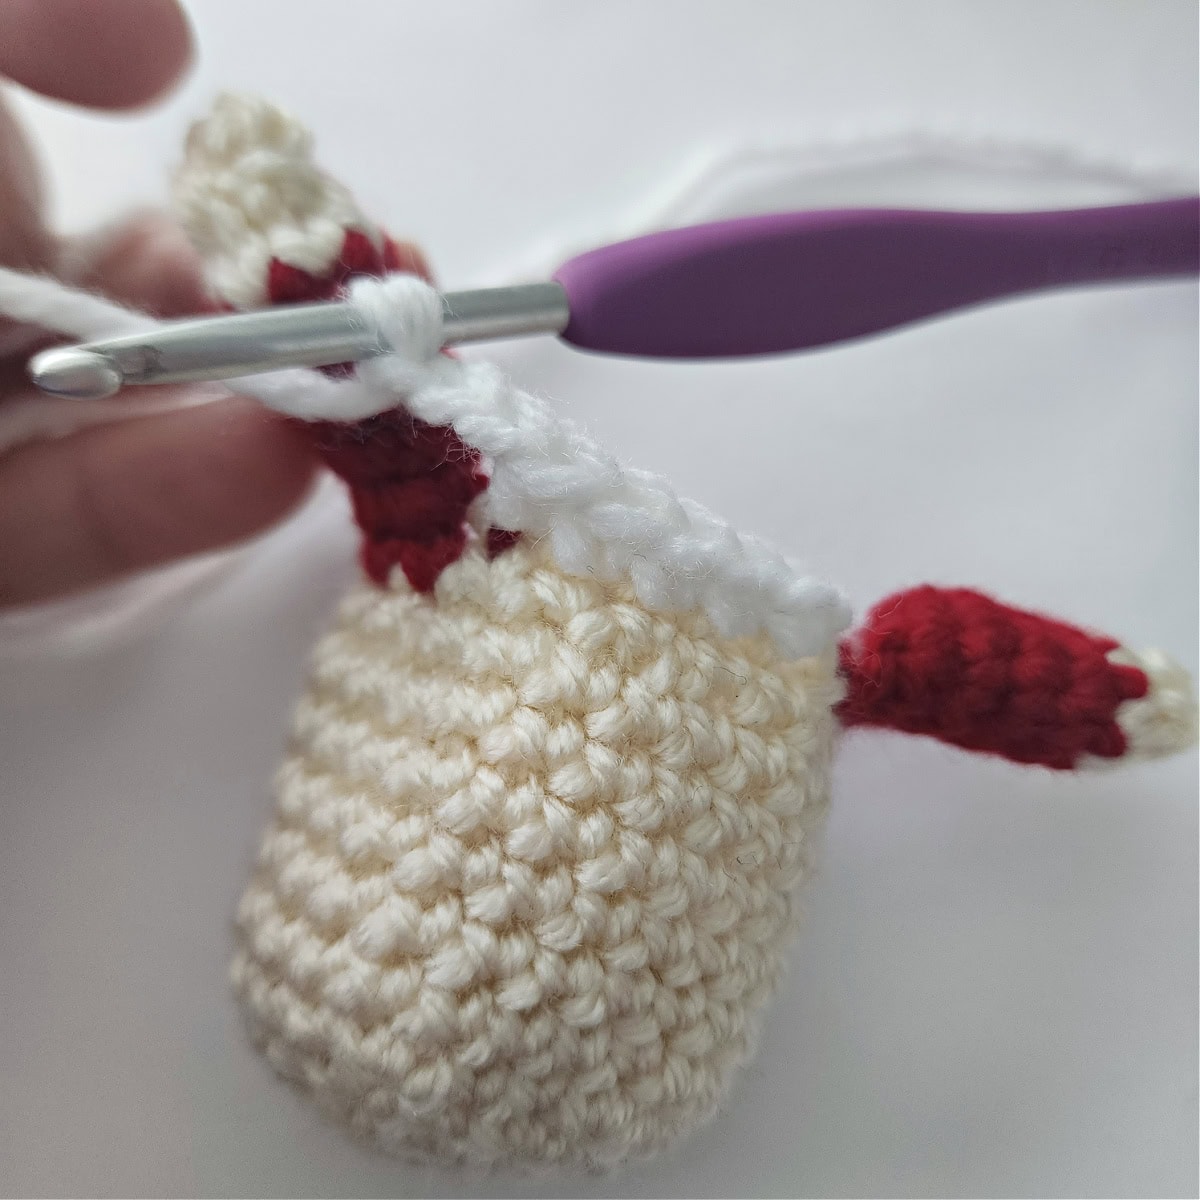
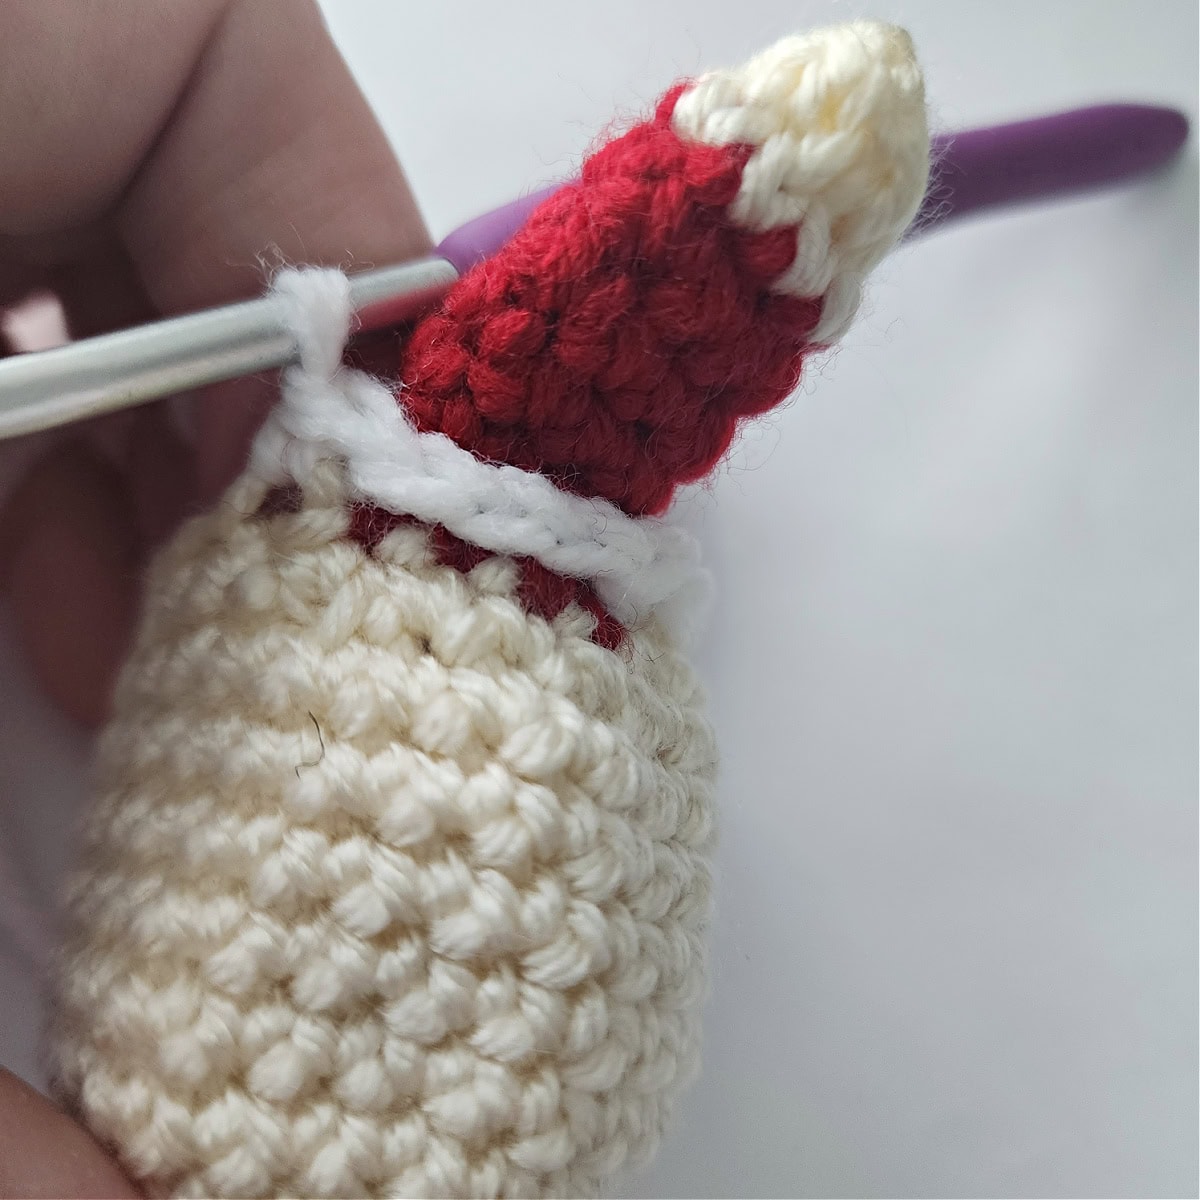
Stitch count varies in the photos BELOW – Follow written pattern
Photos are for a visual aid to show the techniques only.
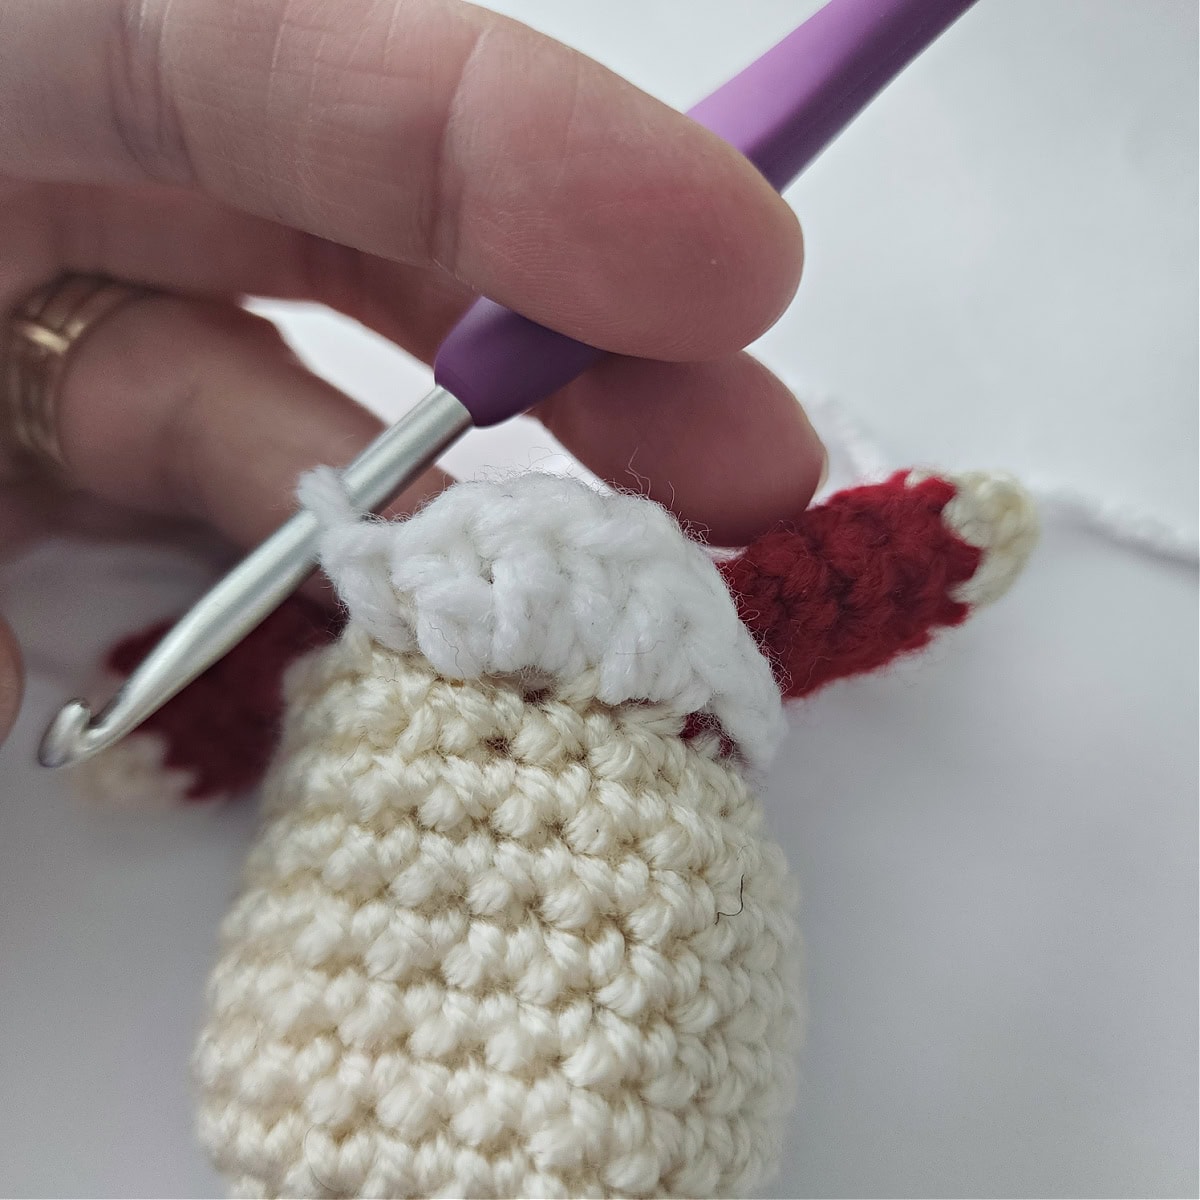
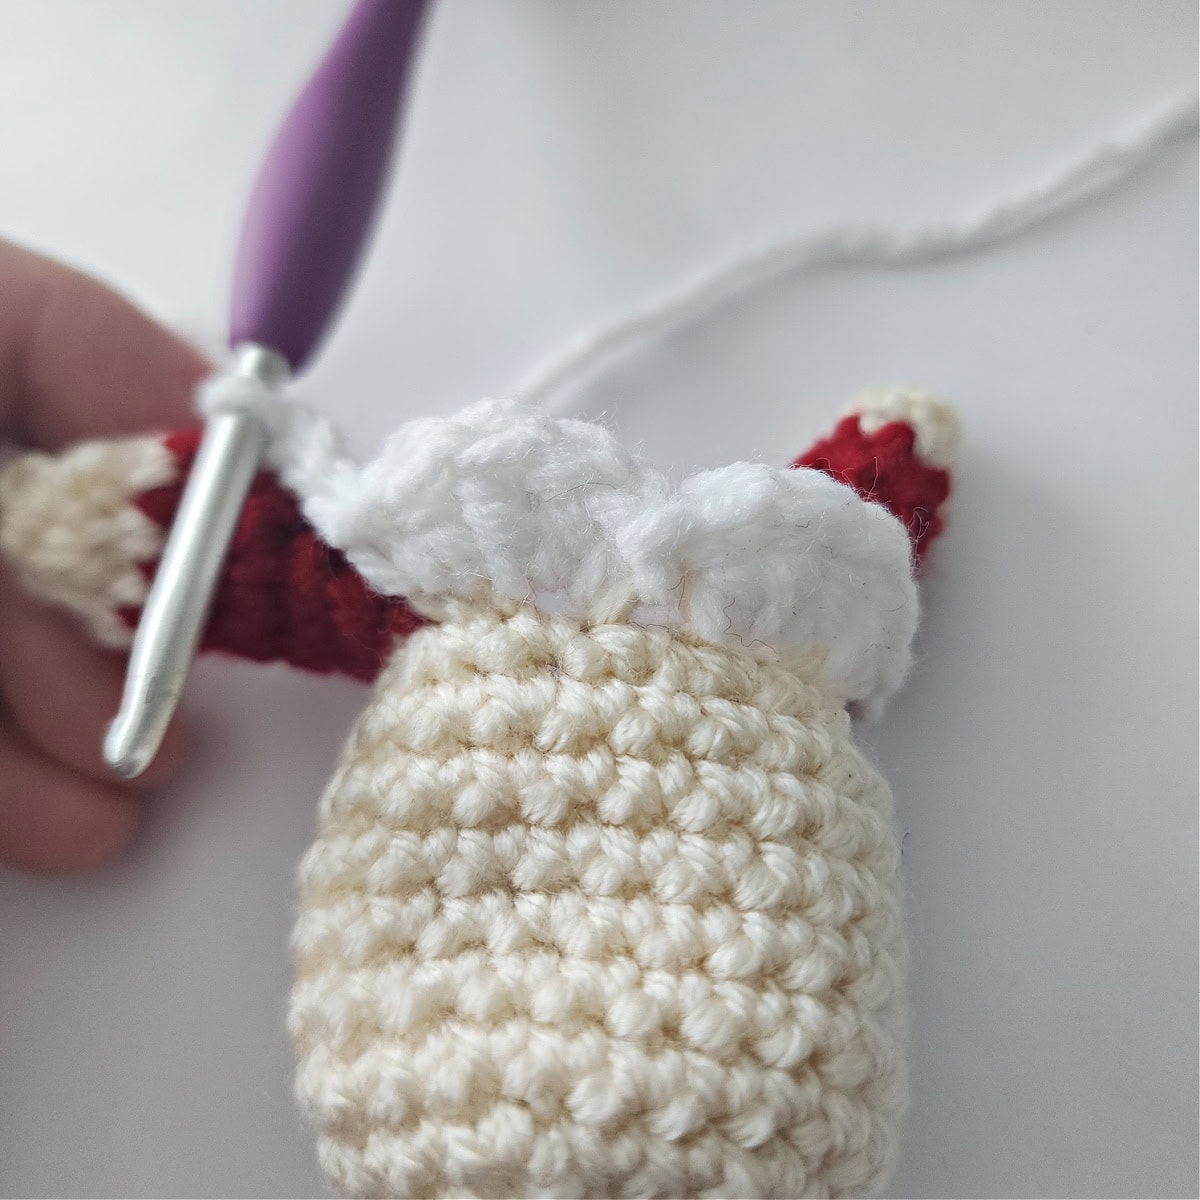
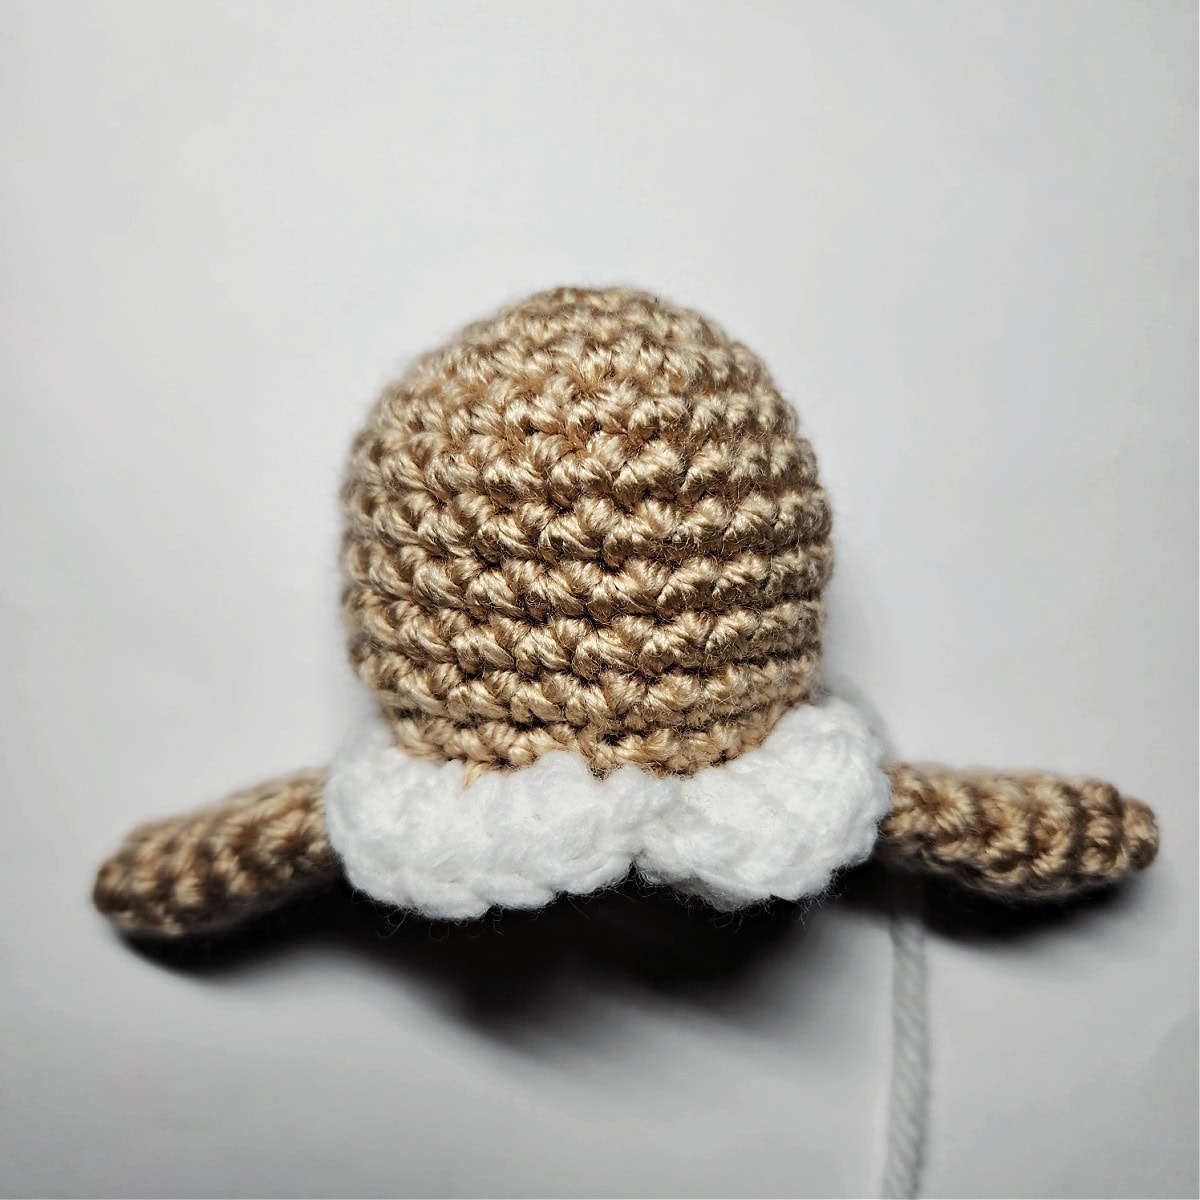
Fasten off. Weave in ends. Continue on to Gingerbread Girl’s Icing Hair.
Gingerbread Girl’s Icing Hair
Note: The first 4 rounds of Gingerbread Girl’s icing hair is worked in continuous rounds to keep from having an unsightly seam. Do not join at the end of each round, instead use a scrap piece of yarn to keep track of the beginning of each round. Move the scrap of yarn up as you complete each round.
Rnd 1 (RS): With MC yarn & a 4.00mm crochet hook, ch 2, work 6 sc into the 2nd ch from your hook. Do not join. (6 sts)
Rnd 2: 2 sc in each st around. (12 sts)
Rnd 3: (2 sc in the next st, sc in the next st) 6 times. (18 sts)
Rnd 4: (2 sc in the next st, sc in each of the next 2 sts) 6 times. (24 sts)
Rnd 5: * (hdc, dc) in the next st, (dc, hdc) in the next st, sl st in each of the next 2 sts, ch 2, 2 hdc in the 2nd ch from your hook, skip the next st from Rnd 4, sl st in each of the next 2 sts, work from * 3 times, then (hdc, dc) in the next st, (dc, hdc) in the next st, sl st in each of the next 2 sts, (hdc, dc) in the next st, (dc, hdc) in the next st, sl st in the last st. (7 wavy bumps)
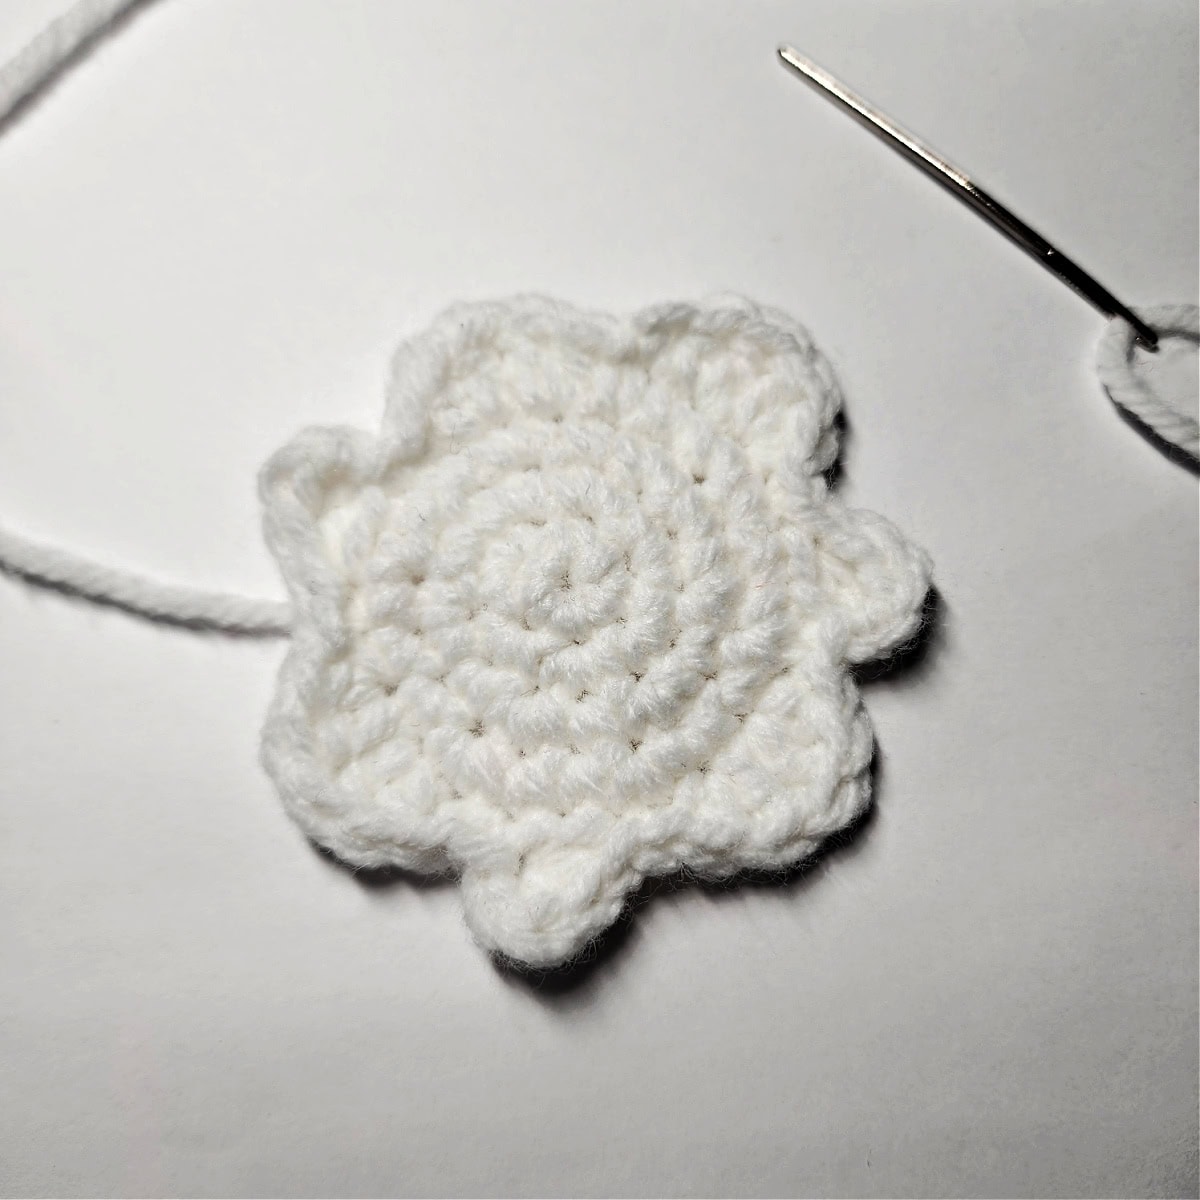
Continue on to Adding Sprinkles to Icing Hair.
Adding Sprinkles to Icing Hair
Add the sprinkles to the icing hair.
With approximately 24″ of both red and green yarn & a yarn needle, add sprinkles by sewing around one stitch on the icing hair. Randomly space sprinkles on the hair.
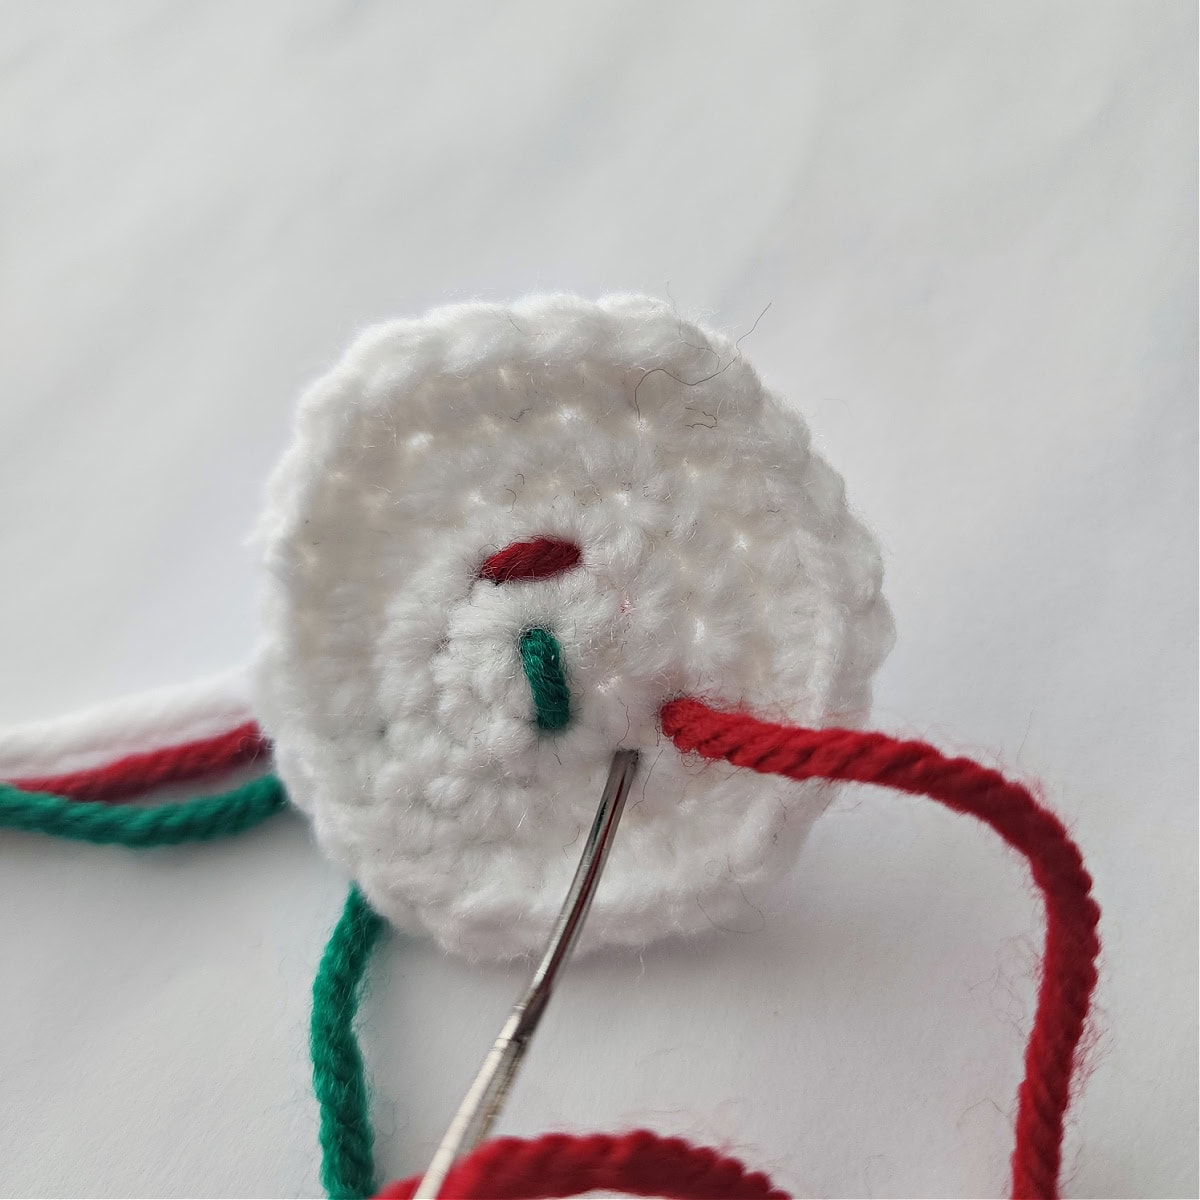
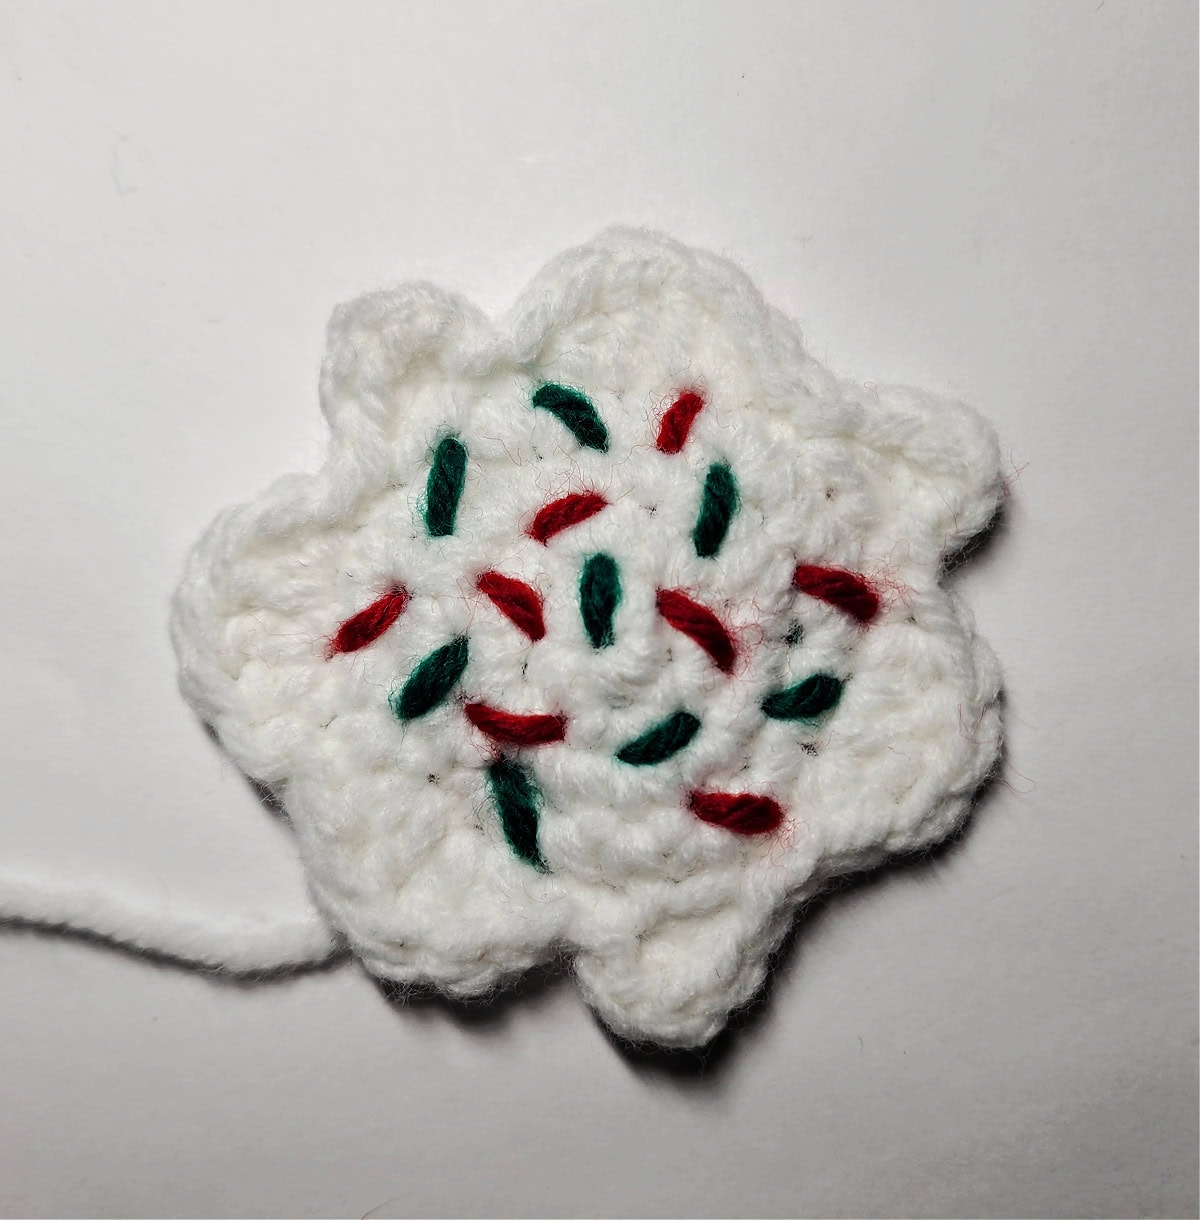
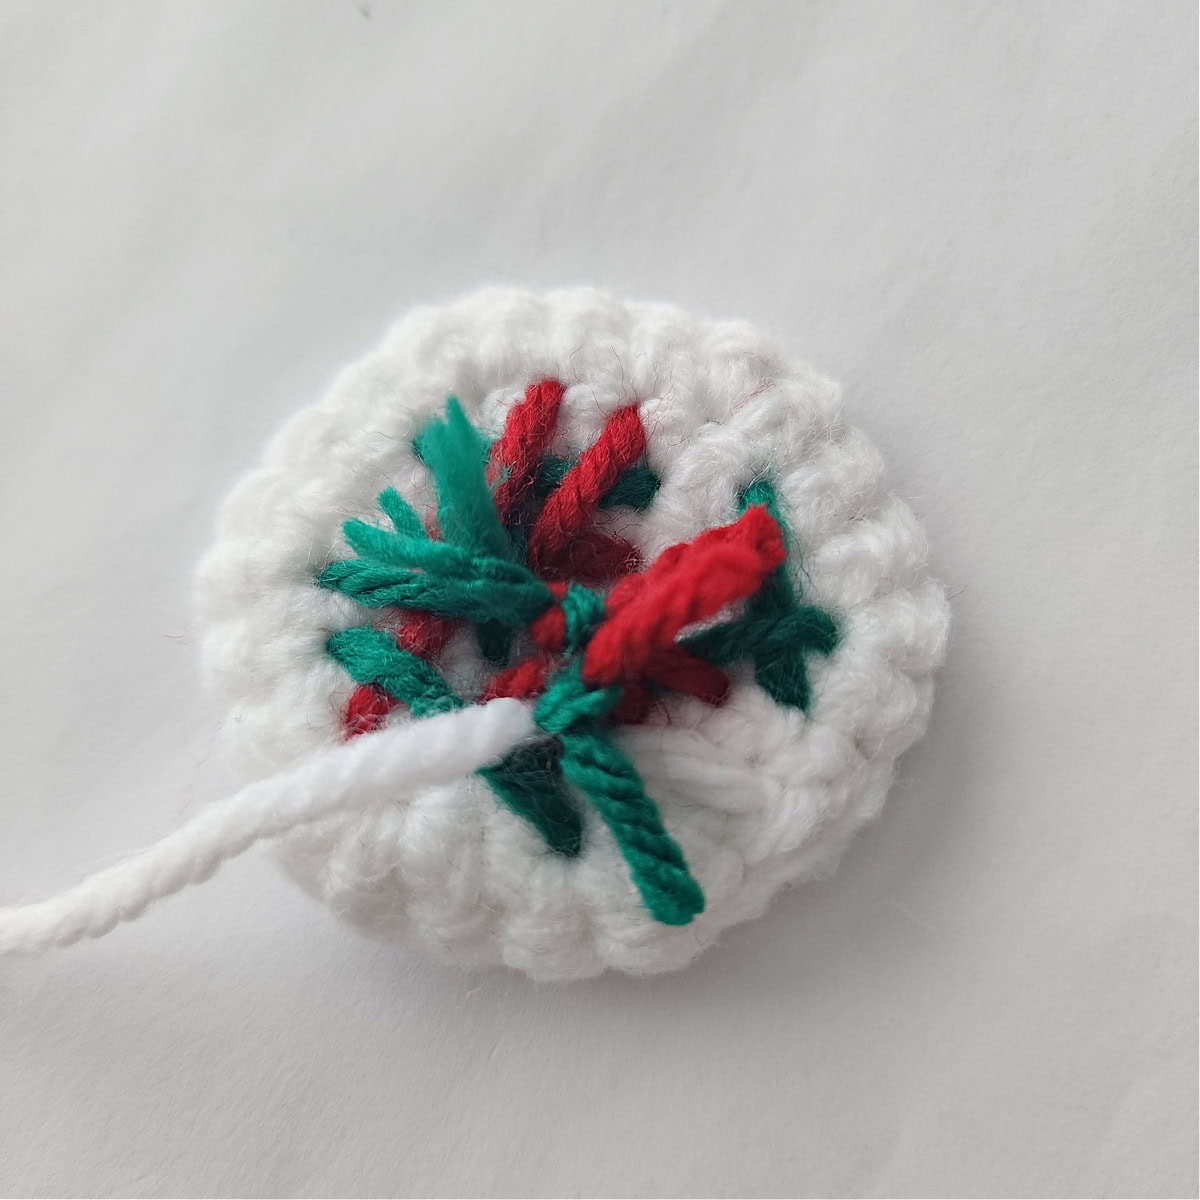
Continue on to Attaching Icing Hair to the Gingerbread Girl.
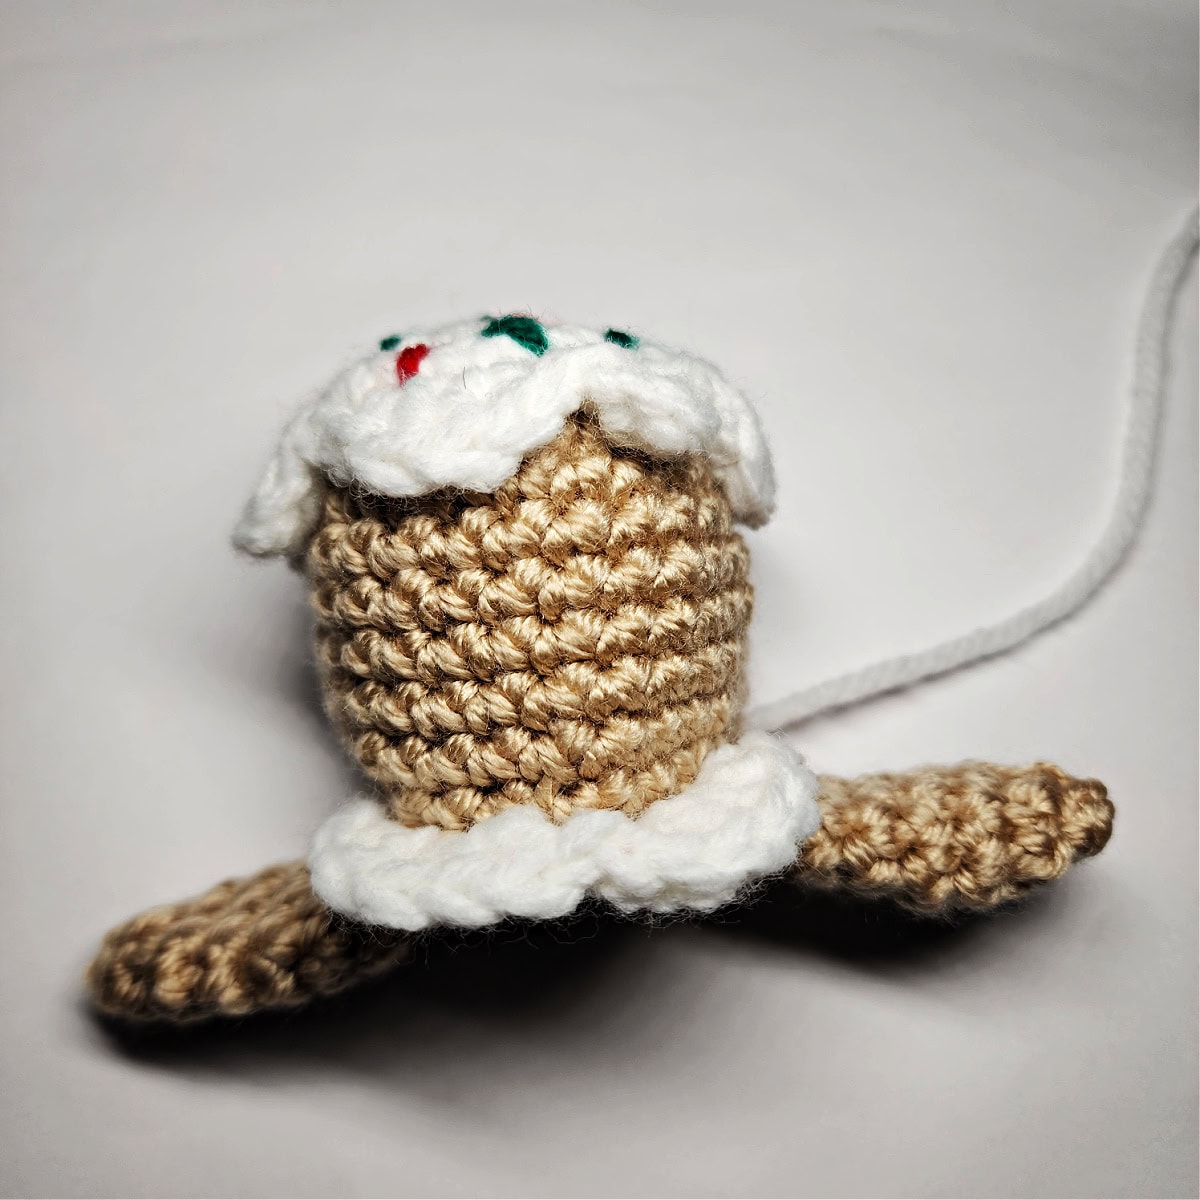
Attaching Icing Hair
With tail of yarn & a yarn needle, sew the icing hair on top of the Gingerbread Girl’s head.
Hair Bow
With red yarn & a 4.00mm crochet hook, ch 3, work 2 dc into the 3rd ch from your hook, ch 2, sl st into the same ch, ch 2, work 2 more dc into the same ch, ch 2, sl st into the same ch.
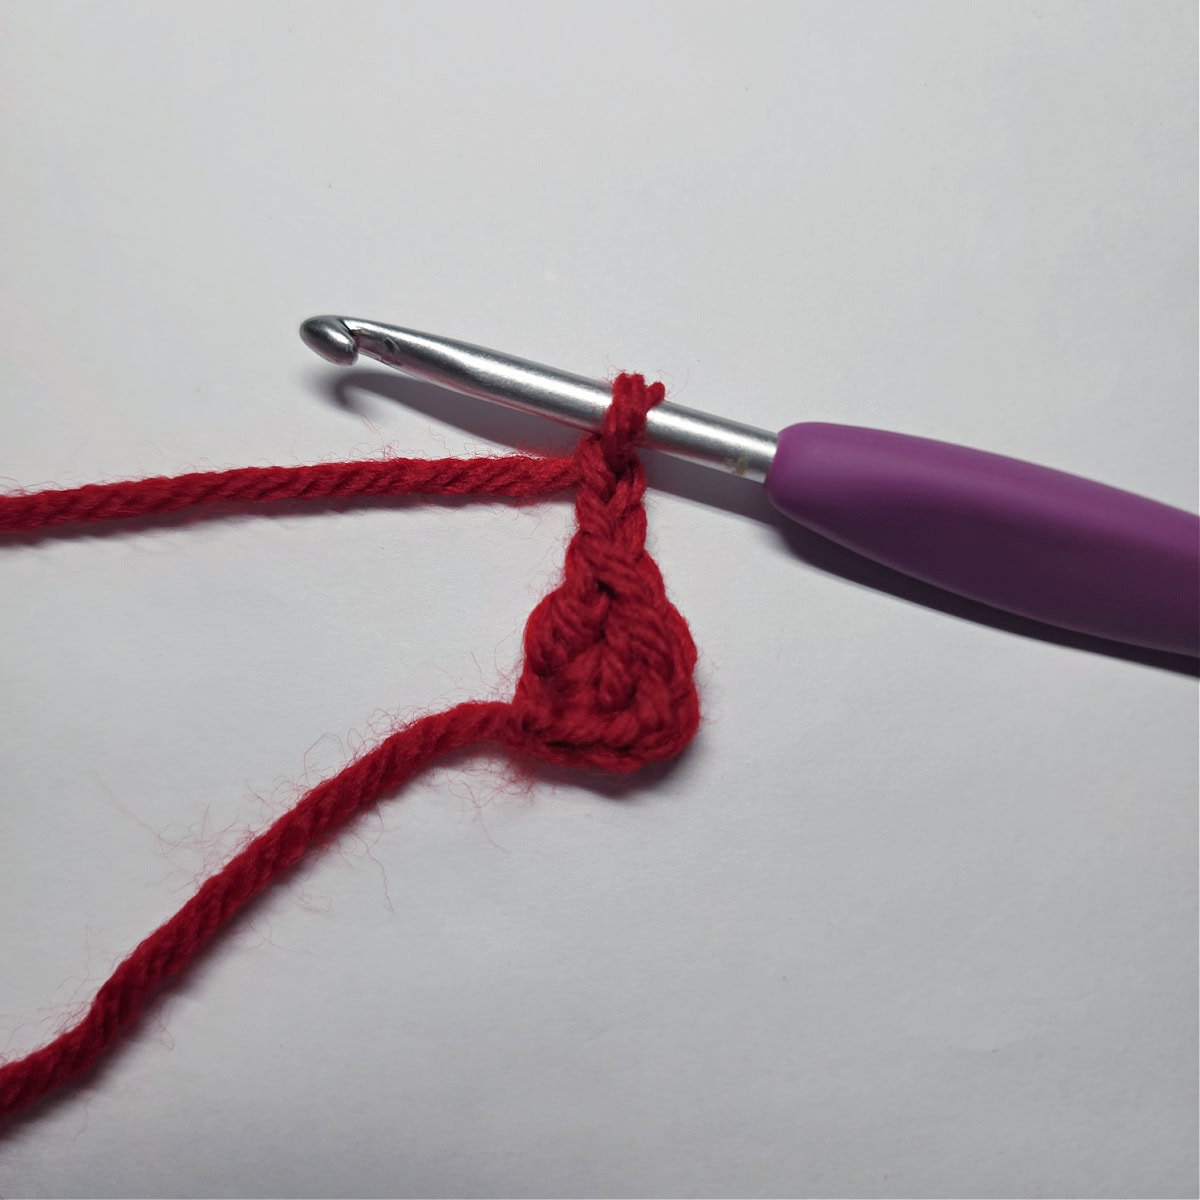
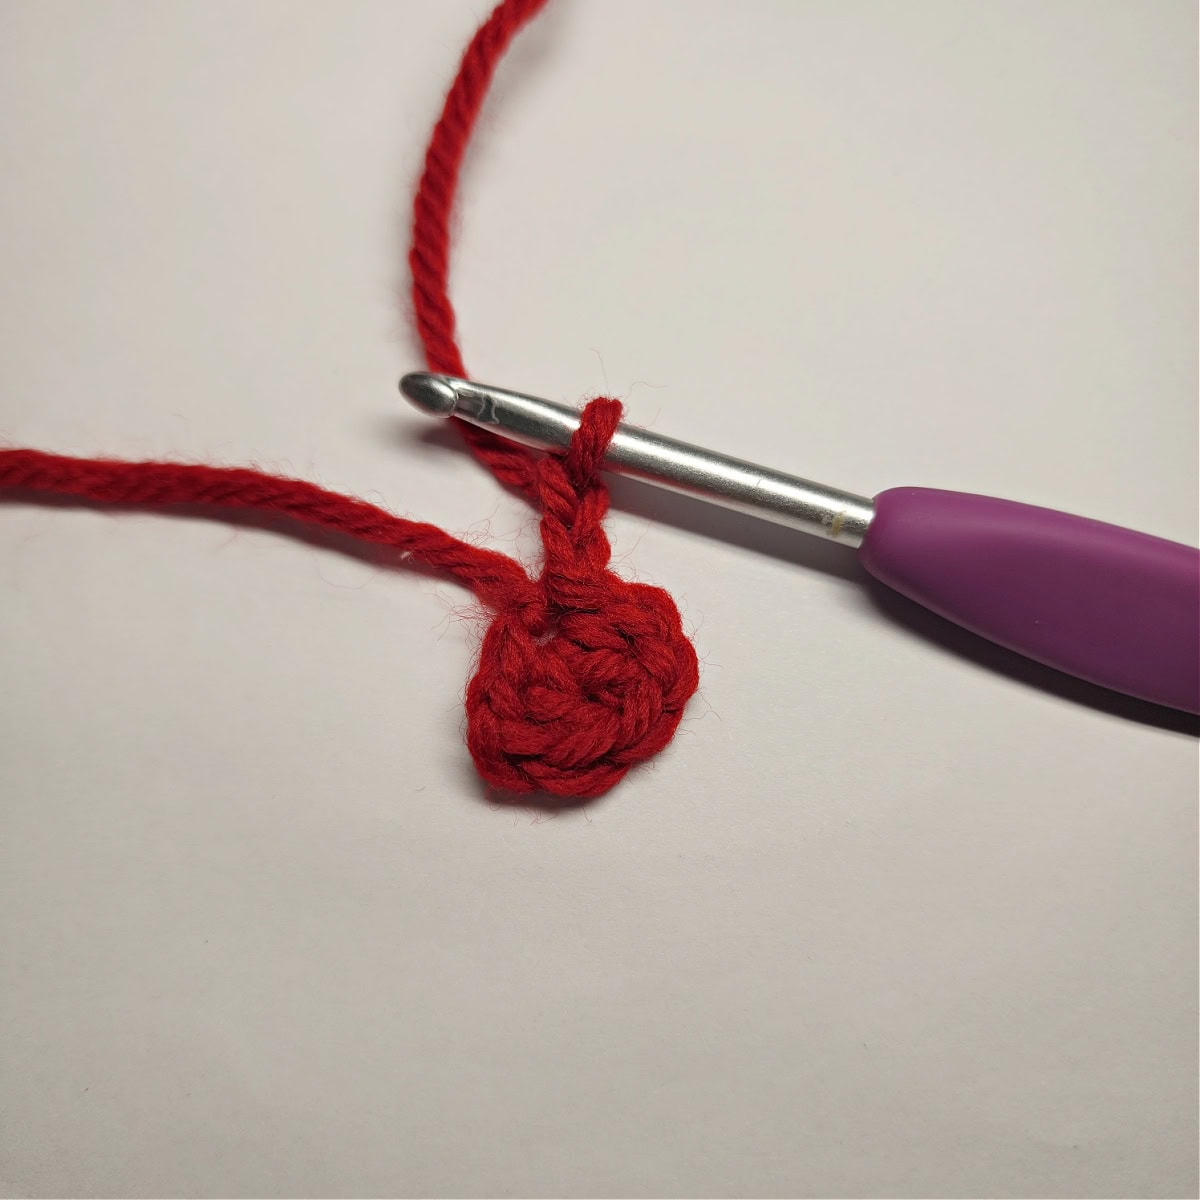
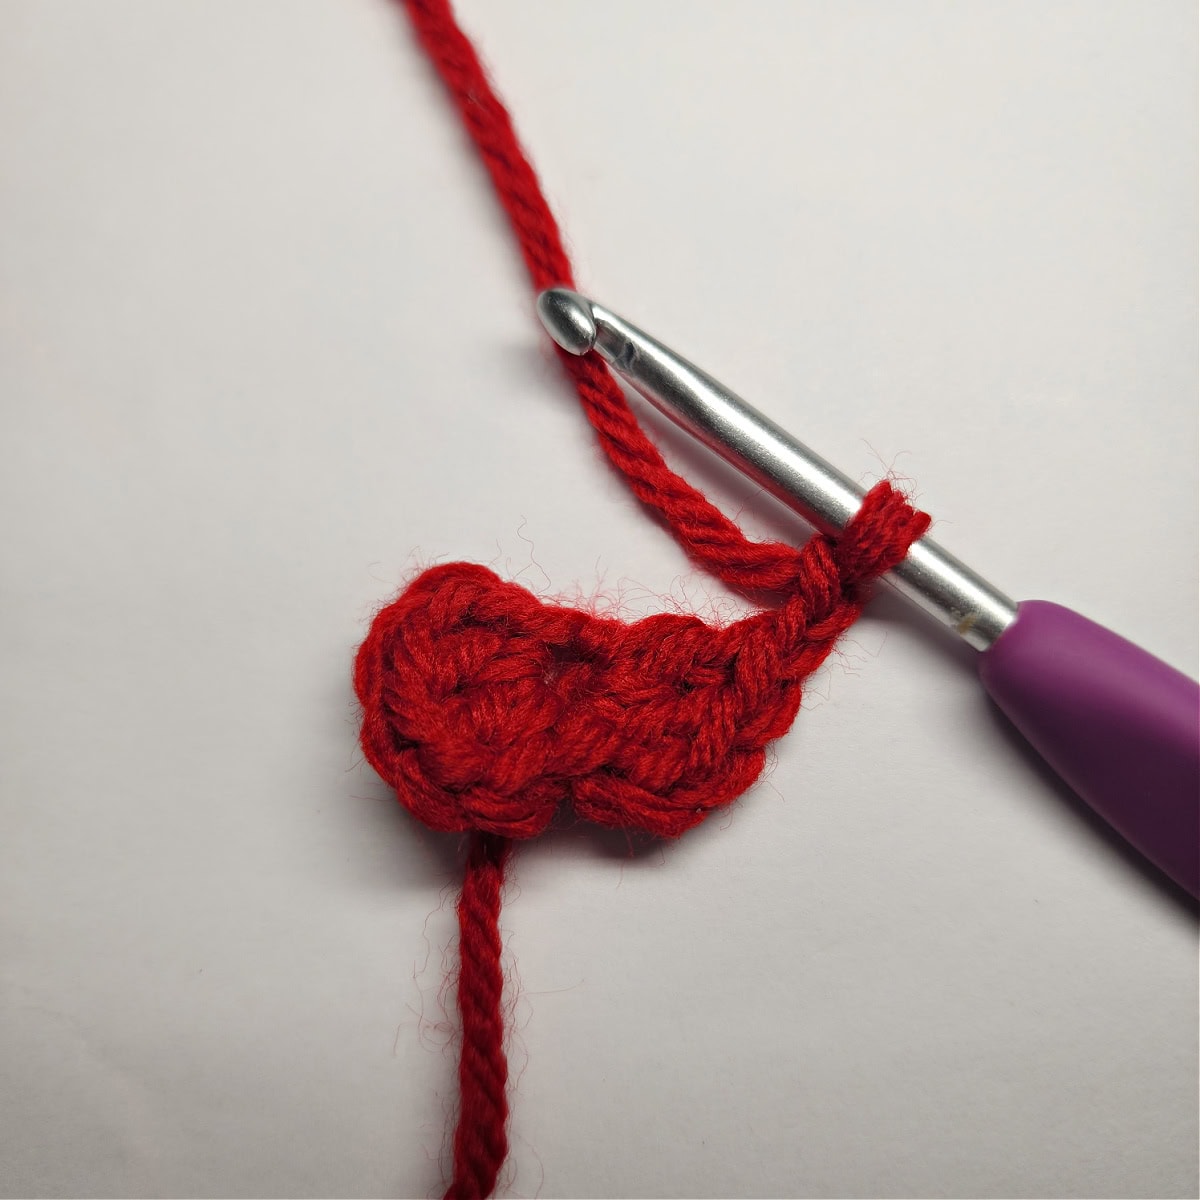
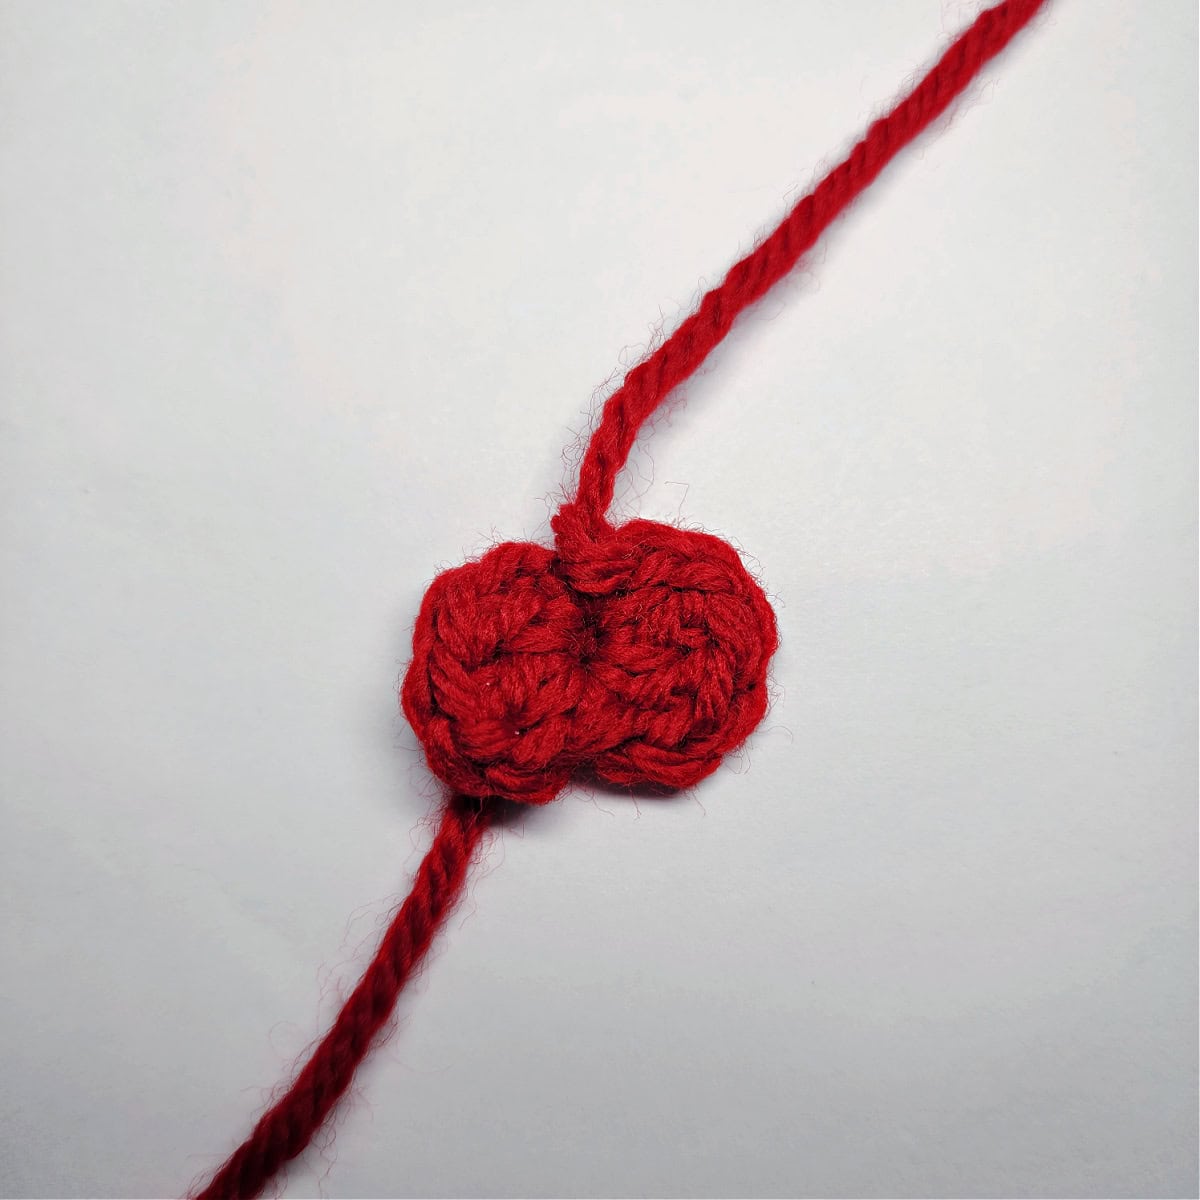
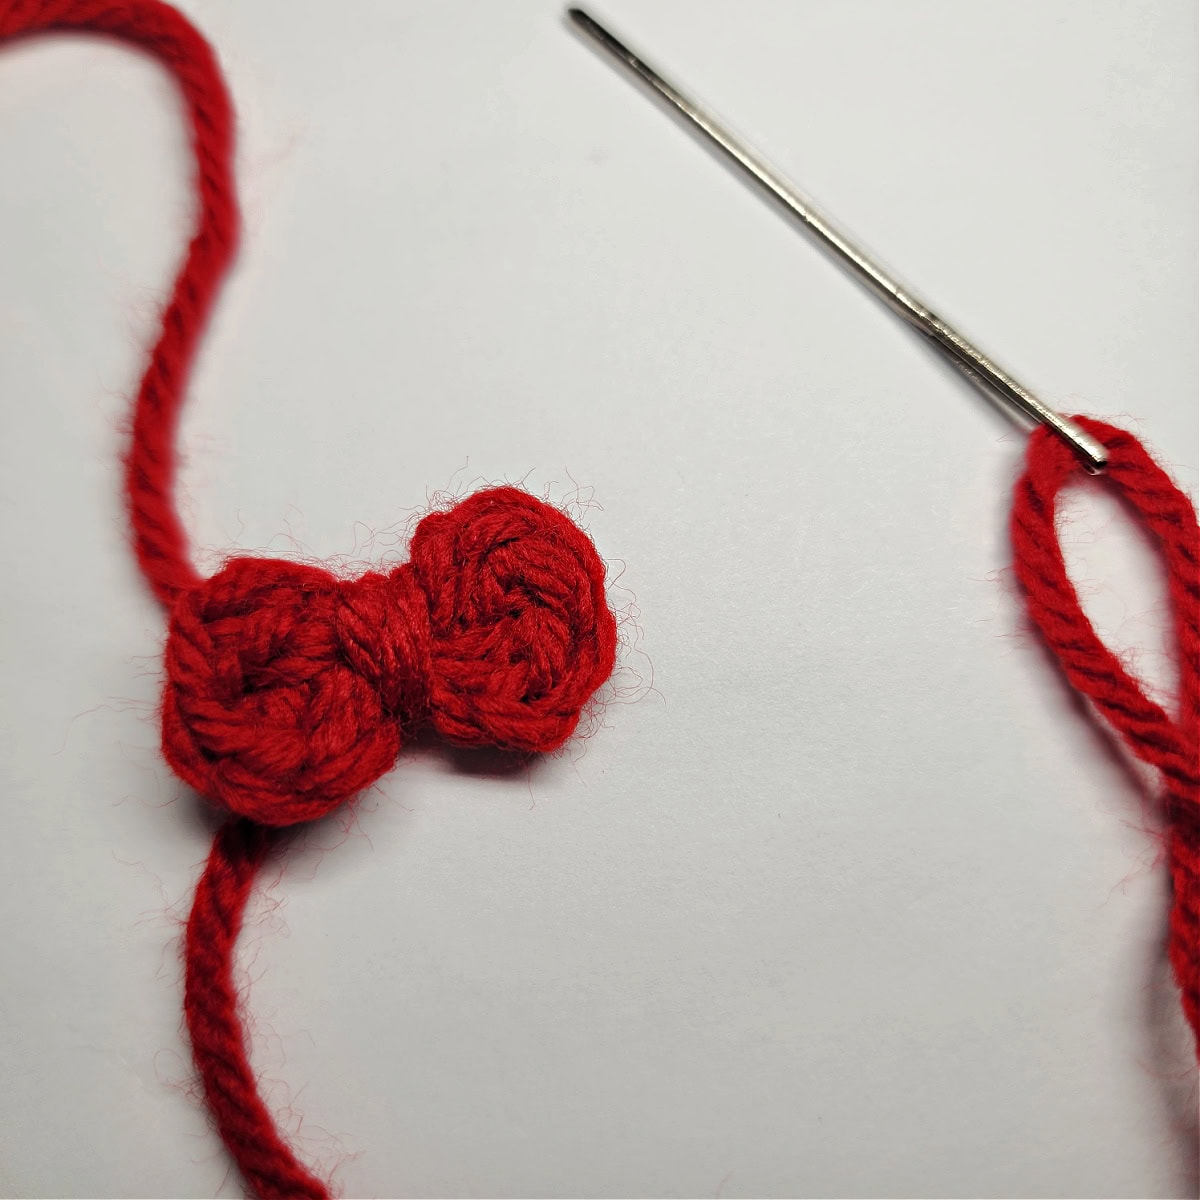
Continue on to Attaching the Bow.
Attaching the Bow
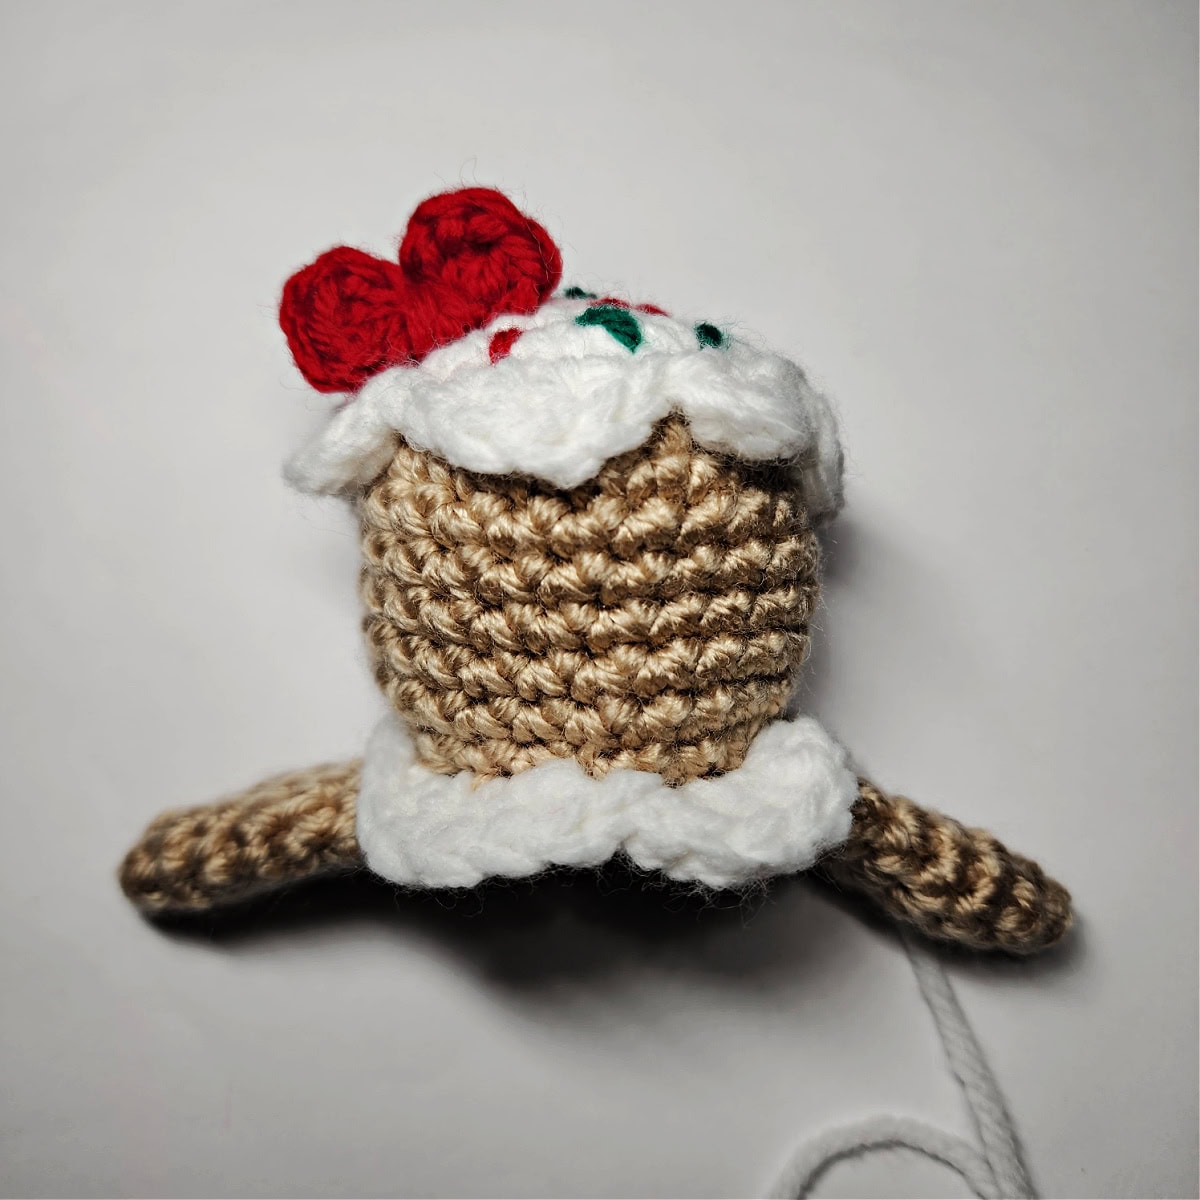
Weave in ends. Continue on to White Trim on Arms.
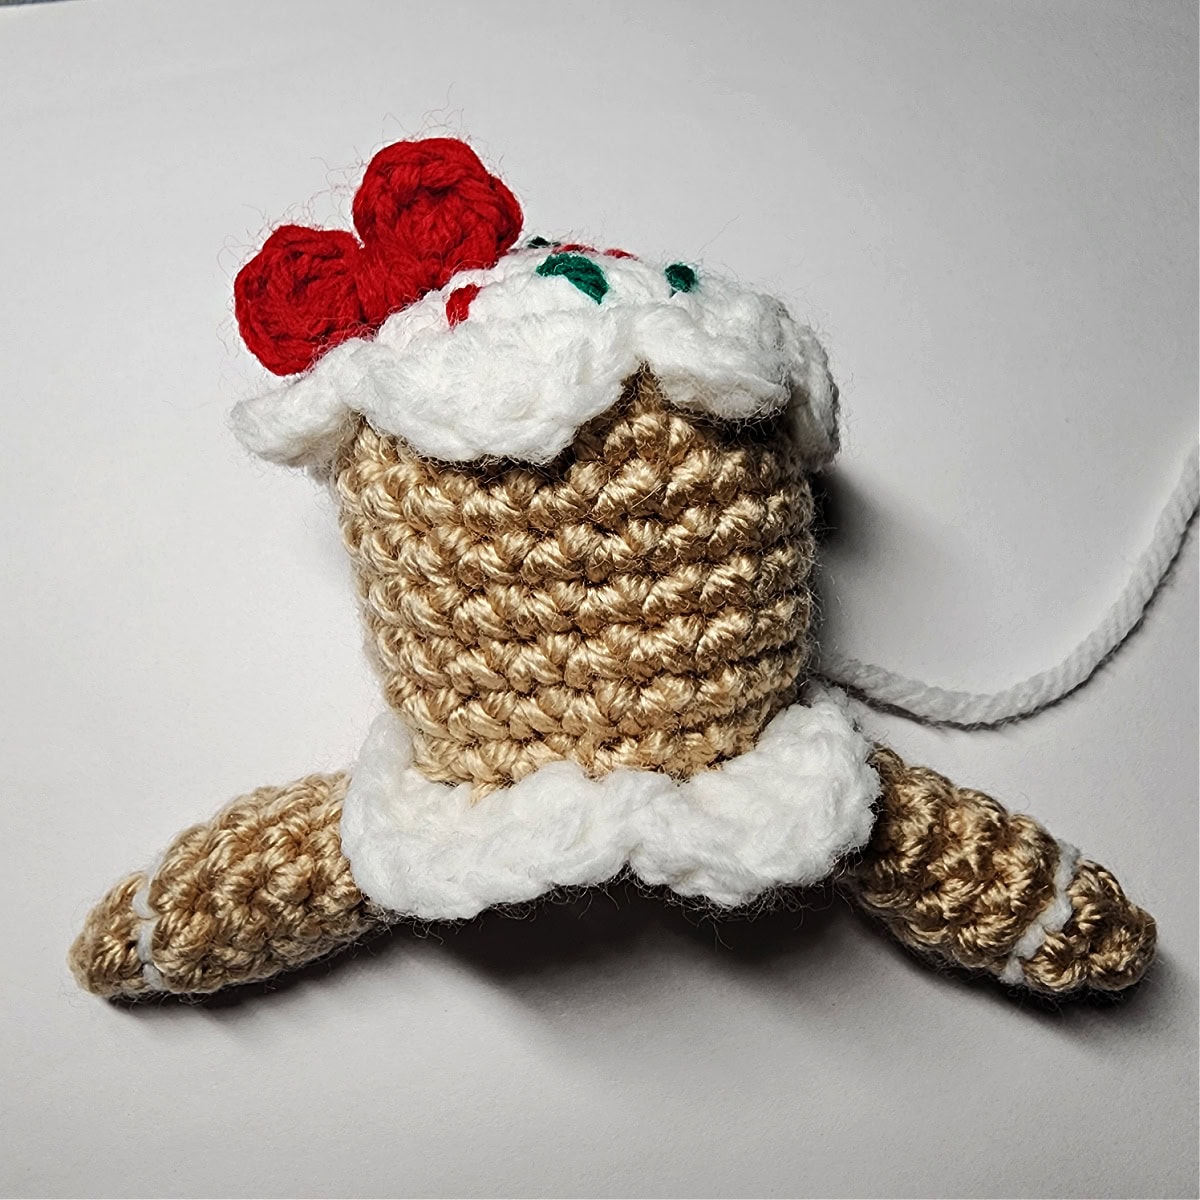
White Trim on Arms
Take a 12″ piece of white yarn and pull apart the plies so that you have two and two. Use two of the plies and a yarn needle to stitch around one of the arms near the wrist.
Facial Features
Eyes
I used (2) 8mm black plastic safety eyes for the Gingerbread Girl. You can also embroider eyes with black thread or yarn.
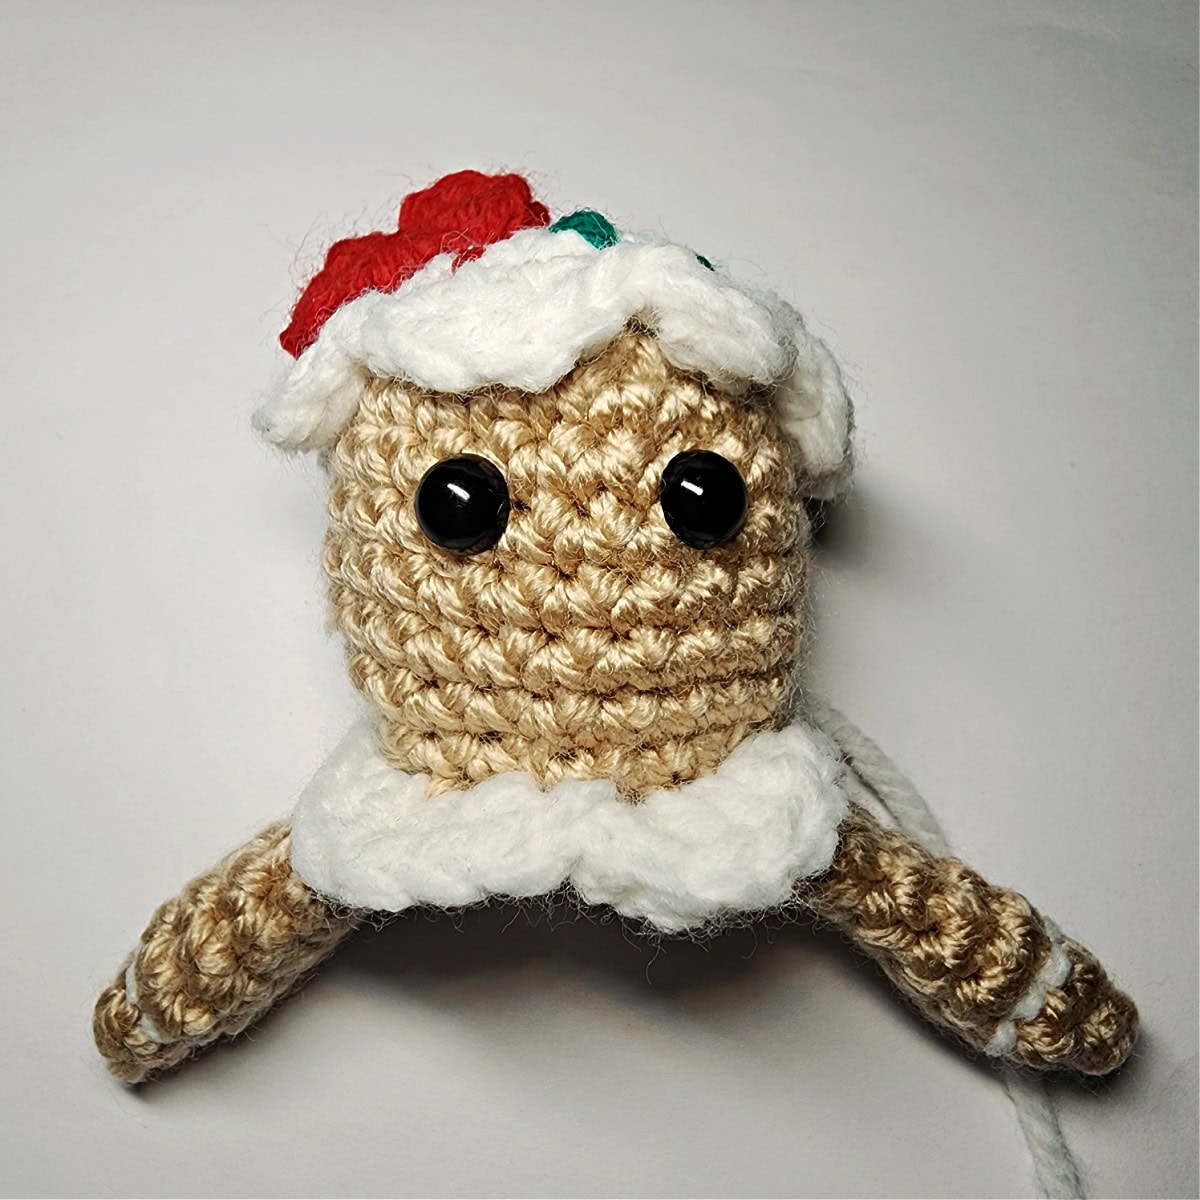
Gingerbread Girl’s Eyelashes
You can either use black thread, or pull apart the plies in a piece of black yarn.
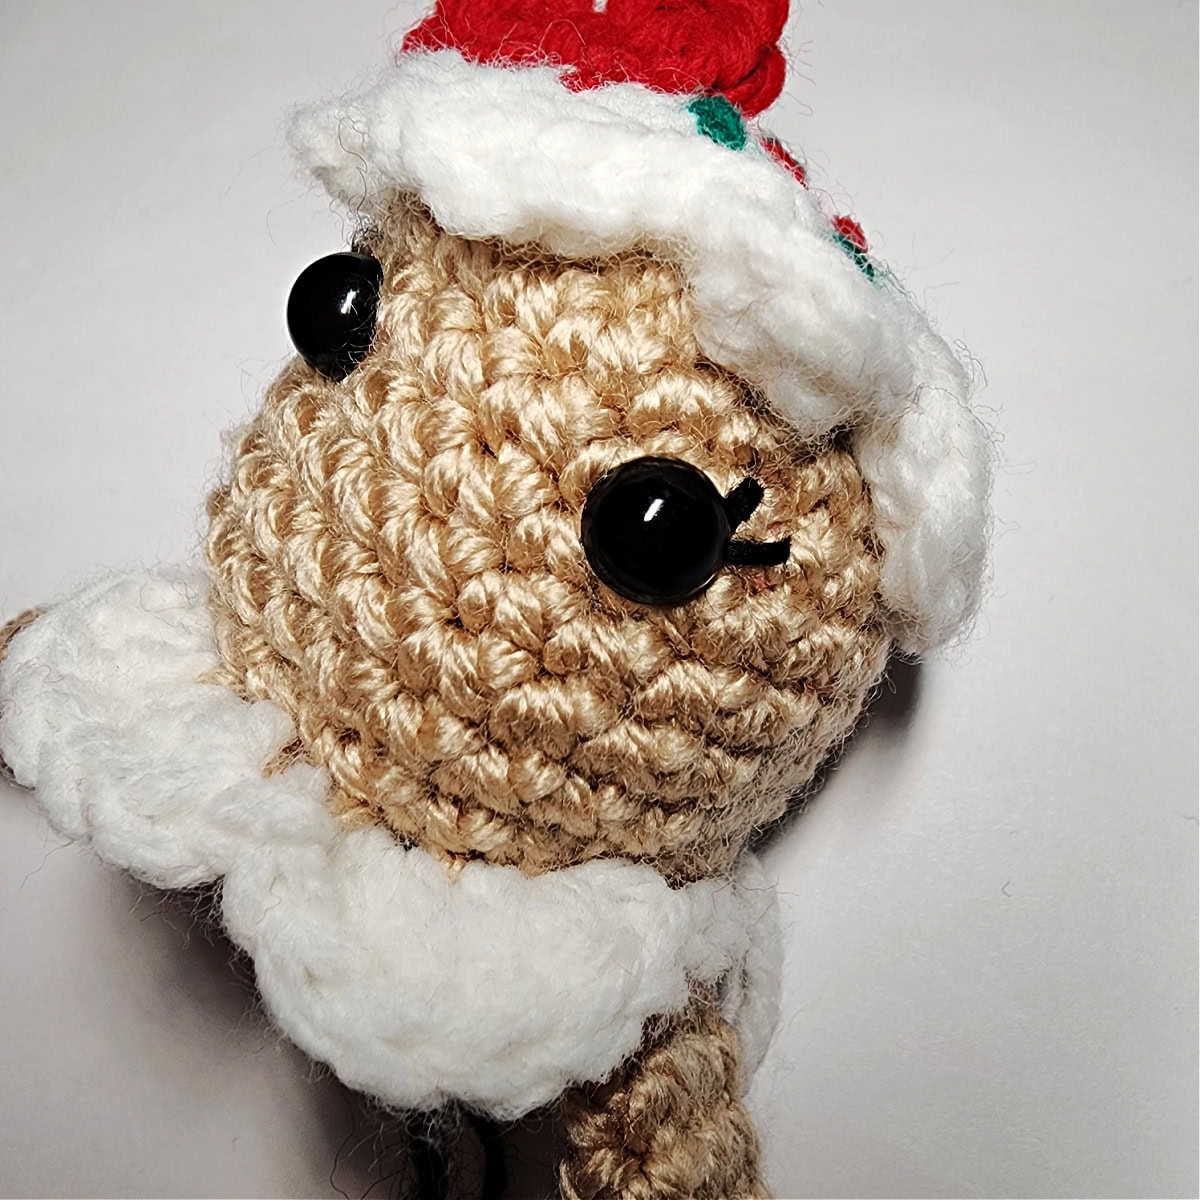
Continue on to Embroider Mouth.
Embroider Mouth
Cut a piece of white yarn 12″ long. With a yarn needle and piece of yarn, embroider a mouth as shown in the photo below. Weave in ends.
Continue on to Cheeks.
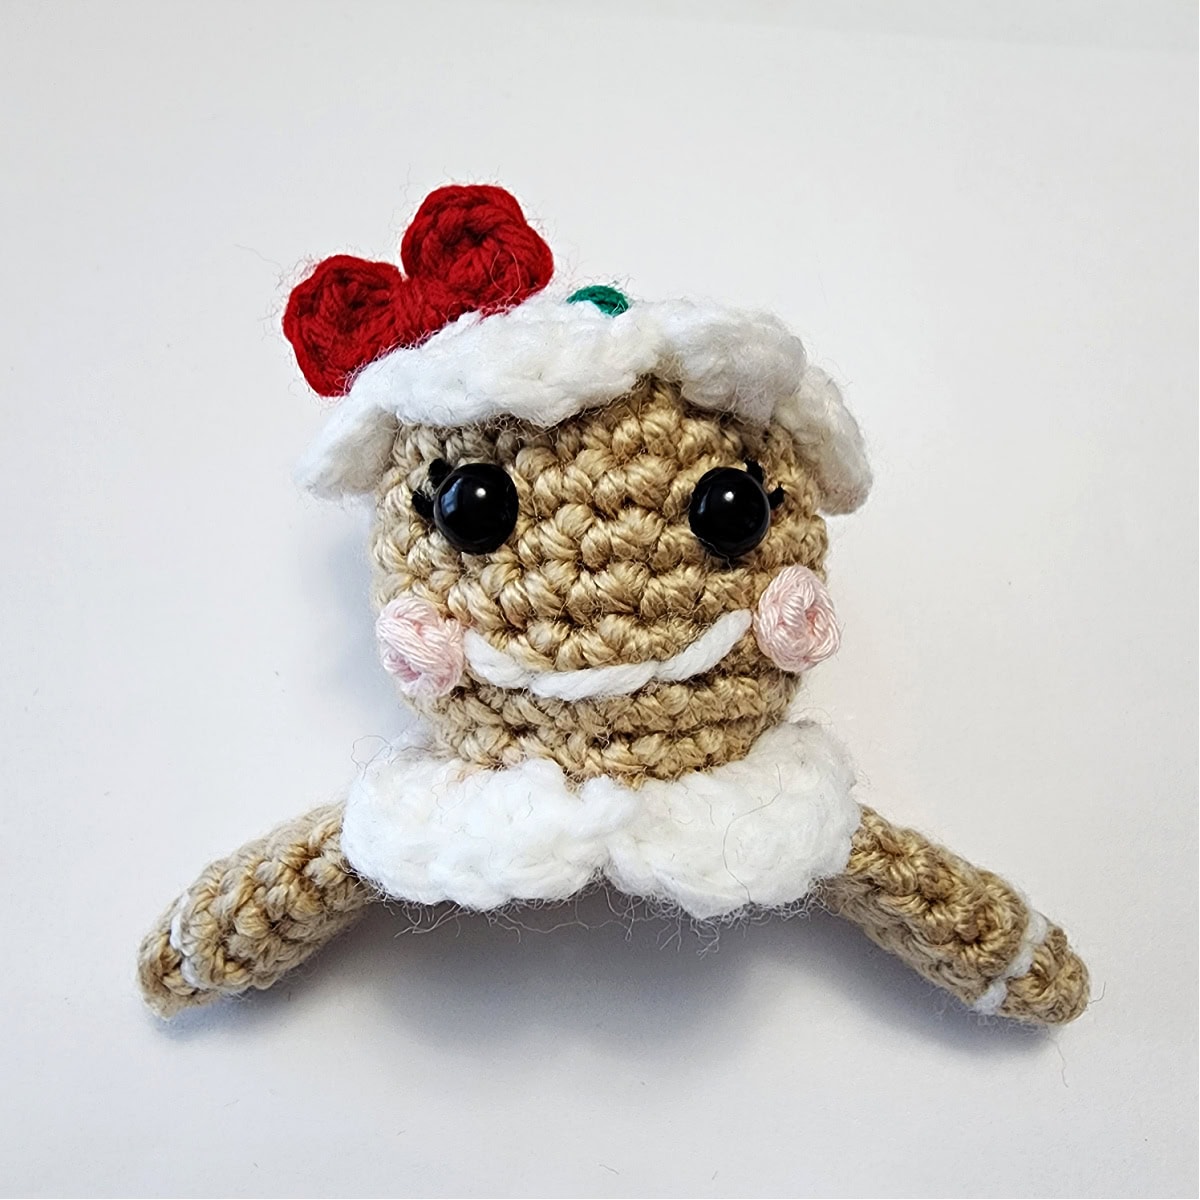
Cheeks (Make 2)
You can use blush, embroider cheeks, or crochet small circles and sew them on. I chose to crochet them.
Rnd 1: With pink yarn & a 4.00mm crochet hook, ch 2, work 2 sc into the 2nd ch from your hook. (2 sts)
Fasten off with the Invisible Join Technique (this helps keep the circle round), leaving a tail of yarn to attach to the face. Make a second cheek, then continue on to Attaching Cheeks.
Attaching Cheeks
With tail of yarn & a yarn needle, attach the cheeks to the Gingerbread Girl’s face at each end of her mouth.
Weave in ends. Continue on to Hanging Loop.
Hanging Loop
With any color yarn & a 4.00mm crochet hook, create a chain that is 6″ long. Join with a sl st to the 1st ch. Fasten off, leaving a tail of yarn. With a yarn needle & tail of yarn, sew the hanging loop onto the top of the Gingerbread Girl’s Head. Weave in ends. Continue on to Attaching Gingerbread Girl to the Jingle Bell.
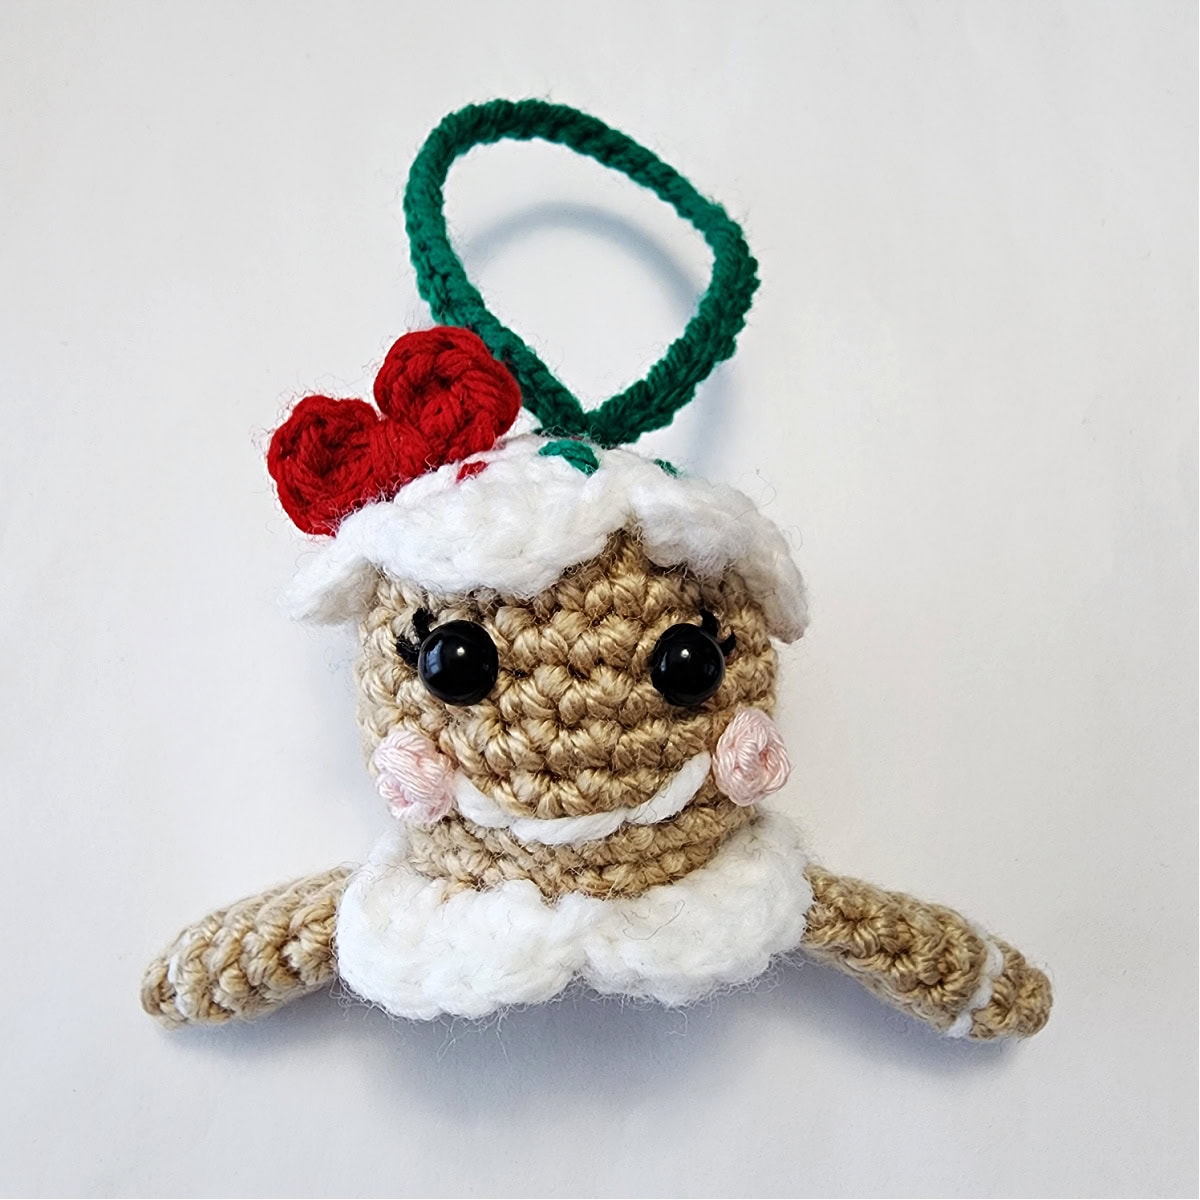
Hanging Loop Alternative
You could also use a 6″ piece of ribbon as a hanging loop, instead. Then attach it onto the top of Gingerbread Girl’s Head, with a needle and thread.
Continue on to Attaching Gingerbread Girl to the Jingle Bell.
Attaching Gingerbread Girl to the Jingle Bell
If you did not use your ends to stuff your Gingerbread Girl, or you feel she needs more stuffing, add batting to her head or more yarn scraps.
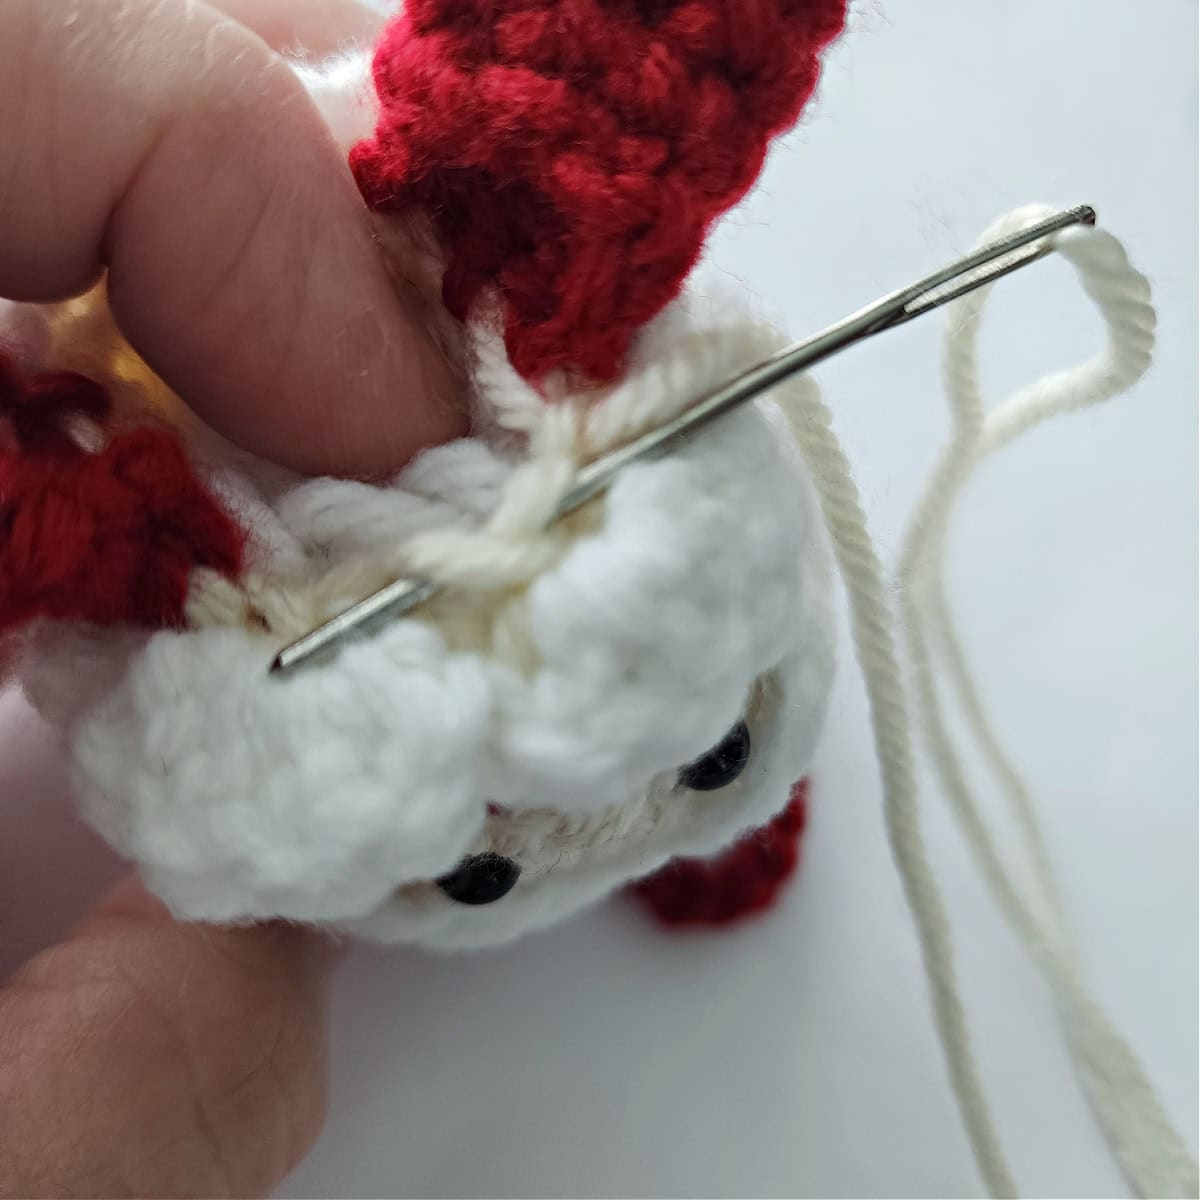
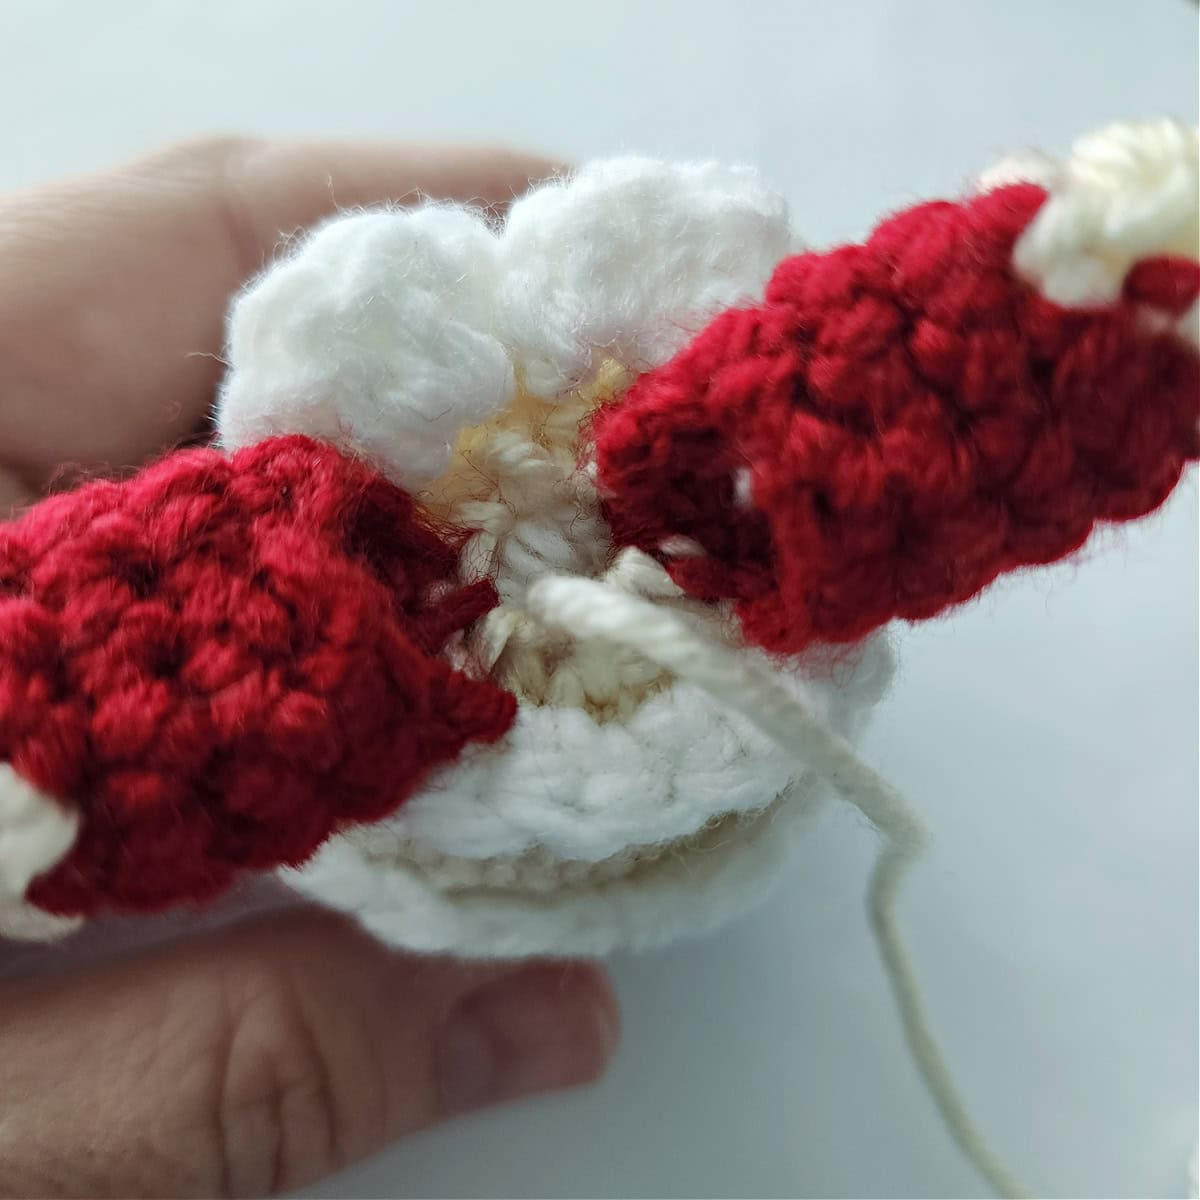
Do not fasten off. Use the same tail of yarn to secure the Gingerbread Girl to the top loop of the jingle bell. Once she’s snug, secure the yarn, fasten off and weave in ends.
If you’ve chosen to use a bauble to finish your Gingerbread Girl, you will need to secure her to the top of the bauble with hot glue.
Jingle Bell Alternatives
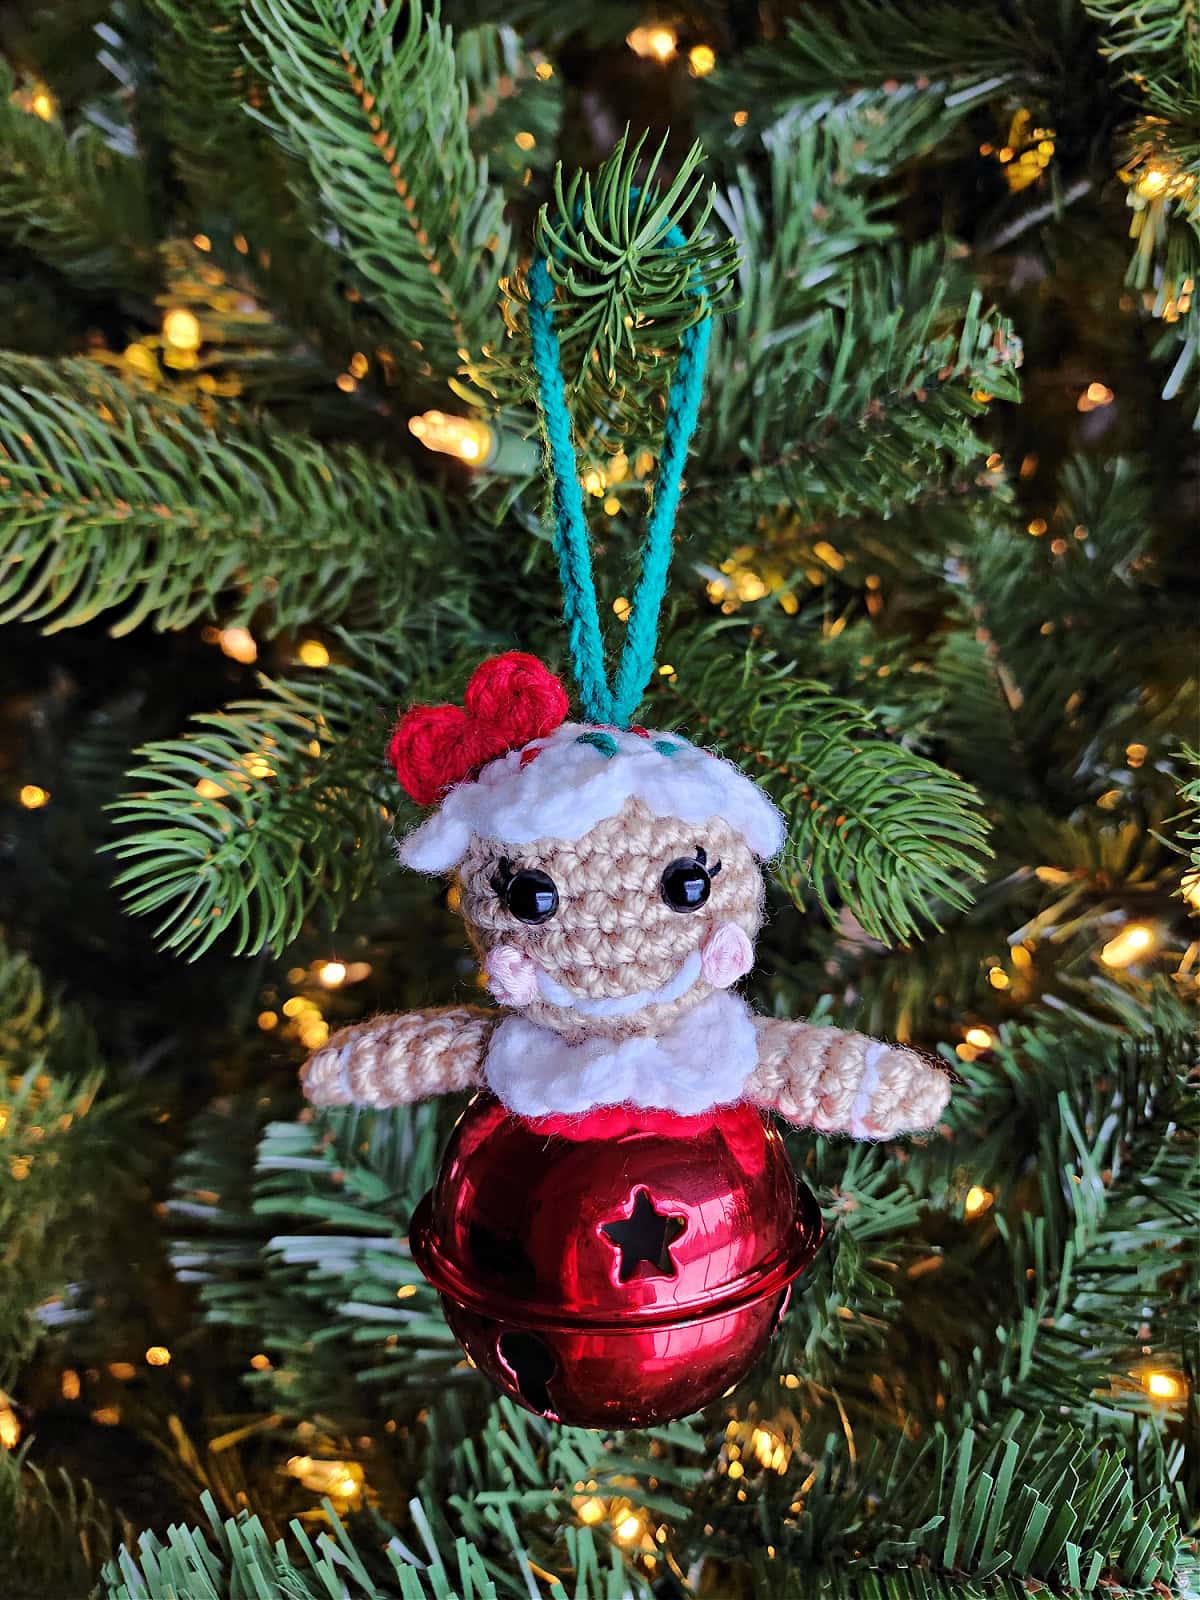
Related: If you enjoyed making this Gingerbread Girl Christmas ornament, I think you’ll love the Mrs. Claus Jingle Bell Ornament and Girl Elf Jingle Bell Ornament.
I Made It! Now What?
Pin this post! Save this Crochet Girl Elf jingle bell ornament to your Pinterest boards so that you can come back and make it again.
Leave a comment below: We love to hear your feedback.
Share Your Finished Projects on Facebook or Instagram: I love to see your finished projects! Share with us on social media and tag me @acrochetedsimplicity or use the hashtag #ACrochetedSimplicity so I can find your posts.
Join us in the Facebook Community Group!
I hope you’ve enjoyed this crochet gingerbread girl jingle bell ornament and will make many crocheted Christmas gifts!
Come share your finished projects with us in the A Crocheted Simplicity Crochet Community Group on Facebook. Join us for fun community events such as crochet alongs, join in on crochet conversations, ask questions, get advice, and share your love for crochet!

More Crochet Christmas Tree Decorations You’ll Love
- Snowman Candy Cane Holder Ornament
- Santa Boot Ornament
- Gingerbread Boy & Girl Candy Cane Holder
- Cookies for Santa Ornament
- Poinsettia Christmas Tree Skirt
More Gingerbread Decor
Do you LOVE Gingerbread Decorations? We have a few other free crochet patterns for gingerbread decor you may love!
