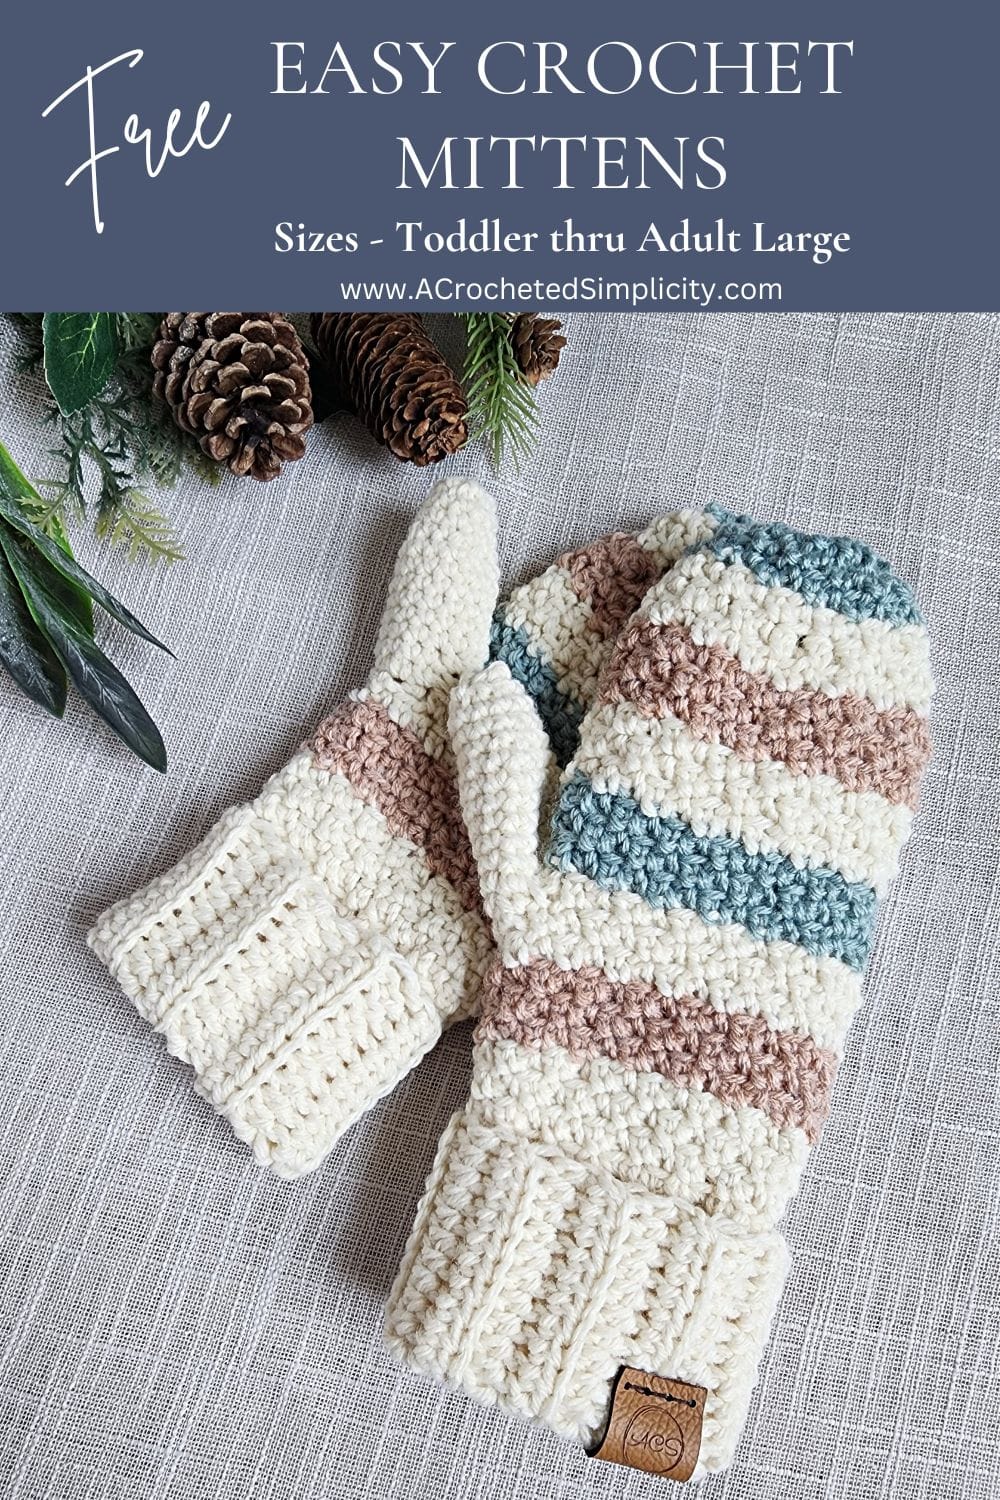
Easy Crochet Mitten Pattern
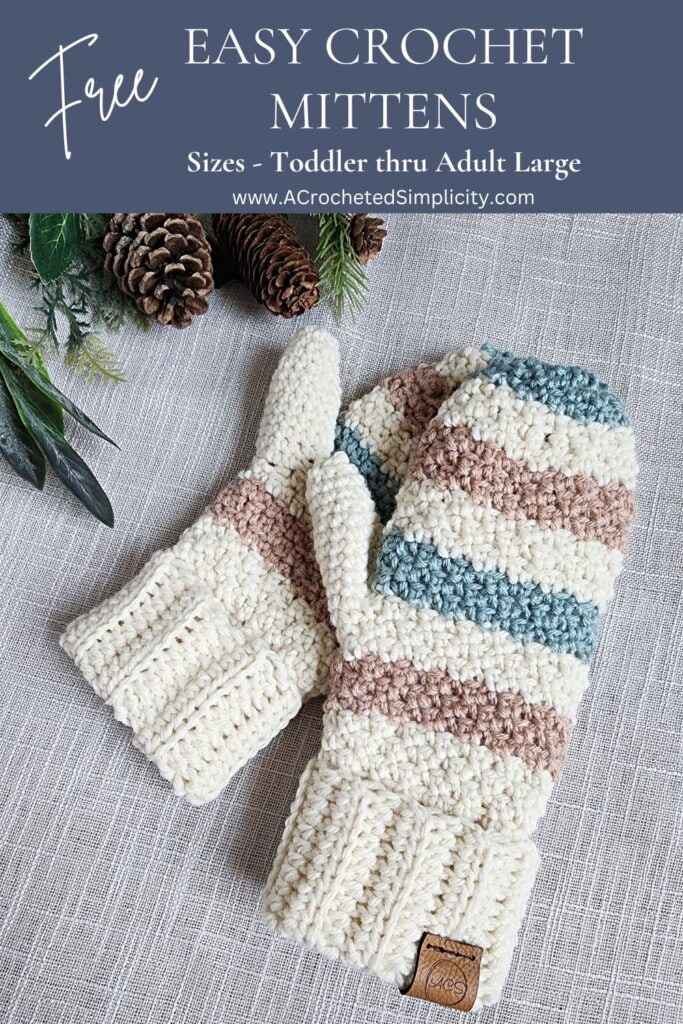
Create cozy and stylish winter accessories with this crochet mitten pattern, perfect for beginners and seasoned crocheters alike.
With clear step-by-step instructions and helpful tips, you’ll create beautifully textured mittens in no time. Perfect for those looking to enhance their crochet skills or make quick and easy holiday gifts, this crochet mitten pattern is a must-make!
You’ll find the free crochet pattern for mittens below, or an ad-free print friendly PDF (including all photo tutorials) on Ravelry, or Etsy (aff).
Easy Crochet Mitten Pattern
As the chilly months approach, it’s the perfect time to cozy up with some yarn and a crochet hook to create warm, handmade winter accessories. Handmade mittens are not only practical but also add a personal touch to your winter wardrobe. This easy crochet mitten pattern is perfect for beginners and experienced crocheters alike, allowing you to create a stylish pair of mittens that provide both comfort and warmth.
Traditional crochet mittens often require separate pieces to be sewn together—such as the thumb, hand, and cuff. However, this mitten pattern is a one-piece mitten pattern, the entire mitten is crocheted seamlessly! This makes the project quicker to complete and creates a cleaner, less-bulky finish. It’s perfect for both beginners and experienced crocheters who prefer a no-sew mitten pattern.
And because they’re made entirely in one piece, without the need for multiple parts and complicated sewing, they work up much more quickly than mittens with seams. This makes them perfect for making and donating to various charities, shelters, schools, and others in need.
How to Crochet a Mitten
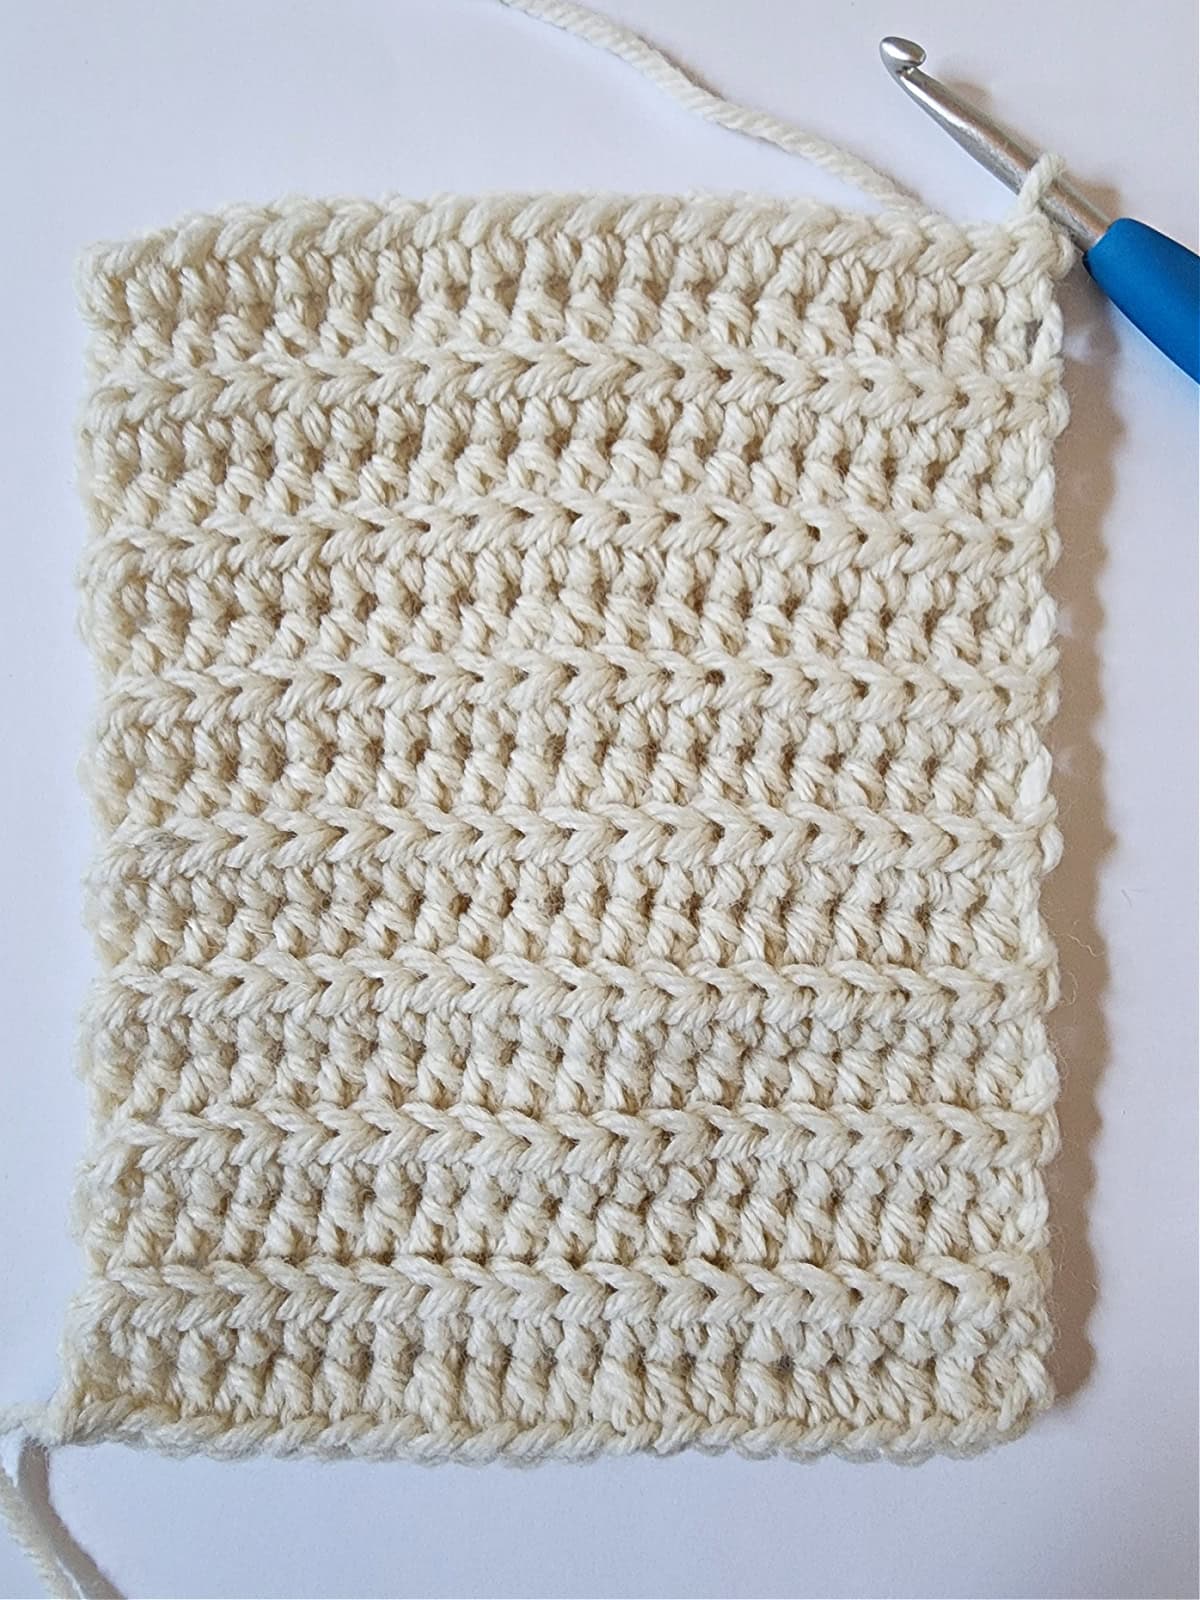
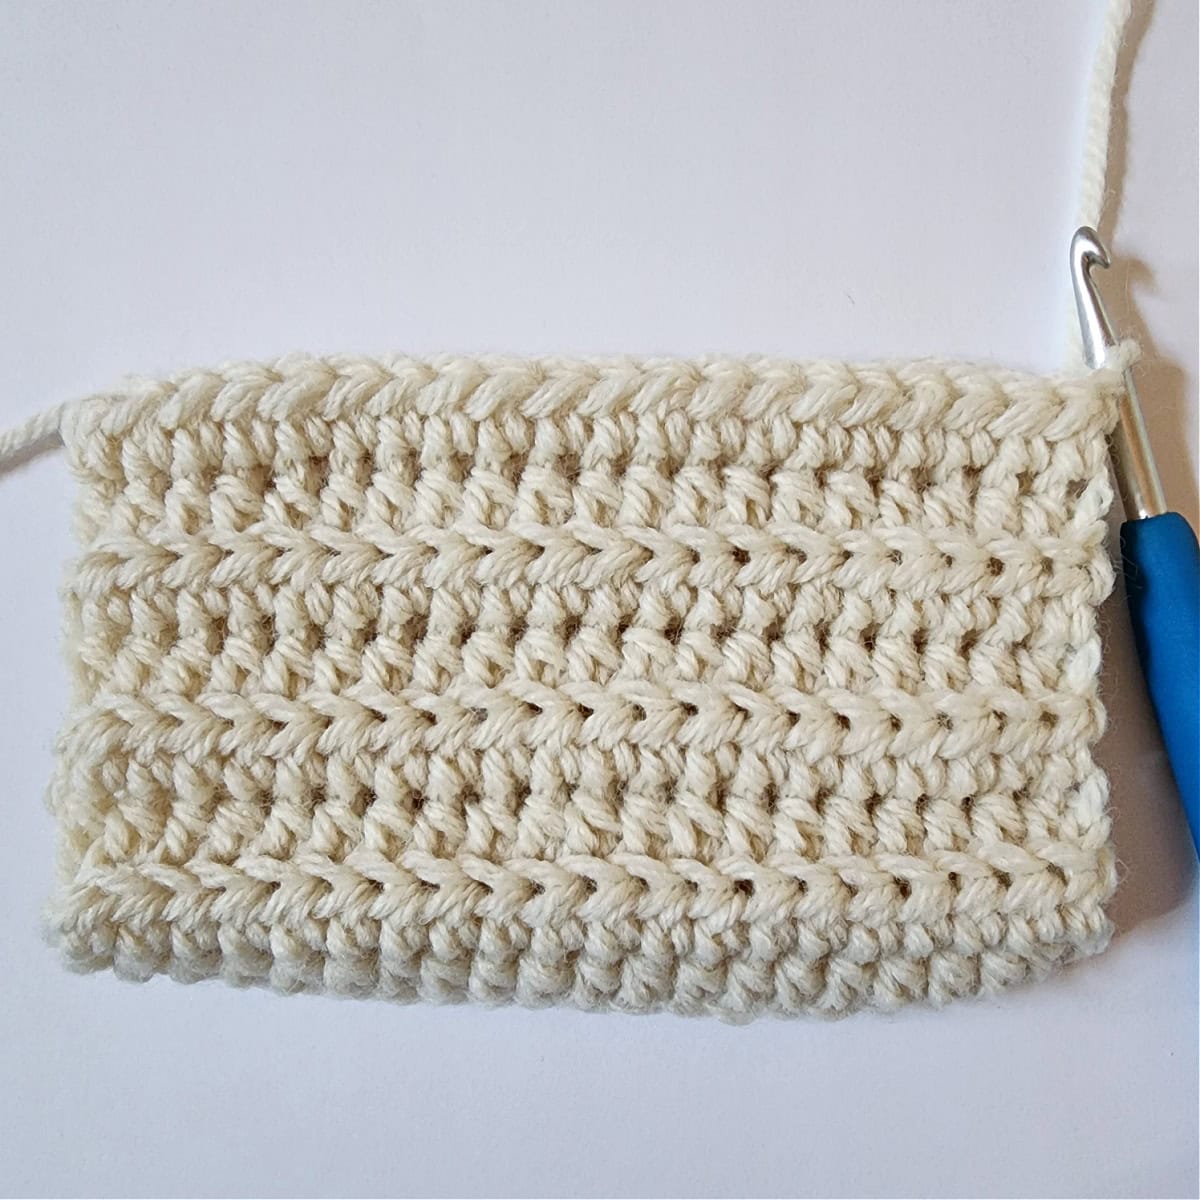
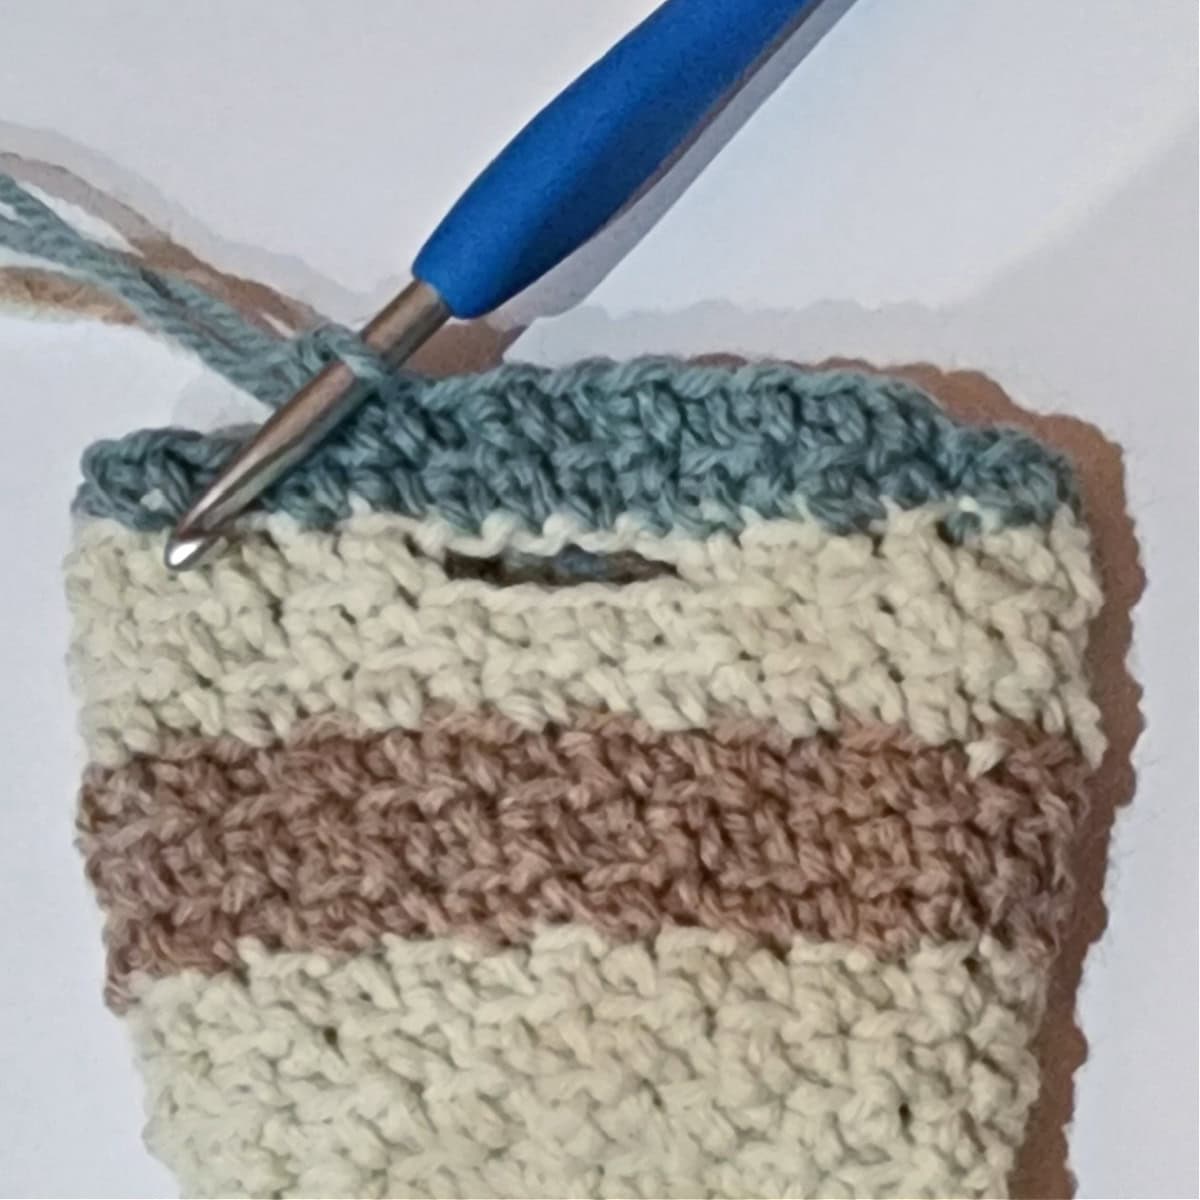
Start with the Cuff: You’ll begin by crocheting the cuff of the mitten. This one-piece mitten pattern start swith a ribbed cuff, made by crocheting in rows using half double crochet in the back loop only (BLO). This gives the cuff its stretchy, ribbed texture.
Join in the Round: Once the cuff is long enough to fit comfortably around your wrist, you’ll join the ends together to form a circle. From this point on, you’ll be crocheting in rounds.
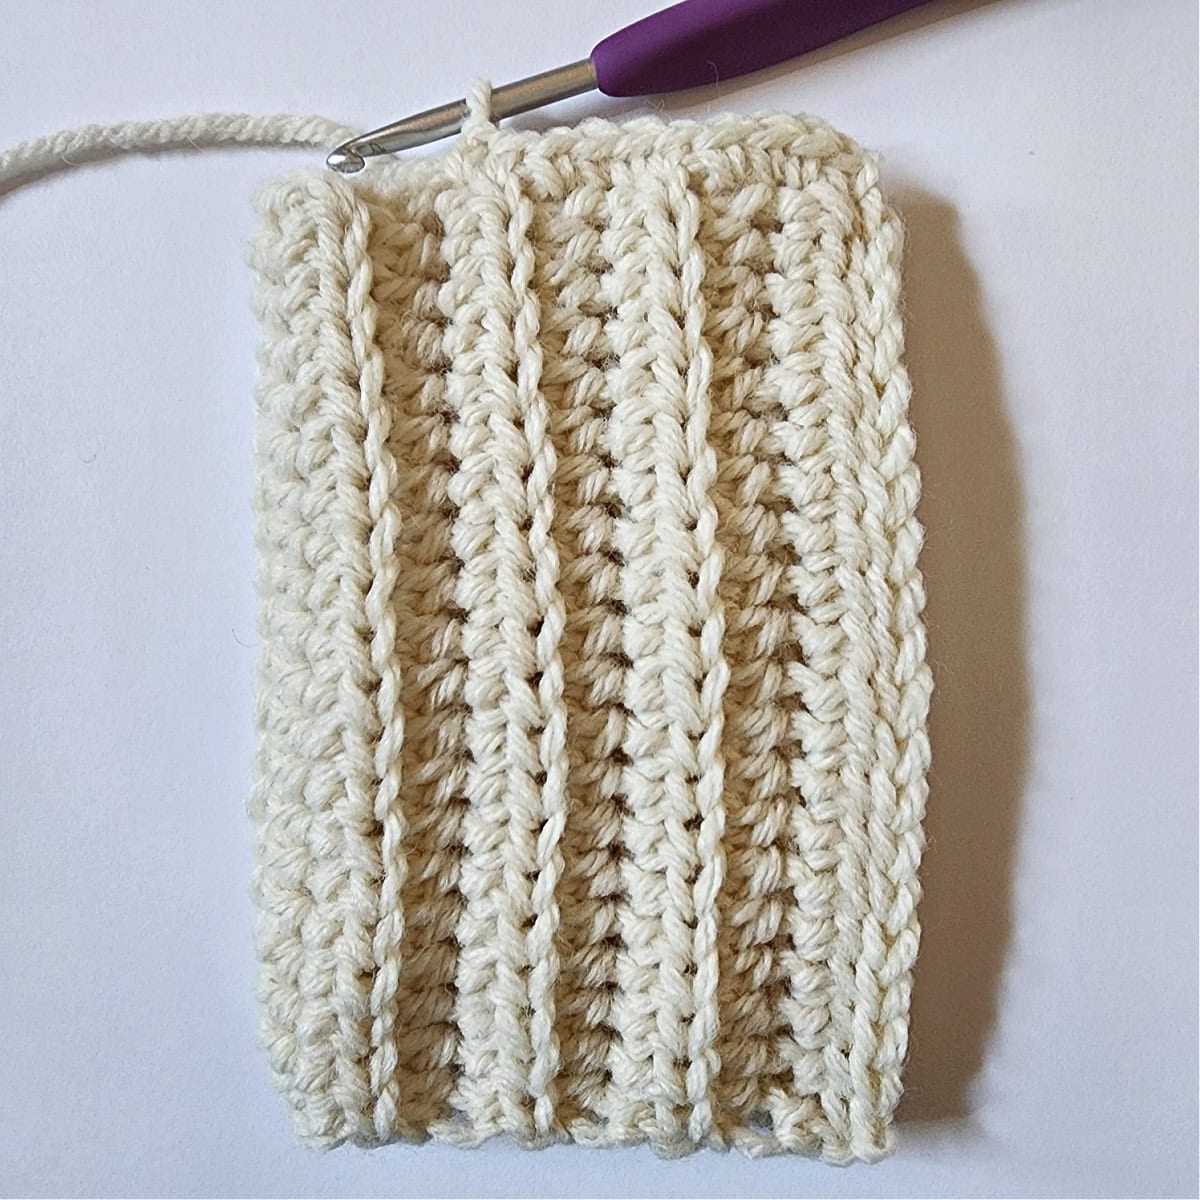
Crochet the Body of the Mitten: After joining the cuff, you’ll crochet the main body of the mitten. This section is worked by alternating extended single crochet stitches in the front loop only and the back loop only.
Create the Thumb Hole: One of the defining features of one-piece mittens is the thumb hole. You’ll crochet a few chain stitches to leave a gap for the thumb, and then continue working the body of the mitten above the hole.
Shaping the Top: As you near the top of the mitten, you’ll start to decrease your stitches to taper the shape, forming the tip of the mitten. When only a few stitches remain, you’ll fasten off and weave in the ends.
Finishing the Thumb: Go back to the thumb hole and work in rounds to crochet the thumb. This is typically done in a few short rounds, decreasing as you reach the tip. Once finished, fasten off and weave in the ends.
Why Crochet Mittens?
Crochet mittens are a fantastic project for several reasons:
- Quick to Make: Unlike larger projects like blankets or sweaters, mittens can be crocheted in just a couple of hours.
- Perfect for Beginners: With just a few basic stitches, you can create a beautifully finished product.
- Customizable: Choose different yarns, colors, or stitch patterns to create a unique look.
- Practical and Stylish: Keep your hands warm while showing off your handmade skills.
- Perfect for Mitten Drives: Because they work up quickly, they’re a perfect project to make and donate to local charities, shelters, schools and more.
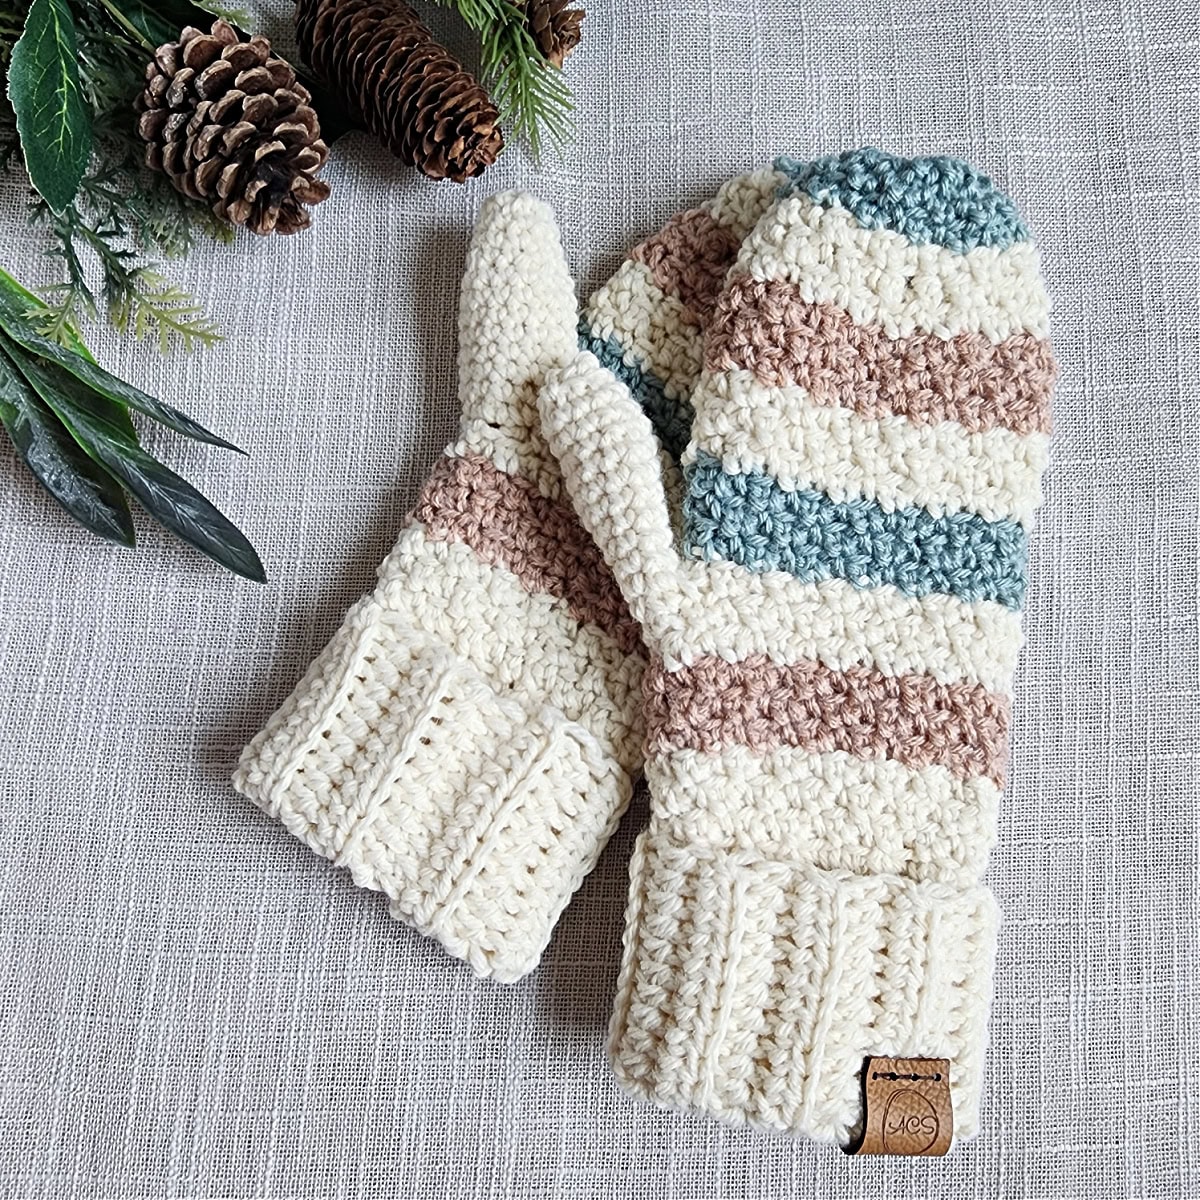
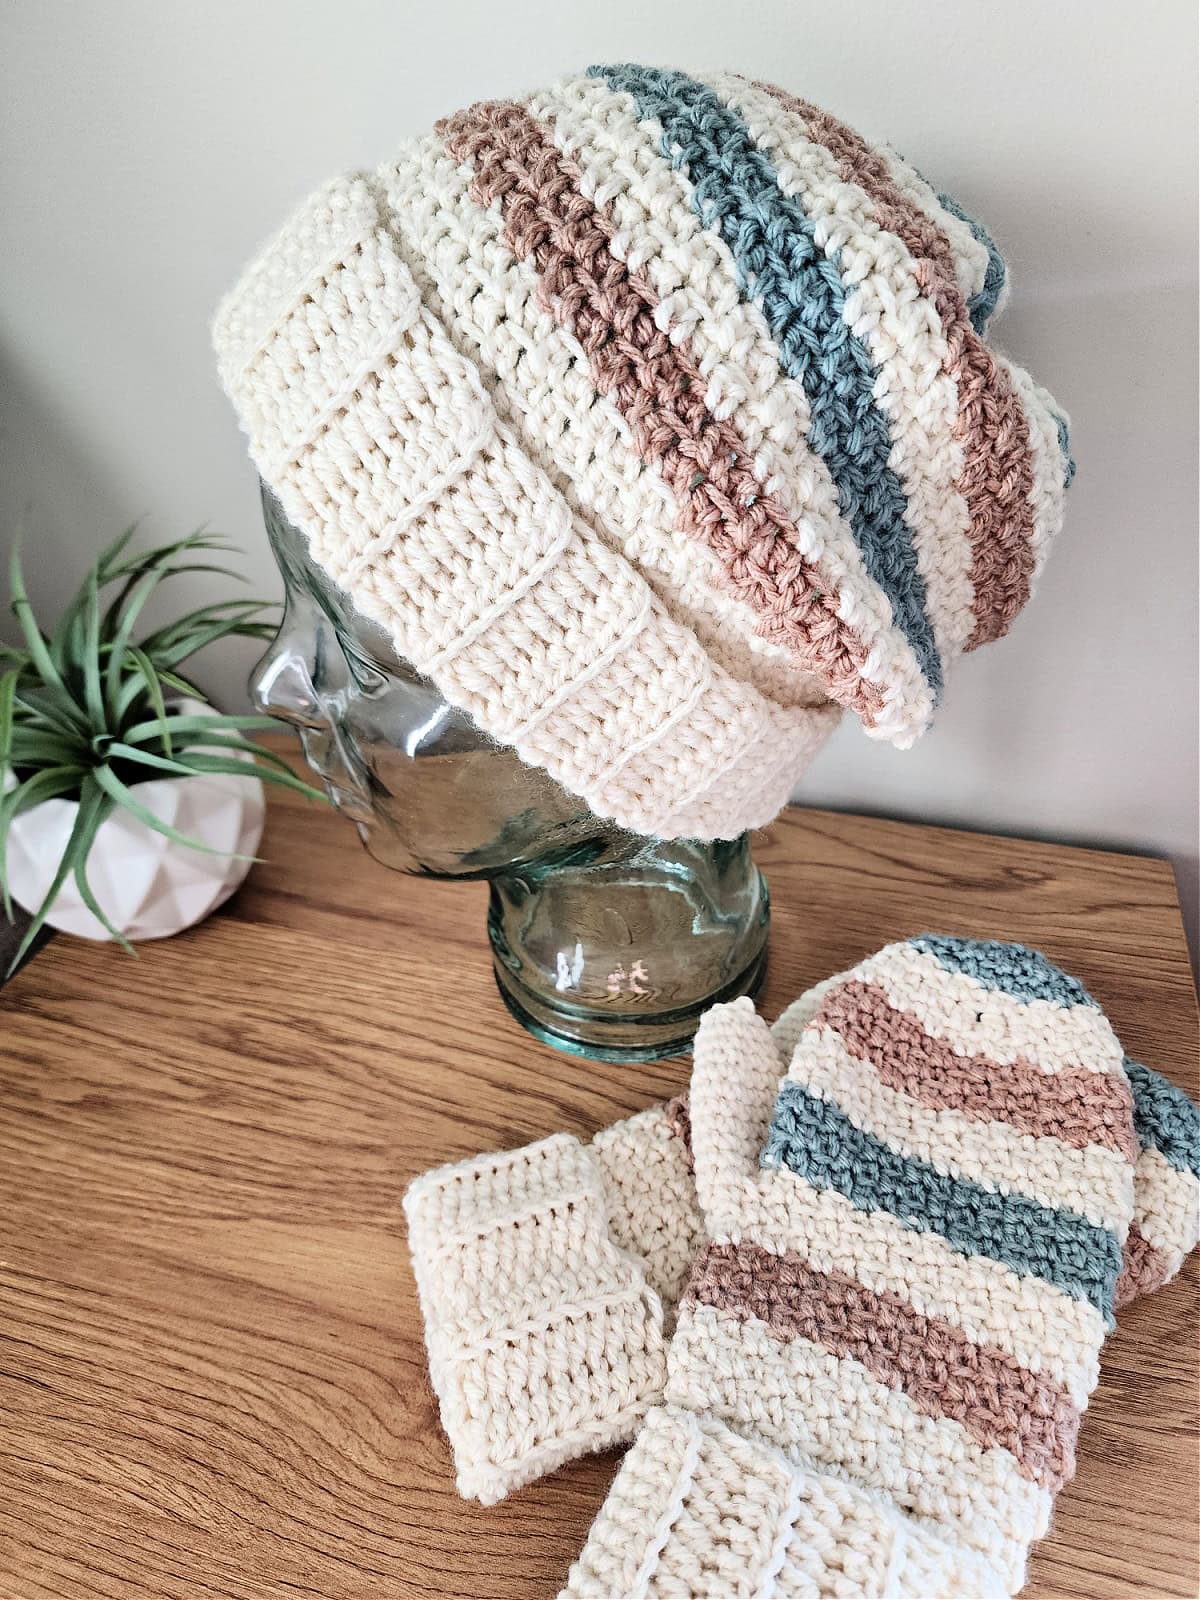
Matching Set: The matching slouchy beanie & pocket scarf compliment these cute mittens for a fun hat, mitten, and scarf set that’s perfect for gifting!
Yarn
I chose a worsted weight yarn because I wanted to make sure my handmade mittens were warm enough to wear while playing in the snow. Crochet mittens made with worsted weight yarn are warm and cozy, but not bulky.
I used Lion Brand Yarns Wool Ease for this crochet mitten pattern. It is, hands down, one of my favorite worsted weight yarns!
Wool Ease is a worsted weight / 4, acrylic wool blend yarn and it’s currently available in 31 fabulous colors! You’re sure to find the perfect colors for your cozy crochet mittens.
There are several other worsted weight yarns that would make great substitutions. Lion Brand Wool Ease Recycled, Lion Brand Heartland, Lion Brand Pound of Love, Lion Brand Vanna’s Choice… just to name a few.
I think this crochet mitten pattern would look great in an ombre yarn too!
Self-Striping Yarn: If you choose a self-striping yarn, your stripes will run vertically on the mitten cuff and horizontally on the hand section of the mitten.
Solid or Stripes
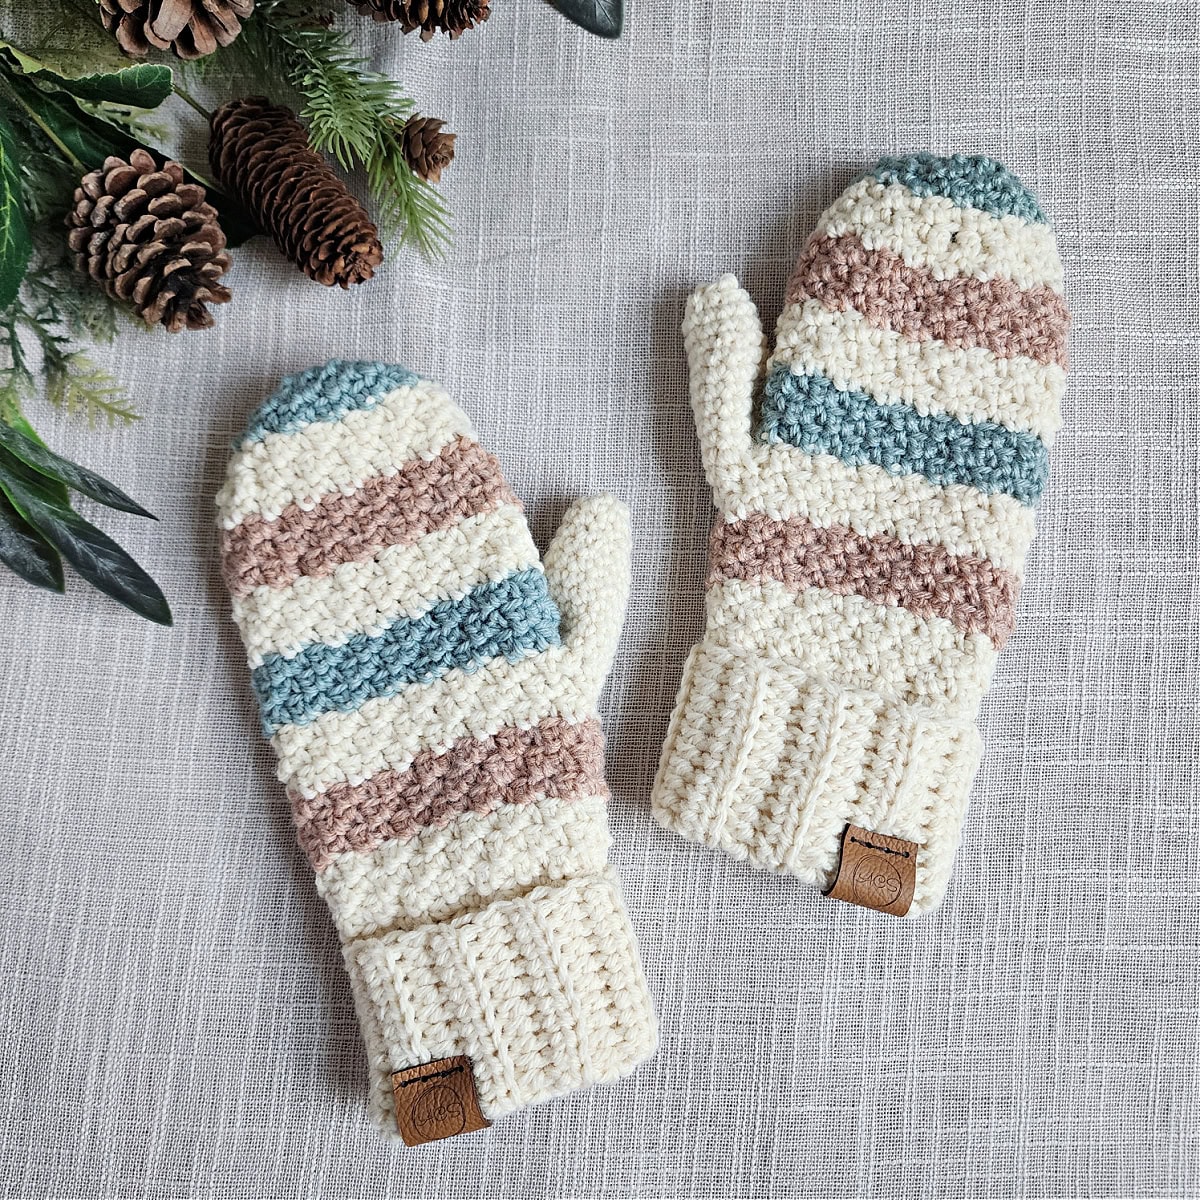
The color combinations are endless for these easy crochet mittens. Keep it simple and make them in one solid color, or add a pop of color with wide crochet stripes.
For the toddler and child sizes, stripes are created by alternating two rounds per color.
For the women’s and men’s mittens, stripes are created by alternating three rounds per color.
Tip! To keep from having several ends to weave in from the color changes of the stripes, instead of fastening off, simply carry the unused yarn up with you until you need it again.
FREE CROCHET MITTEN PATTERN
The crochet mittens pattern is free below, but if you love to work offline, I’ve got a couple other great options for you.
Purchase the ad-free, printable PDF, including all photo tutorials, on Ravelry, or on Etsy (aff).
Purchase the 3-Piece Beanie, Mittens & Scarf Set (aff): Lion Brand has a full crochet kit of the matching mittens, beanie, and pocket scarf, available on their website. The crochet kit includes your choice of colors and a digital copy of the crochet patterns.
Save this pattern to your Ravelry favorites.
Subscribe to my YouTube Channel!
This post contains affiliate links.
Materials
- Yarn: Worsted Weight / 4; Lion Brand Wool Ease was used for the mittens shown in the photos.
- Refer to the Size Chart below for exact yardage for the size you’re making.
- Main Color (fisherman) – 88 – 170 yards
- CA: 20 – 40 yards
- CB: 20 – 40 yards
- Crochet Hook: H/8/5.00mm; or size needed to obtain gauge
- Scissors
- Yarn Needle
Experience Level
- Easy
Gauge
- Cuff in BLO hdc: 16 sts = 4″; 8 rows = 3.25″
- Body of Mitten in alternating FLO / BLO ext sc: 10 sts = 2.75″; 10 rows = 3″
Sizes
- Toddler, Child, Women (Adult Small), Men (Adult Large)
- See Size & Yardage Chart below.
Abbreviations (U.S. Terms)
- ch(s): chain(s)
- st(s): stitch(es)
- sl st(s): slip stitch(es)
- sc: single crochet
- hdc: half double crochet
- ext sc: extended single crochet
- extsc2tog: extended single crochet decrease
- invsc2tog: invisible single crochet decrease
- yo: yarn over
- rep: repeat
- Rnd: round
- BLO: back loop only
- FLO: front loop only
- RS: right side
- WS: wrong side
- MC: Main Color
- CA / CB: Contrasting Colors
- See Special Stitches below
- Join yarn with a standing single crochet
Special Stitches
- Extended Single Crochet (ext sc): Insert hook into stitch indicated, yo, pull up a loop, yo, pull thru 1 loop on hook, yo, pull thru remaining two loops on hook.
- Extended Single Crochet Decrease (extsc2tog): Insert hook into stitch indicated, yo, pull up a loop, yo, pull thru 1 loop on hook, insert hook into next st, yo, pull up a loop, yo, pull thru 1 loop on hook, yo, pull thru remaining loops on hook.
- Invisible Single Crochet Decrease (invsc2tog): Insert hook into the FLO of stitch indicated, insert hook into FLO of next stitch, yo, pull up a loop, yo, pull thru all loops on hook.
- Join yarn with a standing single crochet: Begin with a slip knot on your hook, insert your hook into the stitch or space indicated, yo, pull up a loop, yo and draw thru both loops on hook.
Size Chart & Yardage

Pattern Notes
- Turning chains are not included in stitch count.
- The first stitch of each row is worked into the same stitch as the turning chain.
- I tend to crochet on the tighter side. You may need to go down a hook size (or two) to meet gauge if you crochet on the looser side.
- Yarn Notes: Lion Brand Yarns Wool Ease was used for the sample. Other comparable yarns may be used as long as gauge is met.
- Lion Brand Yarns Wool Ease, worsted weight / 4 yarn, 80% Acrylic / 20% Wool (197 yards / 180 m / 85 g / 3 oz)
- Yarn (See Size & Yardage Chart Above for yardage per size)
- MC / Fisherman (cream): 88 – 170 yards
- CA / Canyon Sunset: 20 – 40 yards
- CB / Succulent: 20- 40 yards
- Sizes are Written Separately: Toddler, Child, Women (Adult Small), Men (Adult Large)
- Crochet Mitten Construction: The ribbed cuff is worked flat and then the edges slip stitched together . The body of mitten is then worked from the edge of the cuff to the fingertip. A thumb is then added. Lastly, fold the cuff down to wear!
- Tip! To keep from having several ends to weave in from the color changes of the stripes, instead of fastening off, simply carry the unused yarn up with you until you need it again.
- Find Personalized Tags for your handmade mittens.
Crochet Mitten Pattern
Mitten sizes are written out separately. Scroll down to the size you’ll be crocheting.
Toddler Size Crochet Mittens
Striped Mittens
To make striped mittens, work the following sections and rows in the following colors:
- MC: Cuff, Prepare Cuff for Body of Mitten, Body of Mitten Rnds 1 – 2, 5 – 6, 9 – 10, 13 – 14
- CA: Body of Mitten Rnds 3 – 4, 11 – 12
- CB: Body of Mitten Rnds 7 – 8, 15 – 16
Toddler Stretchy Mitten Cuff
Row 1 (RS): With MC yarn & a 5.00mm crochet hook, ch 17, working into the back hump of the foundation ch, hdc in the 2nd ch from your hook and in each ch across. Turn. (16 sts)
Rows 2 – 12: Ch 1, BLO hdc in each st across. Turn. (16 sts)
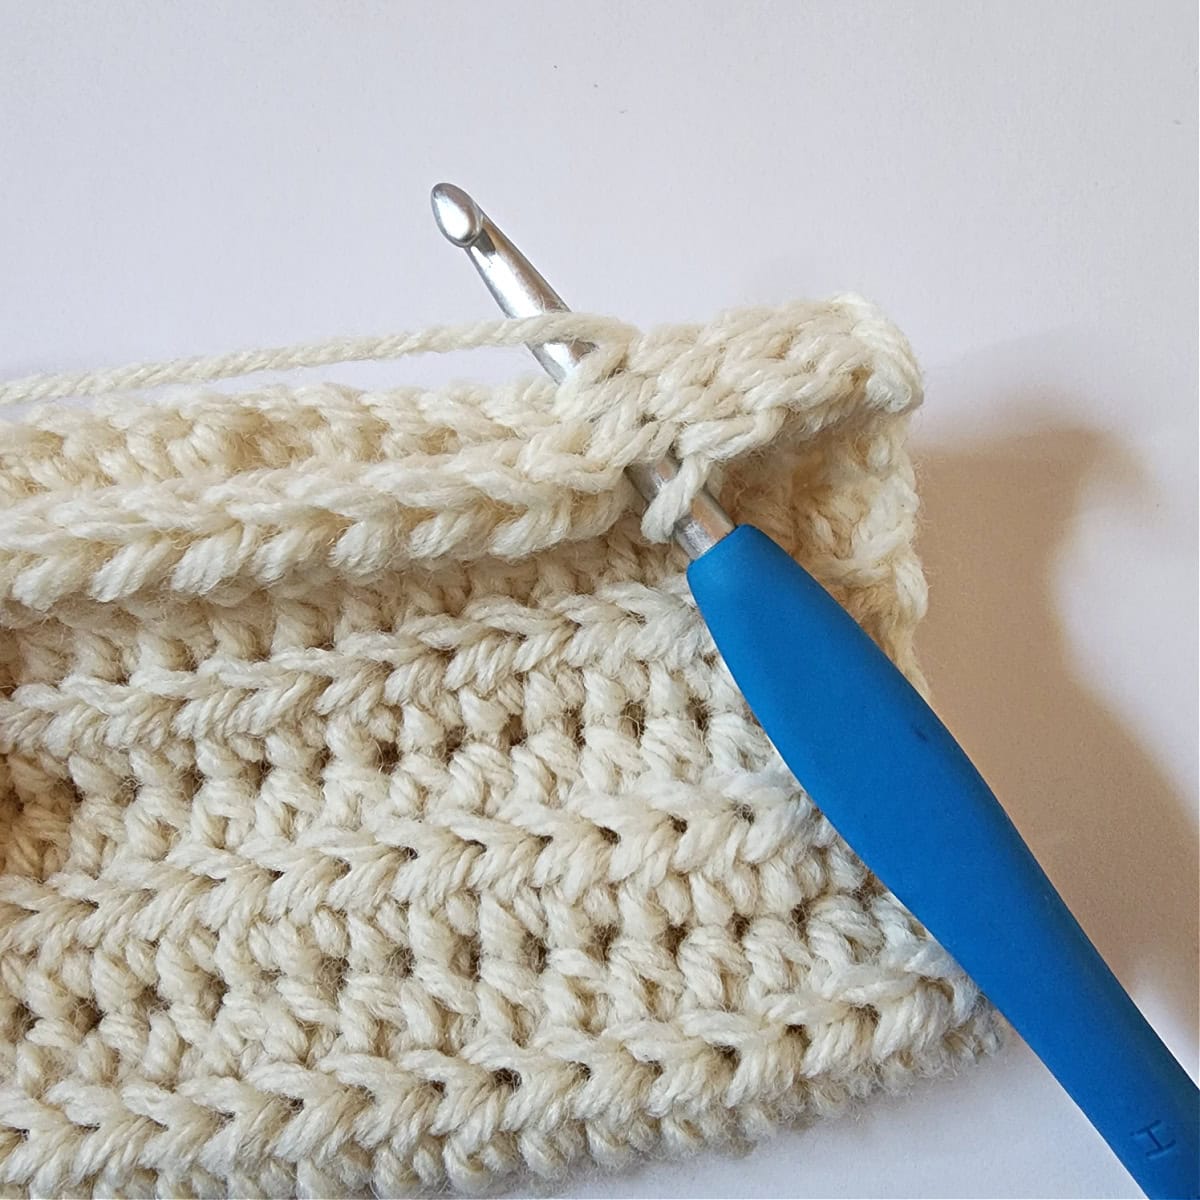
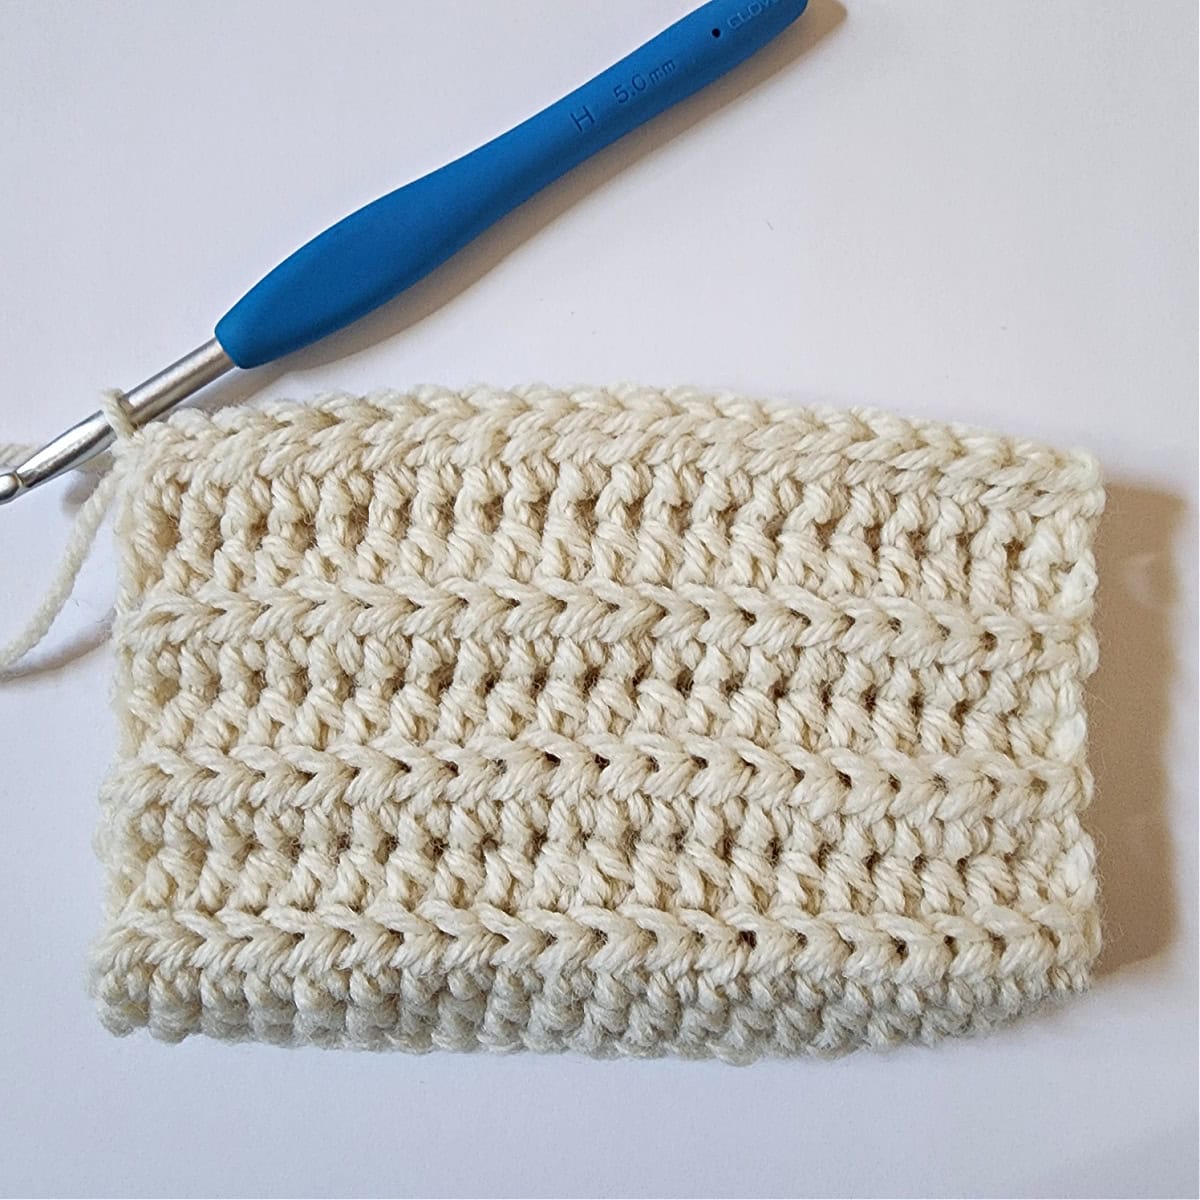
Seam: Bring the first row up to meet the last row (the last row should be closest to you), ch 1, sl st the last row to the first row in each st across. (16 sts) *Note: This is the WS of the cuff, but when you fold it down, the seam will be on the inside of the cuff and the RS will be facing out. – See Seam Photos at the end of the crochet pattern.
Do not fasten off. Continue on to Prepare Cuff for Body of Mitten.
Prepare Cuff for Body of Mitten
Continue with the WS facing out.
Rnd 1: Working into the sides of the rows of the cuff, ch 1, work 1 sc into each of the first 2 sts, then work 2 sc into each of the remaining 10 sts. Join with a sl st to the 1st st. (22 sts)
Do not fasten off. Continue on to Body of Mitten for the hand that you’re making.
Toddler Right Hand – Body of Mitten
Rnd 1 (RS): Ch 1, (FLO ext sc in the next st, BLO ext sc in the next st) rep around. Join. (22 sts)
Rnd 2: Ch 1, (BLO ext sc in the next st, FLO ext sc in the next st) rep around. Join. (22 sts)
Rnds 3 – 5: Rep Rnds 1 – 2, ending with a Rnd 1.
Rnd 6: Ch 1, (BLO ext sc in the next st, FLO ext sc in the next st) 8 times, ch 4, skip each of the next 4 sts, BLO ext sc in the next st, FLO ext sc in the next st. Join. (22 sts)
Rnd 7: Ch 1, (FLO ext sc in the next st, BLO ext sc in the next st) 8 times, ext sc in each of the next 4 chs, FLO ext sc in the next st, BLO ext sc in the next st. Join. (22 sts)
Rnd 8: Rep Rnd 2.
Rnds 9 – 12: Rep Rnds 1 – 2.
Rnd 13: Ch 1, FLO extsc2tog, BLO extsc2tog, (FLO ext sc in the next st, BLO ext sc in the next st) rep from ( to ) around. Join. (20 sts)
Rnd 14: Rep Rnd 2. (20 sts)
Rnd 15: Ch 1, (FLO ext sc in the next st, BLO ext sc in the next st) 4 times, FLO extsc2tog, BLO extsc2tog, (FLO ext sc in the next st, BLO ext sc in the next st) 4 times. Join. (18 sts)
Rnd 16: Rep Rnd 2. (18 sts)
Fasten off leaving a 6 – 8″ tail of yarn. Continue below to the Toddler Thumb.
Toddler Left Hand – Body of Mitten
Rnd 1 (RS): Ch 1, (FLO ext sc in the next st, BLO ext sc in the next st) rep around. Join. (22 sts)
Rnd 2: Ch 1, (BLO ext sc in the next st, FLO ext sc in the next st) rep around. Join. (22 sts)
Rnds 3 – 5: Rep Rnds 1 – 2, ending with a Rnd 1.
Rnd 6: Ch 1, BLO ext sc in the next st, FLO ext sc in the next st, ch 4, skip each of the next 4 sts, (BLO ext sc in the next st, FLO ext sc in the next st) 8 times. Join. (22 sts)
Rnd 7: Ch 1, FLO ext sc in the next st, BLO ext sc in the next st, ext sc in each of the next 4 chs, (FLO ext sc in the next st, BLO ext sc in the next st) 8 times. Join. (22 sts)
Rnd 8: Rep Rnd 2.
Rnds 9 – 12: Rep Rnds 1 – 2.
Rnd 13: Ch 1, FLO extsc2tog, BLO extsc2tog, (FLO ext sc in the next st, BLO ext sc in the next st) rep from ( to ) around. Join. (20 sts)
Rnd 14: Rep Rnd 2. (20 sts)
Rnd 15: Ch 1, (FLO ext sc in the next st, BLO ext sc in the next st) 4 times, FLO extsc2tog, BLO extsc2tog, (FLO ext sc in the next st, BLO ext sc in the next st) 4 times,. Join. (18 sts)
Rnd 16: Rep Rnd 2. (18 sts)
Fasten off leaving a 6 – 8″ tail of yarn. Continue on to the Thumb.
Toddler Thumb
Note: Thumb is worked in continuous rounds (spiral). I suggest using a scrap of yarn as a stitch marker to help keep track of rounds.
Rnd 1: With a 5.00mm crochet hook, join MC yarn with a standing sc in the 1st skipped st of the thumbhole opening, 2 sc in the next st, sc in the next st, 2 sc in the next st, sc into the side of the exposed ext sc from the thumbhole opening rnd, sc in each of the next 4 sts, sc into the side of the exposed ext sc from the thumbhole opening rnd. (12 sts)
Tip! If you’re left with a small gap at each corner of the thumb where you work into the side of the exposed ext sc’s, use a scrap piece of yarn and stitch the gap closed after completing Rnd 2.
Rnds 2 – 6: Sc in each st around. (12 sts)
Rnd 7: (FLO inv sc2tog, sc in each of the next 2 sts) 3 times. (9 sts)
Rnds 8 – 9: Sc in each st around. (9 sts)
Fasten off leaving a 6″ tail of yarn. Continue on to Finishing.
Finishing
Turn mitten inside out. Using a yarn needle and yarn tails, whipstitch both the tip of the mitten and thumb closed. Weave in ends. Repeat instructions to make the second mitten.
Child Size Crochet Mittens
Striped Mittens
To make striped mittens, work the following sections and rows in the following colors:
- MC: Cuff, Prepare Cuff for Body of Mitten, Body of Mitten Rnds 1 – 2, 5 – 6, 9 – 10, 13 – 14
- CA: Body of Mitten Rnds 3 – 4, 11 – 12
- CB: Body of Mitten Rnds 7 – 8, 15 – 16
Child Stretchy Mitten Cuff
Row 1 (RS): With MC yarn & a 5.00mm crochet hook, ch 17, working into the back hump of the foundation ch, hdc in the 2nd ch from your hook and in each ch across. Turn. (16 sts)
Rows 2 – 14: Ch 1, BLO hdc in each st across. Turn. (16 sts)
Seam: Bring the first row up to meet the last row (the last row should be closest to you), ch 1, sl st the last row to the first row in each st across. (16 sts) *Note: This is the WS of the cuff, but when you fold it down, the seam will be on the inside ofthe cuff and the RS will be facing out. – – See Seam Photos at the end of the crochet pattern.
Do not fasten off. Continue on to Prepare Cuff for Body of Mitten.
Prepare Cuff for Body of Mitten
Continue with the WS facing out.
Rnd 1: Working into the sides of the rows of the cuff, ch 1, work 1 sc into each of the first 2 sts, then work 2 sc into each of the remaining 12 sts. Join with a sl st to the 1st st. (26 sts)
Do not fasten off. Continue on to Body of Mitten for the hand that you’re making.
Child Right Hand – Body of Mitten
Rnd 1 (RS): Ch 1, (FLO ext sc in the next st, BLO ext sc in the next st) rep around. Join. (26 sts)
Rnd 2: Ch 1, (BLO ext sc in the next st, FLO ext sc in the next st) rep around. Join. (26 sts)
Rnds 3 – 6: Rep Rnds 1 – 2.
Rnd 7: Ch 1, (FLO ext sc in the next st, BLO ext sc in the next st) 9 times, ch 4, skip each of the next 4 sts, (FLO ext sc in the next st, BLO ext sc in the next st) 2 times. Join. (26 sts)
Rnd 8: Ch 1, (BLO ext sc in the next st, FLO ext sc in the next st) 9 times, ext sc in each of the next 4 chs, (BLO ext sc in the next st, FLO ext sc in the next st) 2 times. Join. (26 sts)
Rnds 9 – 14: Rep Rnds 1 – 2.
Rnd 15: Ch 1, FLO extsc2tog, BLO extsc2tog, (FLO ext sc in the next st, BLO ext sc in the next st) rep from ( to ) around. Join. (24 sts)
Rnd 16: Rep Rnd 2. (24 sts)
Rnd 17: Ch 1, (FLO ext sc in the next st, BLO ext sc in the next st) 5 times, FLO extsc2tog, BLO extsc2tog, (FLO ext sc in the next st, BLO ext sc in the next st) 5 times. Join. (22 sts)
Rnd 18: Rep Rnd 2. (22 sts)
Fasten off leaving a 6 – 8″ tail of yarn. Continue on to the Thumb.
Child Left Hand – Body of Mitten
Rnd 1 (RS): Ch 1, (FLO ext sc in the next st, BLO ext sc in the next st) rep around. Join. (26 sts)
Rnd 2: Ch 1, (BLO ext sc in the next st, FLO ext sc in the next st) rep around. Join. (26 sts)
Rnds 3 – 6: Rep Rnds 1 – 2.
Rnd 7: Ch 1, (FLO ext sc in the next st, BLO ext sc in the next st) 2 times, ch 4, skip each of the next 4 sts, (FLO ext sc in the next st, BLO ext sc in the next st) 9 times. Join. (26 sts)
Rnd 8: Ch 1, (BLO ext sc in the next st, FLO ext sc in the next st) 2 times, ext sc in each of the next 4 chs, (BLO ext sc in the next st, FLO ext sc in the next st) 9 times. Join. (26 sts)
Rnds 9 – 14: Rep Rnds 1 – 2.
Rnd 15: Ch 1, FLO extsc2tog, BLO extsc2tog, (FLO ext sc in the next st, BLO ext sc in the next st) rep from ( to ) around. Join. (24 sts)
Rnd 16: Rep Rnd 2. (24 sts)
Rnd 17: Ch 1, (FLO ext sc in the next st, BLO ext sc in the next st) 5 times, FLO extsc2tog, BLO extsc2tog, (FLO ext sc in the next st, BLO ext sc in the next st) 5 times. Join. (22 sts)
Rnd 18: Rep Rnd 2. (22 sts)
Fasten off leaving a 6 – 8″ tail of yarn. Continue on to the Thumb.
Child Thumb
Note: Thumb is worked in continuous rounds (spiral). I suggest using a scrap of yarn as a stitch marker to help keep track of rounds.
Rnd 1: With a 5.00mm crochet hook, join MC yarn with a standing sc in the 1st skipped st of the thumbhole opening, 2 sc in the next st, sc in the next st, 2 sc in the next st, sc into the side of the exposed ext sc from the thumbhole opening rnd, 2 sc in the next st, sc in each of the next 3 sts, sc into the side of the exposed ext sc from the thumbhole opening rnd. (13 sts)
Tip! If you’re left with a small gap at each corner of the thumb where you work into the side of the exposed ext sc’s, use a scrap piece of yarn and stitch the gap closed after completing Rnd 2.
Rnds 2 – 7: Sc in each st around. (13 sts)
Rnd 8: (FLO inv sc2tog, sc in each of the next 2 sts) 3 times, sc in the next st. (10 sts)
Rnds 9 – 10: Sc in each st around. (10 sts)
Fasten off leaving a 6″ tail of yarn. Continue on to Finishing.
Finishing
Turn mitten inside out. Using a yarn needle and yarn tails, whipstitch both the tip of the mitten and thumb closed. Weave in ends. Repeat instructions to make the second mitten.
Women’s (Adult Small) Size Crochet Mittens
Striped Mittens
To make striped mittens like the mittens in the photos, work the following sections and rows in the following colors:
- MC: Cuff, Prepare Cuff for Body of Mitten, Body Rnds 1 – 3, 7 – 9, 13 – 15, 19 – 21
- CA: Body of Mitten Rnds 4 – 6, 16 – 18,
- CB: Body of Mitten Rnds 10 – 12, 22 – 24
Women’s Stretchy Mitten Cuff
Row 1 (RS): With MC yarn & a 5.00mm crochet hook, ch 21, working into the back hump of the foundation ch, hdc in the 2nd ch from your hook and in each ch across. Turn. (20 sts)
Rows 2 – 16: Ch 1, BLO hdc in each st across. Turn. (20 sts)
Seam: Bring the first row up to meet the last row (the last row should be closest to you), ch 1, sl st the last row to the first row in each st across. (20 sts) *Note: This is the WS of the cuff, but when you fold it down, the seam will be on the inside of the cuff and the RS will be facing out. – See Seam Photos at the end of the crochet pattern.
Do not fasten off. Continue on to Prepare Cuff for Body of Mitten.
Prepare Cuff for Body of Mitten
Continue with the WS facing out.
Rnd 1: Working into the sides of the rows of the cuff, ch 1, work 1 sc into each of the first 2 sts, then work 2 sc into each of the remaining 14 sts. Join with a sl st to the 1st st. (30 sts)
Do not fasten off. Continue on to Body of Mitten for the hand that you’re making.
Women’s Right Hand – Body of Mitten
Rnd 1 (RS): Ch 1, (FLO ext sc in the next st, BLO ext sc in the next st) rep around. Join. (30 sts)
Rnd 2: Ch 1, (BLO ext sc in the next st, FLO ext sc in the next st) rep around. Join. (30 sts)
Rnds 3 – 8: Rep Rnds 1 – 2.
Rnd 9: Ch 1, (FLO ext sc in the next st, BLO ext sc in the next st) 11 times, ch 4, skip each of the next 4 sts, (FLO ext sc in the next st, BLO ext sc in the next st) 2 times. Join. (30 sts)
Rnd 10: Ch 1, (BLO ext sc in the next st, FLO ext sc in the next st) 11 times, ext sc each of the next 4 chs, (BLO ext sc in the next st, FLO ext sc in the next st) 2 times. Join. (30 sts)
Rnds 11 – 17: Rep Rnds 1 – 2, ending with a Rnd 1.
Rnd 18: Ch 1, BLO extsc2tog, FLO extsc2tog, (BLO ext sc in the next st, FLO ext sc in the next st) rep from ( to ) around. Join. (28 sts)
Rnd 19: Rep Rnd 1. (28 sts)
Rnd 20: Ch 1, (BLO ext sc in the next st, FLO ext sc in the next st) 5 times, BLO extsc2tog, FLO extsc2tog, (BLO ext sc in the next st, FLO ext sc in the next st) 7 times,. Join. (26 sts)
Rnd 21: Rep Rnd 1. (26 sts)
Rnd 22: Ch 1, BLO extsc2tog, FLO extsc2tog, (BLO ext sc in the next st, FLO ext sc in the next st) rep from ( to ) around. Join. (24 sts)
Rnds 23 – 24: Rep Rnds 1 – 2. (24 sts)
Fasten off leaving a 6 – 8″ tail of yarn. Continue on to the Thumb.
Women’s Left Hand
Rnd 1 (RS): Ch 1, (FLO ext sc in the next st, BLO ext sc in the next st) rep around. Join. (30 sts)
Rnd 2: Ch 1, (BLO ext sc in the next st, FLO ext sc in the next st) rep around. Join. (30 sts)
Rnds 3 – 8: Rep Rnds 1 – 2.
Rnd 9: Ch 1, (FLO ext sc in the next st, BLO ext sc in the next st) 2 times, ch 4, skip each of the next 4 sts, (FLO ext sc in the next st, BLO ext sc in the next st) 11 times. Join. (30 sts)
Rnd 10: Ch 1, (BLO ext sc in the next st, FLO ext sc in the next st) 2 times, ext sc each of the next 4 chs, (BLO ext sc in the next st, FLO ext sc in the next st) 11 times. Join. (30 sts)
Rnds 11 – 17: Rep Rnds 1 – 2, ending with a Rnd 1.
Rnd 18: Ch 1, BLO extsc2tog, FLO extsc2tog, (BLO ext sc in the next st, FLO ext sc in the next st) rep from ( to ) around. Join. (28 sts)
Rnd 19: Rep Rnd 1. (28 sts)
Rnd 20: Ch 1, (BLO ext sc in the next st, FLO ext sc in the next st) 7 times, BLO extsc2tog, FLO extsc2tog, (BLO ext sc in the next st, FLO ext sc in the next st) 5 times. Join. (26 sts)
Rnd 21: Rep Rnd 1. (26 sts)
Rnd 22: Ch 1, BLO extsc2tog, FLO extsc2tog, (BLO ext sc in the next st, FLO ext sc in the next st) rep from ( to ) around. Join. (24 sts)
Rnds 23 – 24: Rep Rnds 1 – 2. (24 sts)
Fasten off leaving a 6 – 8″ tail of yarn. Continue on to the Thumb.
Women’s Thumb
Note: Thumb is worked in continuous rounds (spiral). I suggest using a scrap of yarn as a stitch marker to help keep track of rounds.
Rnd 1: With a 5.00mm crochet hook, join MC yarn with a standing sc in the 1st skipped st of the thumbhole opening, 2 sc in the next st, sc in the next st, 2 sc in the next st, sc into the side of the exposed ext sc from the thumbhole opening rnd, (sc in the next st, 2 sc in the next st) 2 times, sc into the side of the exposed ext sc from the thumbhole opening rnd. (14 sts)
Tip! If you’re left with a small gap at each corner of the thumb where you work into the side of the exposed ext sc’s, use a scrap piece of yarn and stitch the gap closed after completing Rnd 2.
Rnds 2 – 8: Sc in each st around. (14 sts)
Rnd 9: (FLO inv sc2tog, sc in each of the next 2 sts) 3 times, sc in each of the last 2 sts. (11 sts)
Rnds 10 – 11: Sc in each st around. (11 sts)
Rnd 12: FLO invsc2tog 5 times, sc in the last st. (6 sts)
Fasten off leaving a 6″ tail of yarn. Continue on to Finishing.
Finishing
Turn mitten inside out. Using a yarn needle and yarn tails, whipstitch both the tip of the mitten and thumb closed. Weave in ends. Repeat instructions to make the second mitten.
Men’s (Adult Large) Size Crochet Mittens
Stripe Mittens
To make striped mittens like the mittens in the photos, work the following sections and rows in the following colors:
- MC: Cuff, Prepare Cuff for Body of Mitten, Body Rnds 1 – 3, 7 – 9, 13 – 15, 19 – 21, 25 – 27
- CA: Body of Mitten Rnds 4 – 6, 16 – 18,
- CB: Body of Mitten Rnds 10 – 12, 22 – 24
Men’s Stretchy Mitten Cuff
Row 1 (RS): With MC yarn & a 5.00mm crochet hook, ch 21, working into the back hump of the foundation ch, hdc in the 2nd ch from your hook and in each ch across. Turn. (20 sts)
Rows 2 – 19: Ch 1, BLO hdc in each st across. Turn. (20 sts)
Seam: Bring the first row up to meet the last row (the last row should be closest to you), ch 1, sl st the last row to the first row. (20 sts) *Note: This is the WS of the cuff, but when you fold it down, the seam will be on the inside of the cuff and the RS will be facing out. – See Seam Photos at the end of the crochet pattern.
Do not fasten off. Continue on to Prepare Cuff for Body of Mitten.
Prepare Cuff for Body of Mitten
Continue with the WS facing out.
Rnd 1: Working into the sides of the rows of the cuff, ch 1, work 1 sc into each of the first 2 sts, then work 2 sc into each of the remaining 17 sts. Join with a sl st to the 1st st. (36 sts)
Do not fasten off. Continue on to Body of Mitten for the hand that you’re making.
Men’s Right Hand – Body of Mitten
Rnd 1 (RS): Ch 1, (FLO ext sc in the next st, BLO ext sc in the next st) rep around. Join. (36 sts)
Rnd 2: Ch 1, (BLO ext sc in the next st, FLO ext sc in the next st) rep around. Join. (36 sts)
Rnds 3 – 9: Rep Rnds 1 – 2, ending with a Rnd 1.
Rnd 10: Ch 1, (BLO ext sc in the next st, FLO ext sc in the next st) 12 times, ext sc each of the next 6 chs, (BLO ext sc in the next st, FLO ext sc in the next st) 3 times. Join. (36 sts)
Rnd 11: Ch 1, (FLO ext sc in the next st, BLO ext sc in the next st) 12 times, ch 6, skip each of the next 6 sts, (FLO ext sc in the next st, BLO ext sc in the next st) 3 times. Join. (36 sts)
Rnd 12: Rep Rnd 2.
Rnds 13 – 19: Rep Rnds 1 – 2, ending with a Rnd 1.
Rnd 20: Ch 1, BLO extsc2tog, FLO extsc2tog, (BLO ext sc in the next st, FLO ext sc in the next st) rep from ( to ) around. Join. (34 sts)
Rnd 21: Ch 1, (FLO ext sc in the next st, BLO ext sc in the next st) rep around. Join. (34 sts)
Rnd 22: Ch 1, (BLO ext sc in the next st, FLO ext sc in the next st) 8 times, BLO extsc2tog, FLO extsc2tog, (BLO ext sc in the next st, FLO ext sc in the next st) 7 times. Join. (32 sts)
Rnd 23: Rep Rnd 1. (32 sts)
Rnd 24: Ch 1, BLO extsc2tog, FLO extsc2tog, (BLO ext sc in the next st, FLO ext sc in the next st) rep from ( to ) around. Join. (30 sts)
Rnd 25: Rep Rnd 1. (30 sts)
Rnd 26: Ch 1, (BLO ext sc in the next st, FLO ext sc in the next st) 7 times, BLO extsc2tog, FLO extsc2tog, (BLO ext sc in the next st, FLO ext sc in the next st) 6 times,. Join. (28 sts)
Rnd 27: Rep Rnd 1. (28 sts)
Fasten off leaving a 6 – 8″ tail of yarn. Continue on to the Thumb.
Men’s Left Hand – Body of Mitten
Rnd 1 (RS): Ch 1, (FLO ext sc in the next st, BLO ext sc in the next st) rep around. Join. (36 sts)
Rnd 2: Ch 1, (BLO ext sc in the next st, FLO ext sc in the next st) rep around. Join. (36 sts)
Rnds 3 – 9: Rep Rnds 1 – 2, ending with a Rnd 1.
Rnd 10: Ch 1, (BLO ext sc in the next st, FLO ext sc in the next st) 3 times, ext sc each of the next 6 chs, (BLO ext sc in the next st, FLO ext sc in the next st) 12 times. Join. (36 sts)
Rnd 11: Ch 1, (FLO ext sc in the next st, BLO ext sc in the next st) 3 times, ch 6, skip each of the next 6 sts, (FLO ext sc in the next st, BLO ext sc in the next st) 12 times. Join. (36 sts)
Rnd 12: Rep Rnd 2.
Rnds 13 – 19: Rep Rnds 1 – 2, ending with a Rnd 1.
Rnd 20: Ch 1, BLO extsc2tog, FLO extsc2tog, (BLO ext sc in the next st, FLO ext sc in the next st) rep from ( to ) around. Join. (34 sts)
Rnd 21: Ch 1, (FLO ext sc in the next st, BLO ext sc in the next st) rep around. Join. (34 sts)
Rnd 22: Ch 1, (BLO ext sc in the next st, FLO ext sc in the next st) 8 times, BLO extsc2tog, FLO extsc2tog, (BLO ext sc in the next st, FLO ext sc in the next st) 7 times. Join. (32 sts)
Rnd 23: Rep Rnd 1. (32 sts)
Rnd 24: Ch 1, BLO extsc2tog, FLO extsc2tog, (BLO ext sc in the next st, FLO ext sc in the next st) rep from ( to ) around. Join. (30 sts)
Rnd 25: Rep Rnd 1. (30 sts)
Rnd 26: Ch 1, (BLO ext sc in the next st, FLO ext sc in the next st) 7 times, BLO extsc2tog, FLO extsc2tog, (BLO ext sc in the next st, FLO ext sc in the next st) 6 times,. Join. (28 sts)
Rnd 27: Rep Rnd 1. (28 sts)
Fasten off leaving a 6 – 8″ tail of yarn. Continue on to the Thumb.
Men’s Thumb
Note: Thumb is worked in continuous rounds (spiral). I suggest using a scrap of yarn as a stitch marker to help keep track of rounds.
Rnd 1: With a 5.00mm crochet hook, join CC yarn with a standing sc in the 1st skipped st of the thumbhole opening, 2 sc in the next st, (sc in the next st, 2 sc in the next st) 2 times, sc into the side of the exposed ext sc from thumbhole rnd, (sc in the next st, 2 sc in the next st) 3 times, sc into the side of the exposed ext sc from thumbhole rnd. (20 sts)
Tip! If you’re left with a small gap at each corner of the thumb where you work into the side of the exposed ext sc’s, use a scrap piece of yarn and stitch the gap closed after completing Rnd 2.
Rnds 2 – 10: Sc in each st around. (20 sts)
Rnd 11: (FLO inv sc2tog, sc in each of the next 3 sts) 4 times. (16 sts)
Rnds 12 – 13: Sc in each st around. (16 sts)
Rnd 14 : FLO invsc2tog 8 times. (8 sts)
Fasten off leaving a 6″ tail of yarn. Continue on to Finishing.
Finishing
Turn mitten inside out. Using a yarn needle and yarn tails, whipstitch both the tip of the mitten and thumb closed.
Weave in ends. Repeat all instructions to make the second mitten.
I Made It! Now What?
Pin this post! Save this free crochet mittens pattern to your Pinterest boards so that you can come back and make it again.
Leave a comment below: We love to hear your feedback.
Share Your Finished Projects on Facebook or Instagram: I love to see your finished projects! Share with us on social media and tag me @acrochetedsimplicity or use the hashtag #ACrochetedSimplicity so I can find your posts.
Join us in The Facebook Community Group!
Come share your finished projects with us in the A Crocheted Simplicity Crochet Community Group on Facebook. Join us for fun community events such as crochet alongs, join in on crochet conversations, ask questions, get advice, and share your love for crochet!

More Free Crochet Accessory Patterns
Are you looking for more winter crochet accessories patterns? We have several more free crochet patterns you’ll love! We have several crochet beanies & headwarmers, crochet scarves, shawls, & cowls, and crochet patterns for mittens to help keep you toasty warm this winter.
Pretty pattern. I’m going to attempt a pair for Isaiah 117 House of Washington Cty, VA.🤞If all goes well, I will do a few pairs in different sizes.
Thank you for sharing.