Crochet Pocket Scarf
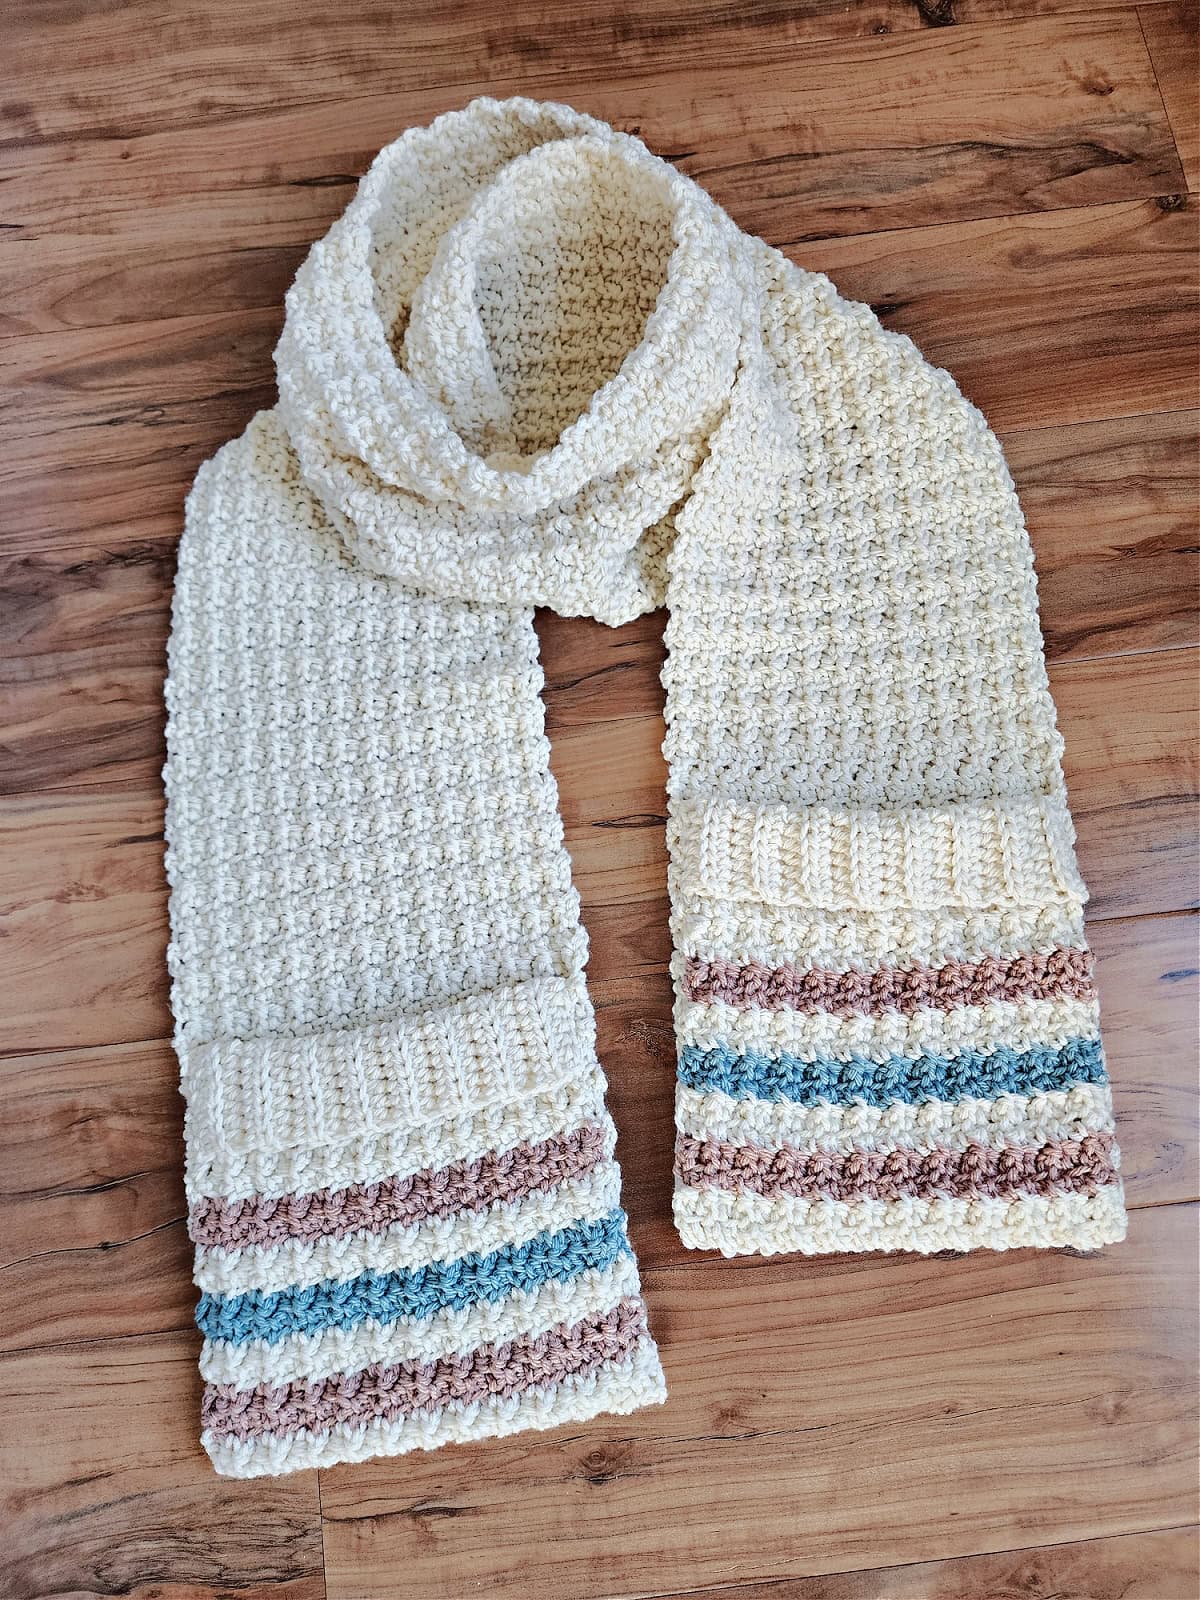
If you’re looking for a winter accessory that’s as practical as it is stylish, a crochet pocket scarf is it!
Not only do these scarves add a unique touch to your winter wardrobe, but they also offer the comfort of cozy pockets to keep your hands warm or to store essentials.
You’ll find the free crochet scarf pattern below, or an ad-free print friendly PDF (including any photo tutorials) on Ravelry, or Etsy (aff).
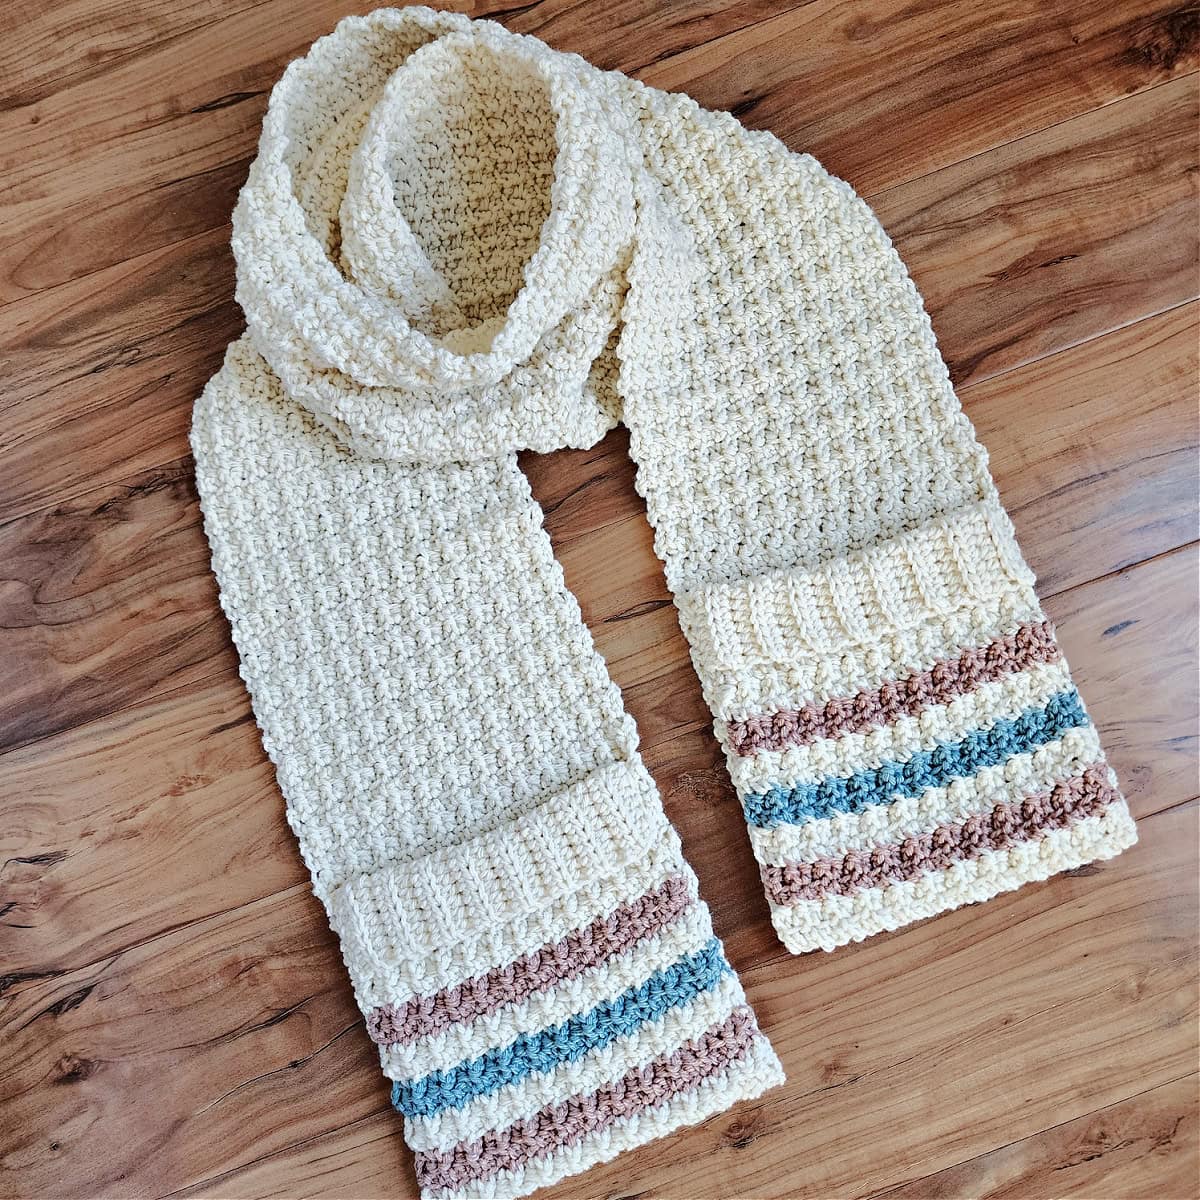
As the temperature drops, there’s nothing like wrapping up in something warm and handmade.
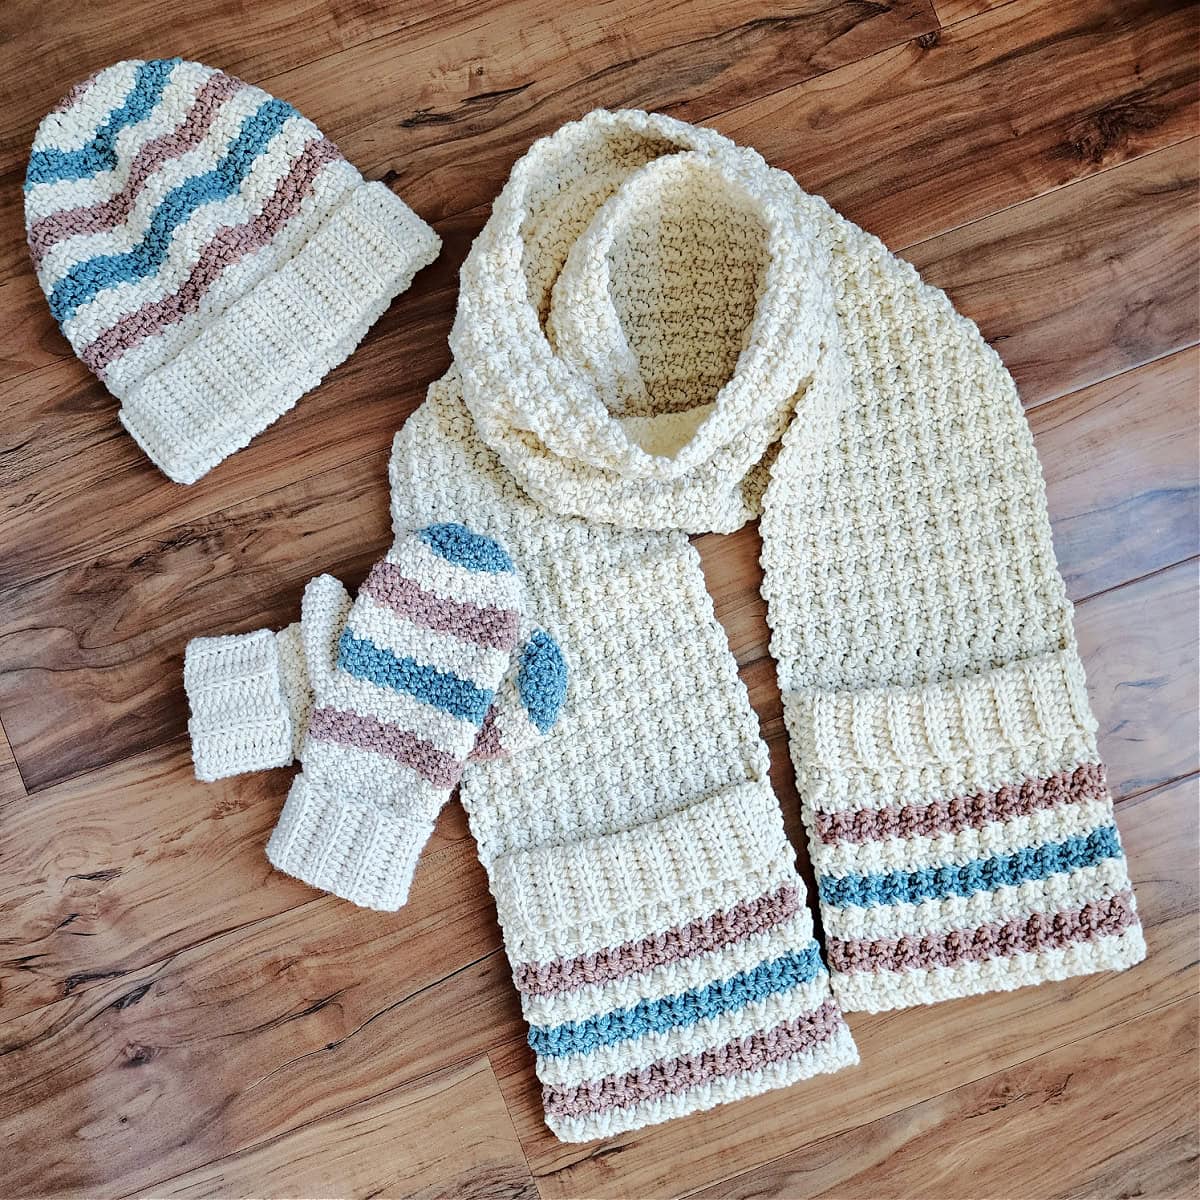
Related: Make the matching Easy Crochet Mittens and Slouchy Beanie for a great crochet gift set!
Why Crochet Pocket Scarves Are the Ultimate Winter Accessory
- Function Meets Fashion: Crochet pocket scarves are versatile. They combine the warmth of a scarf with the utility of pockets. You can carry small essentials, like your phone or lip balm, without needing a bag.
- Perfect for Beginners and Pros Alike: Crochet pocket scarves are great for all skill levels. This scarf pattern is simple and repetitive, making it ideal for beginners.
- Customizable and Stylish: From choosing the perfect yarn for your crochet pocket scarf will allow for endless personalization. Solid, self-striping, and even variegated yarns will look great with this pocket scarf crochet.
This pattern was designed as part of the 2024 Share the Warmth CAL hosted by myself and Blackstone Designs!
How to Crochet a Scarf
Some crochet scarves are worked end to end and some are crocheted lengthwise. The following is how to work this crochet scarf design:
Start with the Pocket Ribbing: You’ll begin by crocheting the ribbing for the top edge of the first pocket. The ribbing is made by crocheting in rows using half double crochet in the back loop only (BLO). This gives the ribbing its stretchy texture.
Crochet Across the Long Edge of the Ribbing: Once the ribbing is finished, you’ll turn and begin to crochet across the long edge of it. From this point on, you’ll be crocheting in rows perpendicular to the ribbing.
Adding Stripes (if desired): To coordinate this crochet pocket scarf with the easy mittens and slouchy beanie I made a few weeks ago, I added a few stripes near the beginning and end of the scarf so that they ended up on my pockets.
Second Pocket RIbbing: After you crochet a scarf to length and add the stripes you will crochet ribbing perpendicular to the last row of the scarf.
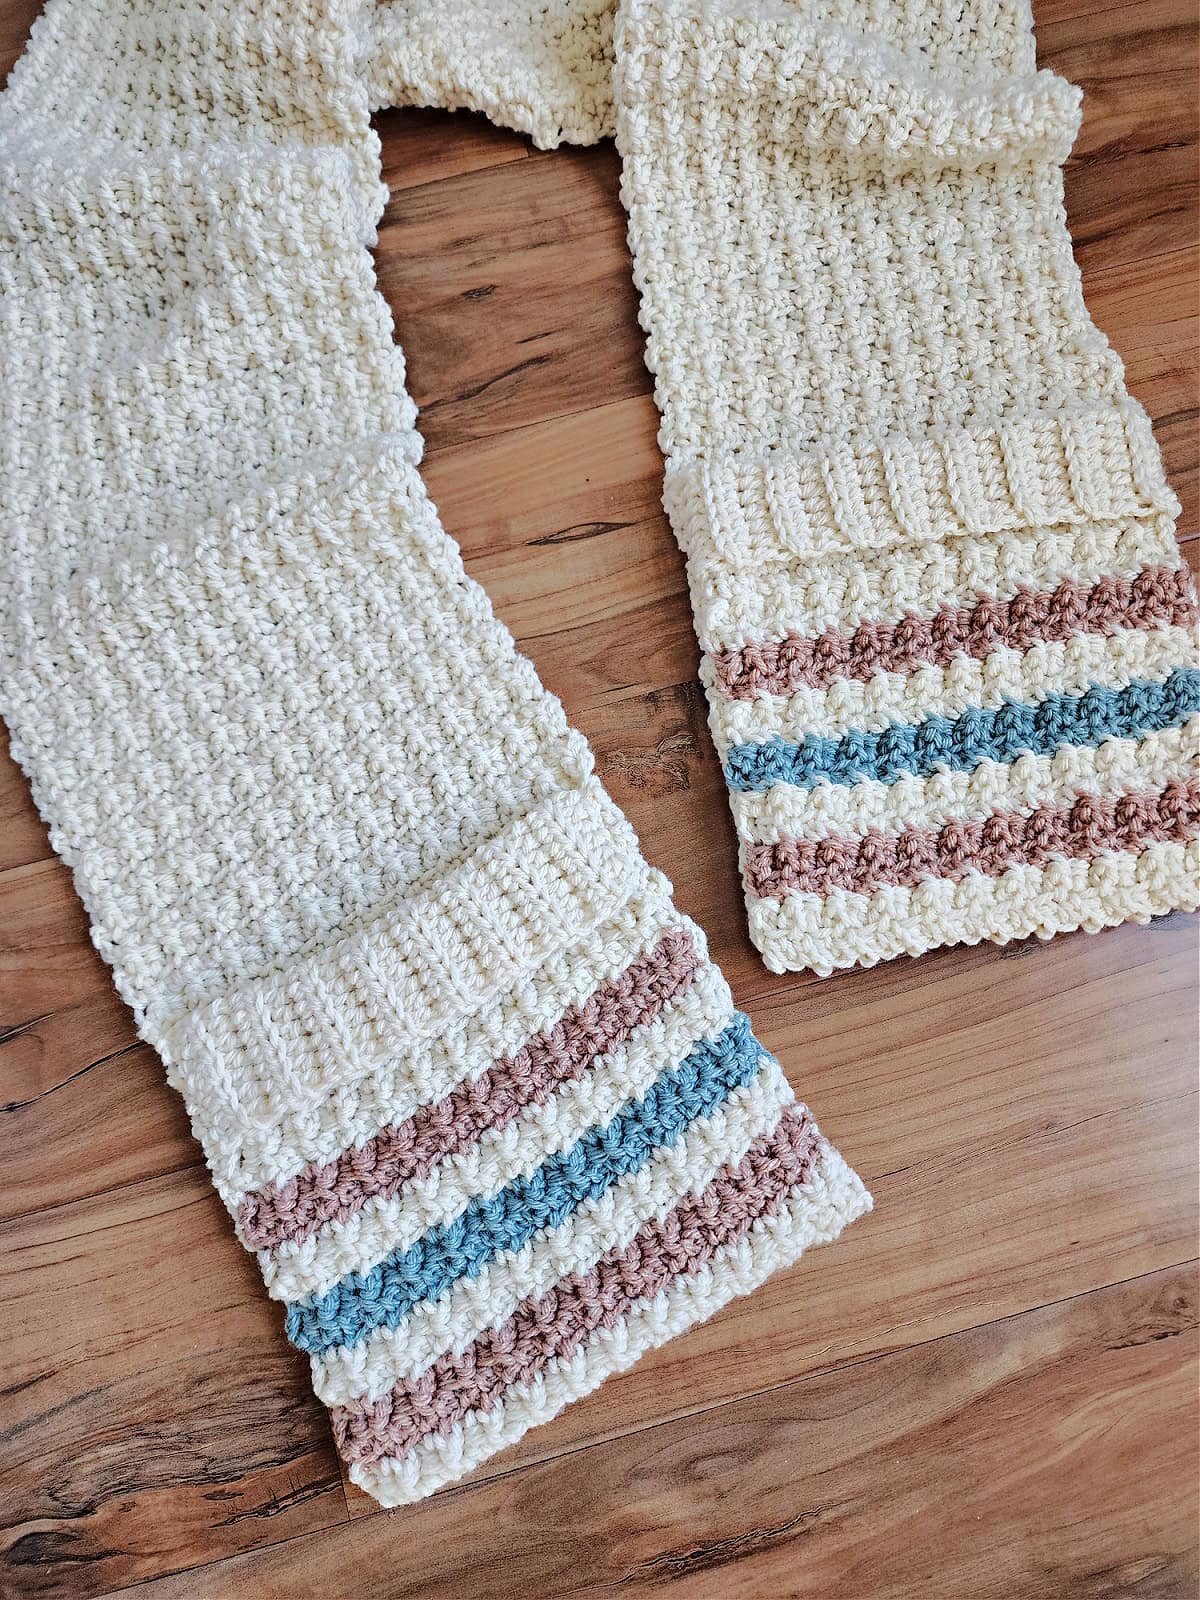
Finishing: After crocheting a scarf, you will fold the pocket ribbing down and whipstitch the edges together. Lastly, fold up several inches of the scarf to create the pockets, turn them inside out and whipstitch the edges together. Turn the pockets right side out and your crochet pocket scarf is ready to wear, or gift!
How To Get The
Crochet Pocket Scarf Pattern
Option 1: Scroll down for the free crochet pocket scarf pattern right here in this blog post.
Option 2: Purchase the ad-free printable PDF from one of my shops:
Yarn
For a pocket crochet scarf, choose a cozy, soft yarn that’s warm but durable. I chose Lion Brand Yarns Wool Ease for this crochet scarf. It is, hands down, one of my favorite worsted weight yarns!
Wool Ease is a worsted weight / 4, acrylic wool blend yarn and it’s currently available in 31 fabulous colors! You’re sure to find the perfect colors for your scarf with pockets.
There are several other worsted weight yarns that would make great substitutions. Lion Brand Wool Ease Recycled, Lion Brand Heartland, Lion Brand Pound of Love, Lion Brand Vanna’s Choice… just to name a few.
Pro Tip: Use washable yarn if you plan to use your scarf daily; acrylic or wool blends are ideal for easy care.
Crochet Scarf Pattern – Free
The pattern for an easy crochet scarf is below, but if you love to work offline, I’ve got a couple other great options for you.
Purchase the ad-free, printable PDF, including any photo tutorials, on Ravelry, or on Etsy (aff).
Purchase the 3-Piece Beanie, Mittens & Scarf Set (aff): Lion Brand has a full crochet kit of the matching mittens, beanie, and pocket scarf, available on their website. The crochet kit includes your choice of colors and a digital copy of the crochet patterns.
This post contains affiliate links.
Materials
- Yarn: Worsted Weight / 4 yarn / 35 yards; Lion Brand Wool Ease was used for the sample shown in the photos.
- Main Color (fisherman) – 570 yards
- CA (Canyon Sunset): 32 yards
- CB (Succulent): 16 yards
- Crochet Hook: J/10/6.00mm; or size needed to obtain gauge (My favorite crochet hooks are the Clover Amour Crochet Hooks, I’ve never had an ache in my hand since switching).
- Scissors
- Yarn Needle
- Locking Stitch Markers
- Measuring Tape
Experience Level
- Beginner-Friendly / Easy
Gauge
- Pocket Ribbing in BLO hdc: 12 sts = 3.25″; 16 rows = 7″
- Body of Scarf in alternating FLO / BLO ext sc: 9 sts = 3″; 10 rows = 4″
Size
- One Size: 8″ W x 72″ L (easily adjustable)
Abbreviations (U.S. Terms)
- ch(s): chain(s)
- st(s): stitch(es)
- sl st: slip stitch
- sc: single crochet
- hdc: half double crochet
- ext sc: extended single crochet
- hdc2tog: half double crochet two together
- yo: yarn over
- BLO: back loop only
- FLO: front loop only
- Rep: repeat
- RS: right side
- WS: wrong side
- SM: stitch marker
- MC: main color
- CA & CB: Contrasting Colors
Special Stitches
- Extended Single Crochet (ext sc): Insert hook into stitch indicated, yo, pull up a loop, yo, pull thru 1 loop on hook, yo, pull thru remaining two loops on hook.
- Half Double Crochet Two Together (hdc2tog): (Yo, insert hook into next stitch, yo, pull up a loop) twice, yo, pull through all loops on your hook.
Pattern Notes
- Turning chains are not included in stitch count.
- The first stitch of each row is worked into the same stitch as the turning chain.
- Yarn Notes: Lion Brand Yarns Wool Ease was used for the sample. Other comparable yarns may be used as long as gauge is met.
- Lion Brand Yarns Wool Ease, worsted weight / 4 yarn, 80% Acrylic / 20% Wool (197 yards / 180 m / 85 g / 3 oz)
- Colors & Yardage
- MC: Fisherman #620-099 (570 yards / 3 balls)
- CA: Canyon Sunset #620-003B (32 yards / 1 ball)
- CB: Succulent #620-119 (16 yards / 1 ball)
- Adjusting Length: You can easily adjust the length of your scarf by working more or fewer rows before adding the second pocket. Keep in mind that the scarf will stretch when worn.
- Crocheting a Scarf: The first pocket ribbing is worked flat and then the scarf is worked along the long edge of the ribbing. Once the crochet scarf reaches the length stated in the instructions, a second ribbing is added. Then the ribbing is folded and seamed and pockets are folded up and seamed.
Crochet Pocket Scarf
Striped Pockets
To make stripes on your pocket scarf like the one shown in the photos, work the following sections and rows in the following colors:
MC: Pocket Ribbing, Body of Scarf Rows 1 – 4, 7 – 8, 11 – 12, Rows 15 until scarf measures 82″ long, Prepare Edge for Second Pocket Ribbing, Second Pocket Ribbing.
CA: Body of Scarf Rows 5 – 6, 13 – 14 & colors for second pocket as noted below.
CB: Body of Scarf Rows 9 – 10 & colors for second pocket as noted below.
First Pocket Ribbing
Row 1: With MC yarn & a 6.00 mm crochet hook, ch 13, working into the back humps of the foundation ch, hdc in the 2nd ch from your hook and in each ch across. Turn. (12 sts)
Rows 2 – 16: Ch 1, BLO hdc in each st across. Turn. (12 sts)
Do not fasten off. Continue on to Body of Scarf. Your ribbing should measure approximately 3.25″ W x 7″ L.
Body of Scarf
Row 1: Ch 1, rotate ribbing to work along the long, work (1 sc into the next st, 2 sc into the next st) 8 times. Turn. (24 sts)
Row 2: Ch 1, (FLO ext sc in the next st, BLO ext sc in the next st) 12 times. Turn. (24 sts)
Row 3: Ch 1, (BLO ext sc in the next st, FLO ext sc in the next st) 12 times. Turn. (24 sts)
Rep Rows 2 – 3 until your scarf measures approximately 82″ L when laid flat, including the ribbing.
Adjusting Length: You can easily adjust the length of your scarf by working more or fewer rows before adding the stripes for the second pocket. Keep in mind that the scarf will stretch when worn.
Next, add the stripes for the second pocket by continuing to repeat Rows 2 -3. Work 13 more rows in the following color sequence:
- 2 Rows CA
- 2 Rows MC
- 2 Rows CB
- 2 Rows MC
- 2 Rows CA
- 3 Rows MC
Do not fasten off. Continue on to Prepare Edge for Second Pocket Ribbing.
Prepare Edge for Second Pocket Ribbing
Row 1 (MC): Ch 1, sc in each st across. Turn. (24 sts)
Do not fasten off. Continue on to Second Pocket Ribbing.
Second Pocket Ribbing
The photos for the ribbing tutorial below are of a smaller swatch to make it easier to show stitch placement.
Row 1 (MC): Ch 13, working in the back humps of the ch, hdc in the 2nd ch from your hook, hdc in each of the next 10 chs, hdc2tog in the next ch & same st as ch 13. Do not turn. (12 sts)

Photo A: This photo shows the beginning of Row 1 of the second pocket ribbing. The yarn needle is showing where to work the first hdc into the 2nd ch from your hook.
Photo B: Photo shows Row 1 complete to the hdc2tog. The yarn needles are showing where to work the hdc2tog.
Photo C: This photo shows the hdc2tog complete. The yarn needles are inserted into the next 2 sts along the edge of the scarf where you will work the 2 sl sts at the beginning of row 2.
Row 2: ( sl st into the next st along the edge of the cowl ) 2 times (these 2 sl sts do not count as sts), TURN, BLO hdc in each st across the previous row. Turn. (12 sts)

Photo D: This photo shows the beginning of Row 2 of the second pocket ribbing. The yarn needles are showing the first 2 sl sts of Row 2 that you will work before turning. I also placed a SM in the hdc2tog to help locate the first stitch to work into after we turn to work the next row.
Photo E: After turning to work the rest of Row 2, you can see the 2 sl sts and the stitch marker where you will work the first hdc in the BLO.
Photo F: This photo shows Row 2 of the second pocket ribbing complete. I placed a SM in the FLO of the last stitch of the row to mark the loop where I need to begin the next row.
Row 3: Ch 1, BLO hdc in the first st, BLO hdc in each of the next 10 sts, hdc2tog in the BLO of the next st and both loops of the next st along the edge of the cowl. Do not turn. (12 sts)

Photo G: The SM in this photo shows where to work the first stitch of Row 3. The yarn needles show where to work the hdc2tog at the end of the row.
Photo H: The yarn needles are showing the 2 sts along the edge of the cowl where you will work the first two sl sts of Row 4. The SM is placed in the FLO of the hdc2tog to mark where to work the first hdc in the next row.
Photo I: Begin Row 4 by sl st in the next 2 stitches along the edge of the scarf.
Row 4: ( sl st into the next st along the edge of the cowl ) 2 times (these 2 sl sts do not count as sts), TURN, BLO hdc in each st across the previous row. Turn. (12 sts)
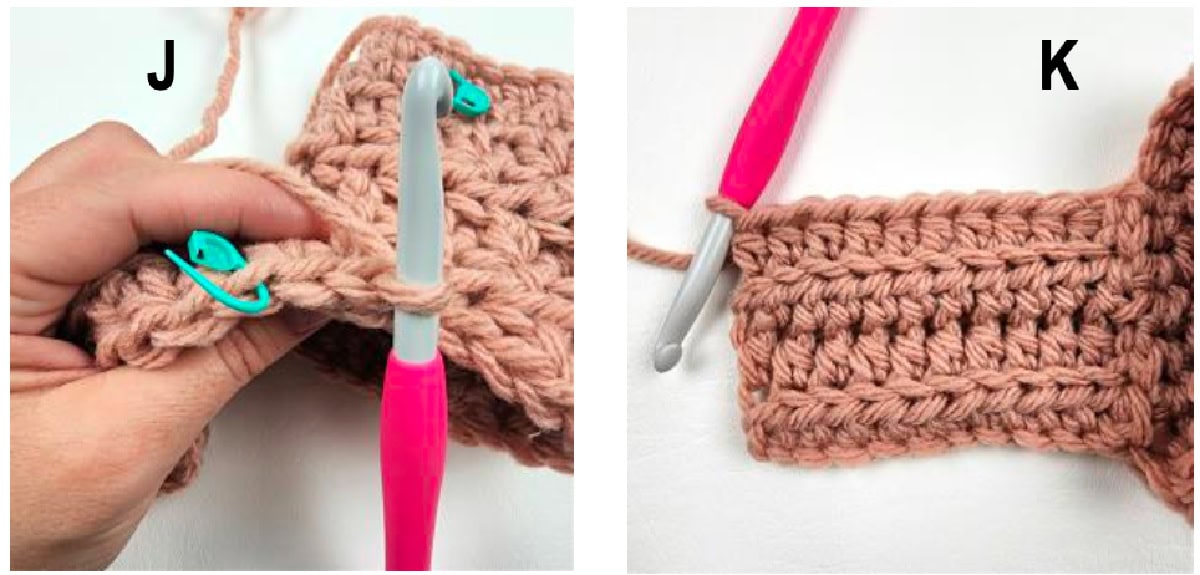
Photo J: In this photo, you can see the 2 sl sts you worked before turning and the SM that’s marking where to work the first hdc.
Photo K: This photo shows Rows 1 – 4 complete.
Rows 6 – 16 : Rep Rows 3 – 4.
Fasten off. Weave in ends. Continue on to Creating the Pockets. The length of your scarf at this point should be approximately 90″.
Creating the Pockets
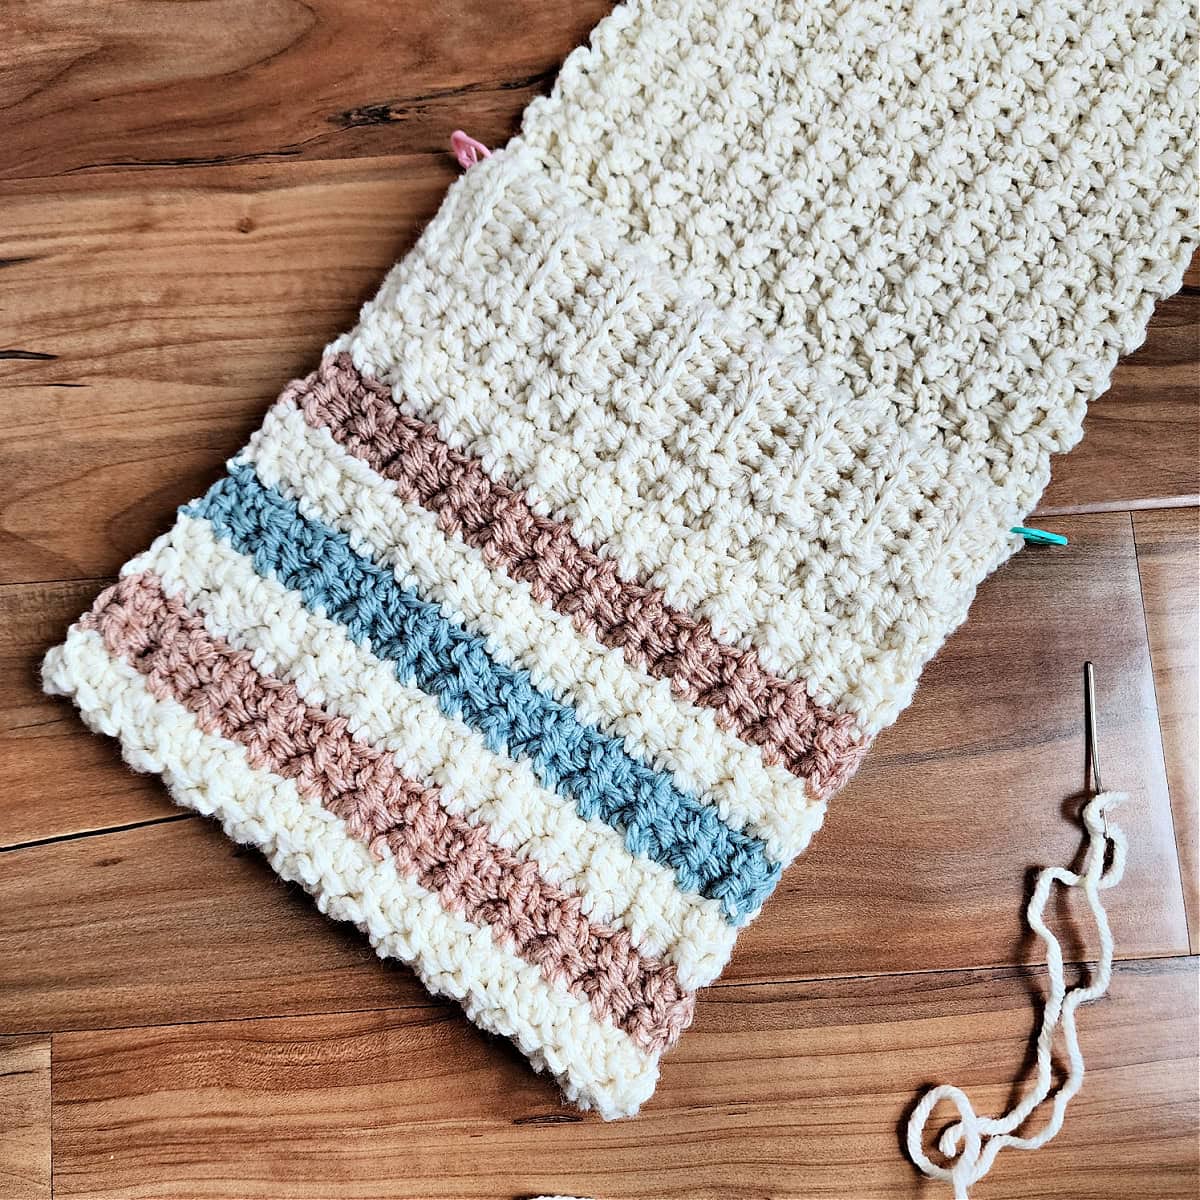
The pockets are created in two steps to. First, you’ll fold the pocket ribbing in half and seam the ribbing edges together on each side. Then, you’ll fold the striped portion of the scarf up and seam the edges.
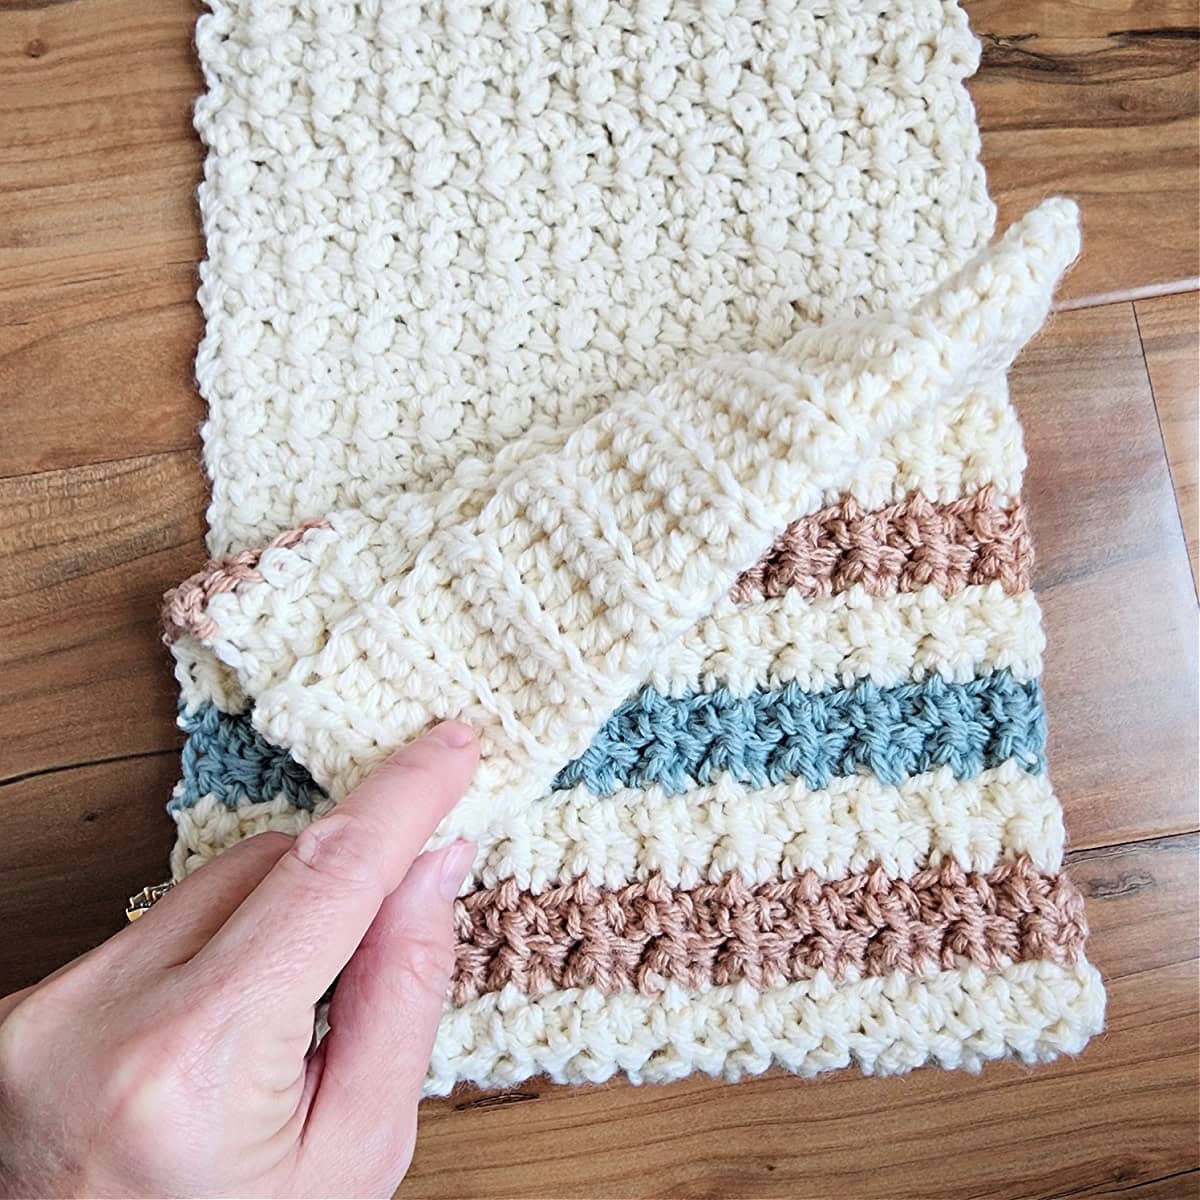
Step One: Fold the pocket ribbing down and in half. I used a couple locking stitch markers to hold it in place while I seamed the edges. Use a yarn needle and 8″ long piece of yarn and whipstitch the stitches from the short edge of the ribbing together. Repeat for the opposite short edge of the ribbing.
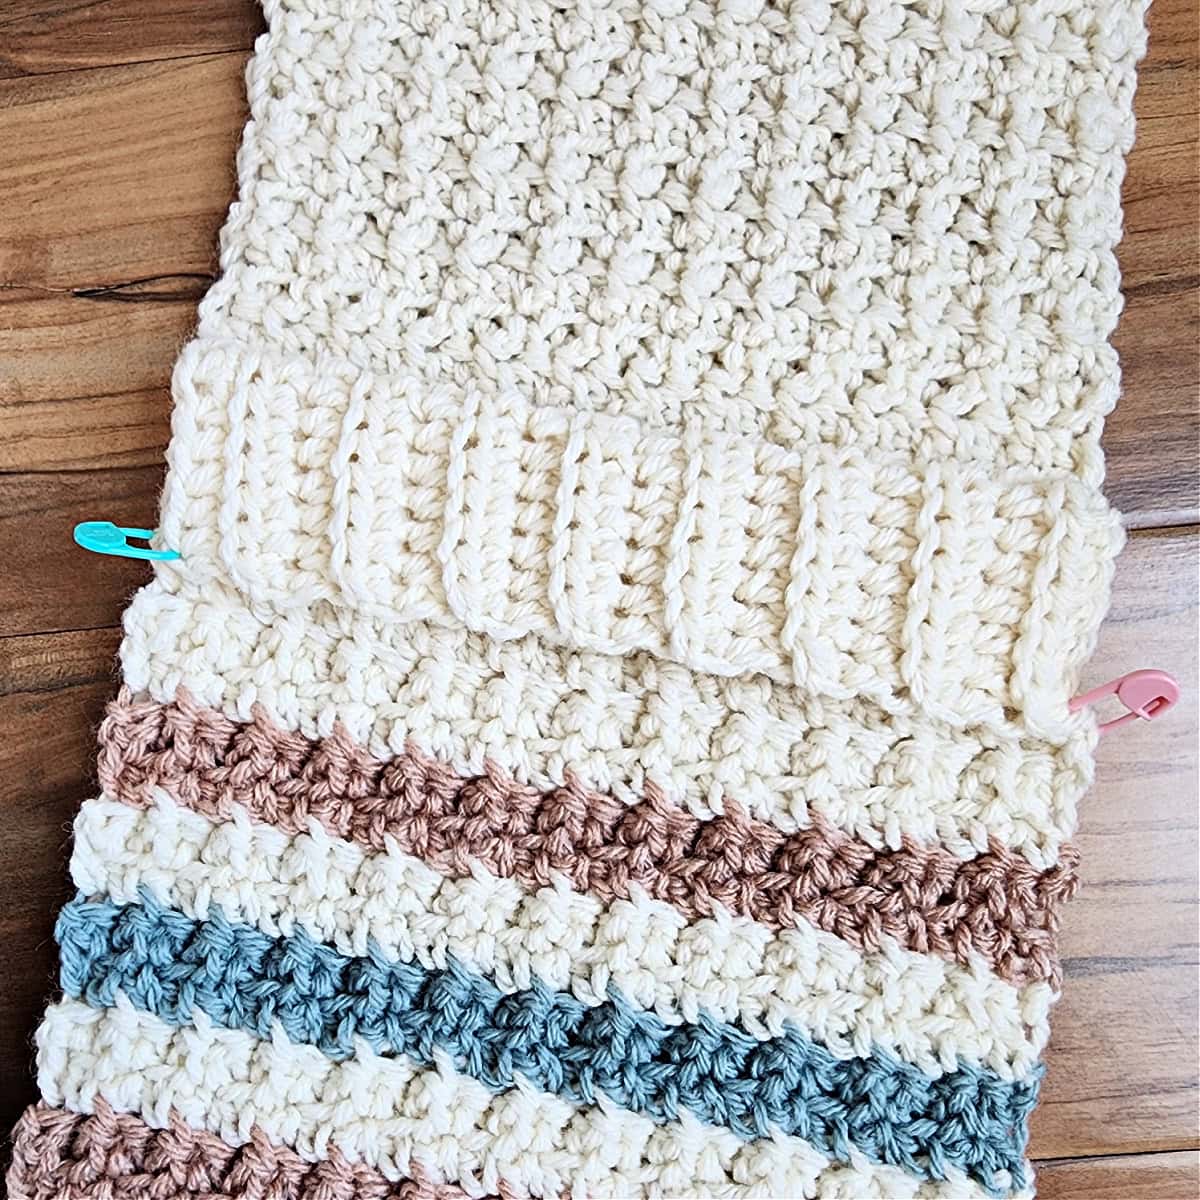
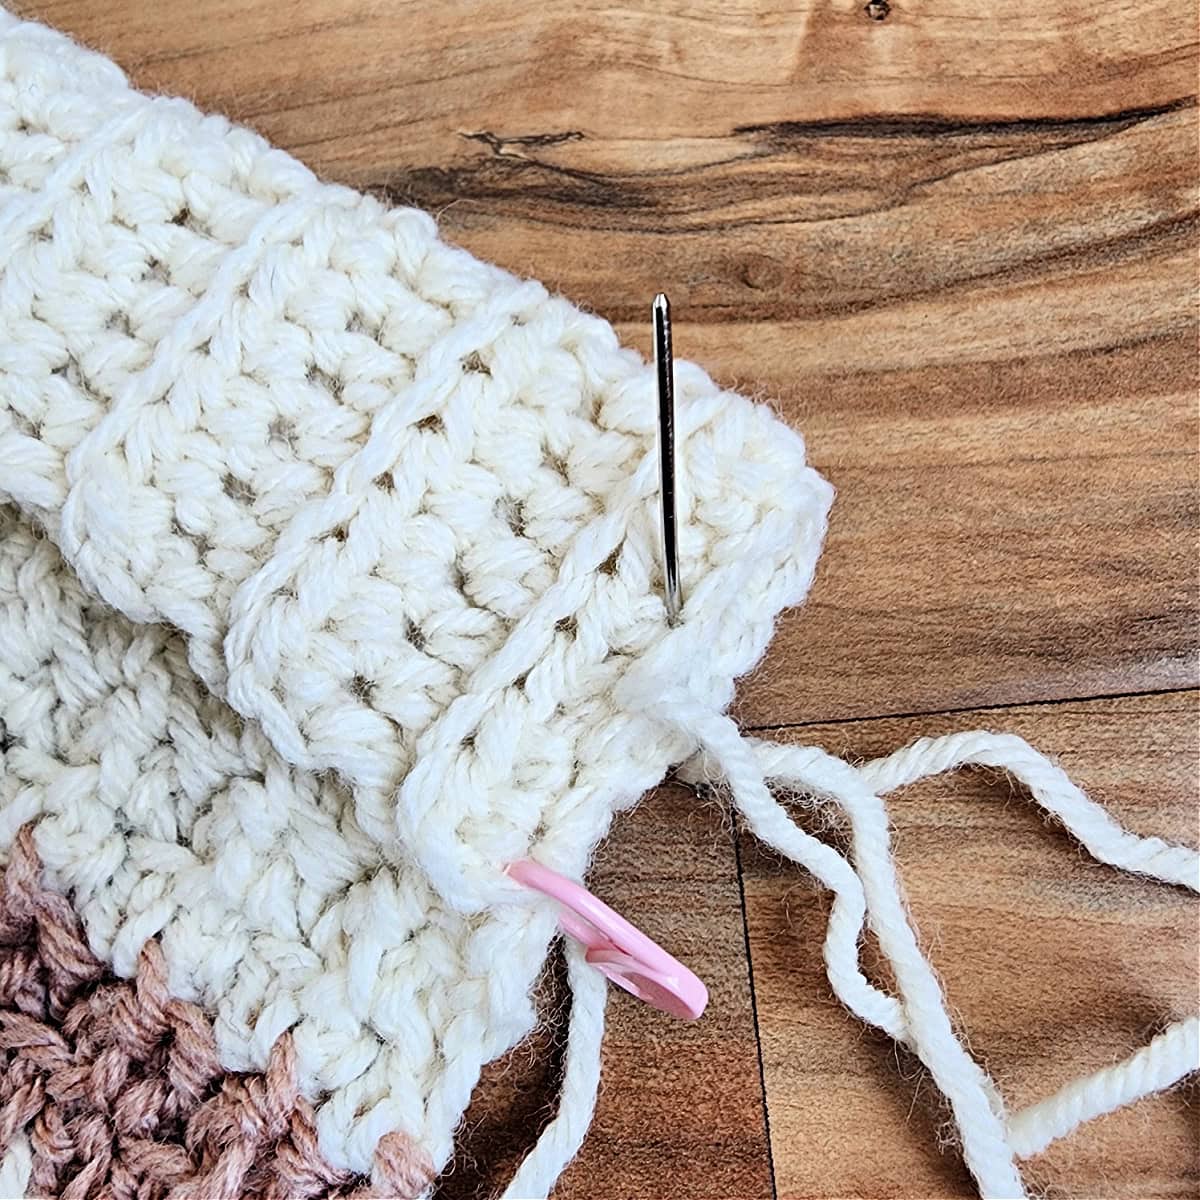
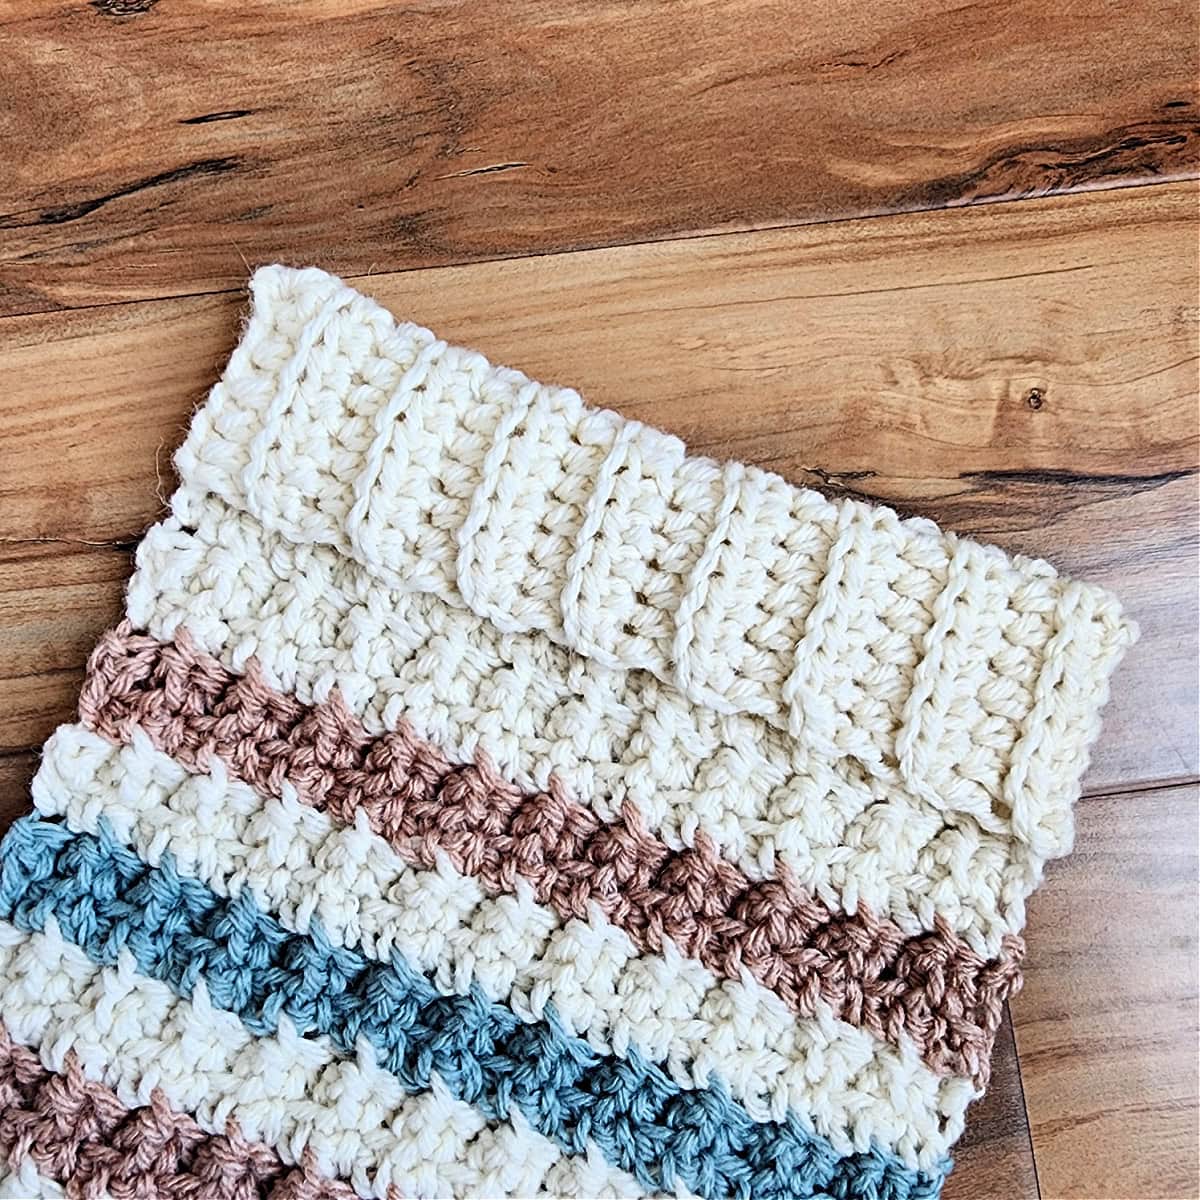
Step Two: Fold the ribbing and striped portion up towards the scarf to create a pocket. Make sure that the free edge of the pocket ribbing is facing the scarf (we’re going to whipstitch the edges of the pocket on the wrong side and then turn it right side out).
To create the pockets, I folded my scarf at the third row after the last stripe. Use locking stitch markers to hold the pocket in place while you whipstitch the edges. If you did not add stripes to your pocket scarf, the fold would be between rows 15 & 16 from the pocket ribbing.
Use a length of yarn that is 2 – 3 times the length of the seam to be made and a yarn needle and whipstitch both side edges of the pocket. Weave in ends. Turn pocket right side out.
Repeat for the second pocket. Make sure to create the second pocket on the same side of the scarf.
I Made It! Now What?
Pin this post! Save this free crochet mittens pattern to your Pinterest boards so that you can come back and make it again.
Leave a comment below: We love to hear your feedback.
Share Your Finished Projects on Facebook or Instagram: I love to see your finished projects! Share with us on social media and tag me @acrochetedsimplicity or use the hashtag #ACrochetedSimplicity so I can find your posts.
Join us in The Facebook Community Group!
Come share your finished projects with us in the A Crocheted Simplicity Crochet Community Group on Facebook. Join us for fun community events such as crochet alongs, join in on crochet conversations, ask questions, get advice, and share your love for crochet!

Different Crochet Scarf Patterns
Are you looking for more winter crochet scarf patterns? We have several more scarf designs you’ll love! From a basic crochet scarf to a c2c scarf and keyhole scarves, you’re sure to find one that fits your personal style!
