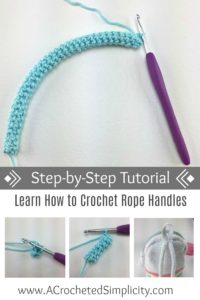
Learn How to Make Crochet Rope Handles
There are several different ways that you can crochet handles for bags, but unfortunately, many of these styles have a lot more stretch to them than preferred. You can adjust your hook size, crochet with a tighter tension, and even sew a ribbon onto the back of the handle to try and keep it from stretching out, or you can crochet rope handles that have much less natural stretch to them than other crochet handles do!
>CLICK HERE TO SIGN-UP TO RECEIVE OUR NEWSLETTER!<
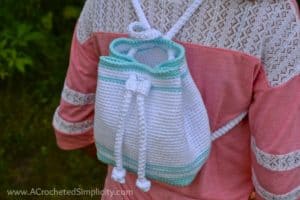
Crochet rope handles aren’t perfect and they do have some stretch to them, but I’ve found that they stretch much less than other styles of crocheted handles. I also prefer them to flat crochet handles because they are much more comfortable to wear. I recently designed a couple small backpacks for Claire and used these crocheted rope handles: Striped Mini-Backpack & Drawstring Mini-Backpack.

Pin it to save it for later!
In this tutorial, you’ll learn how to successfully make crocheted rope! Before we begin, let’s go over a few stitch abbreviations and the materials I used for this crochet tutorial.
This post contains affiliate links.
Materials
- Yarn: You can use any weight yarn you’d like. I used Lion Brand Yarn’s 24/7 cotton for this tutorial. 100% Mercerized Cotton Yarn (186 yards / 170 m / 3.5 oz / 100 g). Available for purchase on the Lion Brand Website or AMAZON
- Crochet Hook: G/6/4.00mm (or hook size to match the weight of yarn you chose)
- Scissors
- Tapestry Needle
These items are available through our affiliates below.
 Lion Brand Yarn Wool-Ease Y...Shop on Amazon
  Clover 1045/G Purple Amour ...Shop on Amazon
  Lion Brand Yarn 400-5-5002 ...Shop on Amazon
  Fiskars All Purpose Scissor...Shop on Amazon
Abbreviations (US Terms)
- ch: chain
- sc: single crochet
- yo: yarn over
- st(s): stitch(es)
- RS: right side
- WS: wrong side
Construction Notes
This crochet rope is worked in continuous rounds (a spiral). You will begin round 1 of this crochet rope as you do other items. However, when you get to round 3, you will be working with the RS of your work facing you, BUT you will be working into the 3rd loop (back bar) that’s on the back side of the sc. As you crochet the rope, the RS of your sc will be on the inside of the rope and what is visible on the outside of the crocheted rope is actually the WS of your sc. This will make much more sense as you start crocheting and see your crochet rope take shape.
Adjusting the Diameter
You can make the diameter of your rope larger or smaller by adjusting the number of stitches you work in round 1. Just remember that the larger the diameter, the more flat your crocheted rope handle will lay when worn.
Crochet Rope Instructions
Rnd 1: With a 4.00mm crochet hook, leave a 12″ tail of yarn for sewing, then ch 2, work 5 sc into the 2nd ch from your hook. Do not join. (5 sts)
Rnd 2: Do not ch, sc in each st around. Do not join.
Rnd 3: With the RS of the sc facing the center of the rope, work into the back side of the sts from the previous round and into the 3rd loop (or back bar), work 1 sc into the 3rd loop/back bar of each sc around. Do not join.
Rep Rnd 3 until your crocheted rope measures the desired length.
Fasten off leaving a 12″ tail of yarn for sewing.
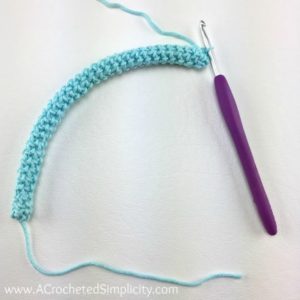
As you crochet the first few rounds, you may find it helpful to use a finger to poke the center of your rope inward to make sure the RS of the sc ends up on the inside of the crochet rope. The right side of the crochet rope should show the back side of the single crochet stitches.
Stick with it!
The first few rounds feel a little awkward, but keep at it and your crochet rope will soon begin to take shape. Once you find your groove, you’ll be pleasantly surprised just how quickly they work up!
Try making crochet rope handles for your next bag project!
I designed the Striped Mini-Backpack & Drawstring Mini-Backpack to have crochet rope handles. Claire loves them and says they are much more comfy than other handles. Click the photos below to see more photos of them in action!
FIND ALL OF MY FREE CROCHET PATTERNS HERE
Are you intimidated by knit-look crochet? Would you love to learn my tips & tricks? Take an Annies Video Class with me and let me ease your fears and help you increase your skills! Click on the photo below to watch a free preview. You can also see the other 4 video classes I have available!


Why not do regular sc. stitches, is this a nicer pattern??
I created the rope this way because I preferred the look of it to regular sc stitches. 🙂
I am making a rope handle for a purse I made using your pattern. How do you like to attach the handle to something like a purse?
Thank you for sharing this pattern. I wanted something different and this is it!
Hi Gail,
I like to add other non-crochet details to bags. So sometimes I’ll use D-rings like this: https://amzn.to/436wPSK
Happy Crocheting,
Jennifer