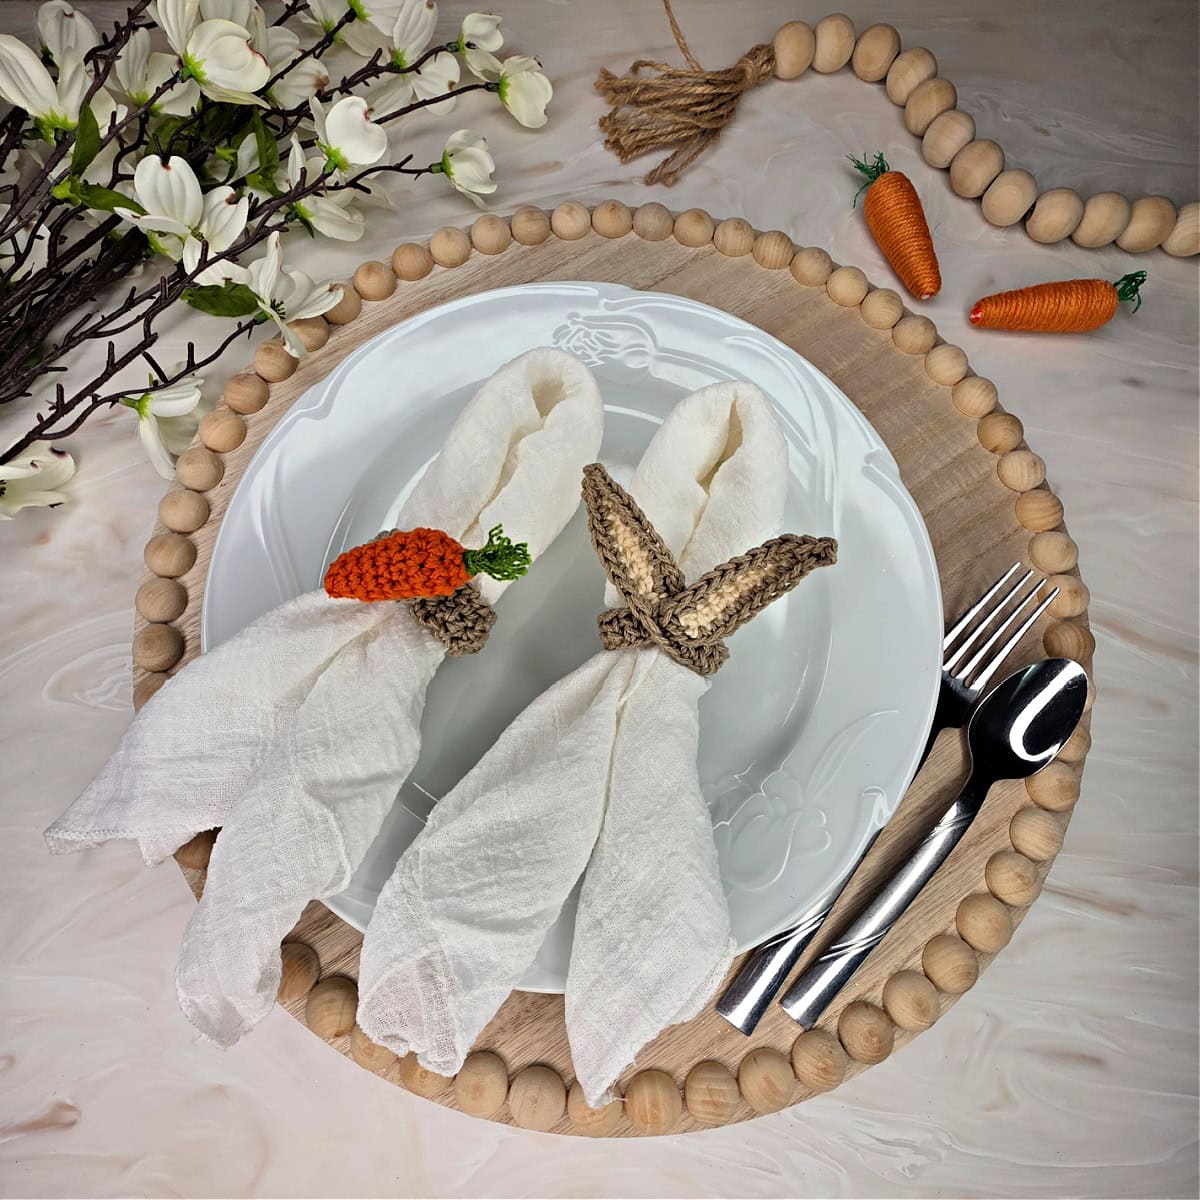
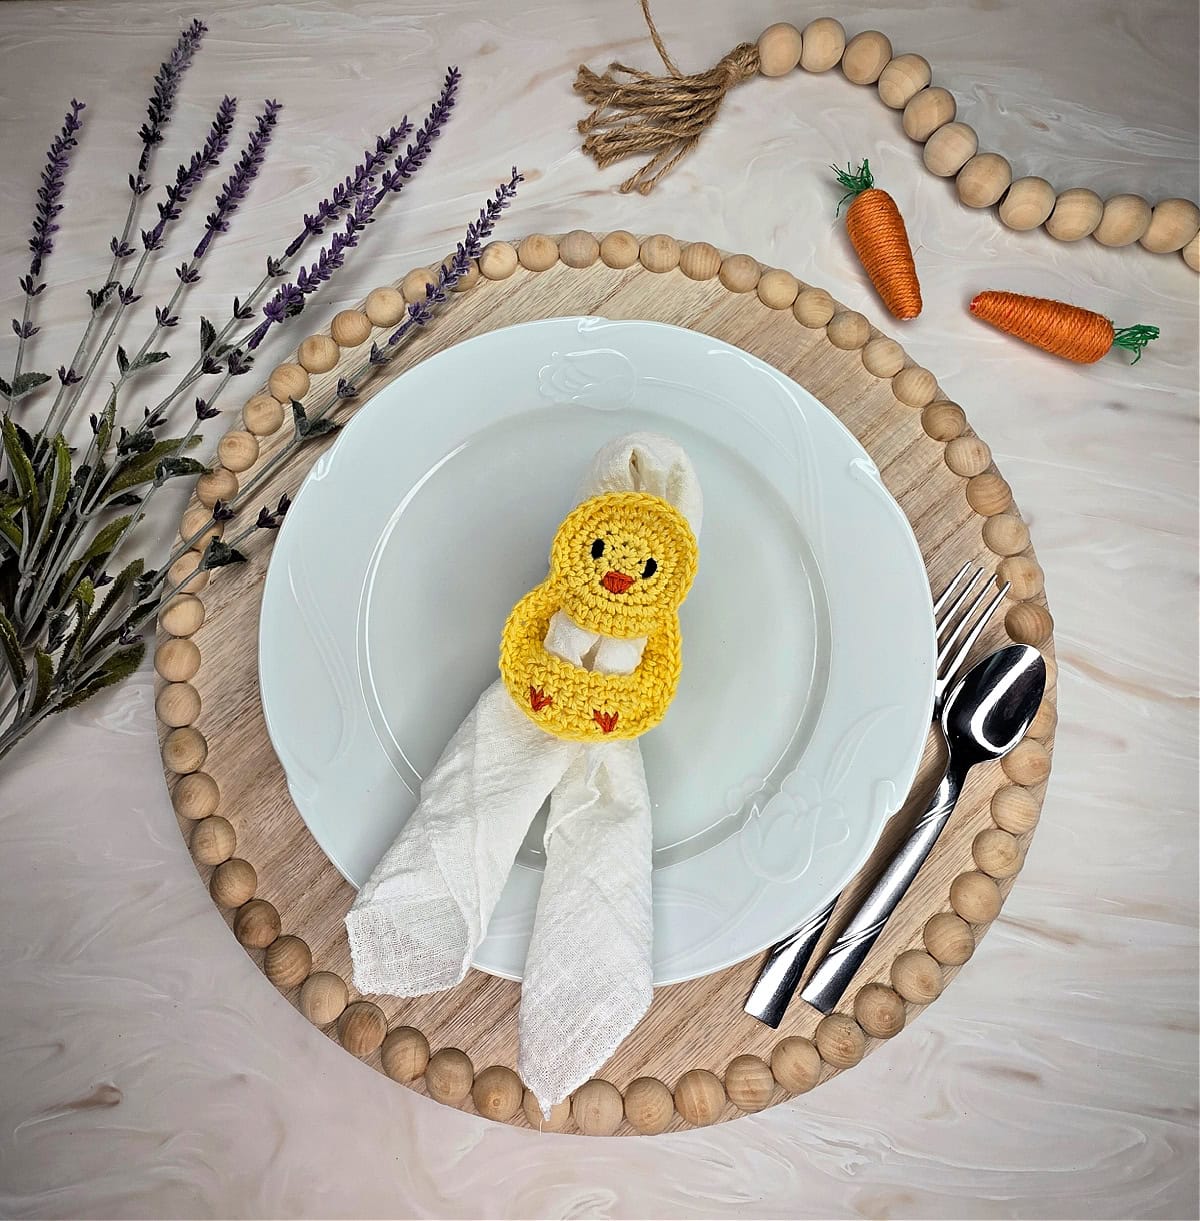
Easter Crochet Napkin Rings
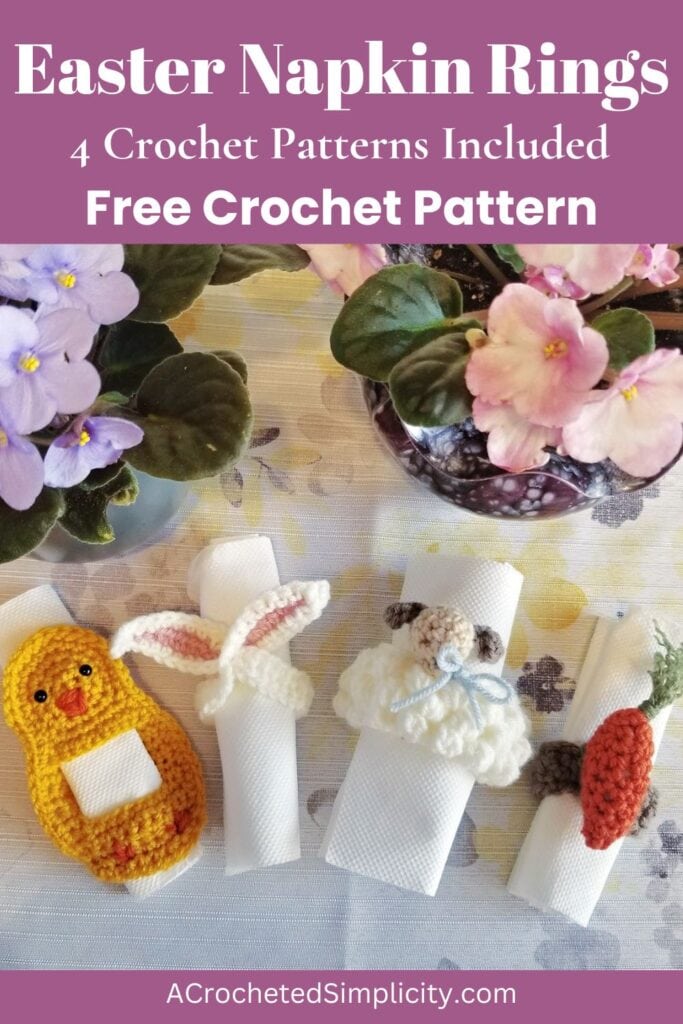
Add a handmade touch to your Easter dinner table with this cute set of crochet napkin rings.
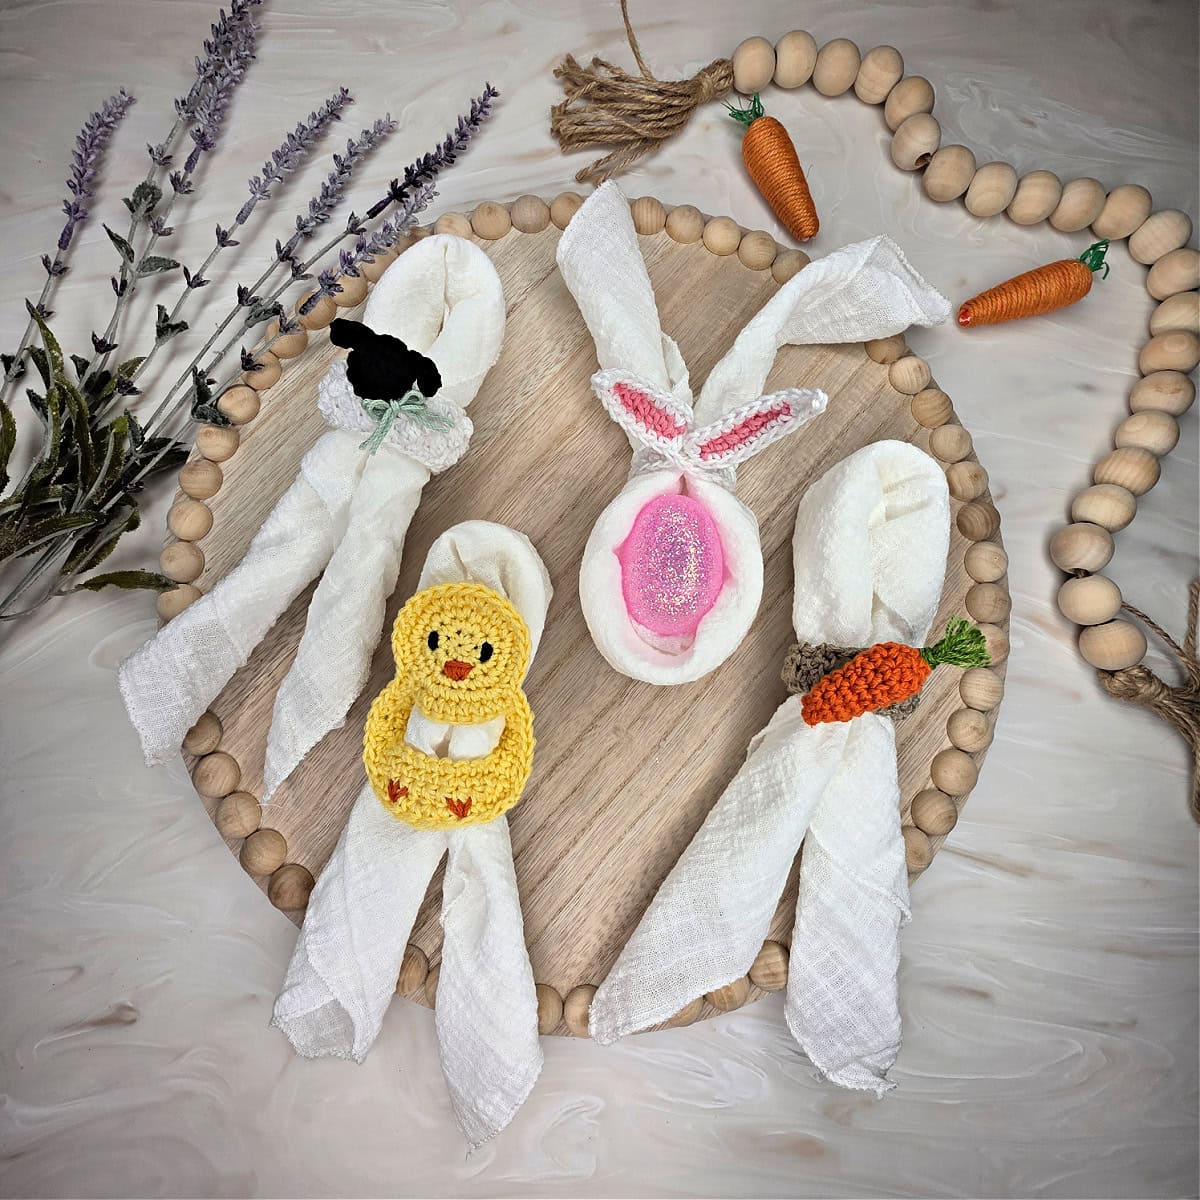
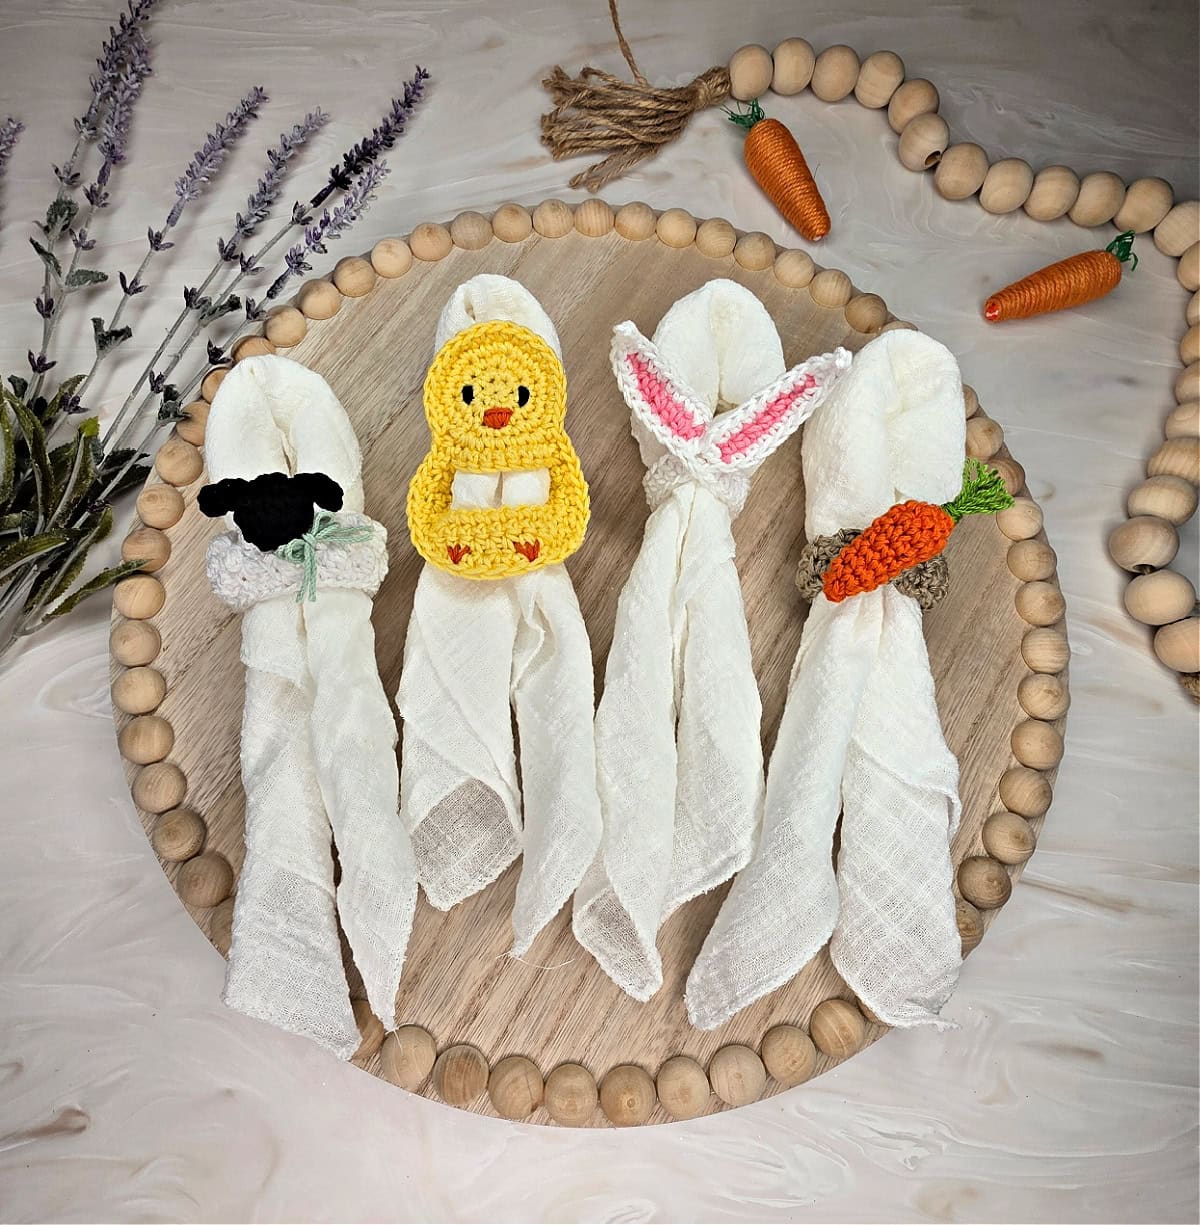
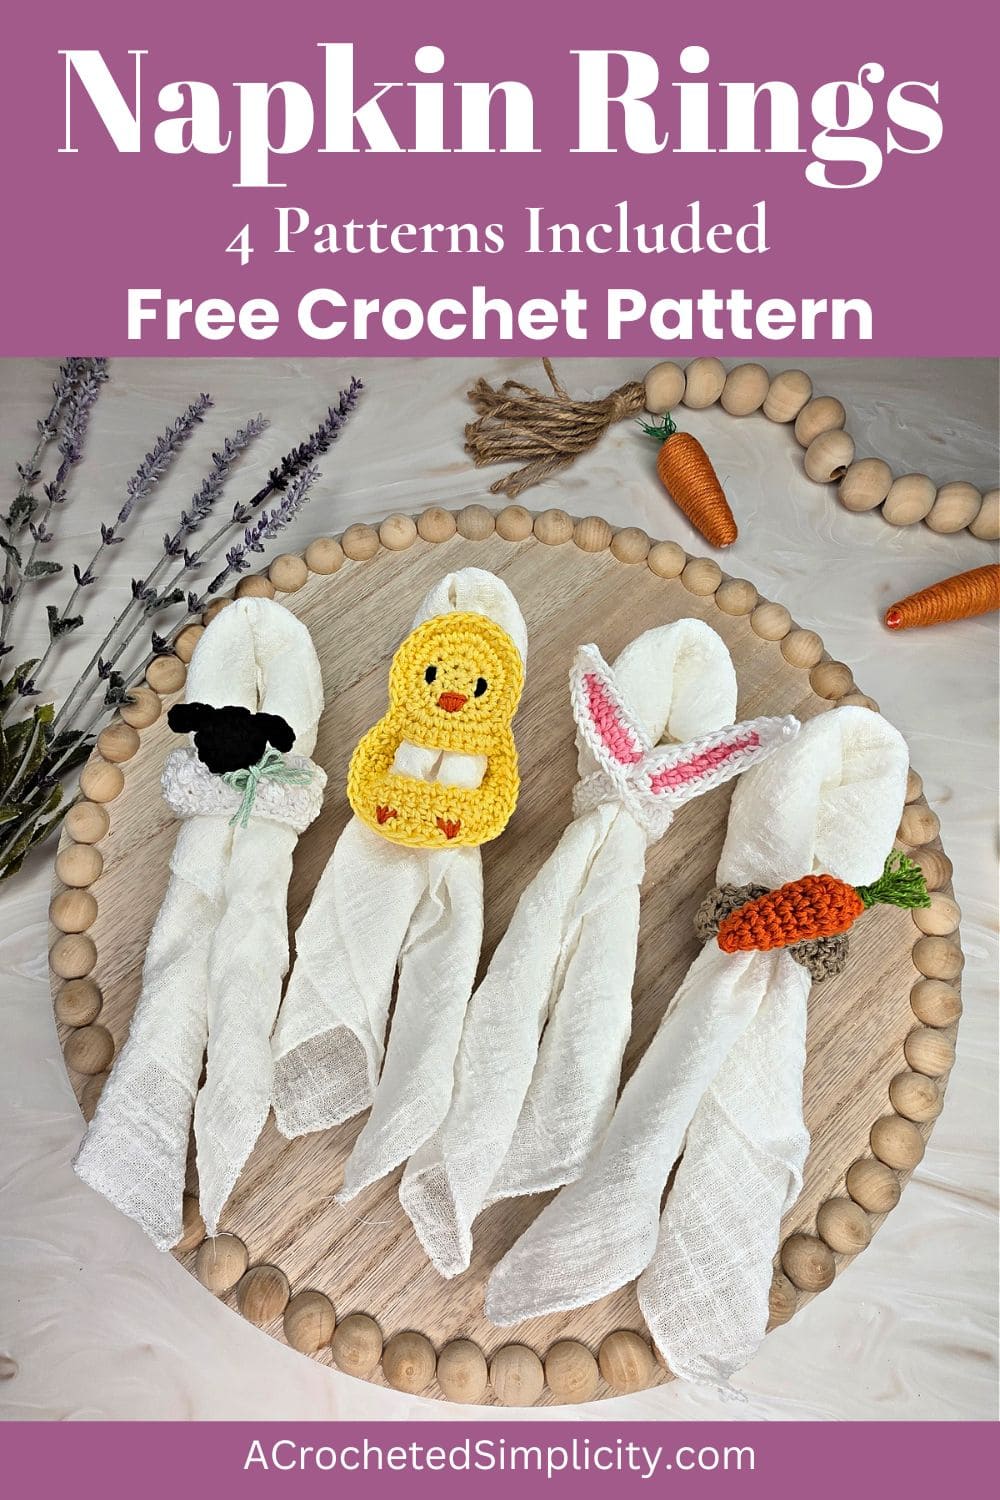
This crochet napkin ring pattern includes instructions for four separate napkin rings: bunny ears, carrot, lamb, and baby chick.
You’ll find the crochet napkin rings free pattern below, or an ad-free print friendly PDF on Ravelry, or Etsy (aff).
Crochet napkin rings are a perfect, stylish solution to add a little personality to your dining experience when you’re hosting a holiday gathering.
Perfect for Gifting and Craft Fairs
Crochet napkin rings make excellent handmade gifts and are ideal for craft fair booths. Bundle them in sets of four or six with a coordinating ribbon for a gift-ready presentation.
Rustic Vibes: Use jute or hemp yarn and pair with linen napkins for a farmhouse feel.
Why Choose Crochet Napkin Rings?
Crochet napkin rings are a simple yet effective way to add charm and texture to your table setting. Here’s why they’re a favorite among DIY decorators and fiber artists:
- Eco-Friendly: Reusable and washable, they’re a sustainable alternative to disposable napkin holders.
- Customizable: Choose colors, yarn textures, and patterns to match your decor or event theme.
- Budget-Friendly: Use leftover yarn or scrap materials to create beautiful napkin rings on a budget.
- Beginner-Friendly: Most crochet napkin ring patterns are easy to follow, making them a great project for new crocheters.
How To Get The
Easter Crochet Napkin Rings Pattern
Option 1: Scroll down for the free crochet napkin rings pattern right here in this blog post.
Option 2: Purchase the ad-free printable PDF from one of my shops:
Yarn
For my crochet napkin rings, I used Lion Brand Yarns 24/7 Cotton. This mercerized cotton yarn is available in all of the colors needed to make my crochet napkin holders, it has a nice sheen, and is very sturdy.
During our Mini-Mystery Crochet Along for these crochet napkin holders, some crocheters used acrylic yarns and they turned out just as cute. This is a great project to use up scraps of yarn.
Easter Crochet Napkin Rings Pattern
These crochet napkin rings are available as a free pattern below, but if you love to work offline, I’ve got a couple other great options for you.
Purchase the ad-free, printable PDF, on Ravelry, or on Etsy (aff).
This post contains affiliate links.
Materials
- Yarn: Worsted Weight / 4 yarn in several colors. The samples shown were made with Lion Brand Yarns 24/7 Cotton (3.5oz / 100 g / 186 yards / 170 meters / 100% mercerized cotton).
- See Pattern Notes below for a complete list of colors and yardages.
- Crochet Hook: G/6/4.00mm; or size needed to obtain gauge (My favorite crochet hooks are the Clover Amour Crochet Hooks, I’ve never had an ache in my hand since switching).
- Scissors
- Yarn Needle
- Measuring Tape
Experience Level
- Easy
Abbreviations (U.S. Terms)
- ch(s): chain(s)
- sl st(s): slip stitch(es)
- st(s): stitch(es)
- sc: single crochet
- hdc: half double crochet
- dc: double crochet
- bobble st: bobble stitch
- invsc2tog: invisible single crochet decrease
- yo: yarn over
- FLO: front loop only
- SM: stitch marker
- Rep: repeat
- Join yarn with a standing single crochet
Gauge
- See individual sections for measurements as you go.
Sizes
- Fits standard size linen napkins up to 18″ x 18″.
- Finished sizes are listed in each individual pattern section.
Special Stitches
- 3 Double Crochet Bobble Stitch (bobble st): Yo, insert your hook into the next st, yo, pull up a loop, yo, pull through 2 loops on your hook, (yo, insert your hook into the same st, yo, pull up a loop, yo, pull through 2 loops on your hook) work from ( to ) 2 times, yo, pull through all remaining loops on your hook.
- Invisible Single Crochet Decrease (invsc2tog): Insert your hook into the FLO of stitch indicated, insert your hook into the FLO of the next stitch, yo, pull up a loop, yo, pull thru all loops on your hook.
- Join yarn with a standing single crochet: Begin with a slip knot on your hook, insert your hook into the stitch or space indicated, yo, pull up a loop, yo and draw thru both loops on hook.
Pattern Notes
- Turning chains are not counted as stitches, unless noted otherwise.
- Yarn Notes: The napkin holders shown where made with Lion Brand 24/7. Other comparable yarns may be used as long as gauge is met.
- Lion Brand Yarn 24/7 Cotton was used for the worsted weight sample. (3.5oz / 100 g / 186 yards / 170 meters / 100% mercerized cotton).
- Yardage & Colors for 1 Set of 4 Crochet Napkin Rings
- White: 26 yards
- Black: 6 yards
- Pink: 2.5 yards
- Orange: 9 yards
- Yellow: 25 yards
- Green: 15″
- Taupe or Any color for the carrot’s ring: 7.5 yards
- Any color for lamb’s bow: 18″
Crochet Napkin Rings Written Crochet Pattern
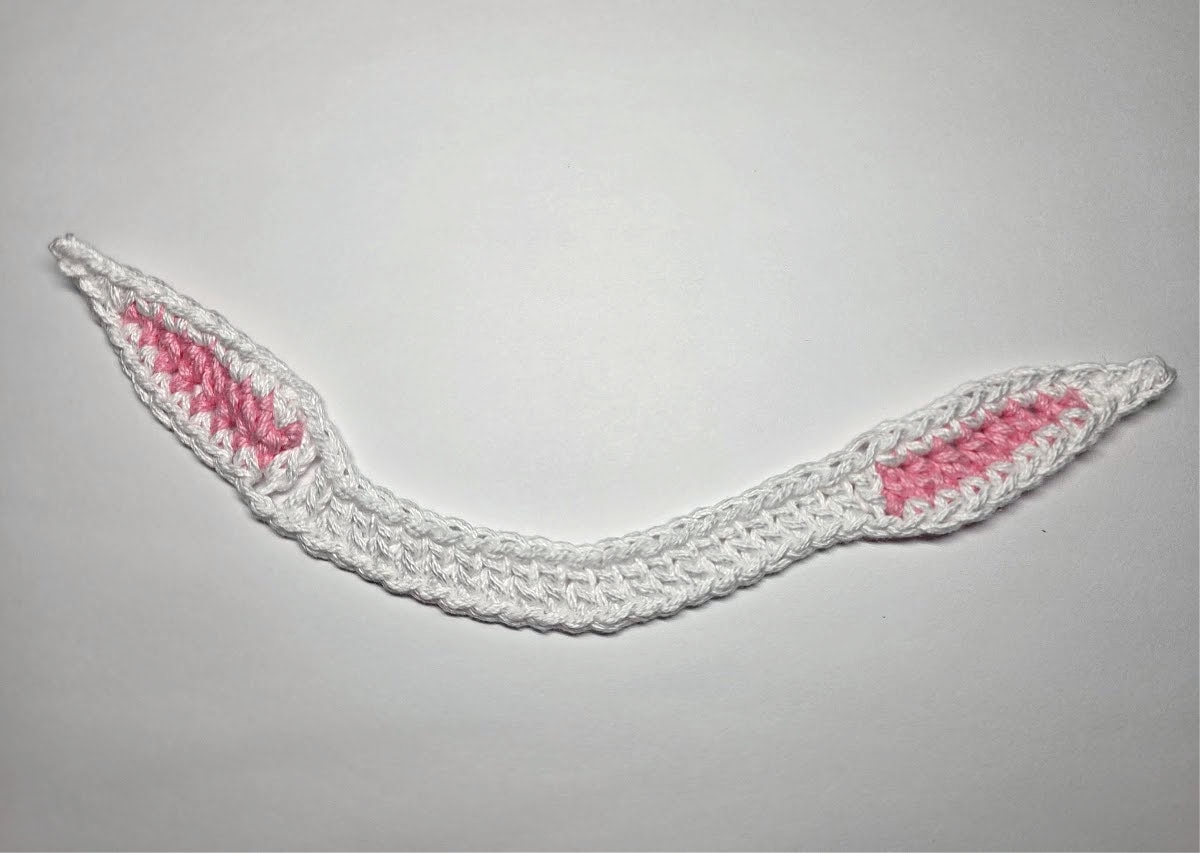
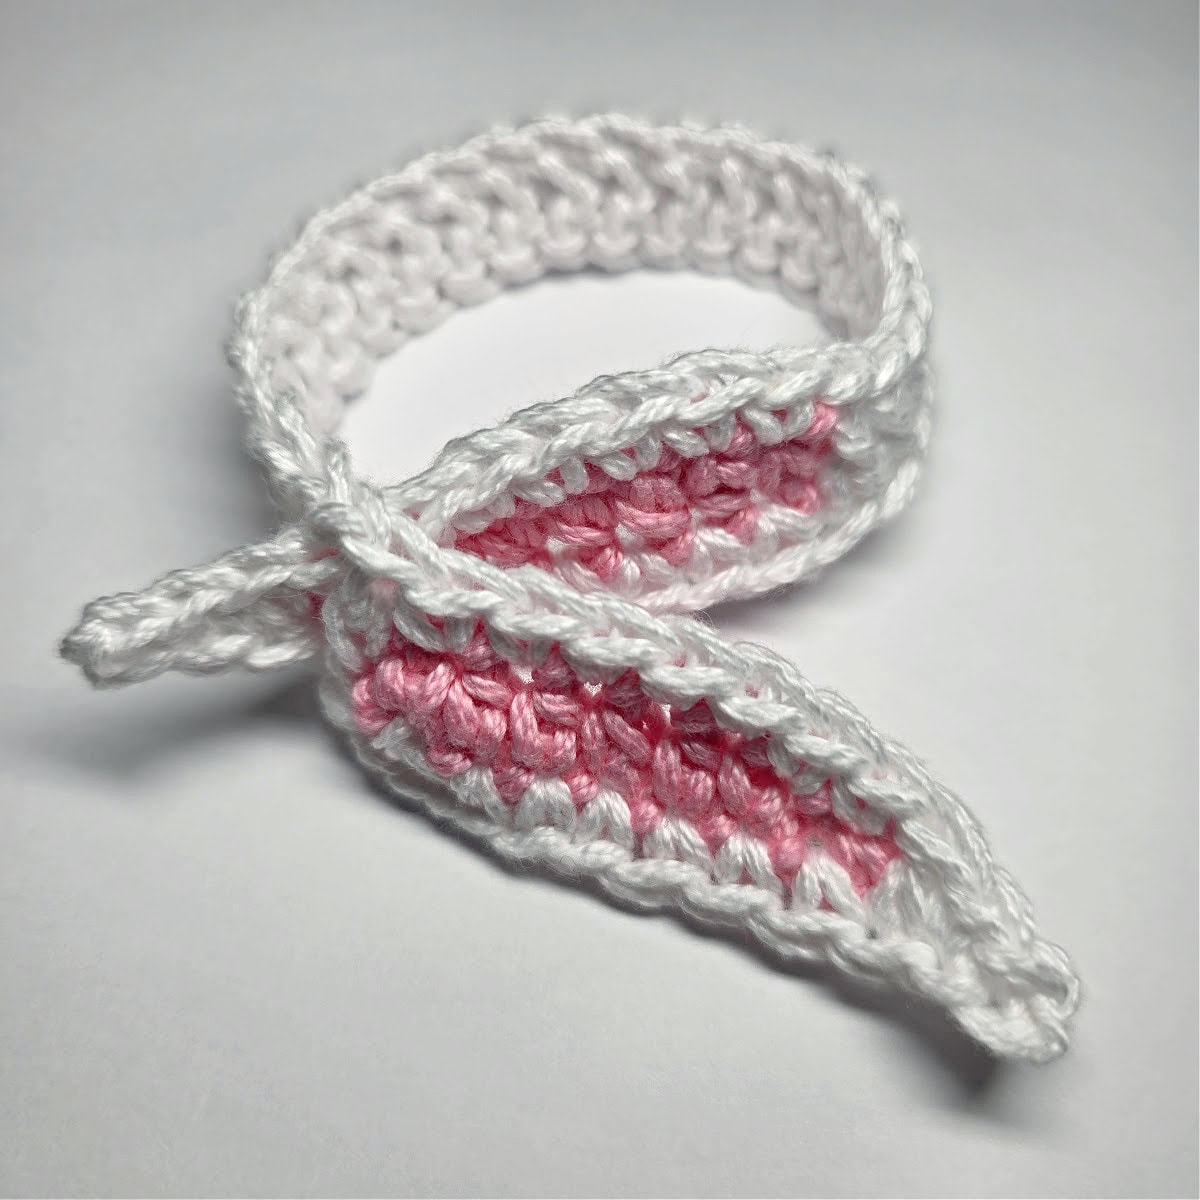
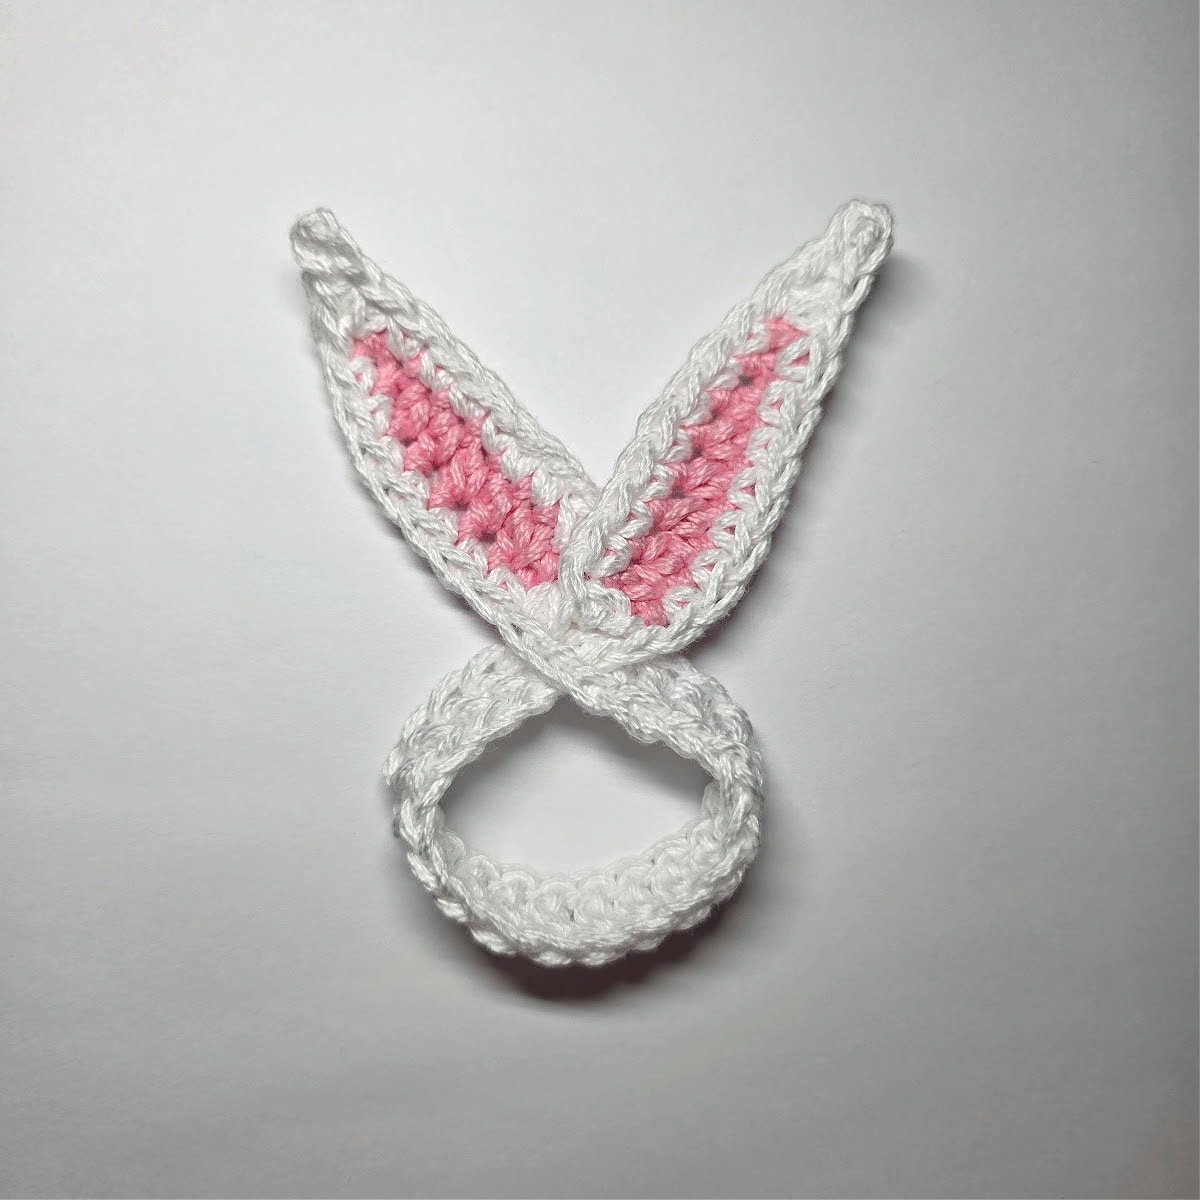
Bunny Napkin Rings
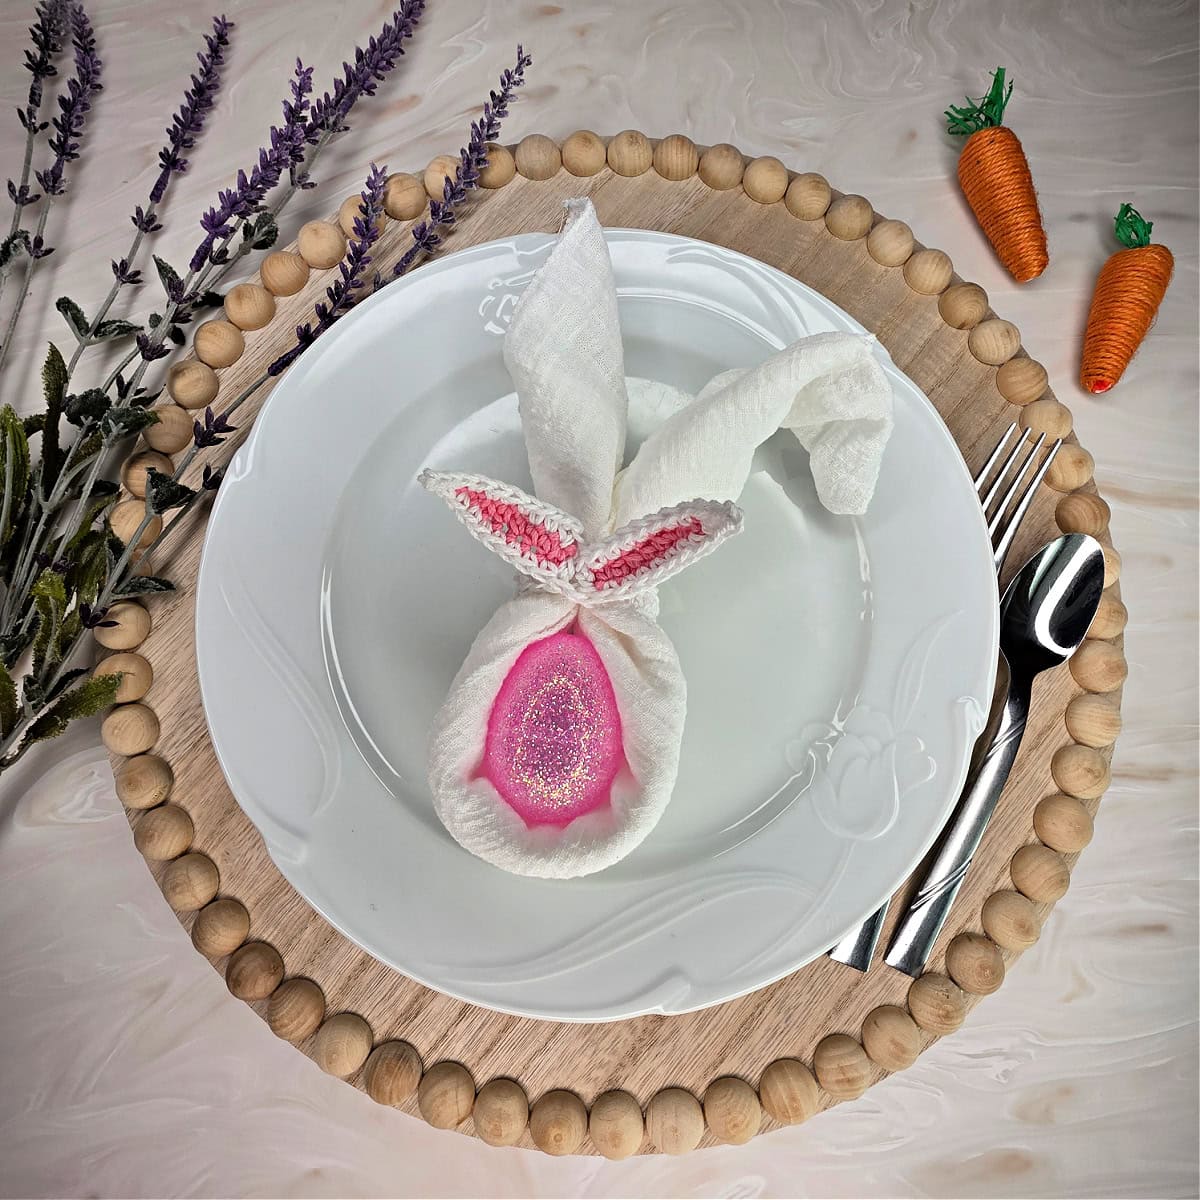
To crochet the bunny ears napkin rings, you’ll first crochet two pink inner ears. Then, you’ll join yarn to one of the inner ears, crochet around it, crochet a chain and connect the yarn to the second ear. Lastly, you’ll crochet around the second inner ear and crochet into each chain.
Bunny Napkin Holder Yardage
- White: 7 yards
- Pink: 2.5 yards
Inner Ears (Make 2)
Rnd 1: With pink yarn & a 4.00mm crochet, ch 8, working into the back humps of the foundation ch, sl st into the 2nd ch from your hook, sc in the next ch, hdc into each of the next 4 chs, sc in the last ch. Place a stitch marker into the bottom of the last sc to mark where to join yarn in the next step. (7 sts)
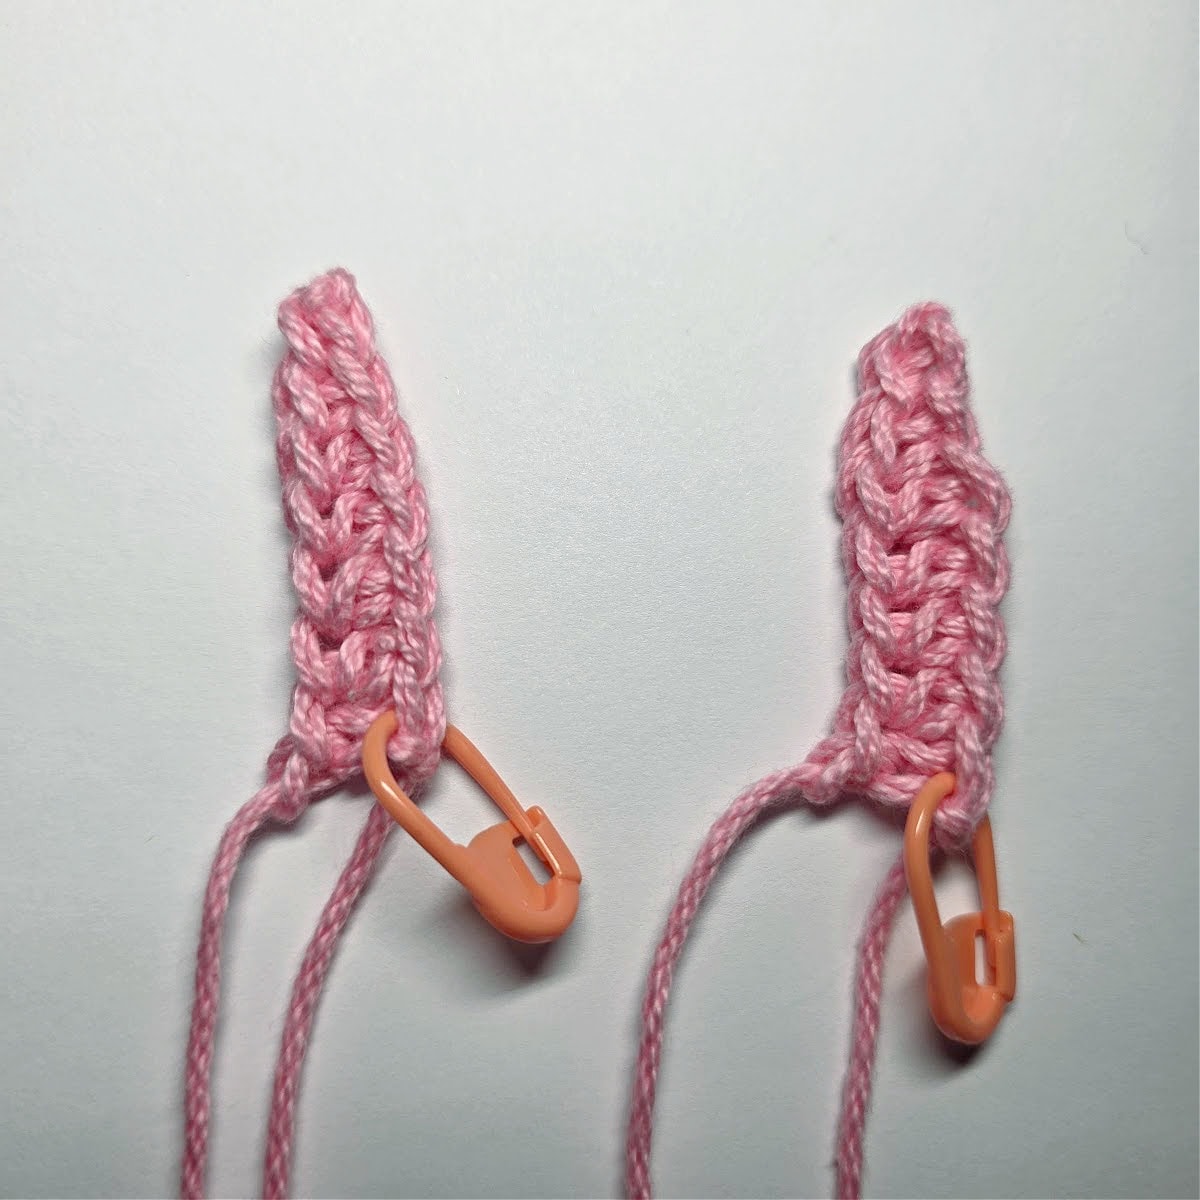
Fasten off. Weave in ends. Make the second inner ear, then continue on to the Napkin Holder. Inner Ears should measure approximately 1.5″ L x .375″ W.
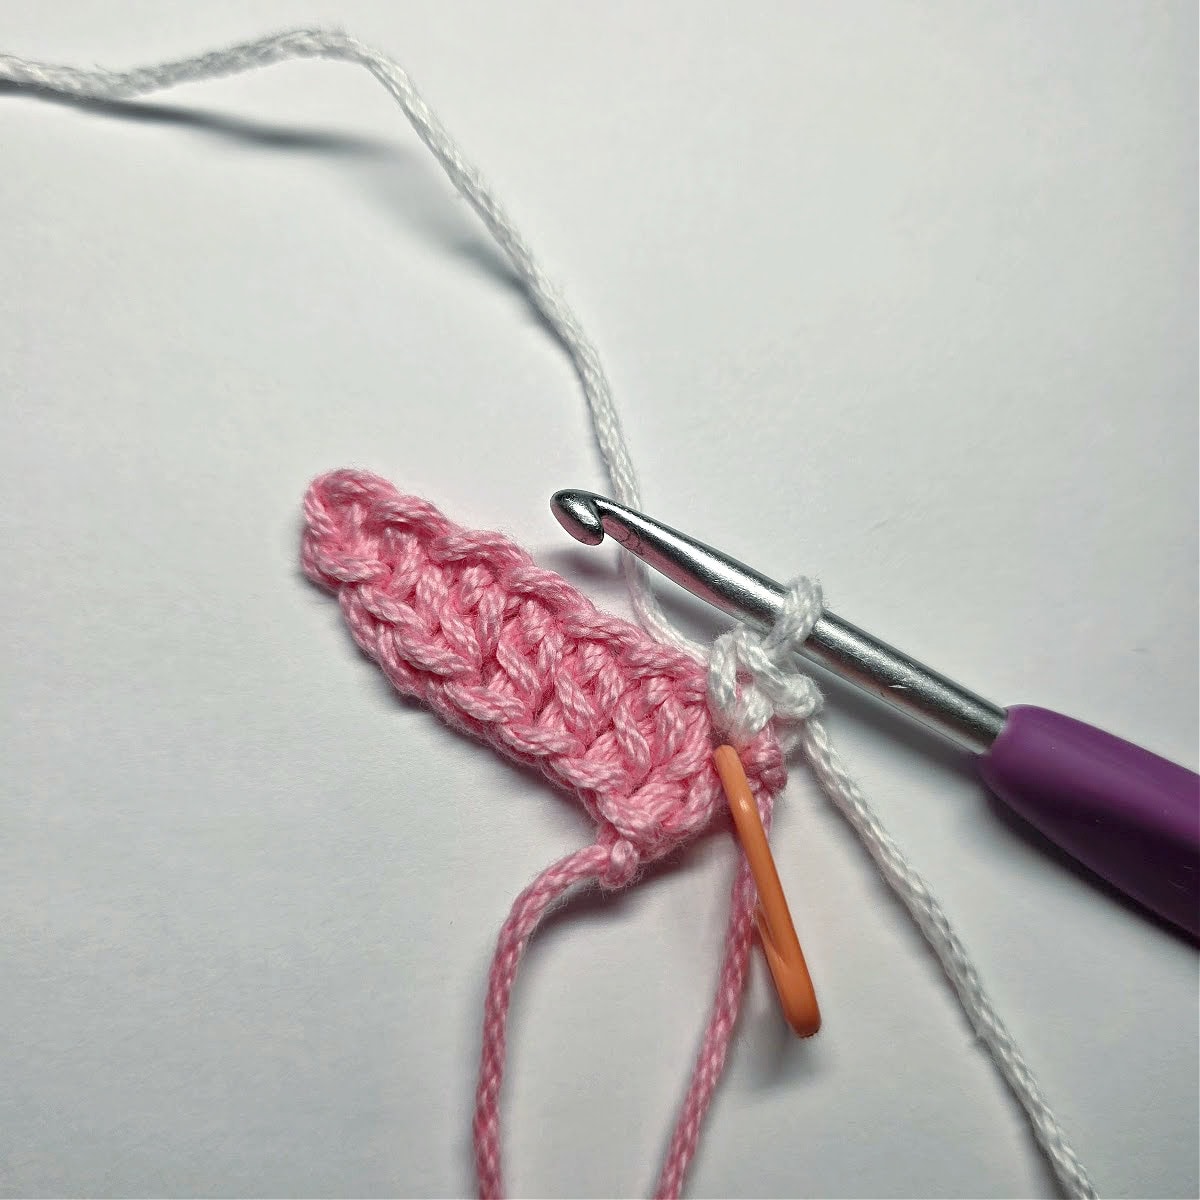
Napkin Holder
Note: This section is written in steps instead of rows to make it more clear.
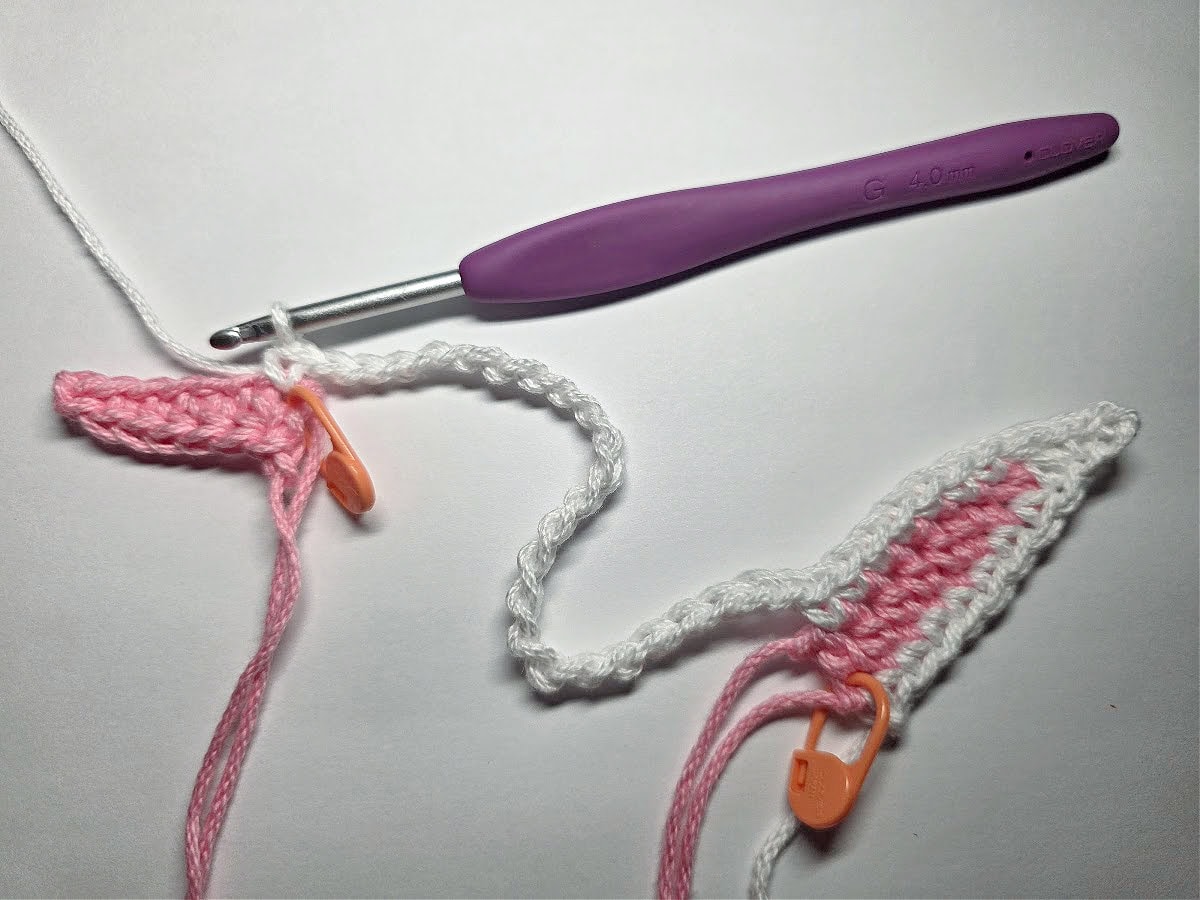
Step 1: With white yarn & a 4.00mm crochet, join yarn with a standing sc in the stitch marked with a SM on one of the inner ears, sc in each of the next 6 sts, ch 4, sl st into the 2nd ch from your hook, sc in the next ch, dc in the next ch, sc in each of the next 7 sts along the edge of the bunny ear. Do not fasten off. Continue on to Step 2.
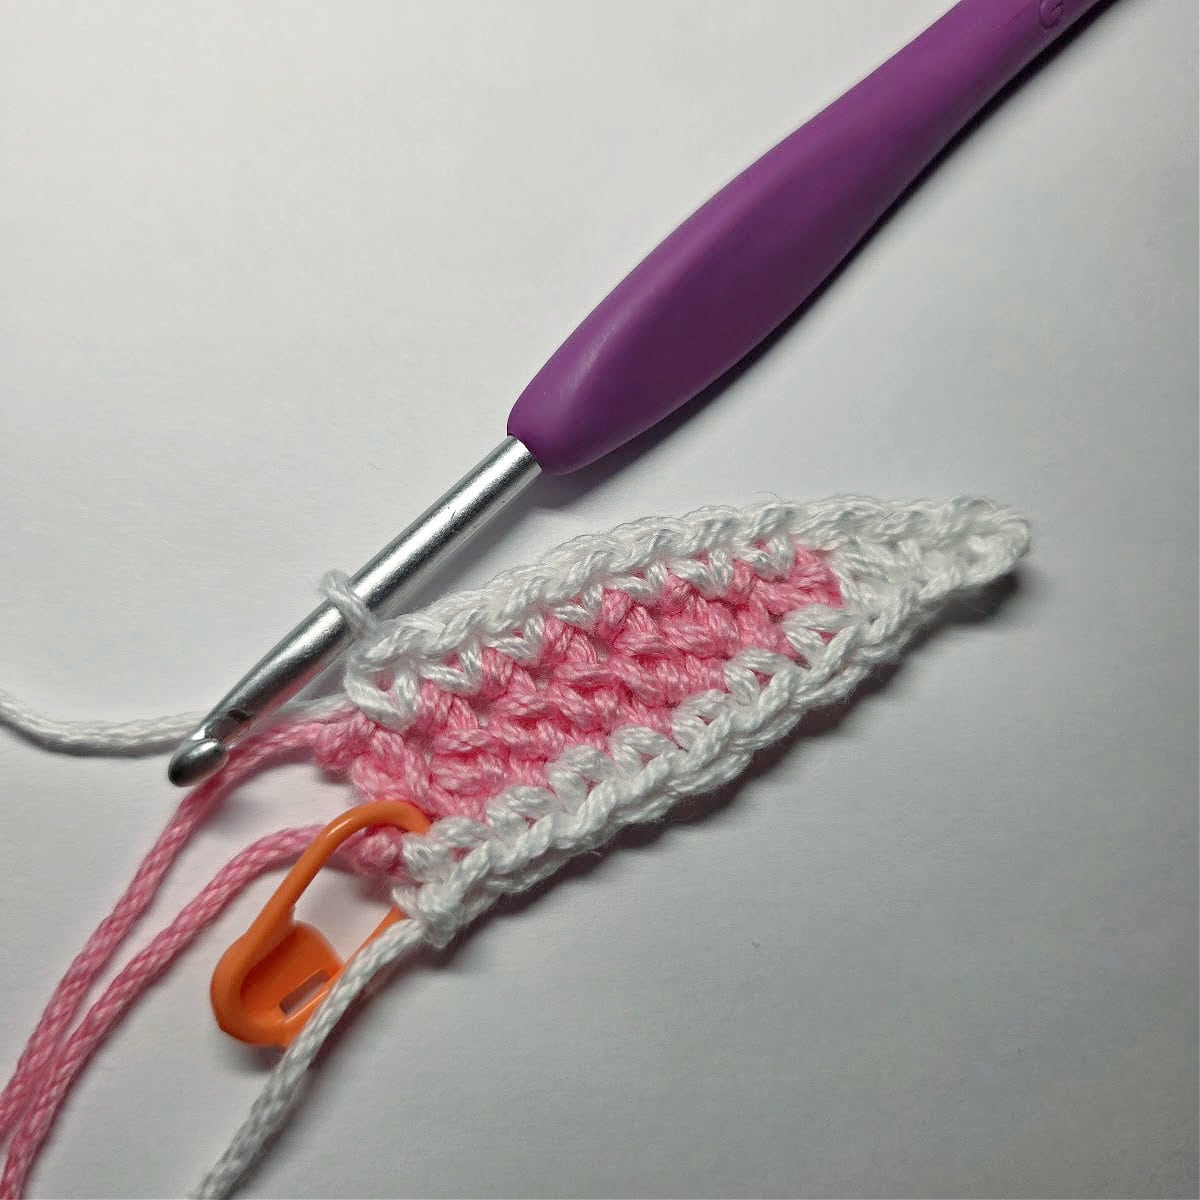
Step 2: Ch 24 (or until ch measures 5″), join yarn with a standing sc in the stitch marked with a SM on the second inner ear, sc in each of the next 6 sts, ch 4, sl st into the 2nd ch from your hook, sc in the next ch, dc in the next ch, sc in each of the next 7 sts along the edge of the bunny ear. Do not fasten off. Continue on to Step 3.
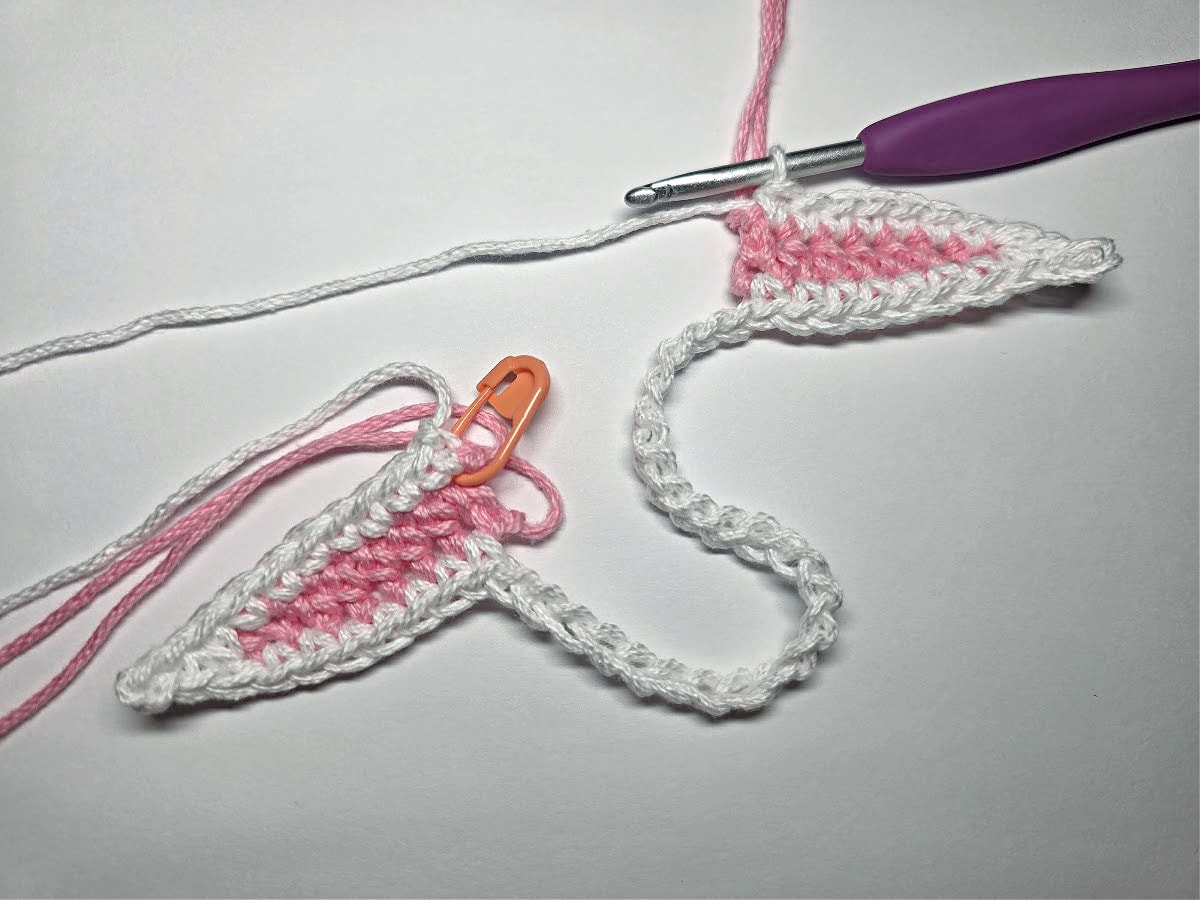
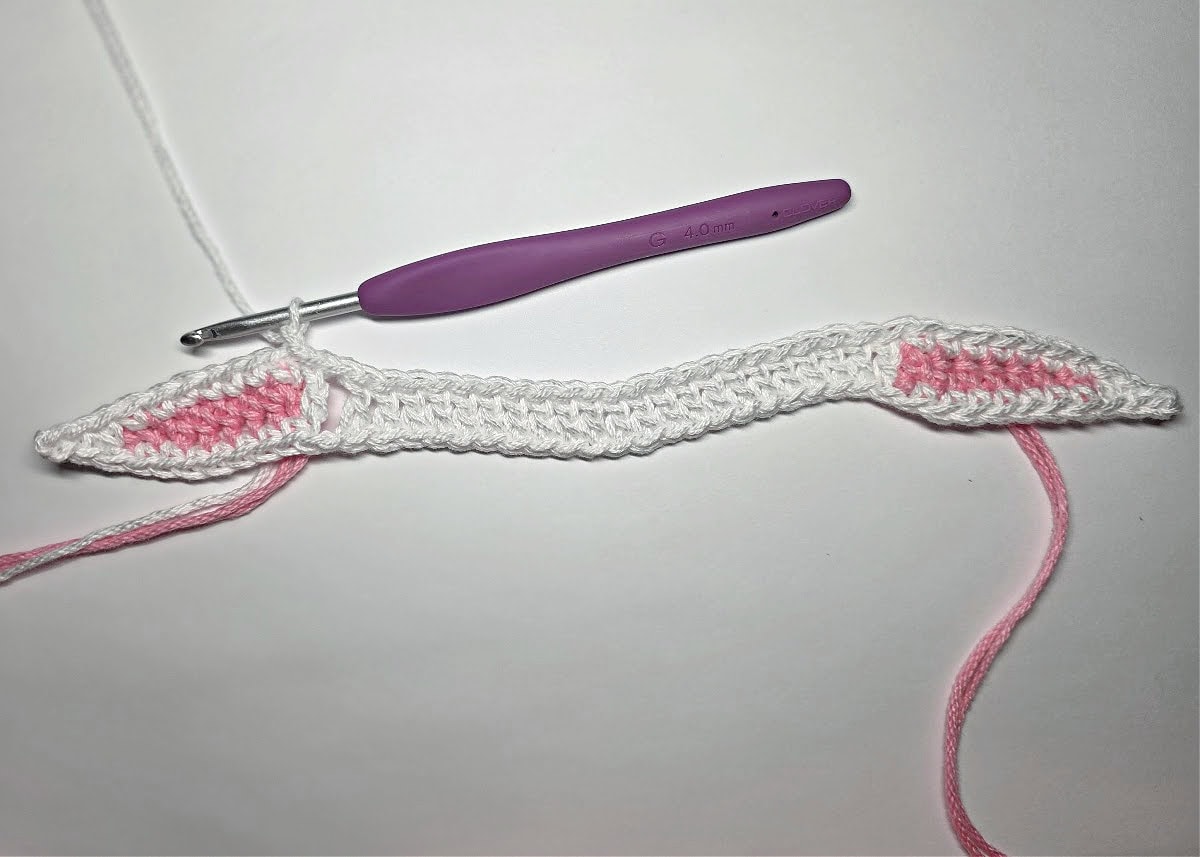
Step 3: Working into the back hump of the chs from the beginning of Step 2, dc into each ch across to the last 2 chs, ch 1, skip the next ch, dc in the last ch. Join with a sl st to the 1st sc from Step 1. Fasten off. Weave in all ends.
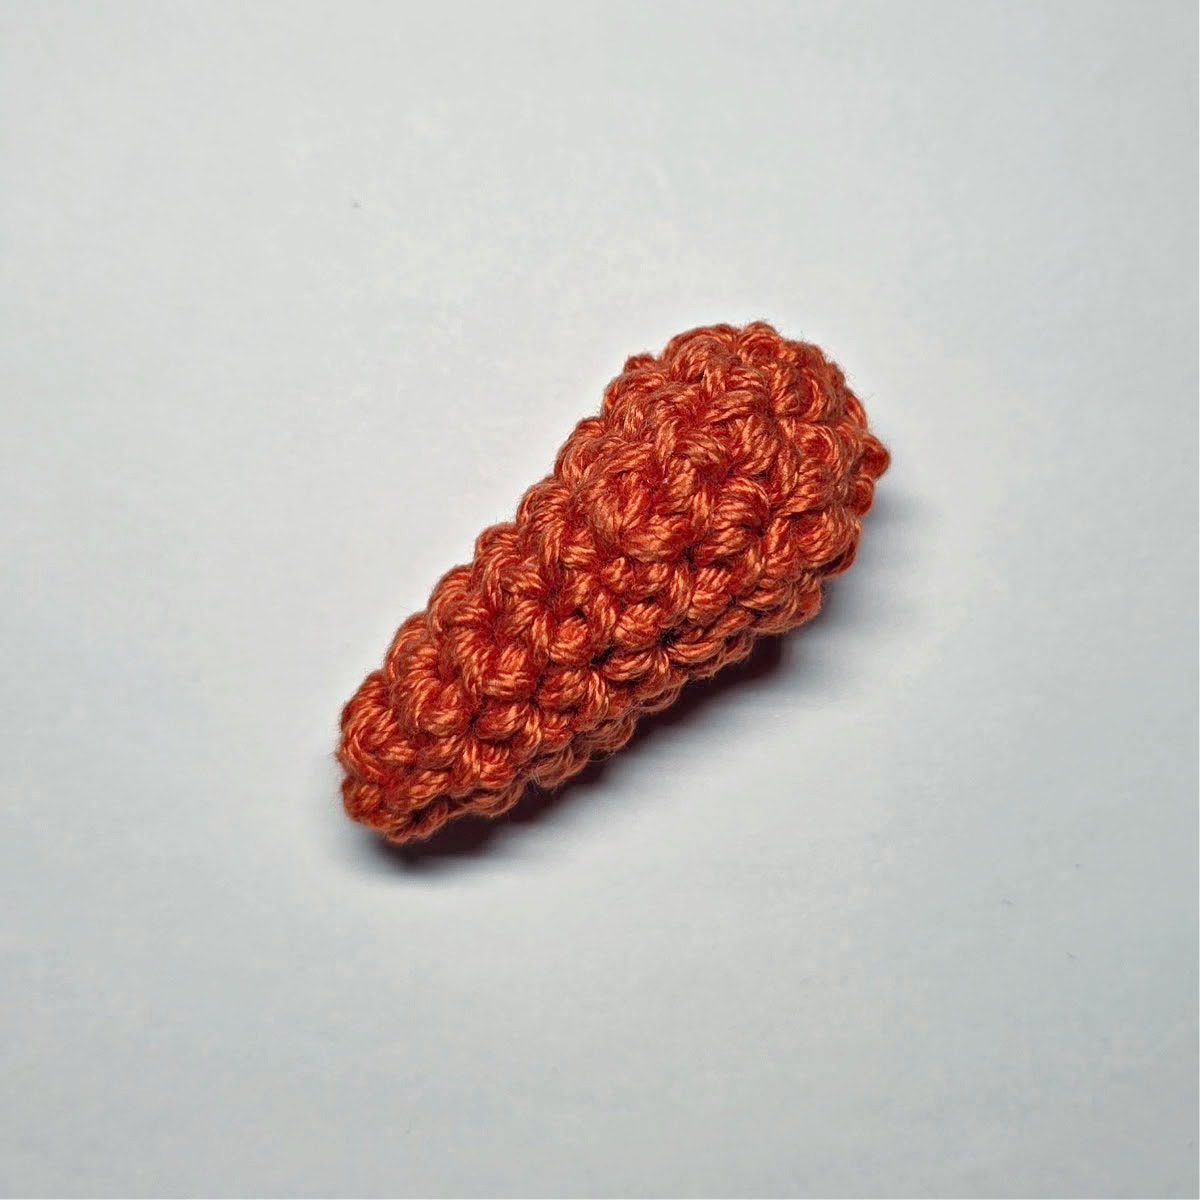
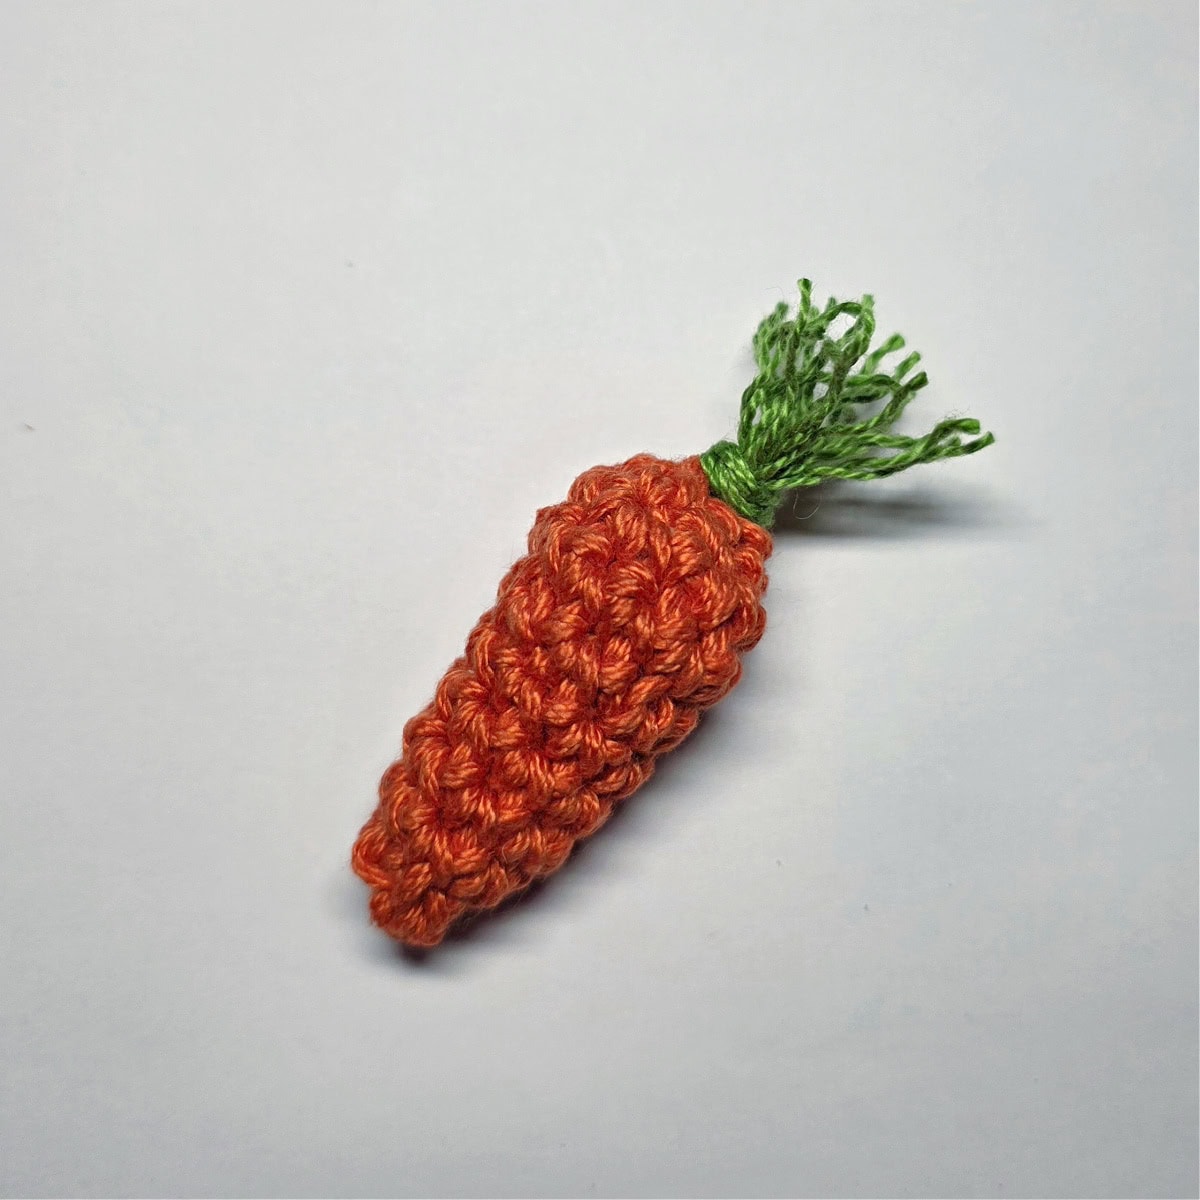
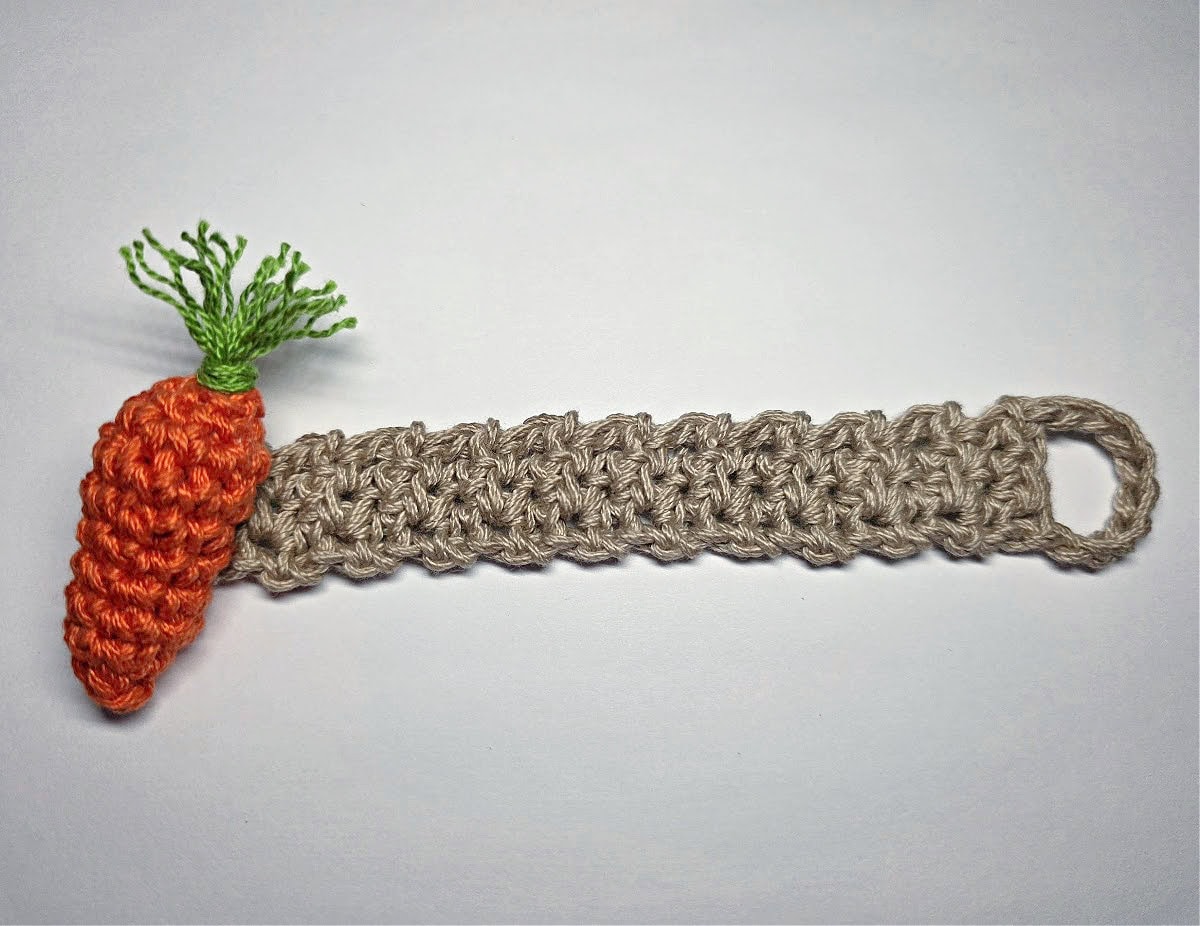
Carrot Napkin Ring
Carrot Napkin Holder Yardage
- Orange: 8 yards
- Green: 15″
- Taupe (or any color): 7.5 yards
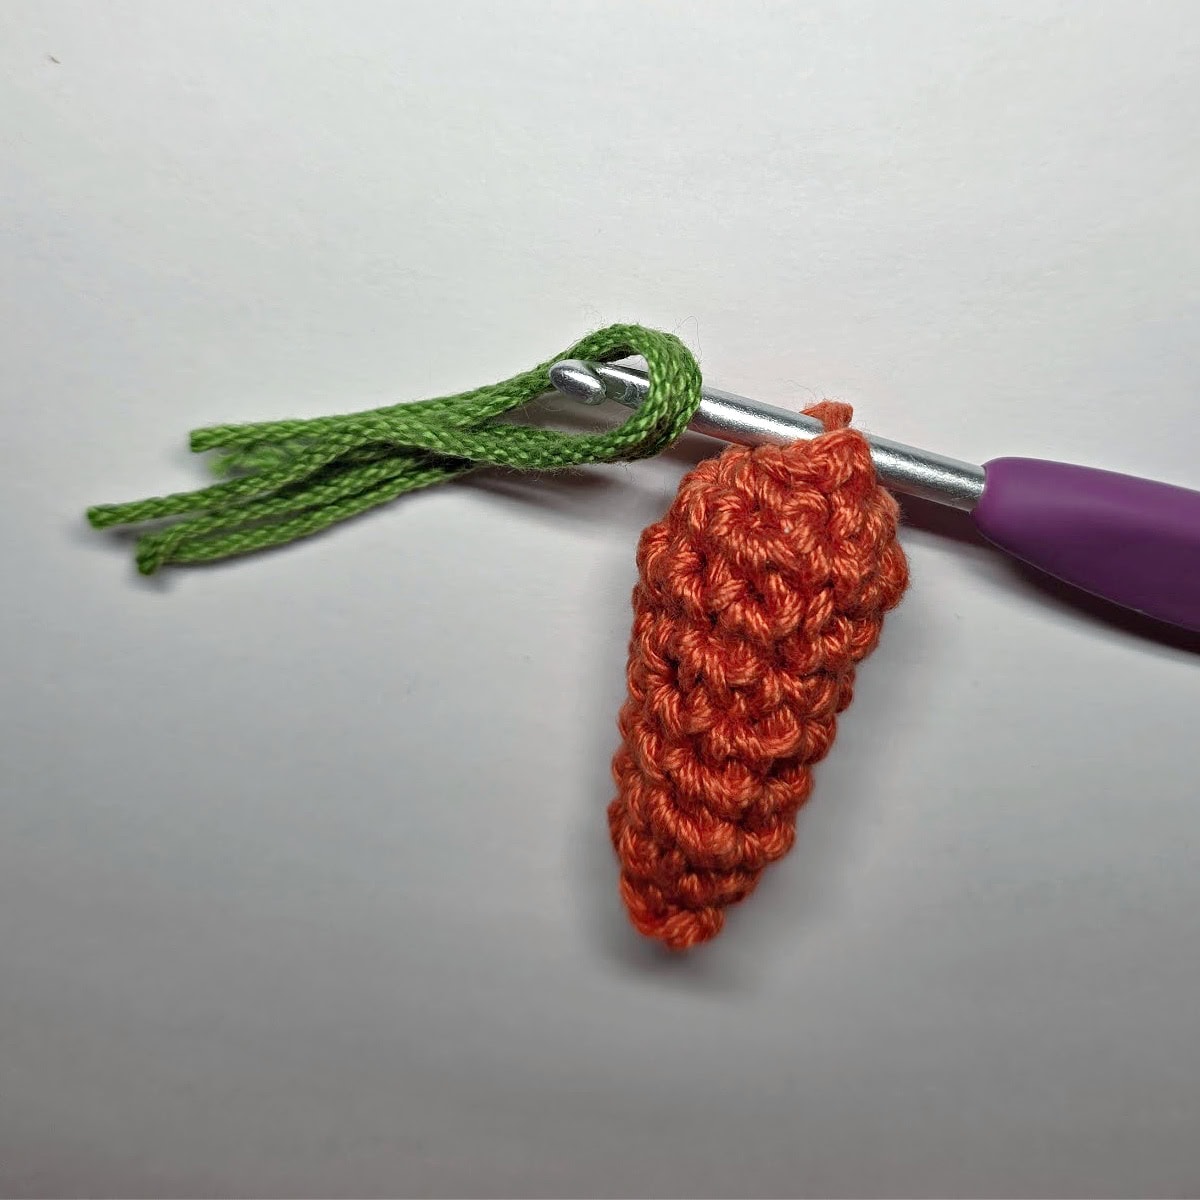
Continuous Rounds (aka a spiral): Most of the crochet carrot is worked in continuous rounds to keep from having an unsightly seam. Do not join at the end of each round, instead use a scrap piece of yarn to keep track of the beginning of each round. Move the scrap of yarn up as you complete each round.
Set-Up: With orange yarn & a 4.00mm crochet hook, ch 6, being careful not to twist the ch, sl st into the back hump of the first ch to form a ring.
Rnd 1: Ch 1, working into the back humps of the foundation ch, sc in each st around. Do not join. (6 sts)
Rnd 2: 2 sc in each st around. (12 sts)
Rnd 3: Sc in each st around. (12 sts)
Rnd 4: (FLO invsc2tog, Both Loops sc in the next st) rep from ( to ) around. (8 sts)
Stuff the carrot with scraps of yarn as you’re working the last several rounds.
Rnds 5 – 8: Sc in each st around. (8 sts)
Rnd 9: Invsc2tog 4 times. (4 sts)
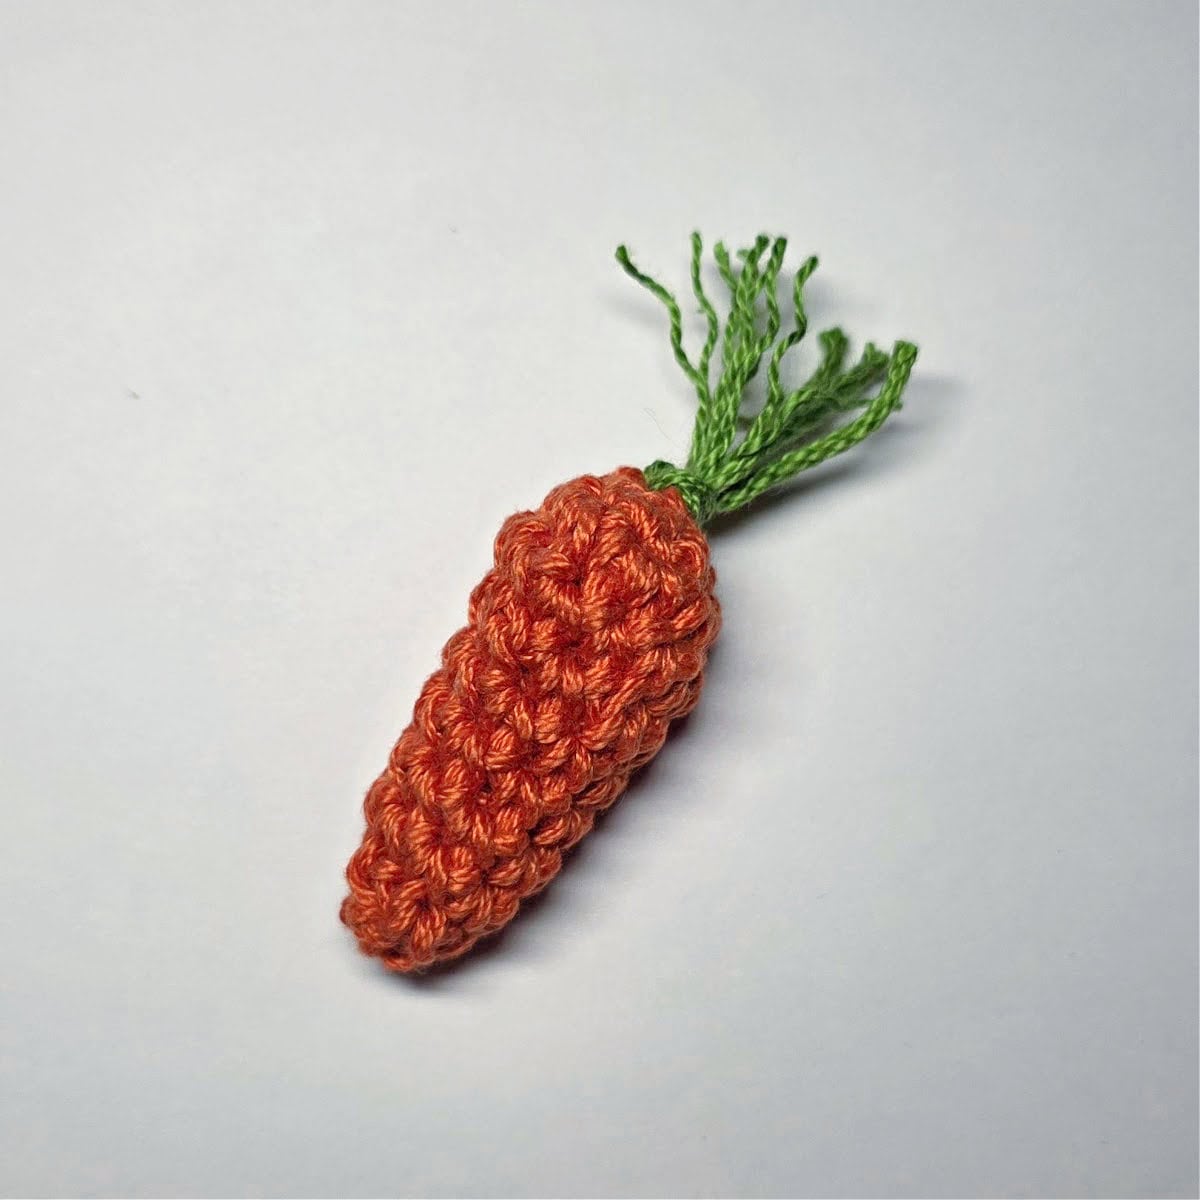
Fasten off, leaving a tail of yarn to close the tip of the carrot. With a yarn needle and tail of yarn, close the last round. Weave in ends. Carrot measures approximately 2″ L x .876″ W at widest point. Continue on to the Carrot Top.
Carrot Top
Cut 3 pieces of 5″ long green yarn. Hold all three pieces of yarn together as one and add it to the top of the carrot in a similar way that you add fringe to a project. I use a crochet hook to help pull the yarn through.
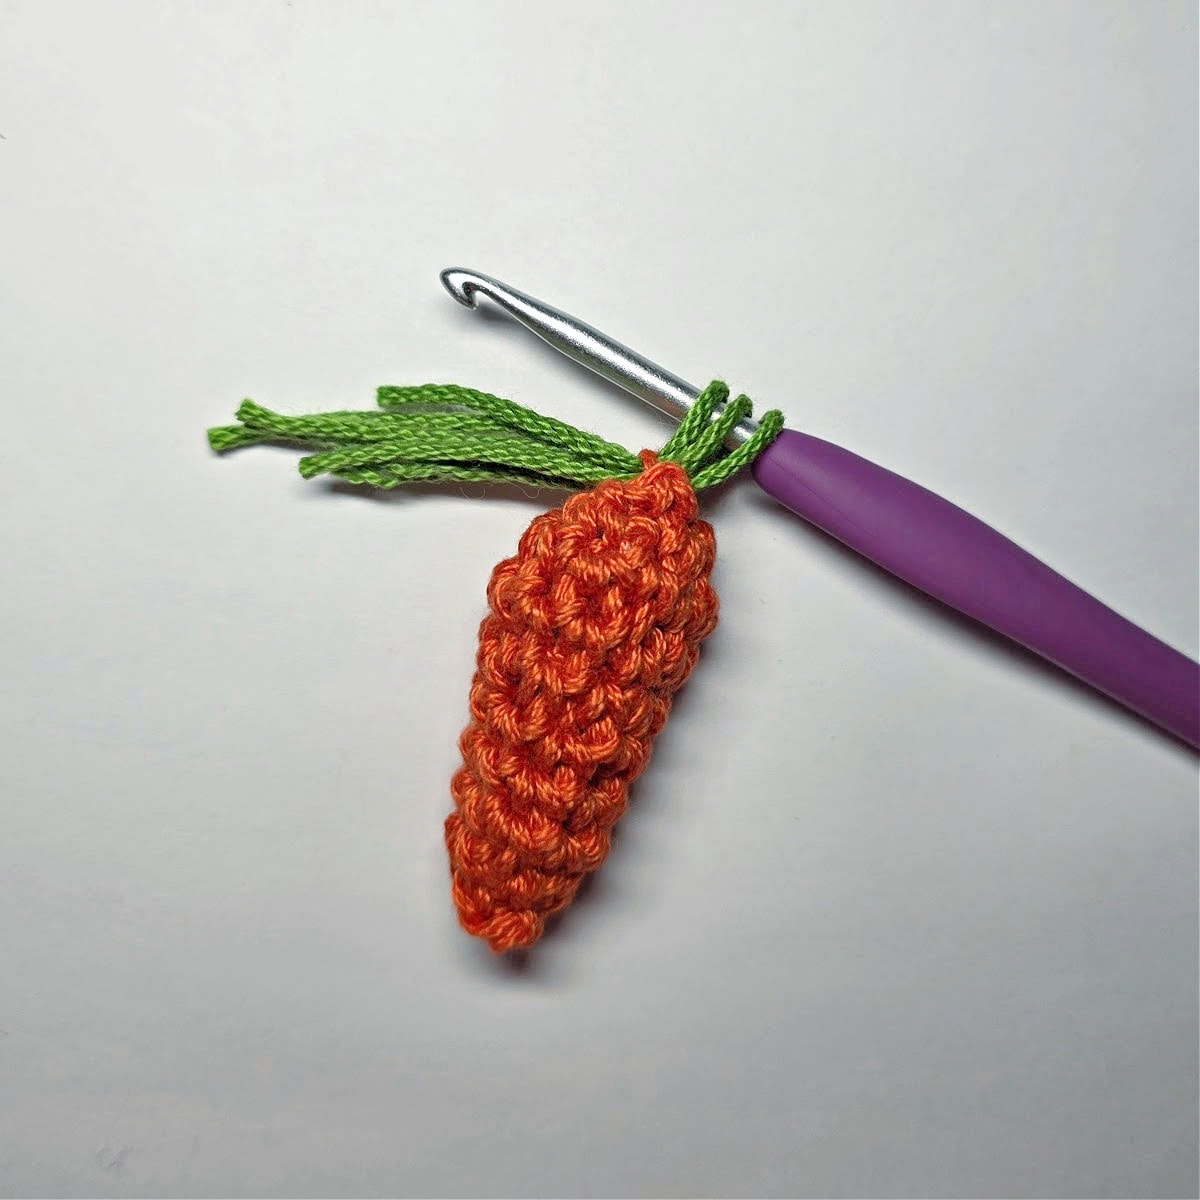
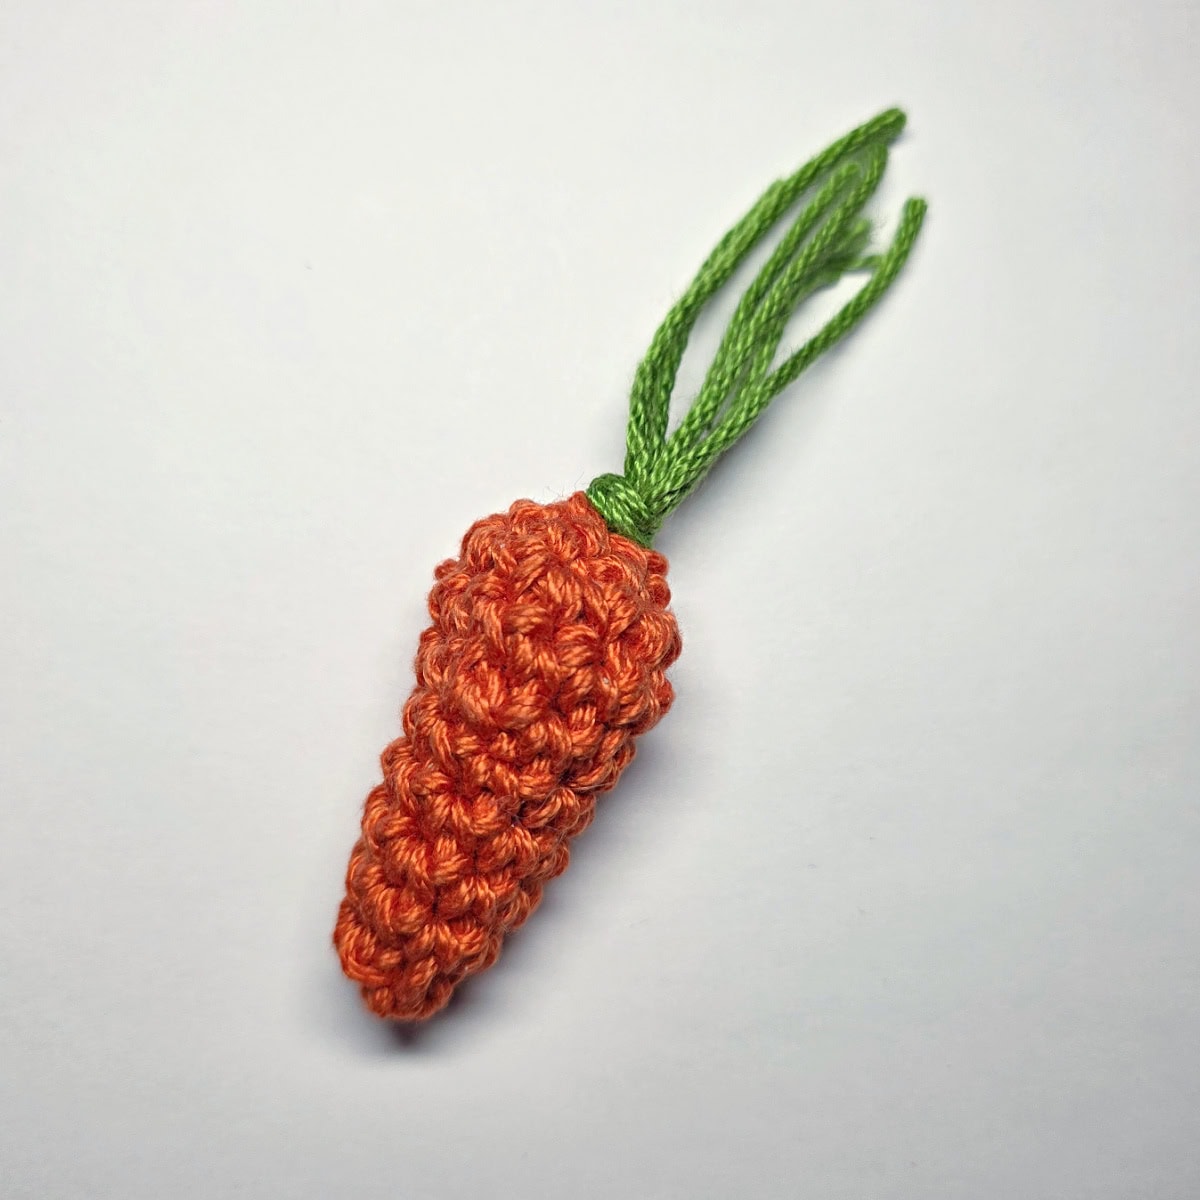
Continue on to Napkin Holder.
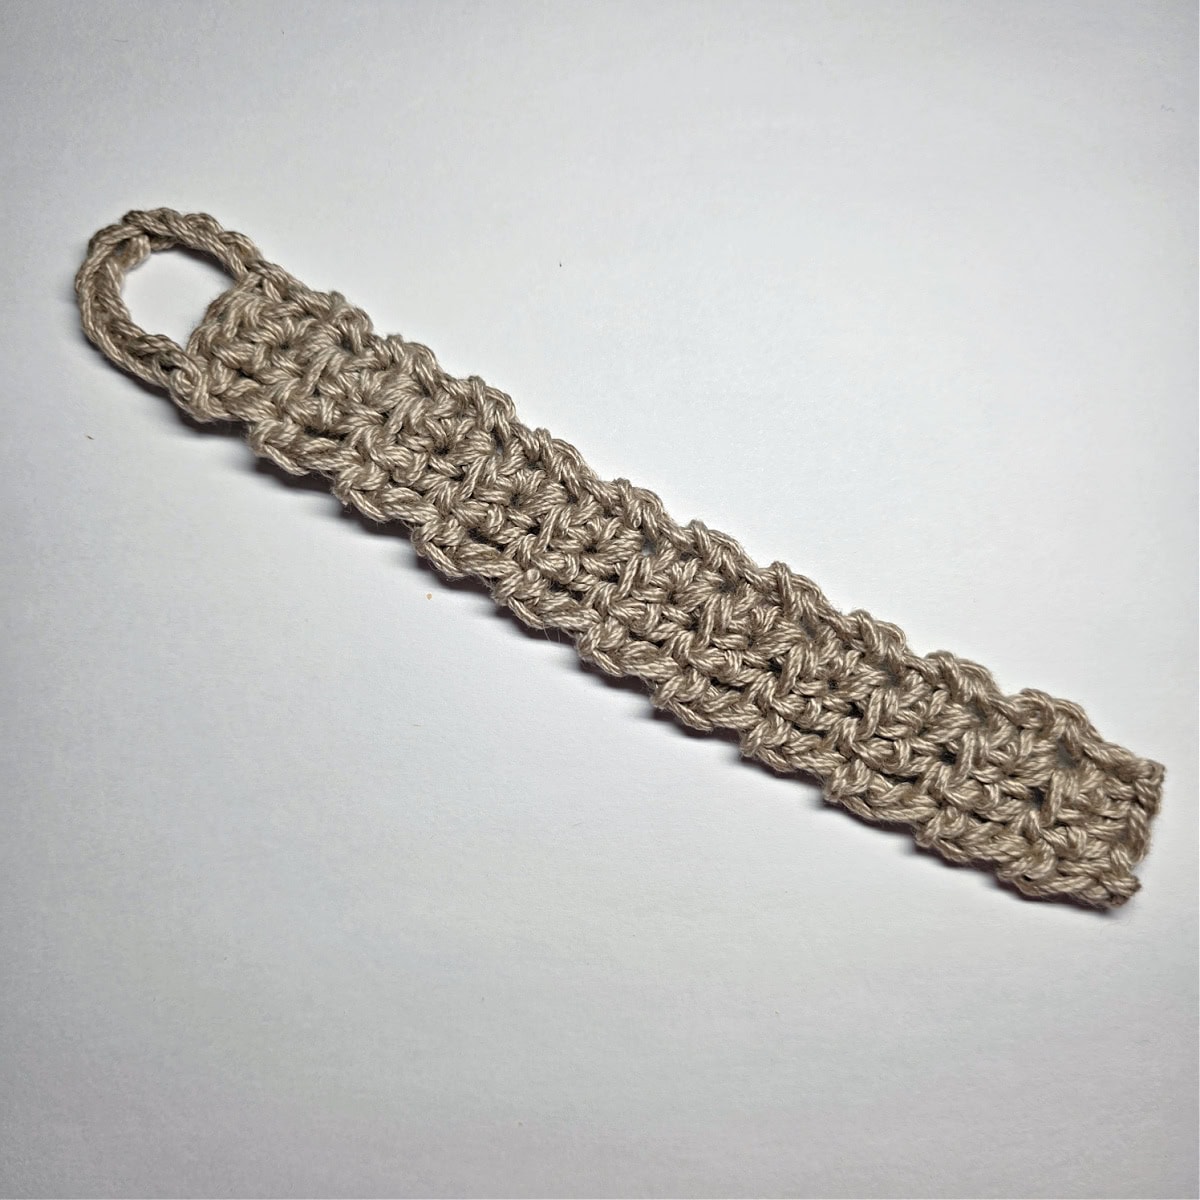
Carrot Napkin Holder Band
Row 1: With taupe yarn & a 4.00mm crochet hook, ch 4, working into the back humps of the foundation ch, sc in the 2nd ch from your hook and in each ch across. Turn. (3 sts)
Row 2: Ch 1, sc in the first st, hdc in the next st, sc in the last st. Turn. (3 sts)
Row 3: Ch 1, hdc in the first st, sc in the next st, hdc in the last st. Turn. (3 sts)
Rep Rows 3 – 4 until your Carrot Napkin Holder Band measures approximately 5″ L.
Last Row: Ch 9, skip each of the first 2 sts, sl st in the last st. (1 ch-9)
Fasten off. Weave in ends. Carrot Napkin Holder Band should measure approximately 875″ W x 5″ L. Continue on to Finishing.
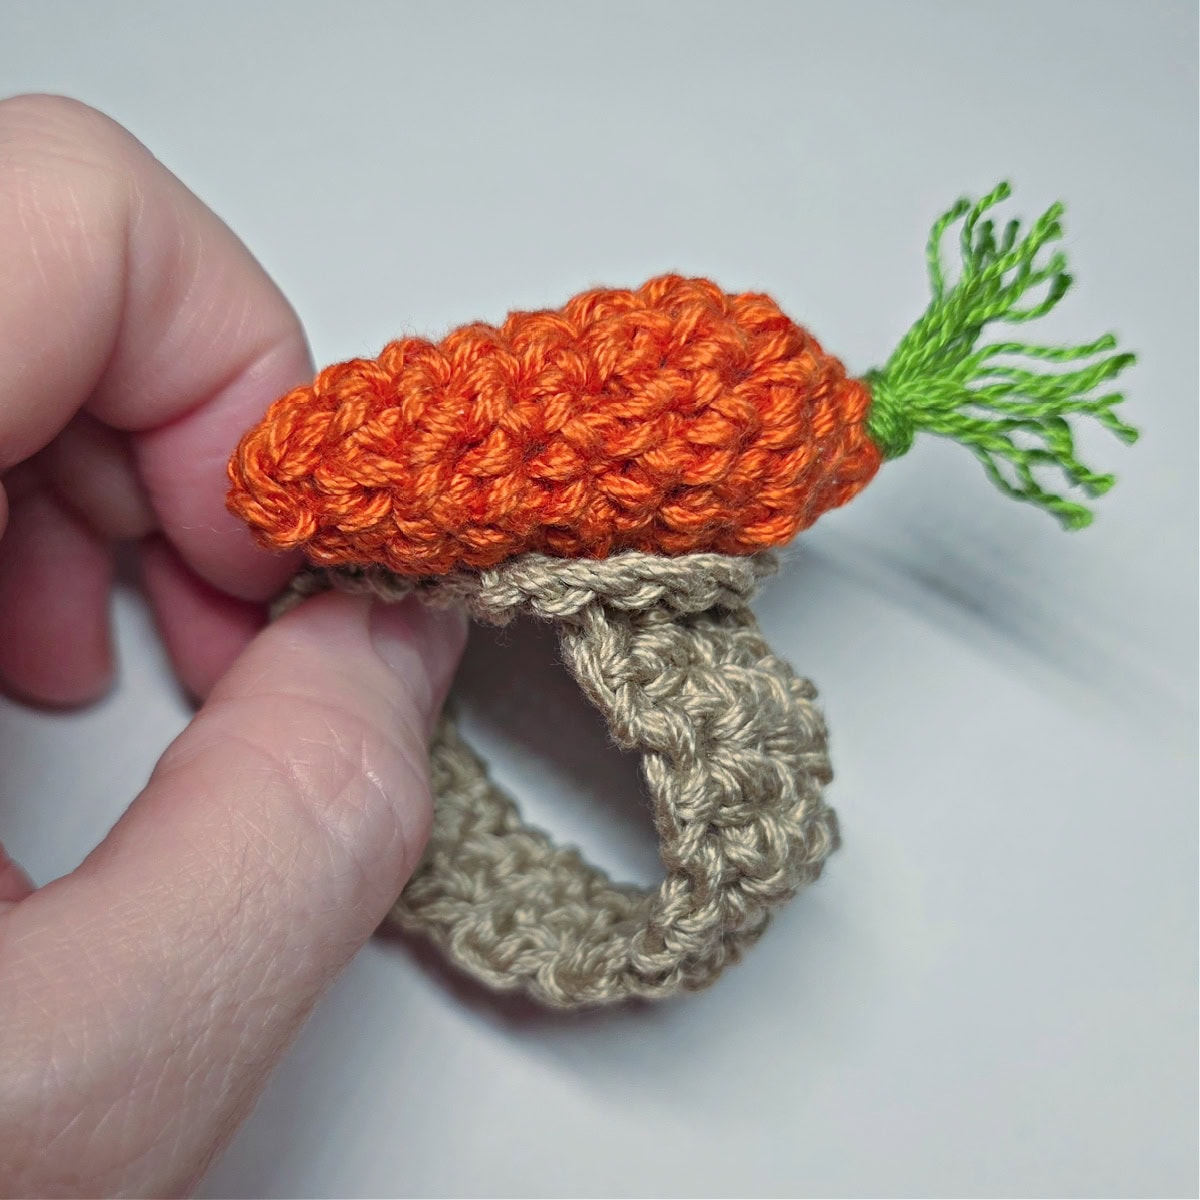
Carrot Napkin Holder Finishing
Baby Chick Napkin Holder
Baby Chick Napkin Holder Yardage
- Yellow: 25 yards
- Orange: 1 yard
- Black: 18″
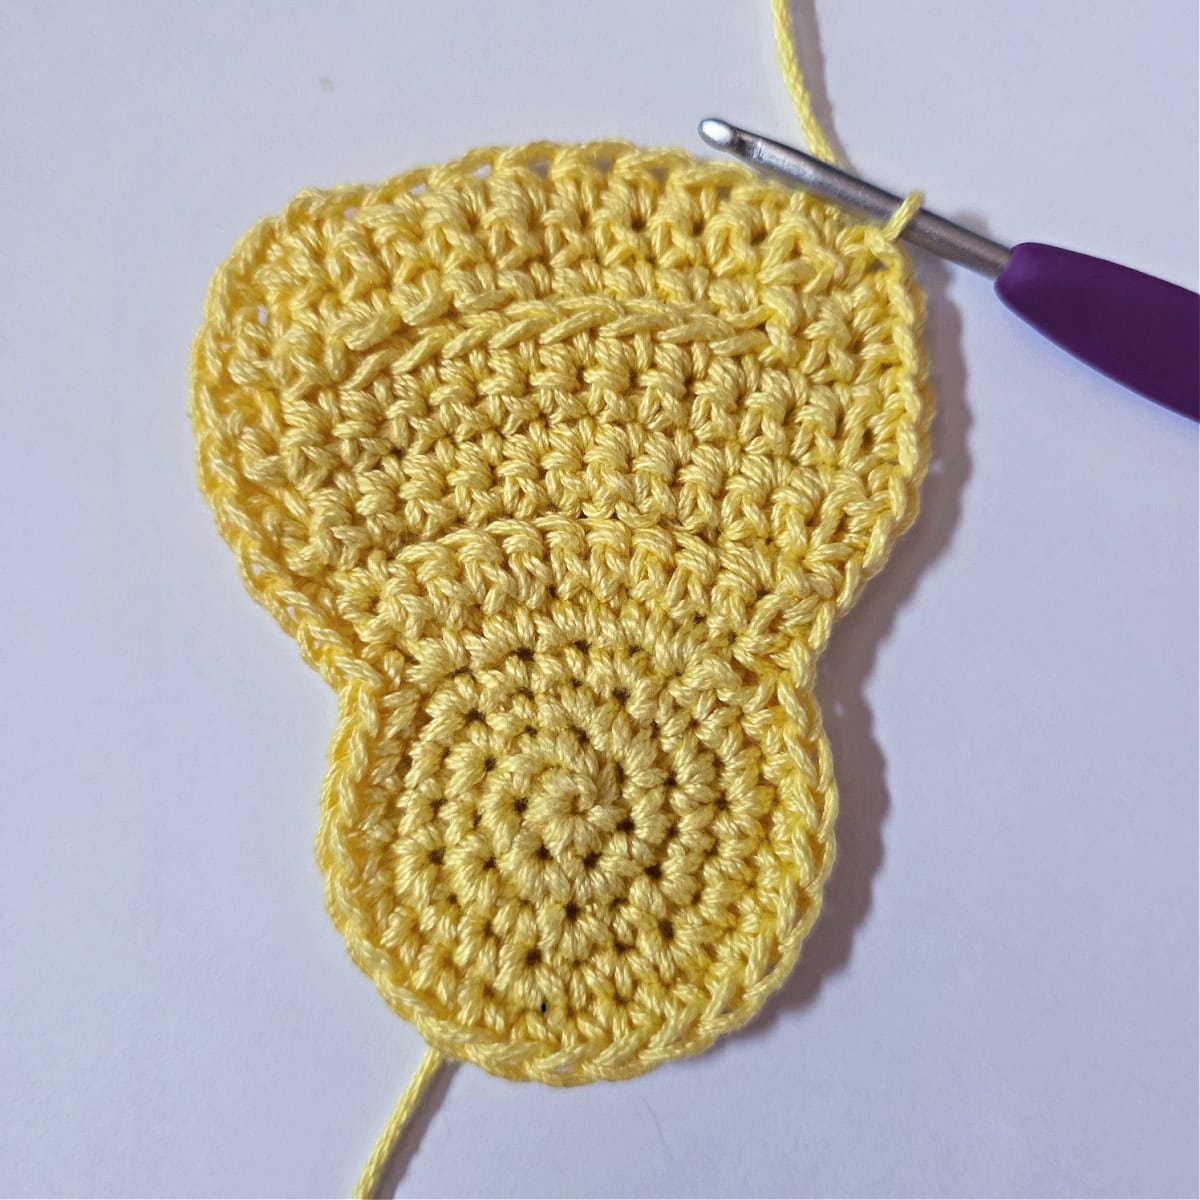
Baby Chick’s Head
Continuous Rounds (aka a spiral): The baby chick’s head is worked in continuous rounds to keep from having an unsightly seam. Do not join at the end of each round, instead use a scrap piece of yarn to keep track of the beginning of each round. Move the scrap of yarn up as you complete each round.
Rnd 1: With yellow yarn & a 4.00mm crochet hook, ch 2, work 6 sc into the 2nd ch from your hook. Do not join. (6 sts)
Rnd 2: 2 sc in each st around. (12 sts)
Rnd 3: (2 sc in the next st, sc in the next st) rep from ( to ) around. (18 sts)
Rnd 4: (2 sc in the next st, sc in each of the next 2 sts) rep from ( to ) around. Join with a sl st to the 1st st. (24 sts)
Do not fasten off. Diameter of the chick’s head should be approximately 1.875″. Continue on to the Baby Chick’s Body.
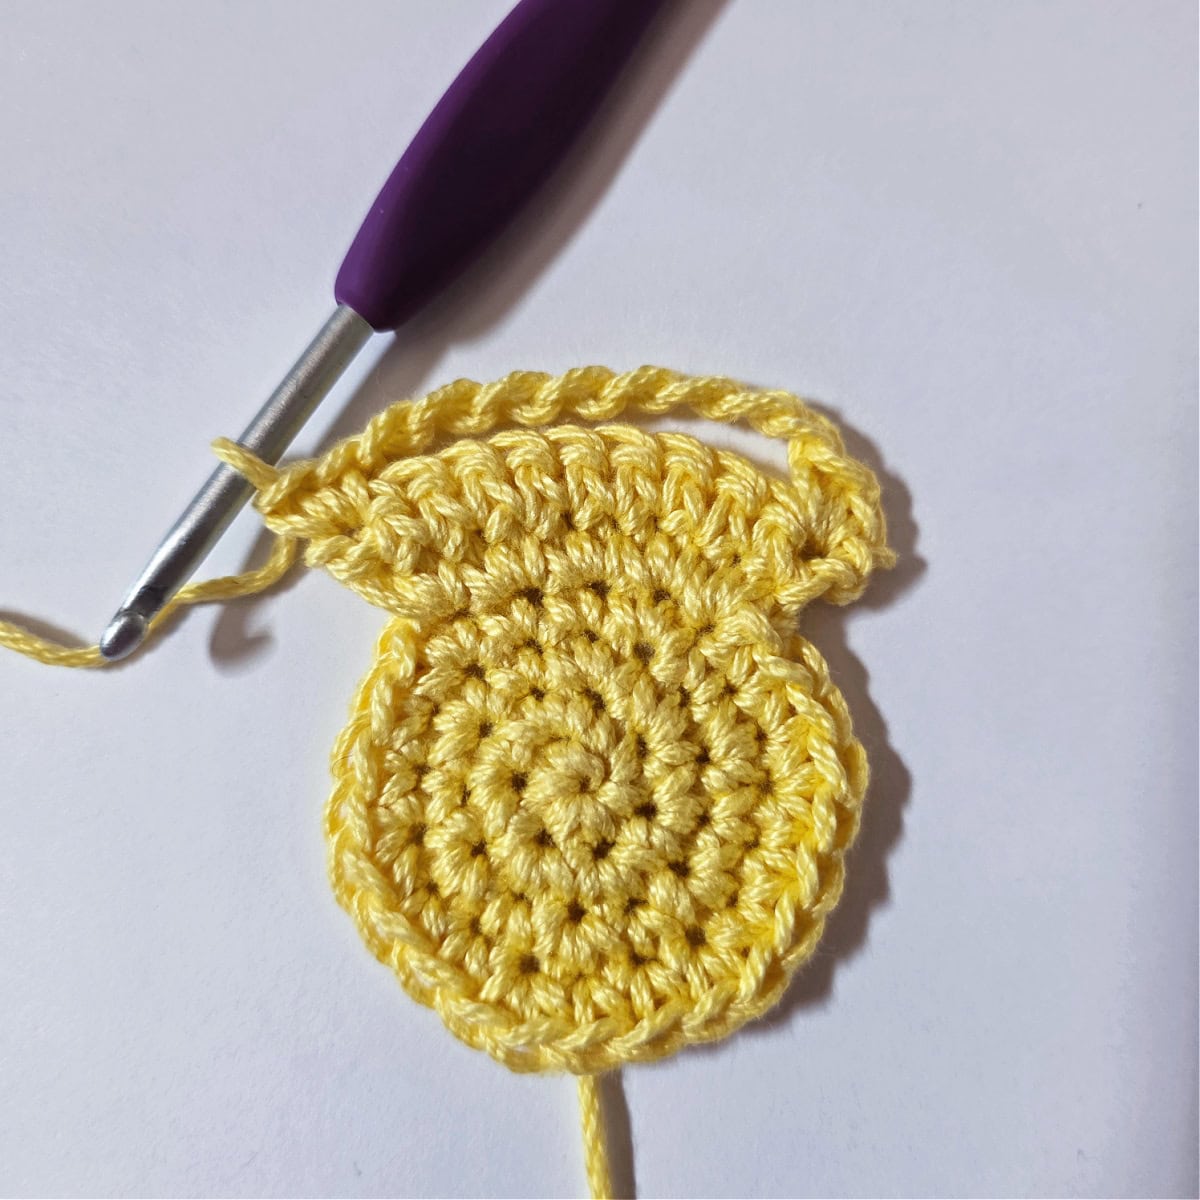
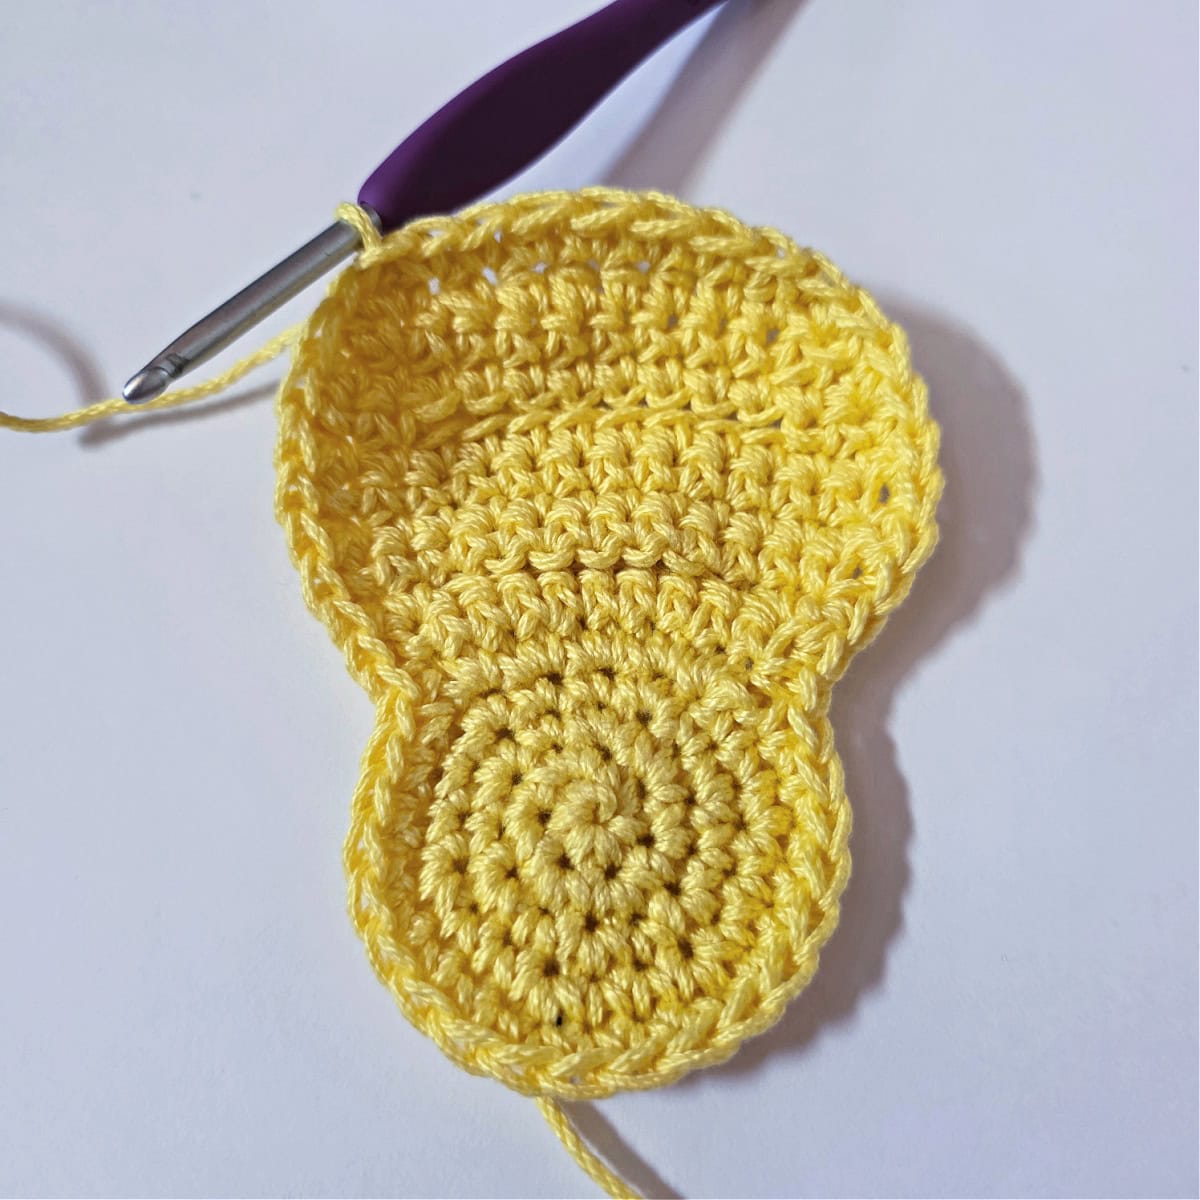
Baby Chick’s Body
Row 1: 2 sc in the first st, 2 sc in each of the next 4 sts. Turn. (10 sts)
Row 2: Ch 1, sc in each st across. Turn. (10 sts)
Row 3: Ch 1, 2 sc in the first st, ch 8, skip each of the next 8 sts, 2 sc in the last st. Turn. (4 sts + 1 ch-8)
Row 4: Ch 1, sc in each sc and ch across. Turn. (12 sts)
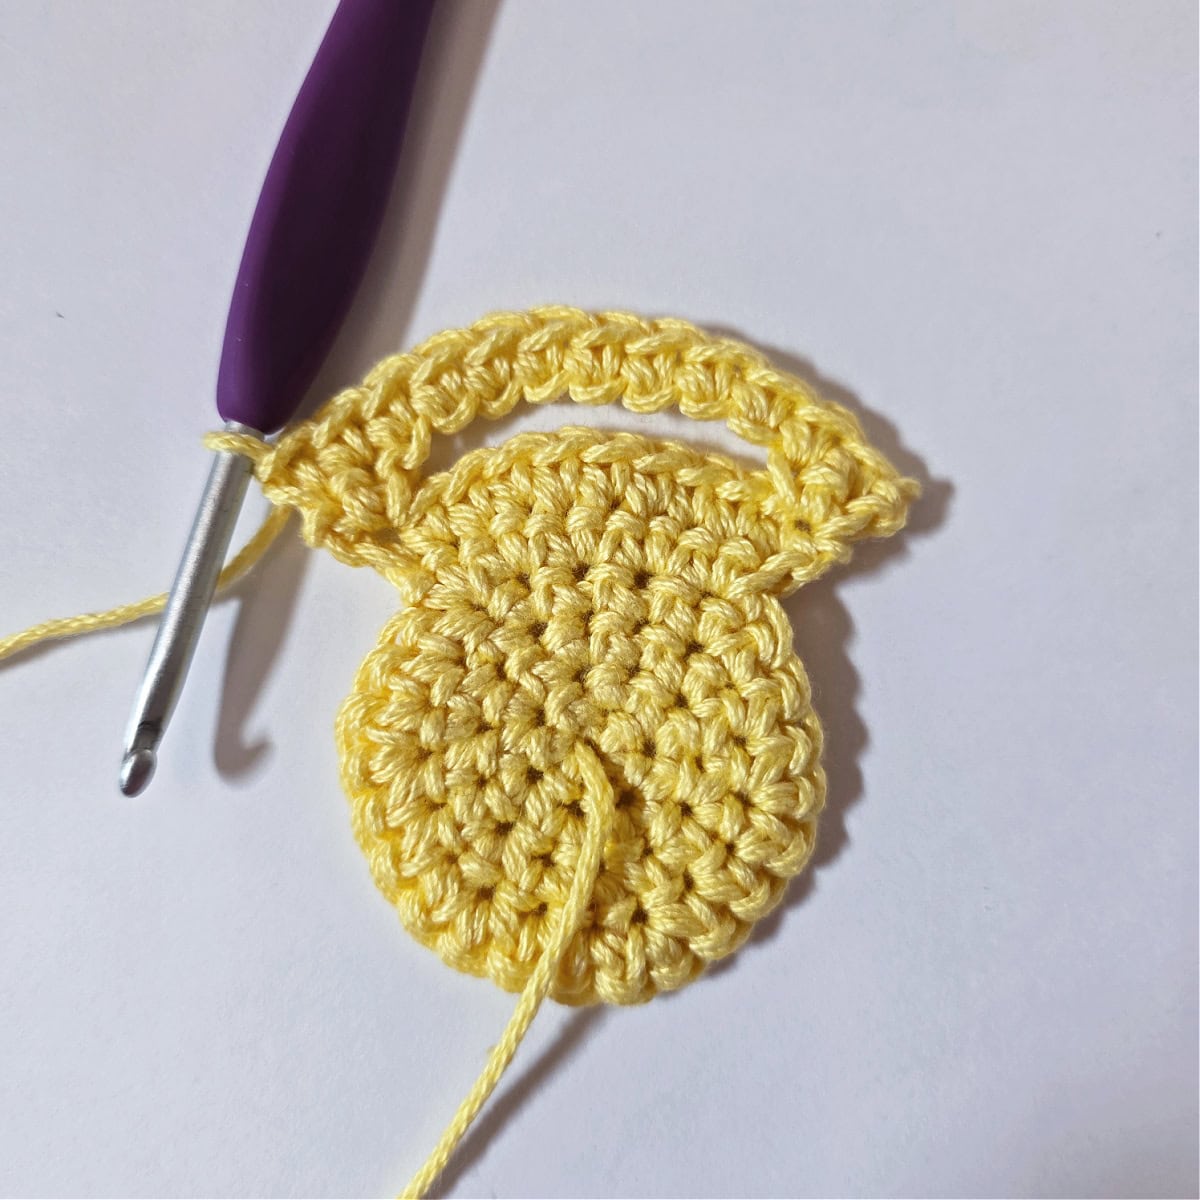
Rows 5 – 7: Ch 1, sc in each st across. Turn. (12 sts)
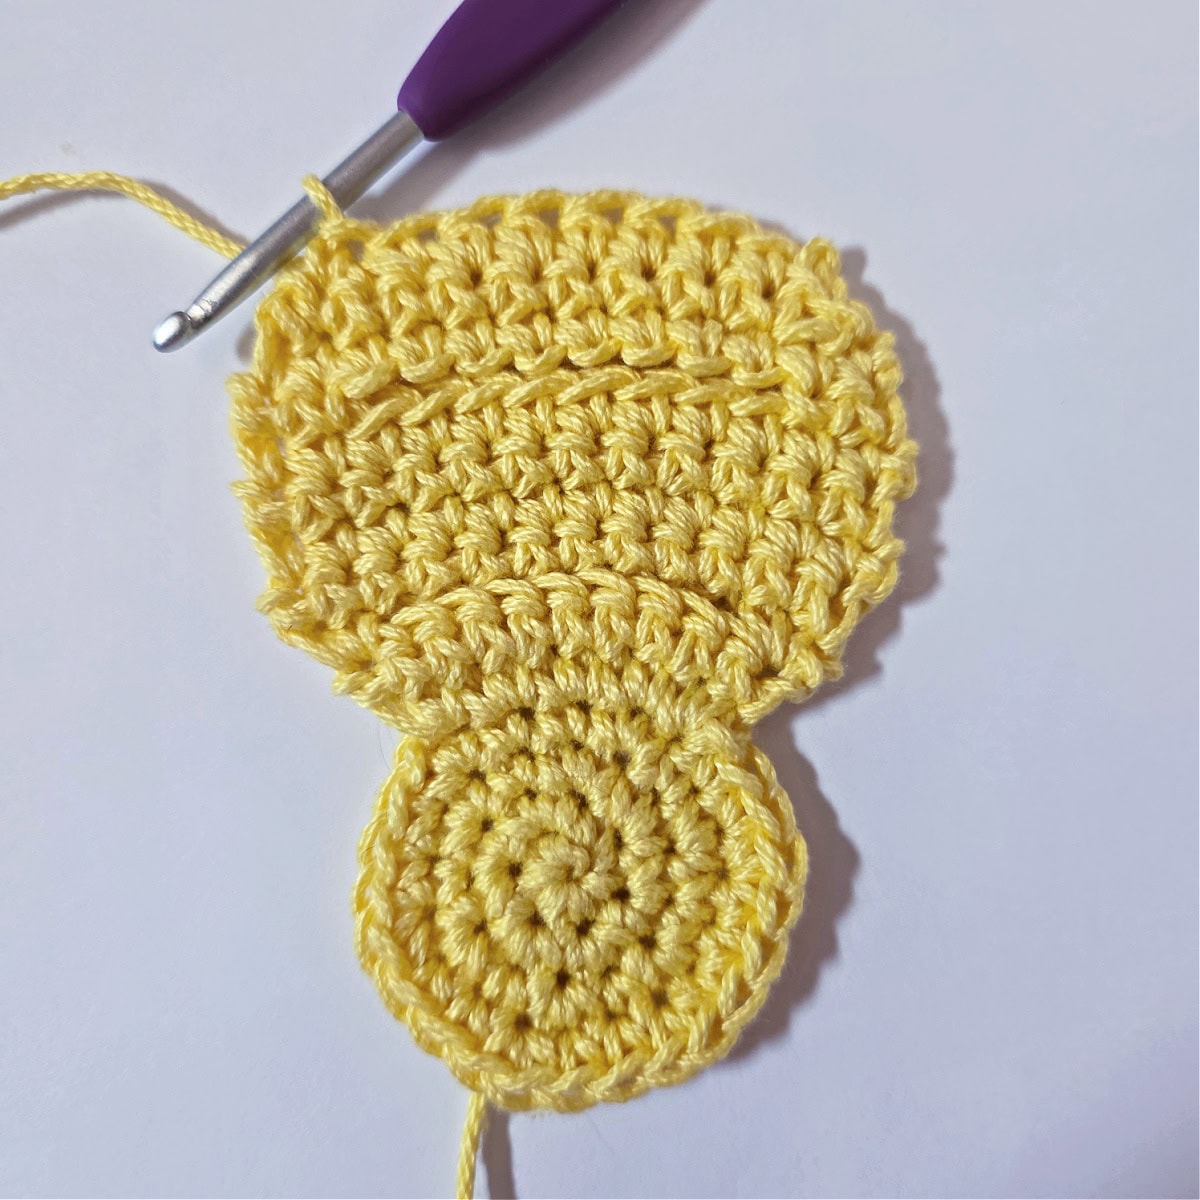
Row 8: Ch 1, sc in each of the first 2 sts, ch 8, skip each of the next 8 sts, sc in each of the last 2 sts. Turn. (4 sts + 1 ch-8)

Row 9: Ch 1, sc in each sc and ch across. Turn. (12 sts)
Row 10: Ch 1, skip the first st, sc in each of the next 9 sts, skip the next st, sc in the last st. Turn. (10 sts)
Row 11: Ch 1, skip the first st, sc in each of the next 2 sts, hdc in each of the next 4 sts, sc in the next st, skip the next st, sc in the last st. Do not turn. (8 sts) Place a SM in the 1st sc of this row to mark the stitch for the next step.
Do not fasten off. Chick’s body should measure approximately 3″ W x 3.75″ L from the tip of the head. Continue on to Edging the Baby Chick.
Edging the Baby Chick
In this round, you’ll crochet around the entire baby chick. It’s okay if the body of your baby chick curls up just a little bit. If it curls up a lot, Work Rnd 1 with a slightly larger crochet hook.
Rnd 1: Continuing on from the last row worked, rotate to continue working around the edge of the baby chick, sc into each st around the baby chick up until you reach the st marked with a SM. Now you’ll work into each st along the bottom edge of the baby chick, sc in the st marked with a SM, sc in the next st, hdc in each of the next 4 sts, sc in each of the next 2 sts. Join with a sl st to the 1st sc. (49 sts) Stitch count isn’t crucial.
Fasten off. Use the Invisible Join Technique, then weave in ends. Continue on to Adding Features to the Baby Chick.
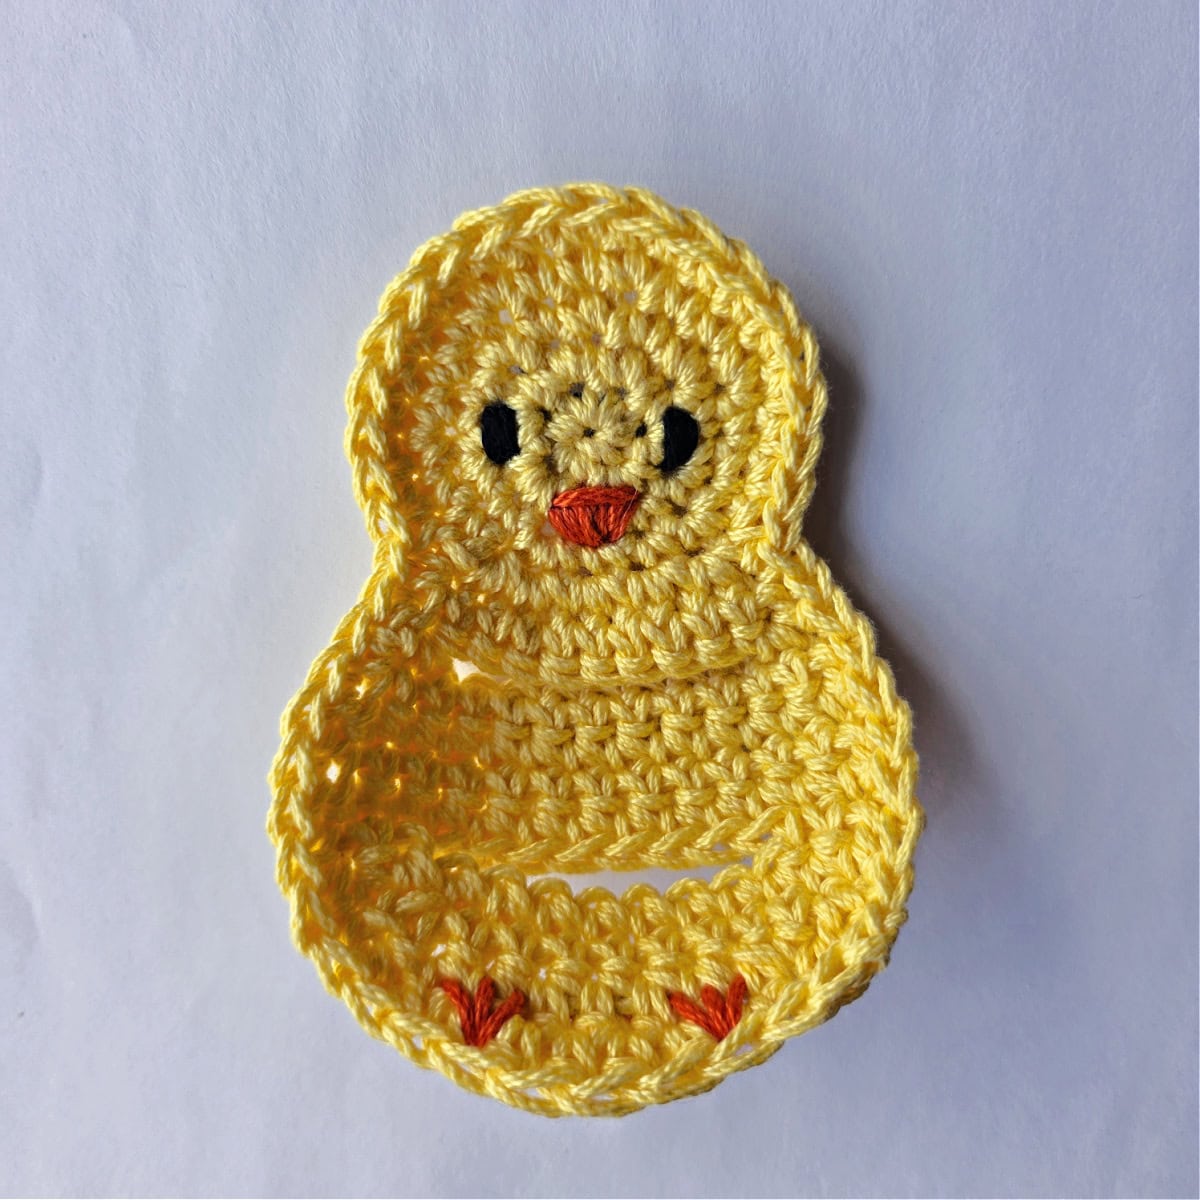
Adding Features to the Baby Chick
Step 1: With a 15″ piece of orange yarn & a yarn needle, embroider little feet on your baby chick as shown in the photo.
Step 2: With a 15″ piece of orange yarn & a yarn needle, embroider a beak on your baby chick’s face. I worked over stitches in the 3rd round of the head.
Step 3: With a 15″ piece of black yarn & a yarn needle, embroider eyes on your baby chick. I vertically wrapped my yarn around one stitch 3 times for each eye.
Weave in ends.
Lamb Napkin Ring

Lamb Napkin Ring Yardage
- White: 19 yards
- Black: 5.5 yards
- Any Color for Bow: 18″
- Scroll down to see Debbie’s finished lamb napkin ring. She used a couple shades of brown for hers and it is super cute!
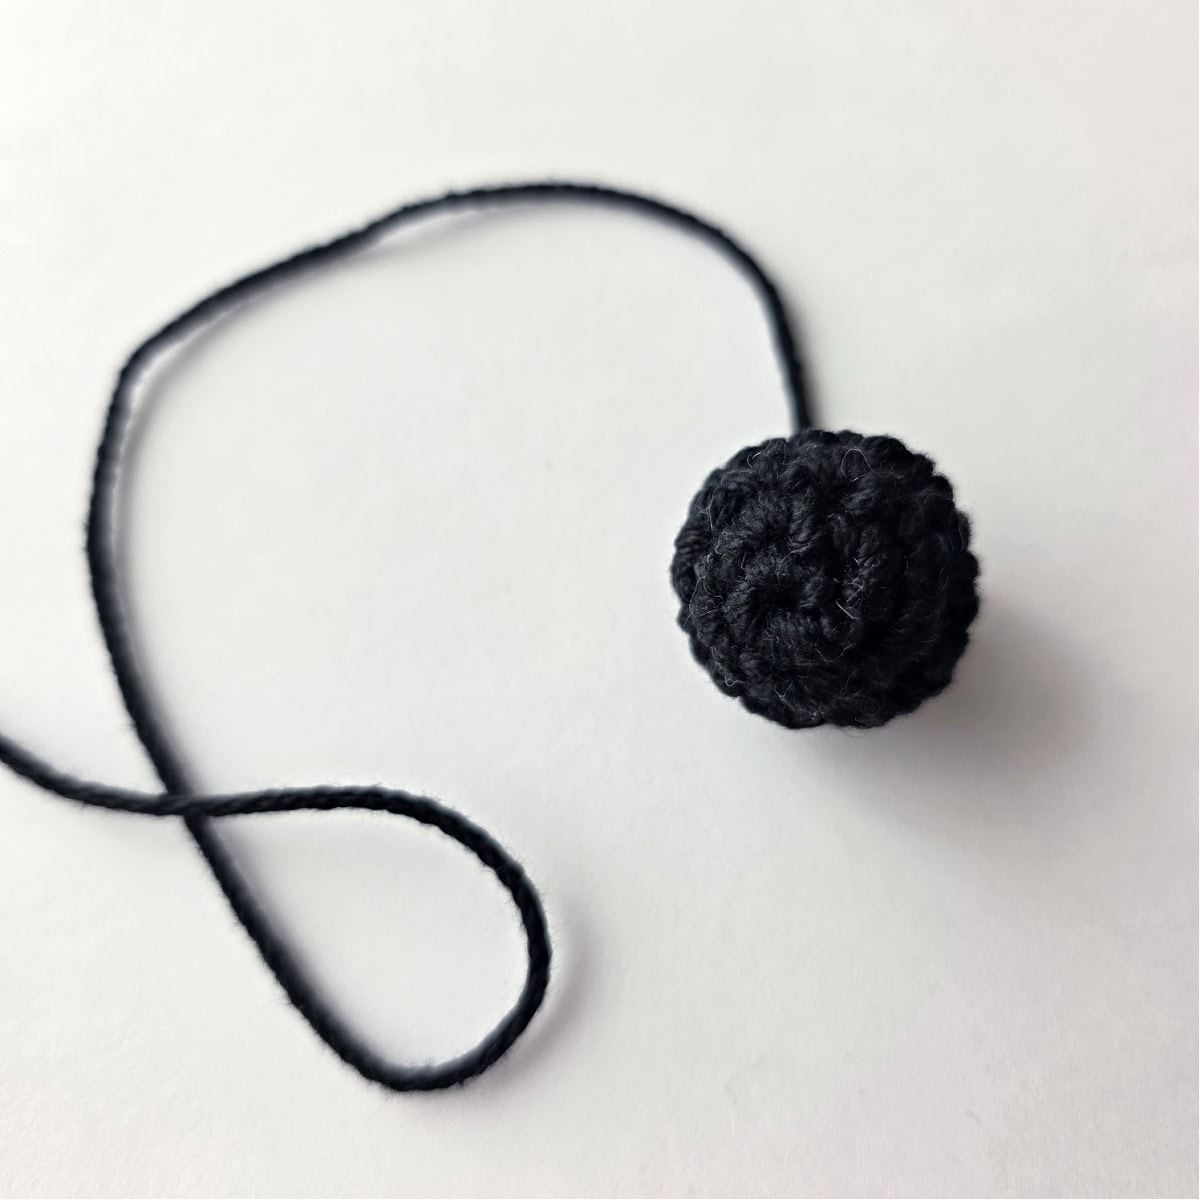
Lamb’s Head
Continuous Rounds (aka a spiral): The lamb’s head is worked in continuous rounds to keep from having an unsightly seam. Do not join at the end of each round, instead use a scrap piece of yarn to keep track of the beginning of each round. Move the scrap of yarn up as you complete each round.
Rnd 1: With black yarn & a 4.00mm crochet hook, ch 2, work 4 sc into the 2nd ch from your hook. Do not join. (4 sts)
Rnd 2: 2 sc in each st around. (8 sts)
Rnd 3: (2 sc in the next st, sc in the next st) rep from ( to ) around. (12 sts)
Rnd 4: Sc in each st around. (12 sts)
Rnd 5: (FLO invsc2tog, Both Loops sc in the next st) rep from ( to ) around. (8 sts)
Stuff the lamb’s head with scraps of yarn before working the final round.
Rnd 6: Invsc2tog 4 times. (4 sts)
Fasten off, leaving a 12″ long tail of yarn to later attach the lamb’s head to the napkin ring. The lambs head should be a 1″ ball. Continue on to the Lamb’s Ears.
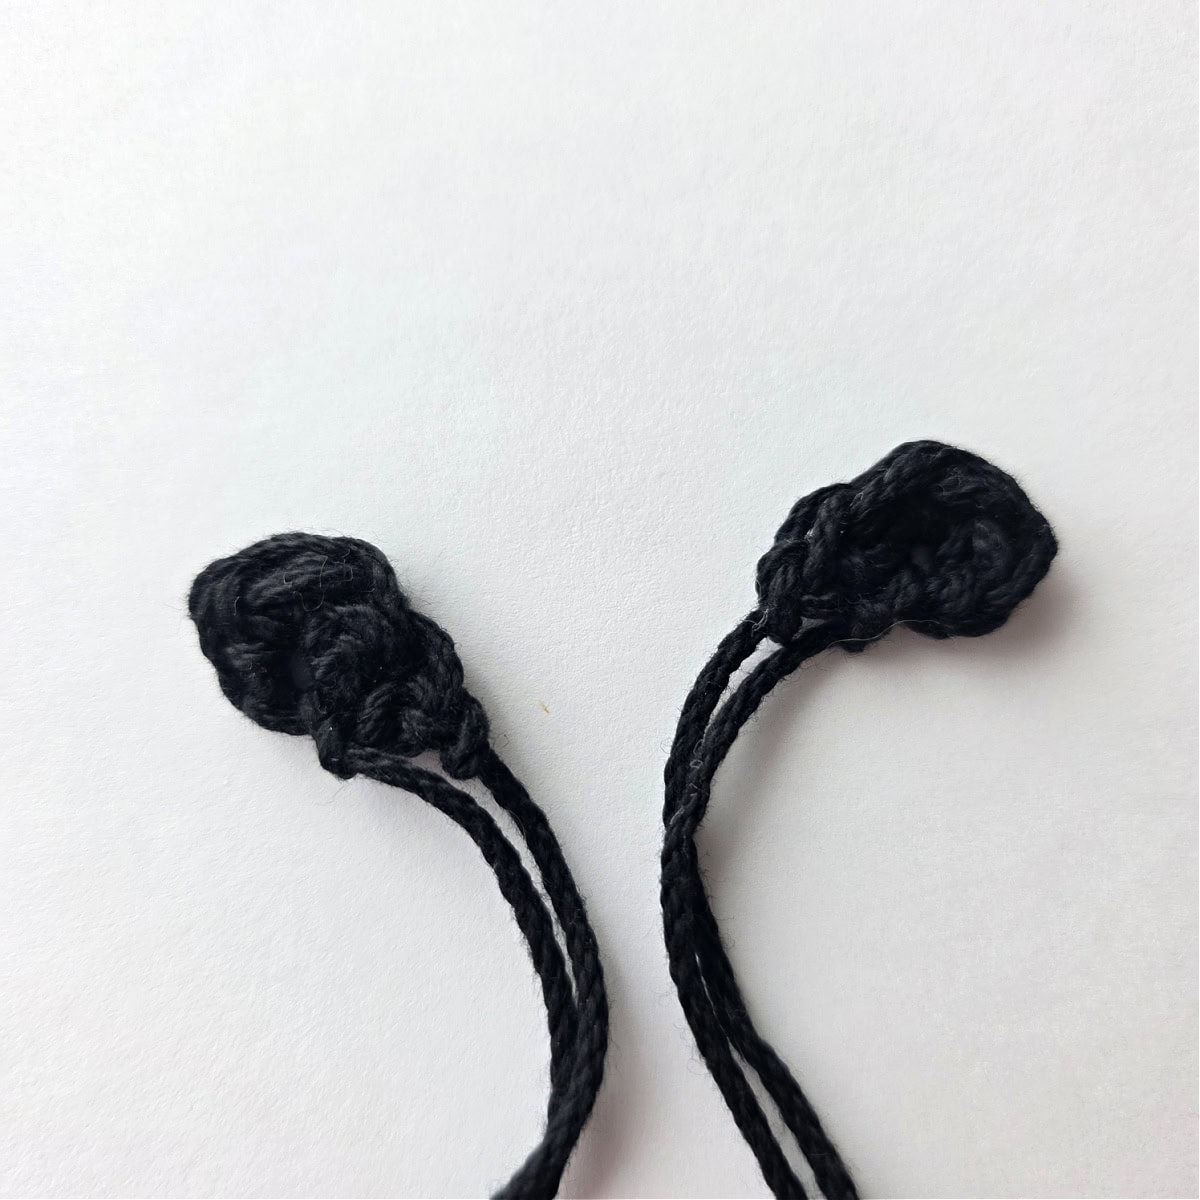
Lamb’s Ears (Make 2)
Rnd 1: With black yarn & a 4.00, crochet hook, ch 3, working into the back hump of the foundation ch, 3 hdc in the 2nd ch from your hook, sc in the next ch. (4 sts)
Fasten off, leaving a tail of yarn long enough to attach the ear to the lamb’s head. Make the second lamb’s ear, then continue on to Attaching Lamb’s Ears to the Head. Lamb’s Ears should be approximately .5″ W x .675″ L.
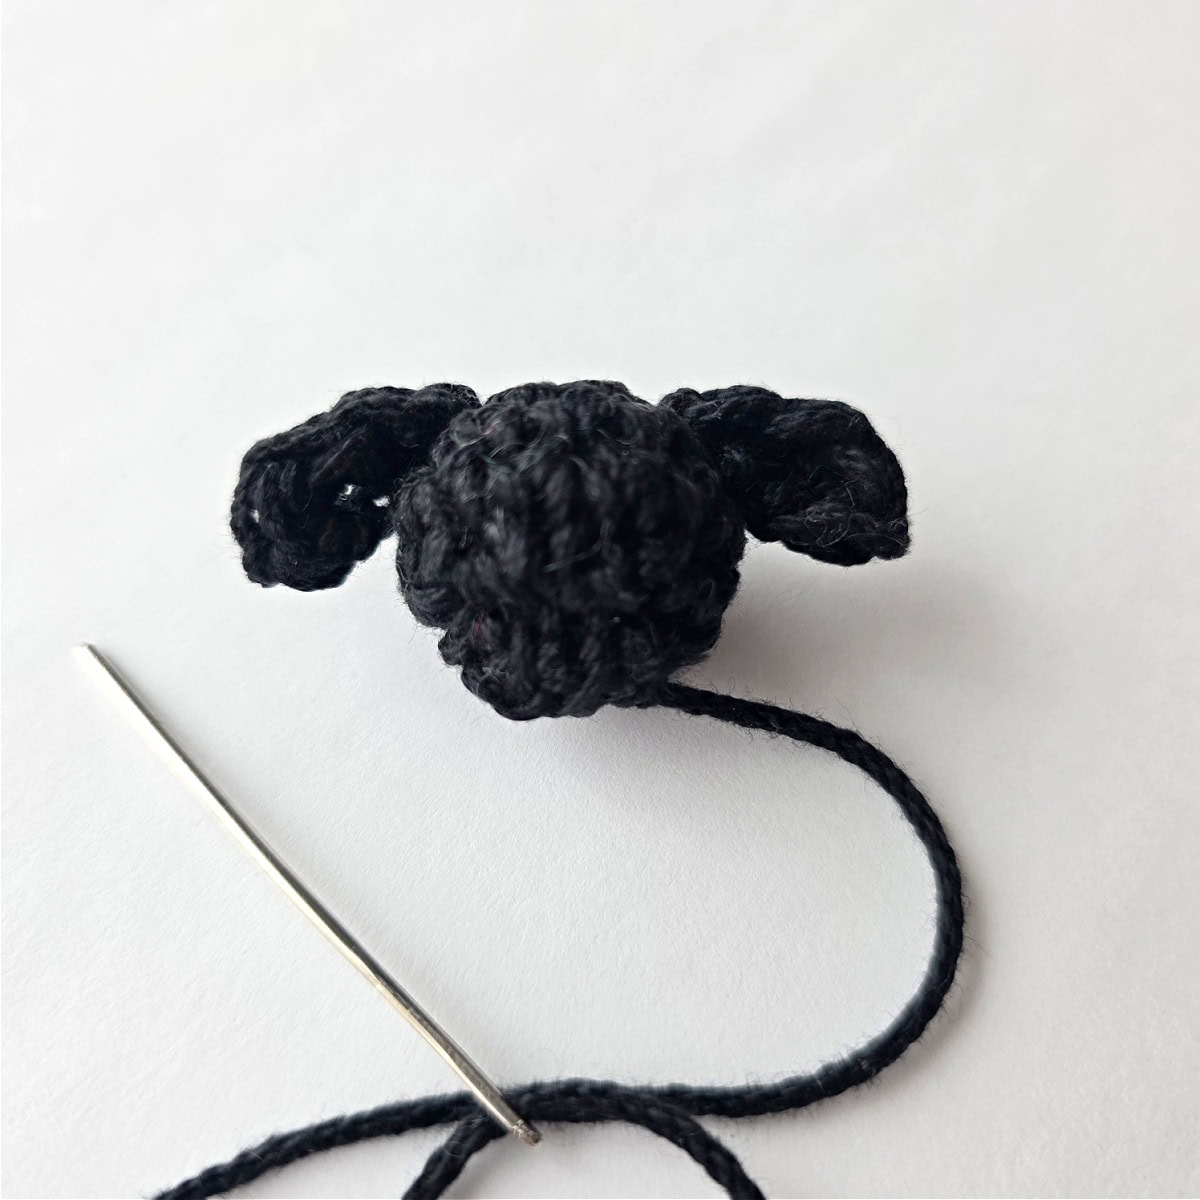
Attaching Lamb’s Ears to the Head
Using a yarn needle and tail of yarn, attach each of the ears to the lamb’s head. I attached mine to the stitches from Rnd 2 of the Lamb’s Head.
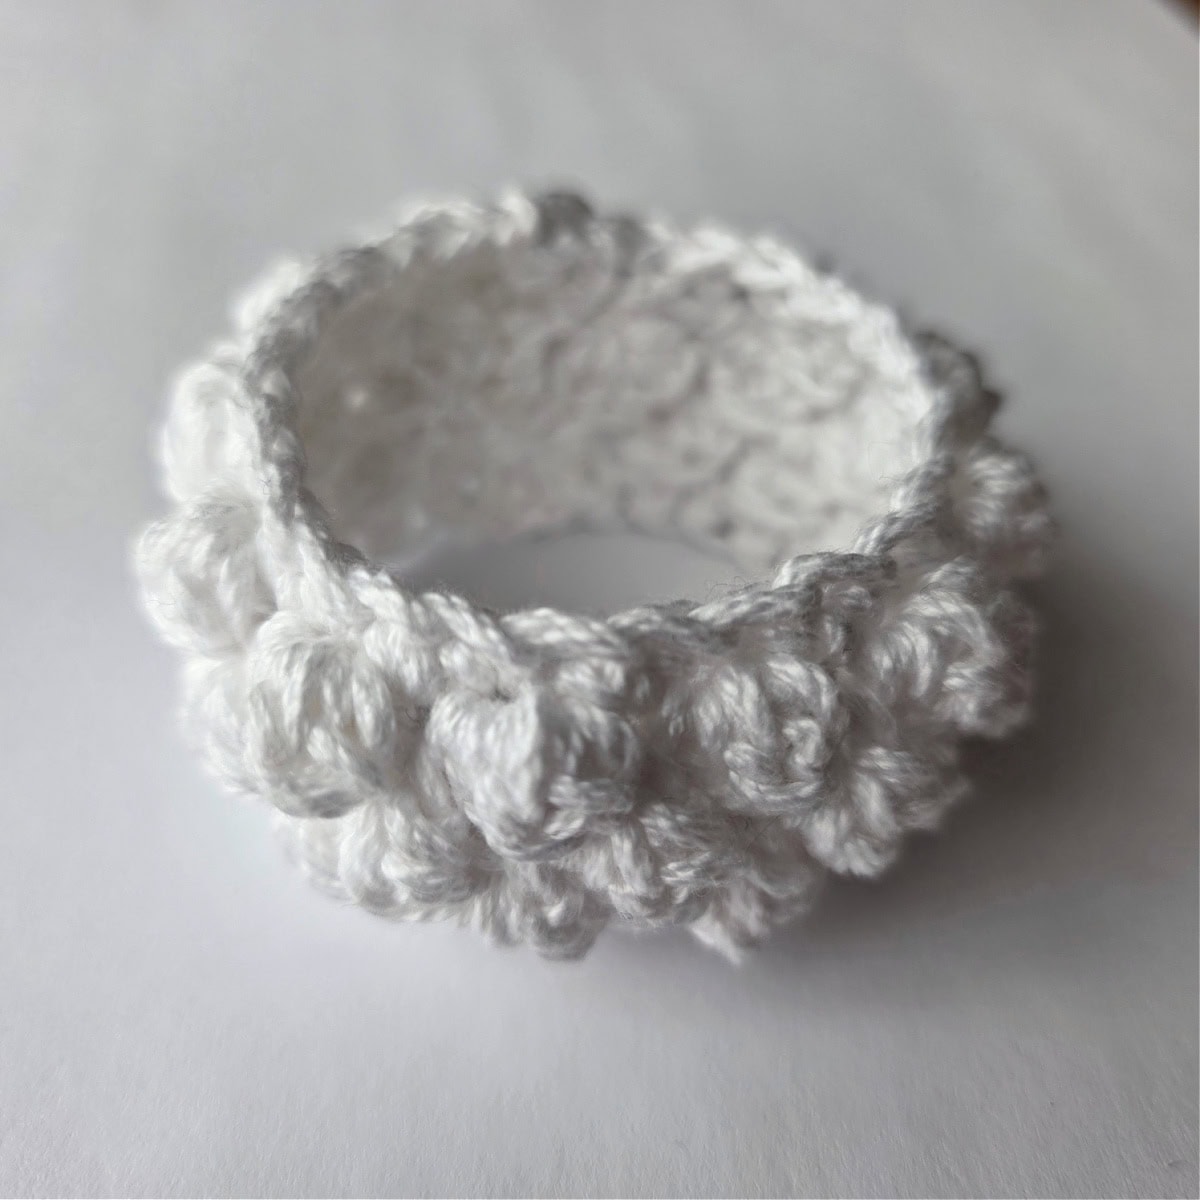
Lamb Napkin Ring
Rnd 1: With white yarn & a 4.00mm crochet hook, ch 24, being careful not to twist the ch, sl st into the back hump of the 1st ch to form a ring. (24 sts)
Rnd 2: Ch 1, working into the back hump of the foundation ch, sc in each ch around. Join with a sl st to the 1st st. (24 sts)
The diameter of your crochet ring should be approximately 2″ at this point.
Rnd 3: Ch 2 (does not count as a st), bobble st in the first st, sl st in the next st, (bobble st in the next st, sl st in the next st) work from ( to ) 11 times. Do not join. (12 bobble sts + 12 sl sts)
Rnd 4: (sl st in the next bobble st, bobble st in the next sl st) work from ( to ) 12 times. Join with a sl st to the 1st sl st. (12 bobble sts + 12 sl sts)
Rnd 5: Ch 2 (does not count as a st), bobble st in the first sl st, sl st in the next bobble st, (bobble st in the next sl st, sl st in the next bobble st) work from ( to ) 11 times. Join with a sl st to the 1st bobble st. (12 bobble sts + 12 sl sts)
Rnd 6: Ch 1, sc in each bobble st and sl st around. Join with a sl st to the 1st st. (24 sts)
Fasten off. Weave in ends. Continue on to Finishing the Lamb Napkin Ring. Finished napkin ring should be approximately 2″ diameter x 1.25″ H.
Finishing the Lamb Napkin Ring

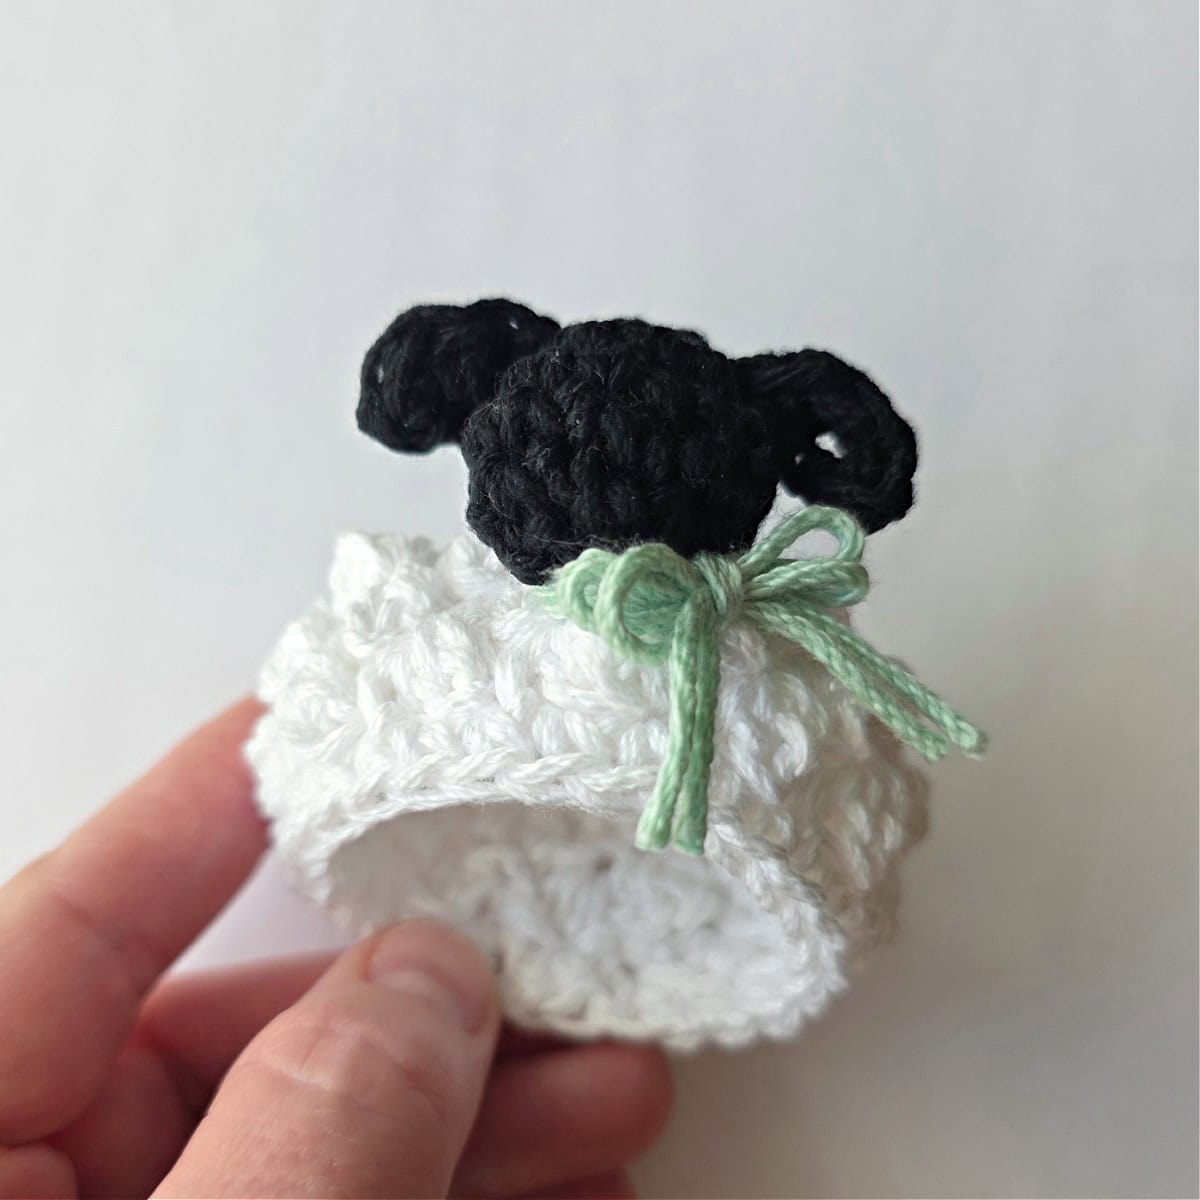

Boost Your Dining Aesthetic with Crochet
From everyday meals to festive feasts, handmade crochet napkin rings add a heartwarming, artisanal touch. They’re quick to make, easy to customize, and endlessly charming. Whether you’re a crochet newbie or a seasoned yarn lover, this is a delightful project that delivers big impact with minimal effort.
I MADE IT! NOW WHAT?
Pin this post!: Save this free crochet napkin rings pattern to your Pinterest boards so that you can come back and make it again.
Leave a comment below: We love to hear your feedback.
Share Your Finished Projects on Facebook or Instagram: I love to see your finished projects! Share with us on social media and tag me @acrochetedsimplicity or use the hashtag #ACrochetedSimplicity so I can find your posts.
Join us in the Facebook Community Group!
Come share your finished projects with us in the A Crocheted Simplicity Crochet Community Group on Facebook. Join us for fun community events such as crochet alongs, join in on crochet conversations, ask questions, get advice, and share your love for crochet!

More Crochet Patterns for Home Decor I Think You’ll Love
More Quick Crochet Ideas
Are you looking for more fun, free quick crochet patterns? These small projects are great for long car rides and most make excellent gifts!