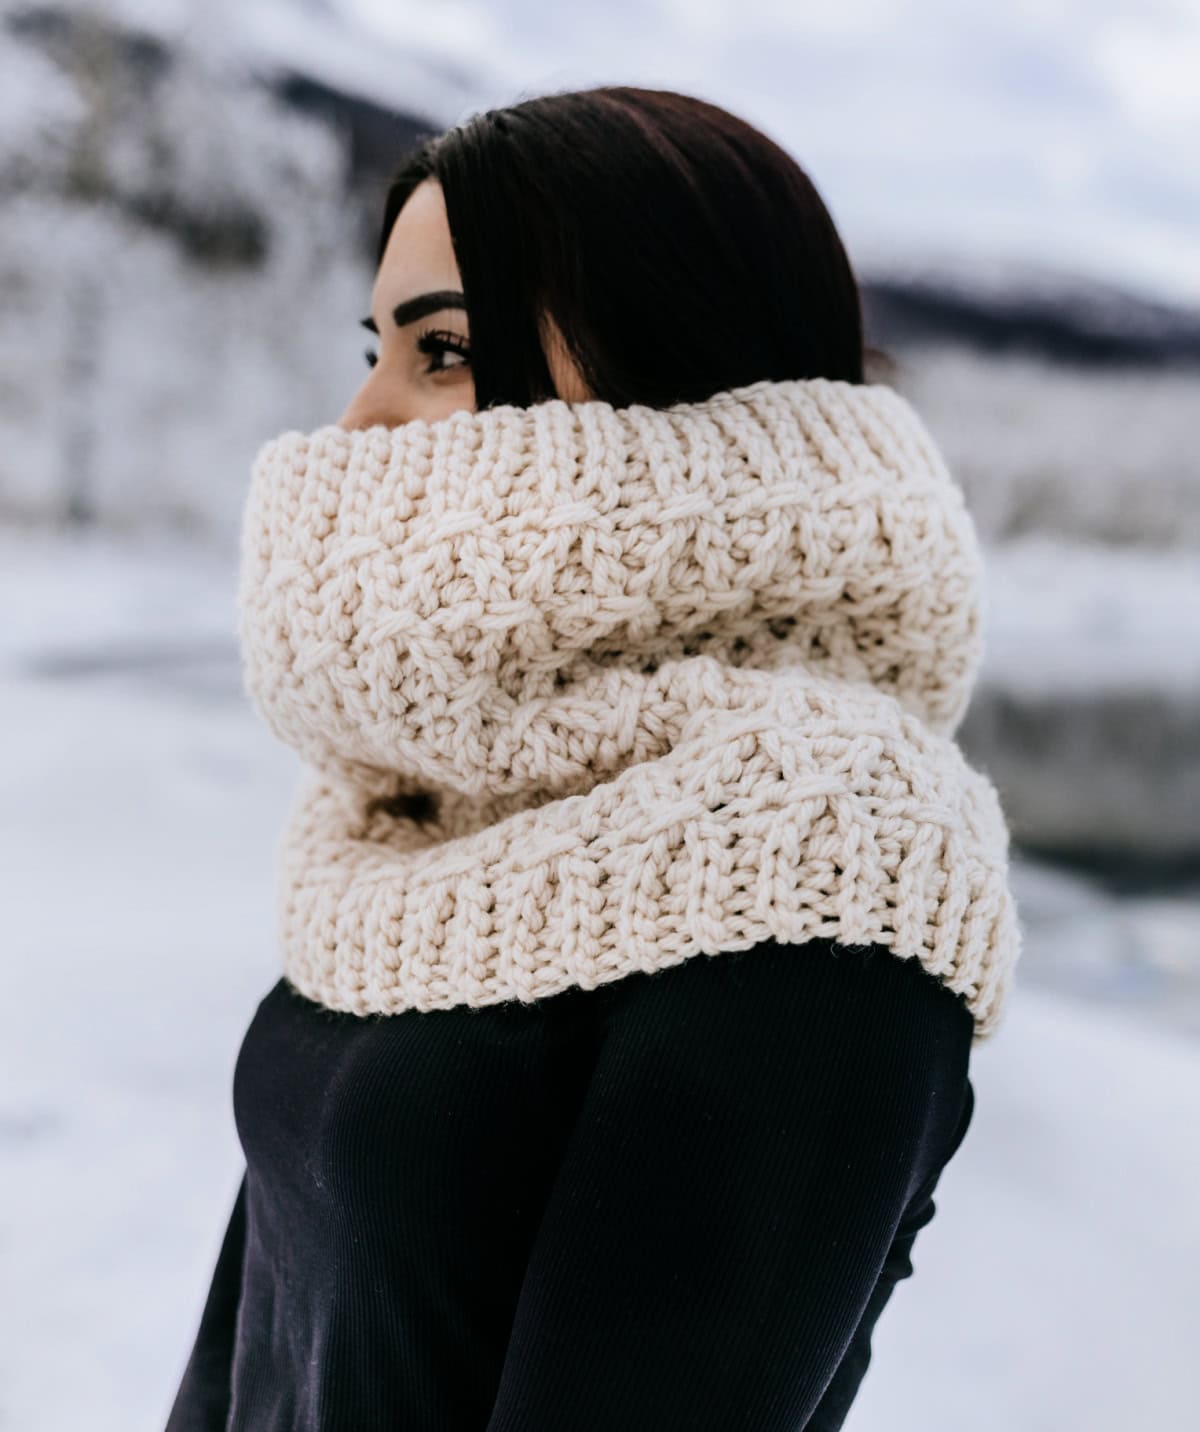
Fireside Free Crochet Cowl Pattern
Love the look of knitted accessories but prefer the ease of crochet? This free crochet cowl pattern gives you the best of both worlds!
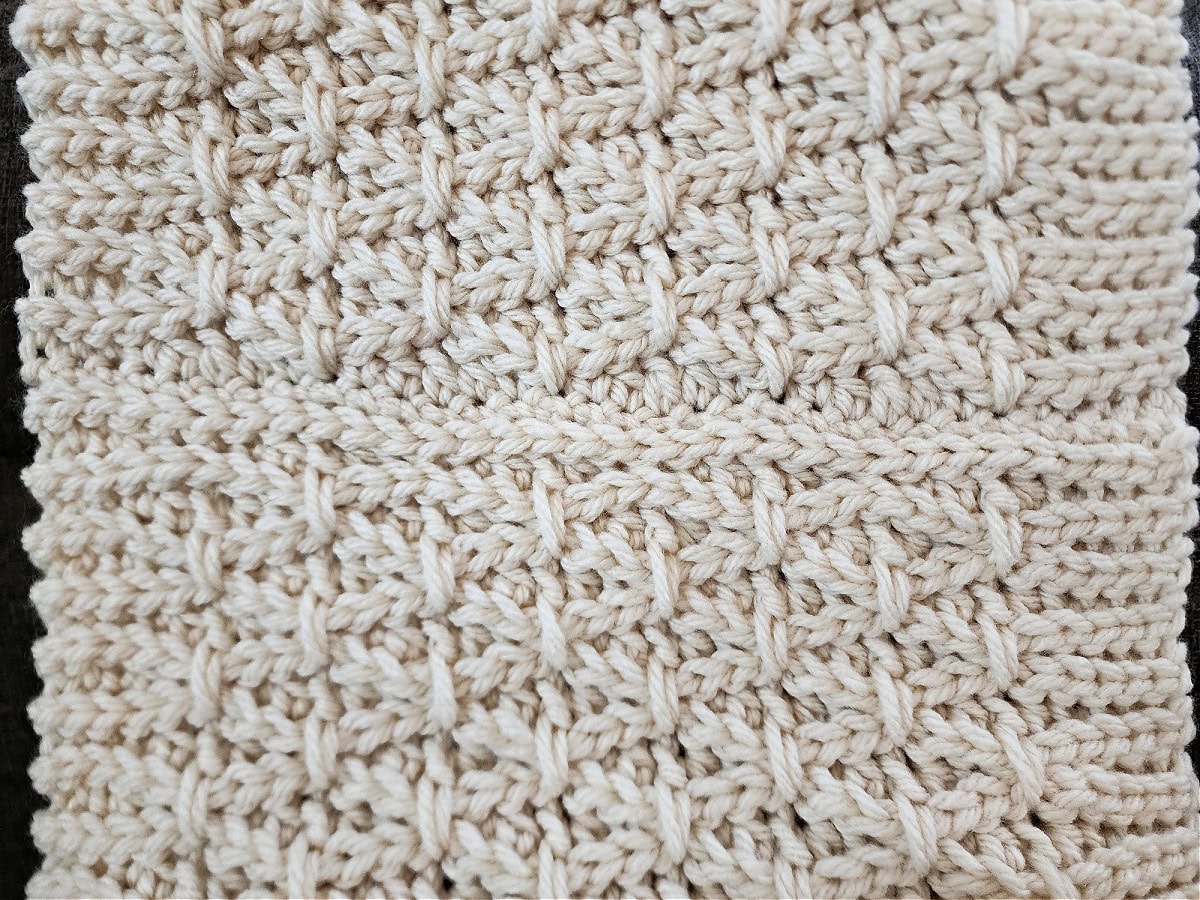
Using simple crochet techniques, you can achieve a beautifully textured piece that mimics knitting—without ever picking up a pair of knitting needles. Admirers will ask, “Is that knit or crochet?”
You’ll find the free crochet cowl pattern below, or an ad-free print friendly PDF on Ravelry, or Etsy (aff).

If you’re like myself and admire the look of knitting, but cannot knit, this free crochet cowl pattern made with crochet stitches that look like knitting gives you the best of both worlds!
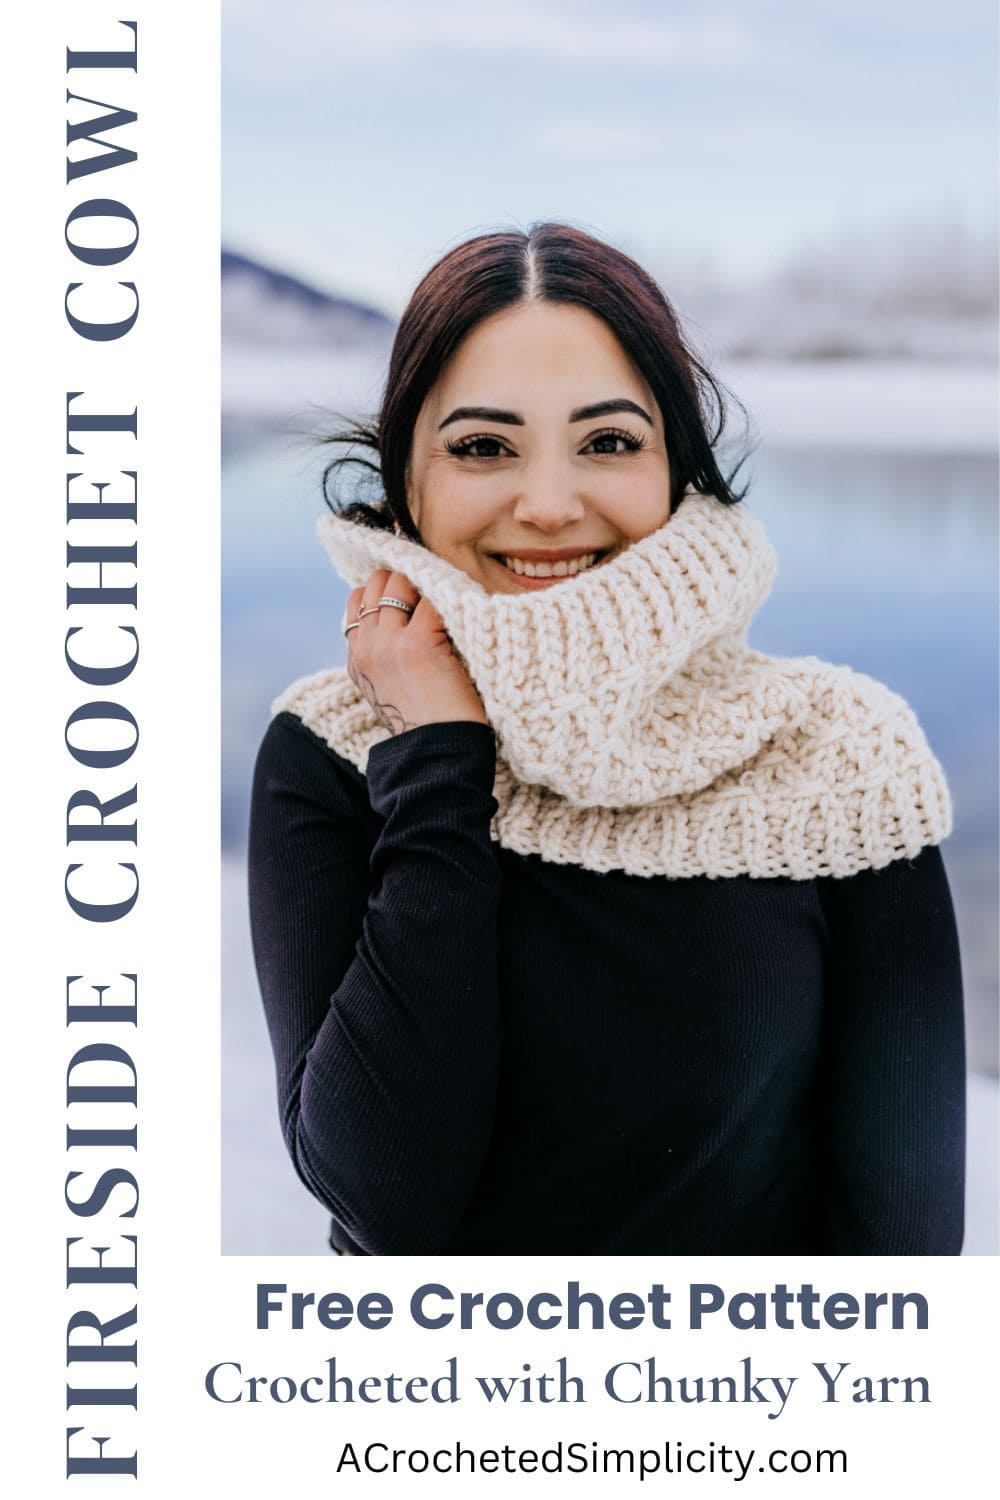
Made with chunky yarn and simple stitches, this cowl works up quickly—making it a quick crochet gift or a fun weekend project for yourself.
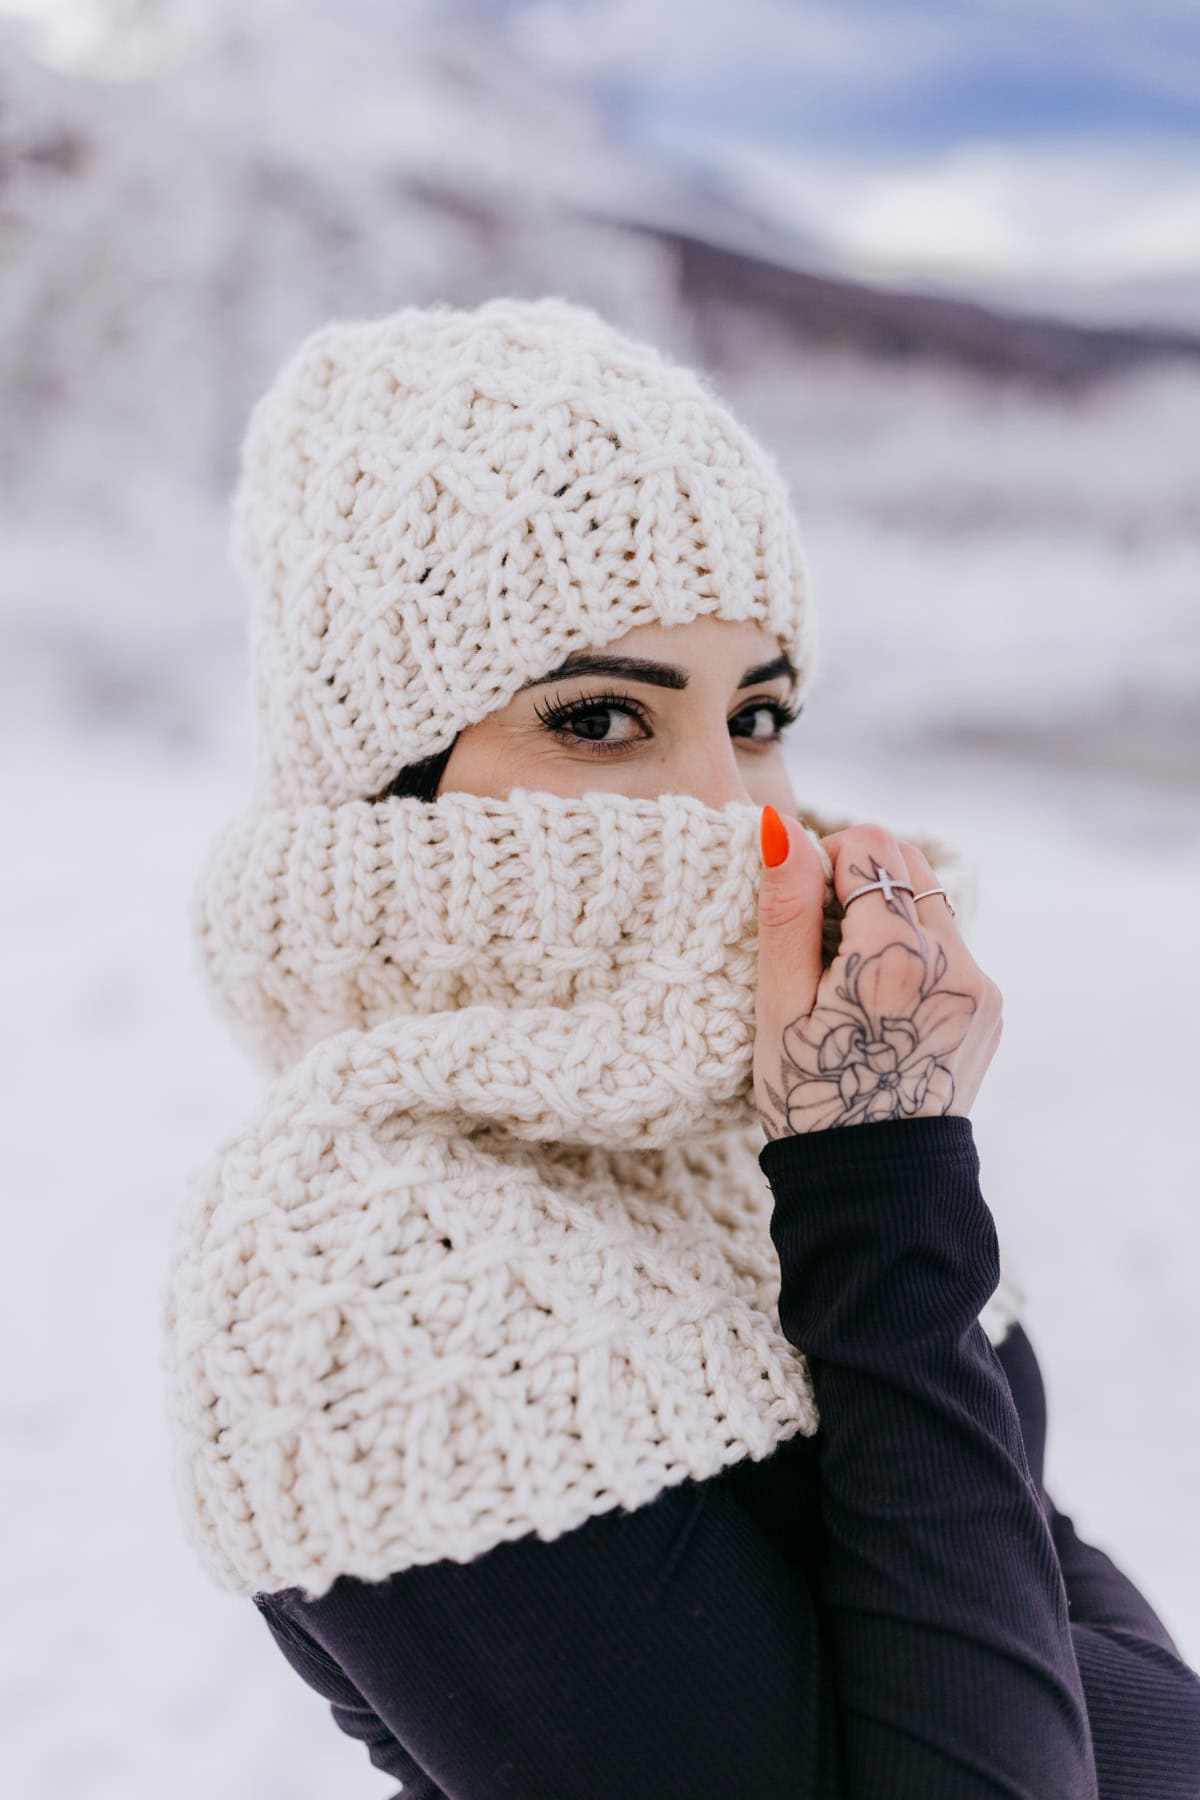
Make a Matching Set: Our Fireside Beanie was designed to match this chunky cowl pattern for a matching set.
How Do You Make a Crochet Cowl
Traditionally, most cowl patterns are worked in the round, but when working many stitch patterns for crochet that looks like knitting, you’ll crochet them flat from side to side and seam them.
An advantage to working the cowl flat and then seaming is that you can adjust the fit of your cowl as you crochet and get the perfect fit!
Yarn
For this winter cowl, I wanted to make sure it would be toasty warm so I chose to use Lion Brand Hue & Me, a thicker yarn.
Hue & Me yarn is a chunky weight / 5 yarn that is an acrylic wool blend and it’s perfect for making warm crochet winter accessories. It’s currently available in 36 colors.
You can substitute your favourite chunky yarn, or here are some other yarns that would make great substitutions:
How To Get The
Fireside Crochet Cowl Pattern
Option 1: Scroll down for the free crochet cowl pattern right here in this blog post.
Option 2: Purchase the ad-free printable PDF from one of my shops:
Can I Use a Different Weight Yarn – Can I Adjust the Size & Fit of the Cowl
Absolutely! If you’d like to use a yarn other than a bulky weight yarn, or you’d like a taller, shorter, more snug, or more loose cowl, this free crochet pattern is easy to adjust!
If you’d like to use a different weight yarn for your cowl, simply adjust your hook size and follow these two tips:
- If you prefer a taller or shorter cowl, simply adjust your foundation chain by adding or subtracting chains in multiples of 6.
- If you prefer a more snug fitting or looser fitting cowl, add or subtract rows of your cowl in multiples of 4.
Pro Tip: Use washable yarn if you plan to wear your cowl daily; acrylic or wool blends are ideal for easy care.
Standard Measurements of a Crochet Cowl
Standard cowl sizes vary based on personal preference, but the following is a good rule of thumb:
- Snug Fitting Cowl: 22″ – 23″ circumference x 8″ – 14″ H (depending how slouchy you’d like it).
- Loose Fitting Cowl: 30″ circumference x 8″ – 14″ H.
- Infinity Scarf: 60″ circumference x 6″ – 8″ H.
Fireside Chunky Crochet Cowl Free Pattern
The free chunky crochet cowl pattern is below, but if you love to work offline, I’ve got a couple other great options for you.
Purchase the ad-free, printable PDF, on Ravelry, or on Etsy (aff).
Purchase the cowl & beanie crochet kit! (aff): Lion Brand has a full kit of the Fireside Crochet Beanie & Cowl Set, available on their website. The crochet kit includes your choice of colors and a digital copy of BOTH the Fireside Cowl & Beanie patterns!
This post contains affiliate links.
Materials
- Yarn: Chunky / Bulky, 5 weight yarn was used for this crochet cowl. Lion Brand Yarns Hue & Me in Salt was used for the cowl in the photos 80% Acrylic / 20% Wool (137 yards / 125 m / 125 g / 4.4 oz)
- Salt #617- 098AS (2 balls / 263 yards)
- Crochet Hook: MN/9.00mm; or size needed to obtain gauge (My favorite crochet hooks are the Clover Amour Crochet Hooks, I’ve never had an ache in my hand since switching).
- Scissors
- Yarn Needle
Abbreviations (U.S. Terms)
- ch(s): chain(s)
- sl st(s): slip stitch(es)
- st(s): stitch(es)
- yo: yarn over
- sc: single crochet
- hdc: half double crochet
- dc: double crochet
- BLO: back loop only
- FLO: front loop only
- Rep: repeat
Experience Level
- Easy / Intermediate
Gauge
- In BLO sl st: 10 sts = 4.25″
- Row height isn’t crucial.
Size
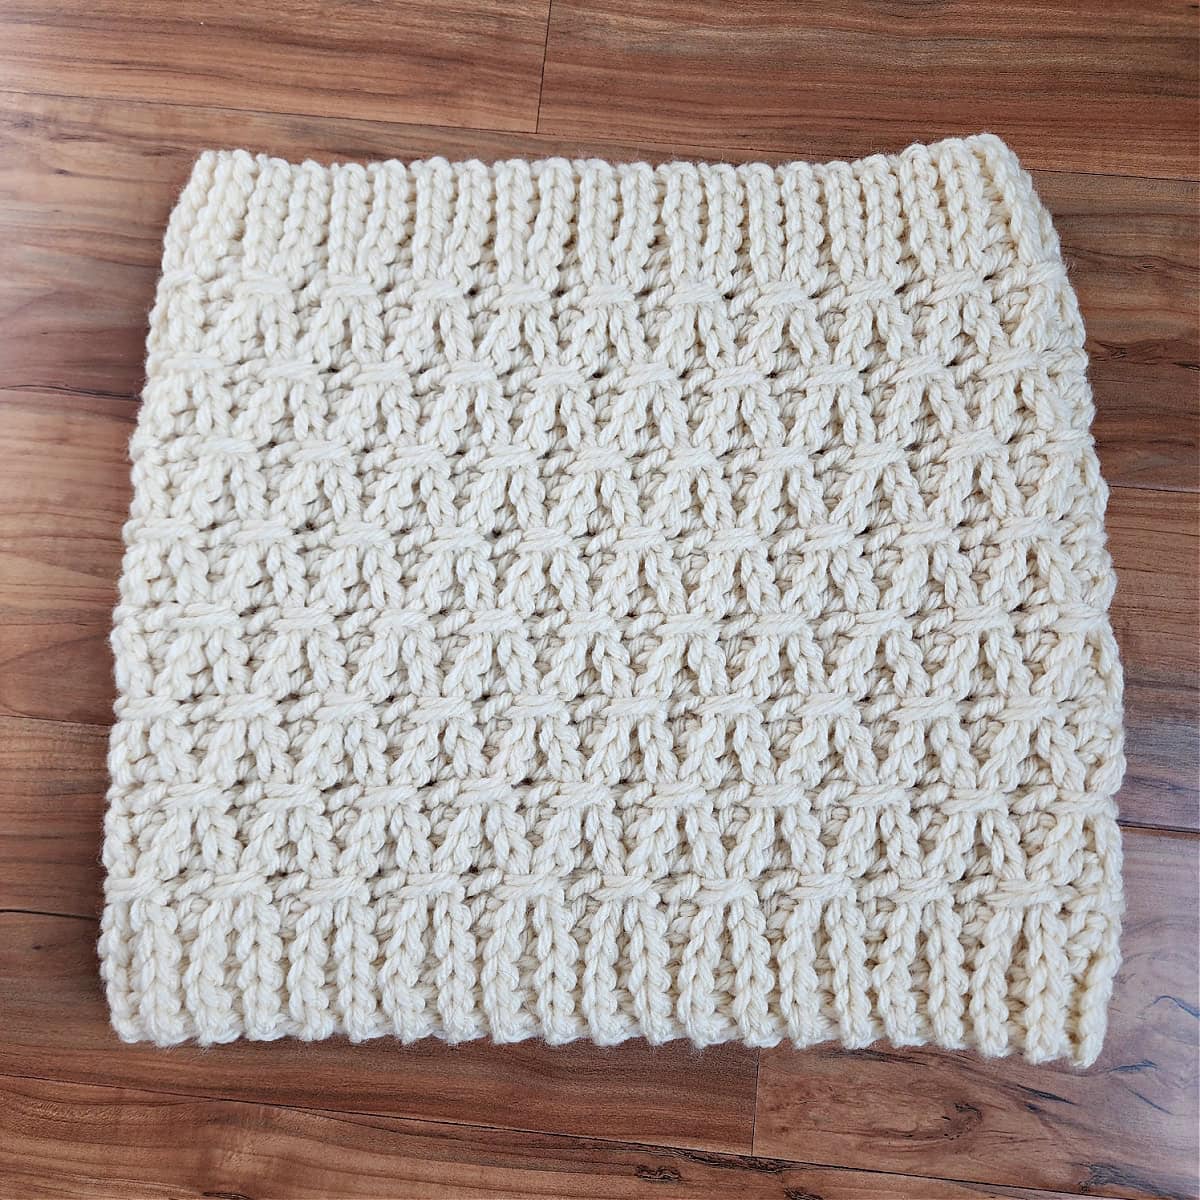
- One Size: 14.75″ W x 13.5″ H (laid flat)
Pattern Notes
- Turning chains are not counted as stitches, unless noted otherwise.
- The first stitch of each row is worked into the same stitch as the beginning chain, unless noted otherwise.
- Yarn Notes: Lion Brand Yarns Hue & Me was used for the sample. Other comparable yarns may be used as long as gauge is met.
- Lion Brand Yarns Hue & Me, in Salt, bulky weight / 5 yarn, 80% Acrylic / 20% Wool (137 yards / 125 m / 125 g / 4.4 oz).
- Yardage & Color
- Salt #617- 098AS (2 balls / 263 yards)
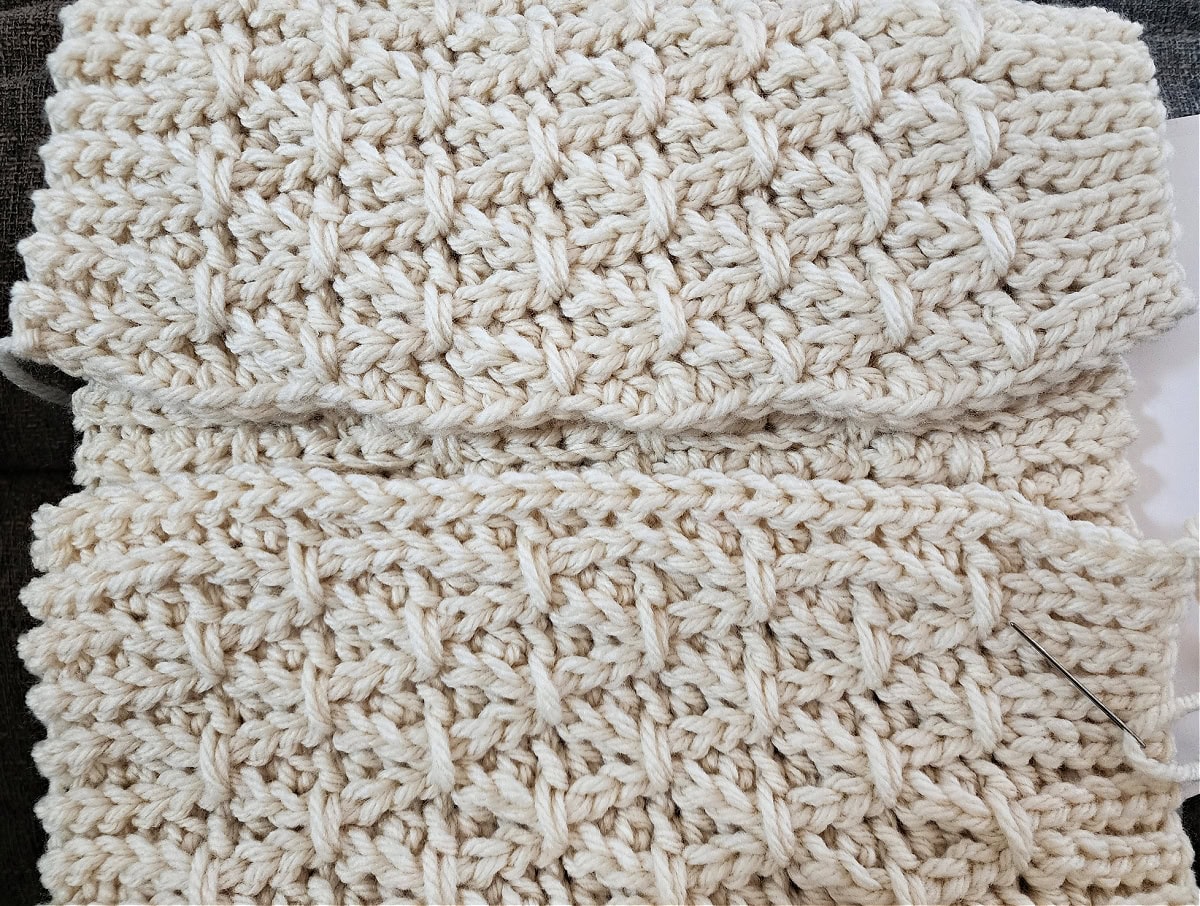
- Cowl Construction: This cowl is crocheted sideways and then seamed. After seaming the edge, you’ll stitch a few finishing stitches to blend the seam stitches together.
- Adjusting Cowl Height: Increase or decrease your foundation chain in multiples of 6.
- Adjusting Cowl Circumference: Add or subtract rows in multiples of 4.
Free Crochet Cowl Pattern
Gauge: In pattern as written below: 10 sts = 4.25″; 8 rows = 3″ (row height isn’t crucial)
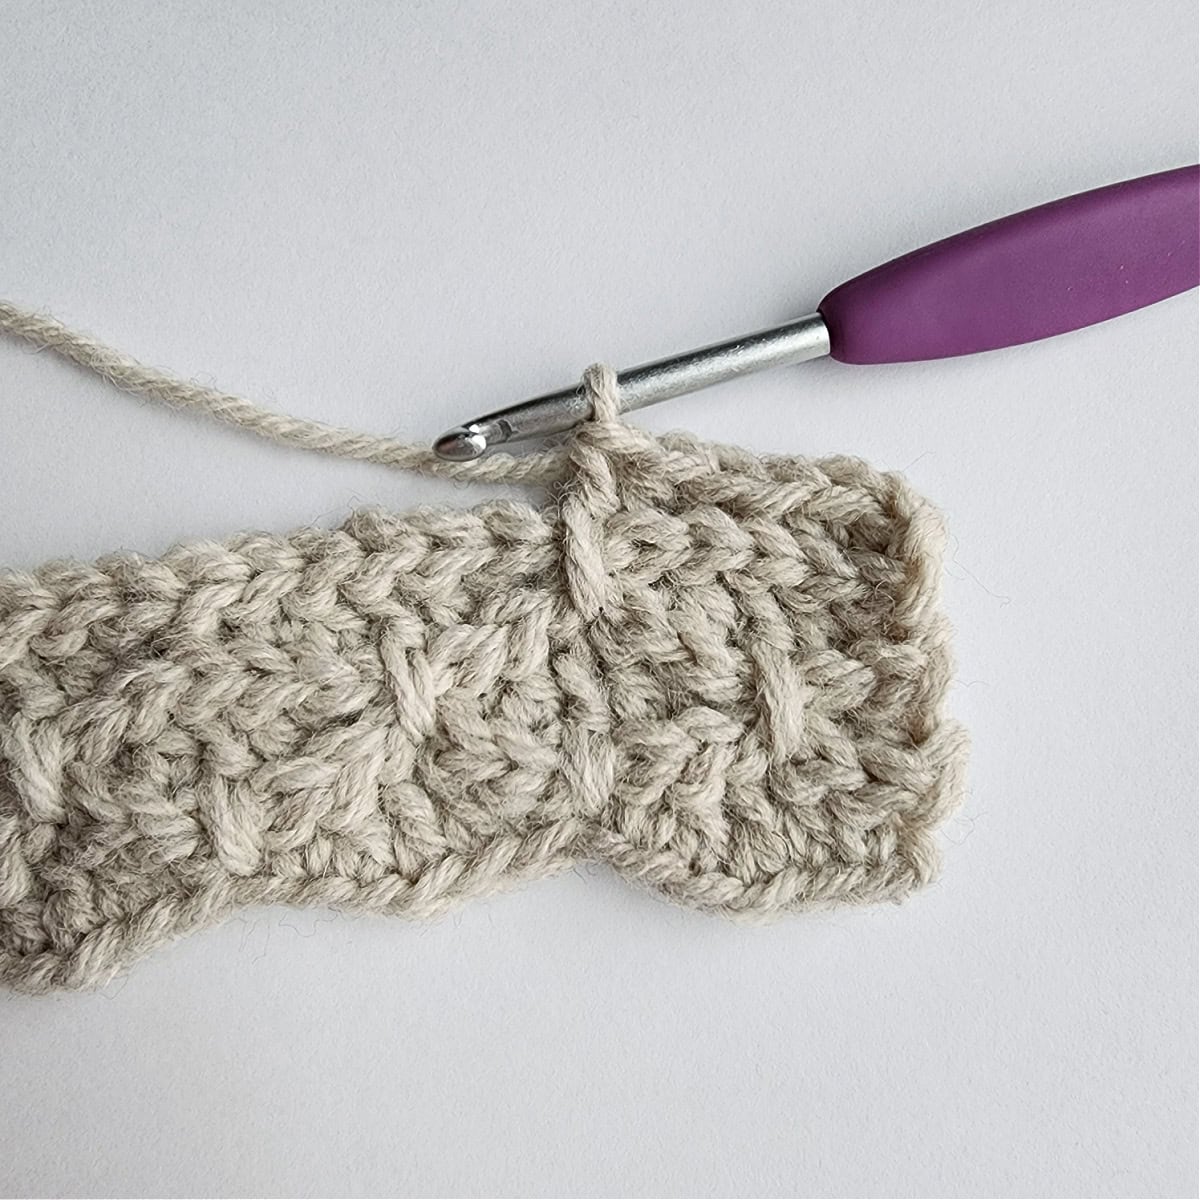
Row 1 (RS): With yarn & a 9.00mm crochet hook, ch 33, working into the back of your foundation ch, sl st into the 2nd ch from your hook, sl st into each of the next 3 chs, sc in the next ch, (sl st in the next ch, sc in the next ch, hdc in the next ch, dc in the next ch, hdc in the next ch, sc in the next ch) work from ( to ) 4 times, then sl st in each of the last 3 chs. Turn. (32 sts) Width of Row 1 should be approximately 13.5″.
Row 2: Ch 1, BLO sl st in each st across. Turn. (32 sts)
Row 3: Ch 1, BLO sl st in each of the first 3 sts, (BLO sc in the next st, BLO hdc in the next st, dc in the next foundation ch from Row 1, BLO hdc in the next st, BLO sc in the next st, BLO sl st in the next st) work from ( to ) 4 times, then BLO sc in the next st, BLO hdc in the next st, BLO sc in the next st, BLO sl st in each of the last 2 sts. Turn. (32 sts)
Row 4: Rep Row 2.
Row 5: Ch 1, BLO sl st in each of the first 4 sts, BLO sc in the next st, (BLO sl st in the next st, BLO sc in the next st, BLO hdc in the next st, dc in the next dc from Row 1, BLO hdc in the next st, BLO sc in the next st) work from ( to ) 4 times, then BLO sl st in each of the last 3 sts. Turn. (32 sts)
Row 6: Rep Row 2.
Row 7: Ch 1, BLO sl st in each of the first 3 sts, (BLO sc in the next st, BLO hdc in the next st, dc in the next dc 4 rows below, BLO hdc in the next st, BLO sc in the next st, BLO sl st in the next st) work from ( to ) 4 times, then BLO sc in the next st, BLO hdc in the next st, BLO sc in the next st, BLO sl st in each of the last 2 sts. Turn. (32 sts)
Row 8: Rep Row 2.
Row 9: Ch 1, BLO sl st in each of the first 4 sts, BLO sc in the next st, (BLO sl st in the next st, BLO sc in the next st, BLO hdc in the next st, dc in the next dc 4 rows below, BLO hdc in the next st, BLO sc in the next st) work from ( to ) 4 times, then BLO sl st in each of the last 3 sts. Turn. (32 sts)
Row 10: Rep Row 2.
Rep Rows 6 – 10 (ending with a Row 8), until your cowl is approximately 29.5″.
Fasten off leaving a length of yarn 3 times the width of the last row. Finished cowl size before seaming: 13.5″ W x 29.5″ H.
Continue on to the Nearly Invisible Seam. Seam your cowl and then continue to Finishing Stitches.
Nearly Invisible Seam
Finishing Stitches
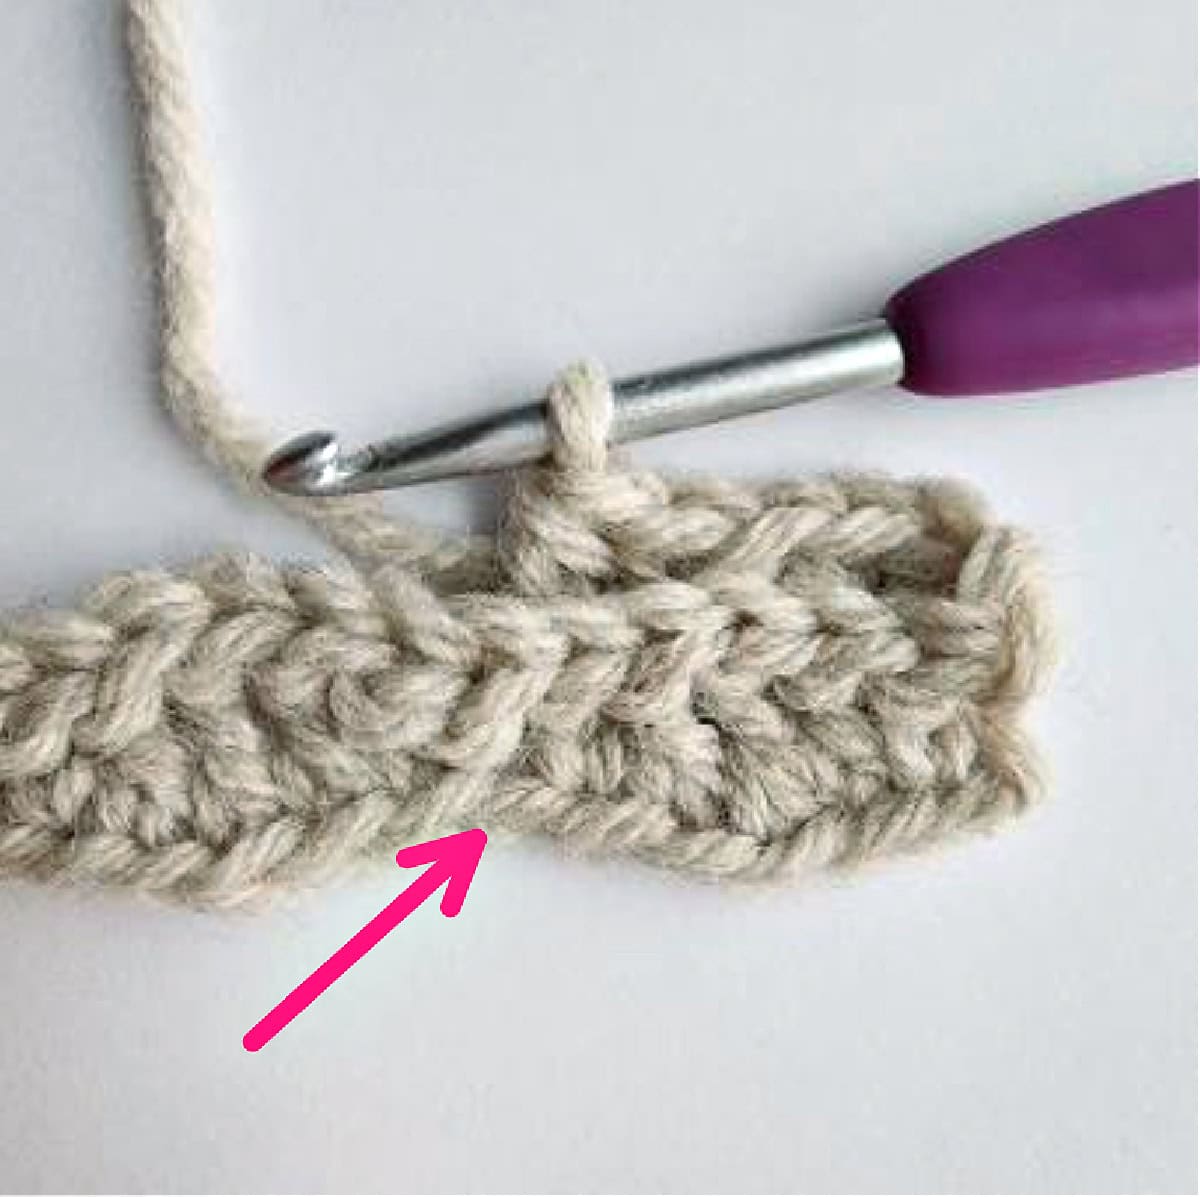
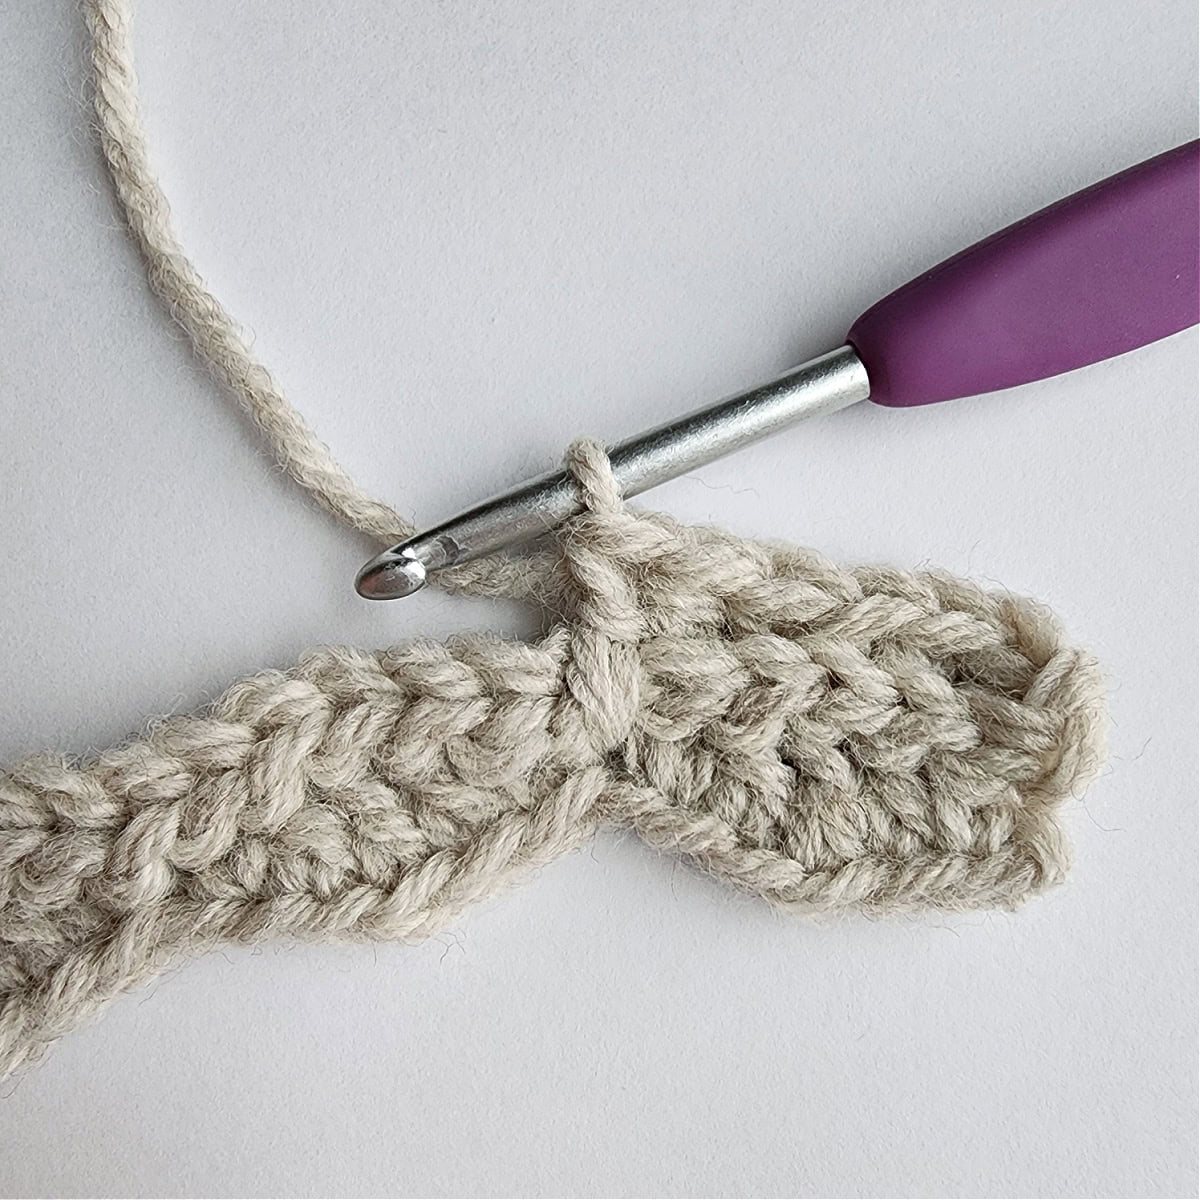
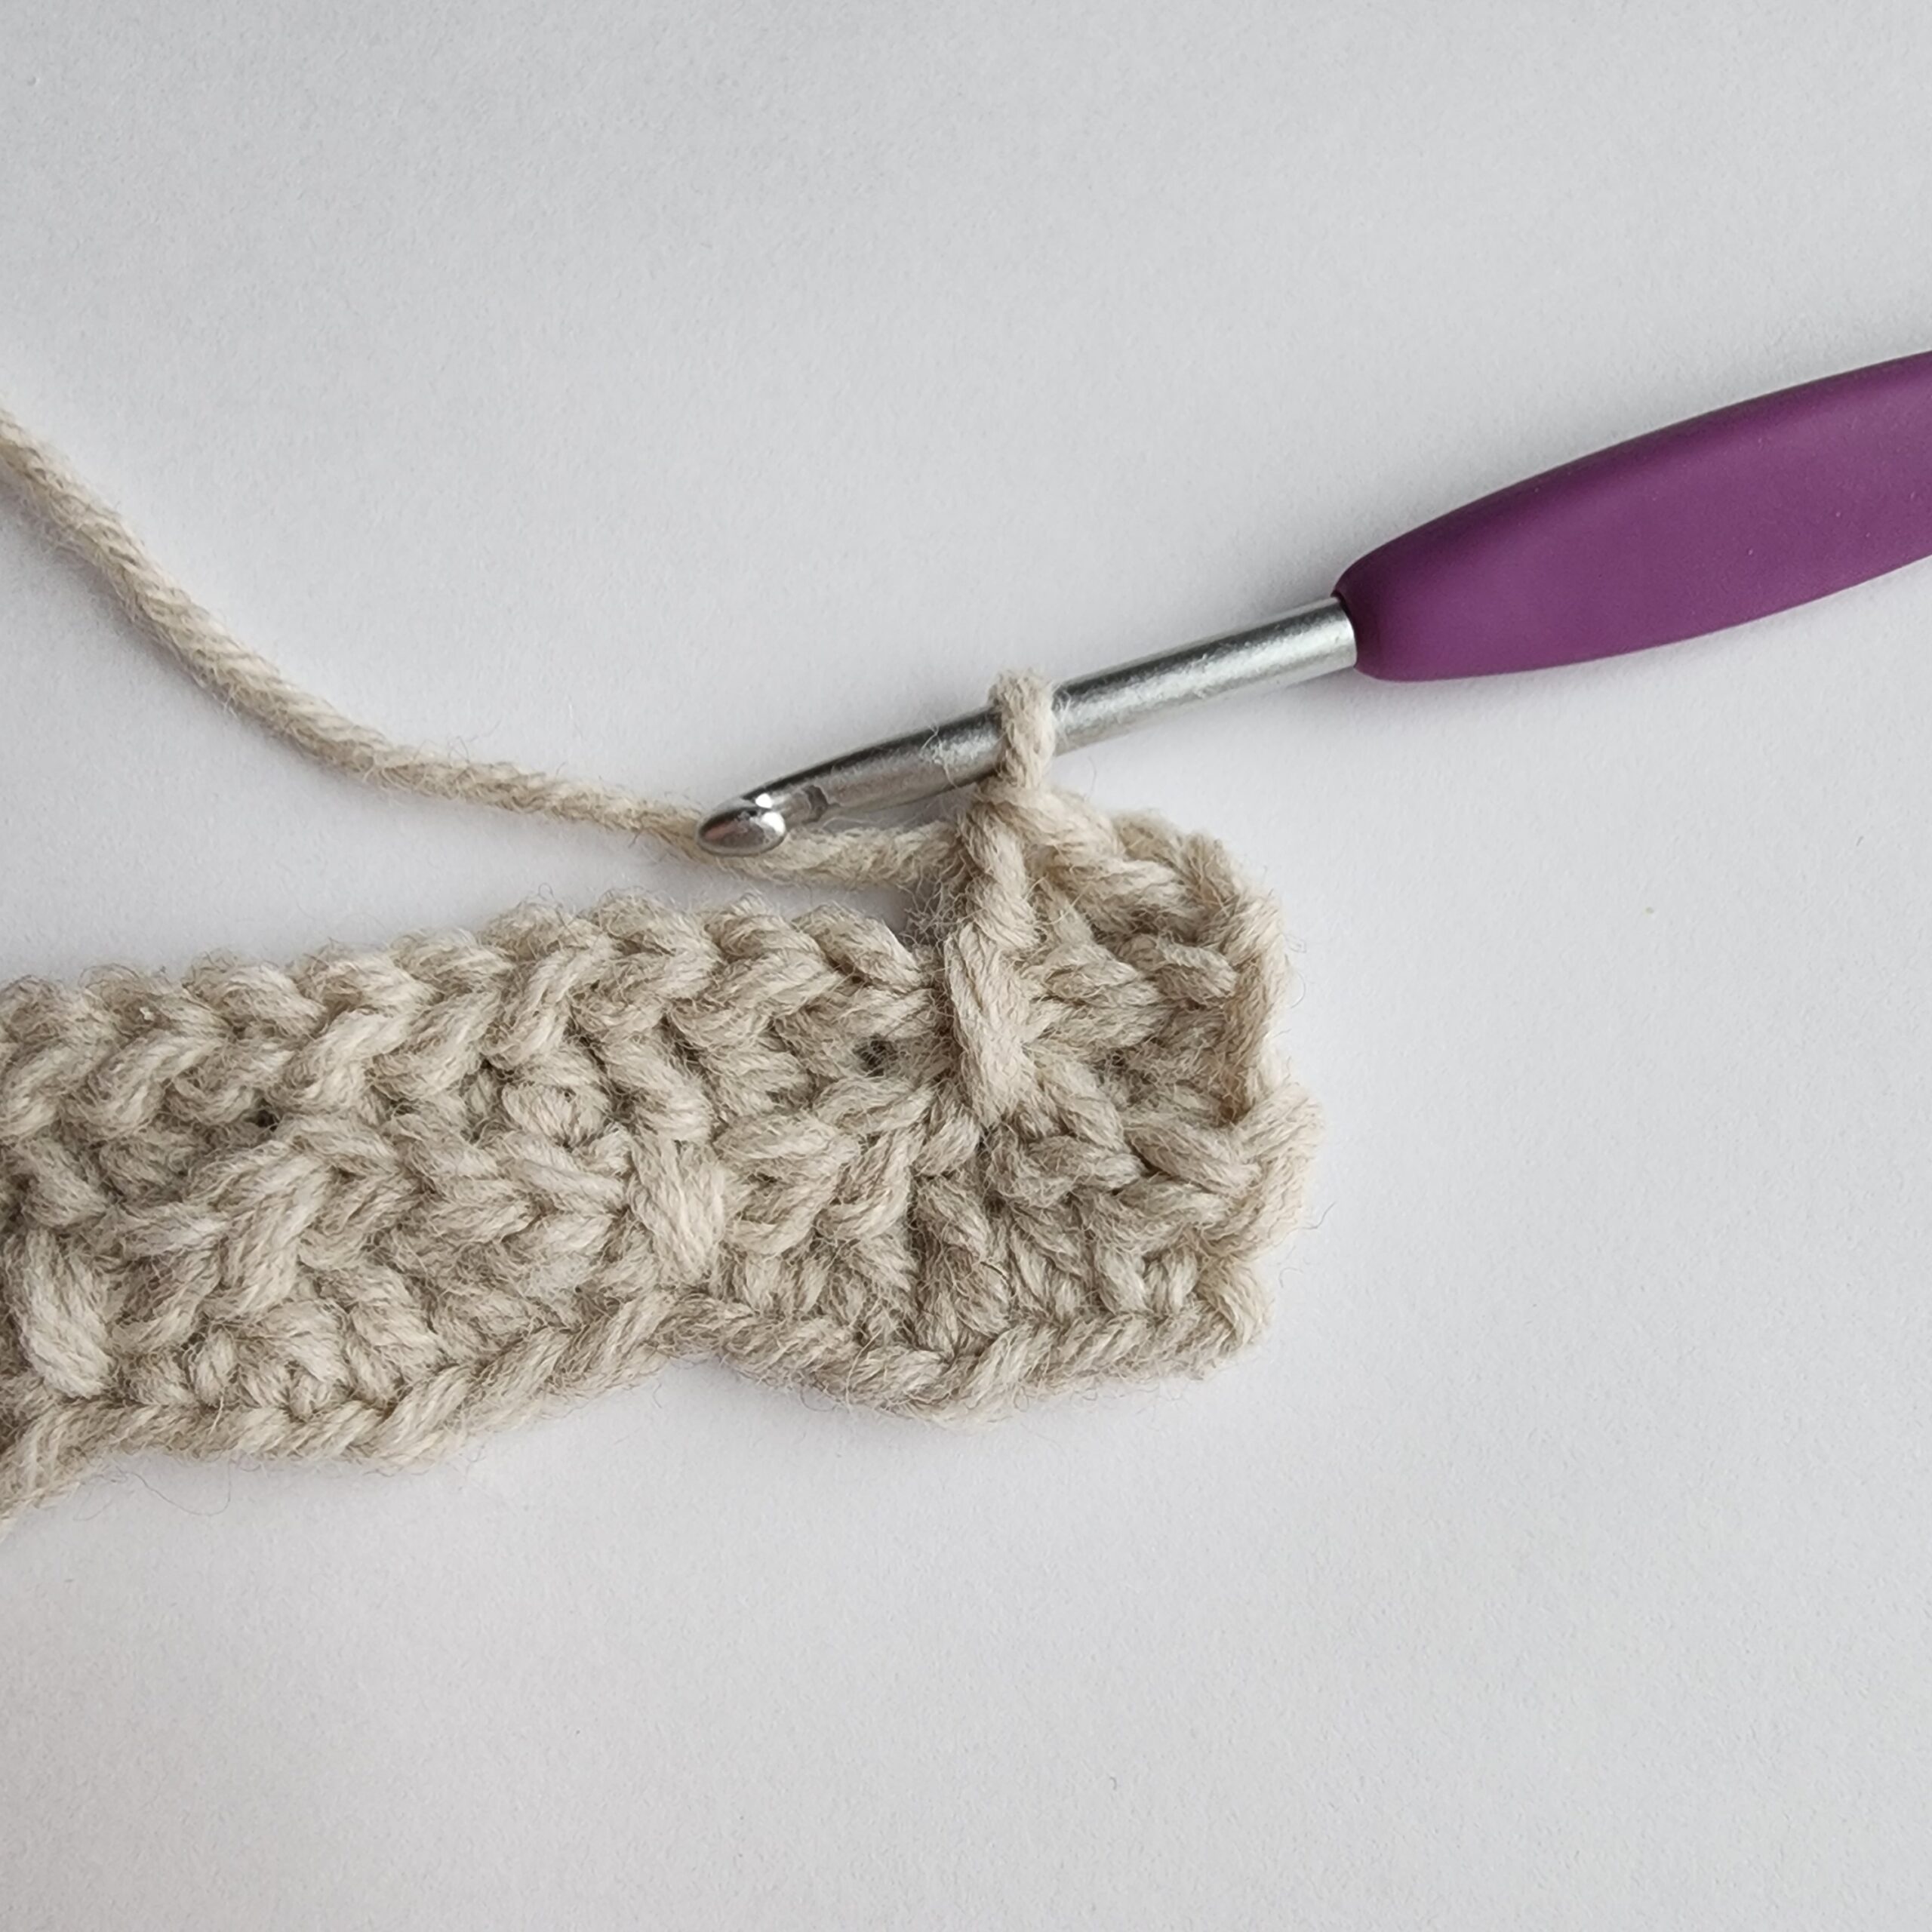
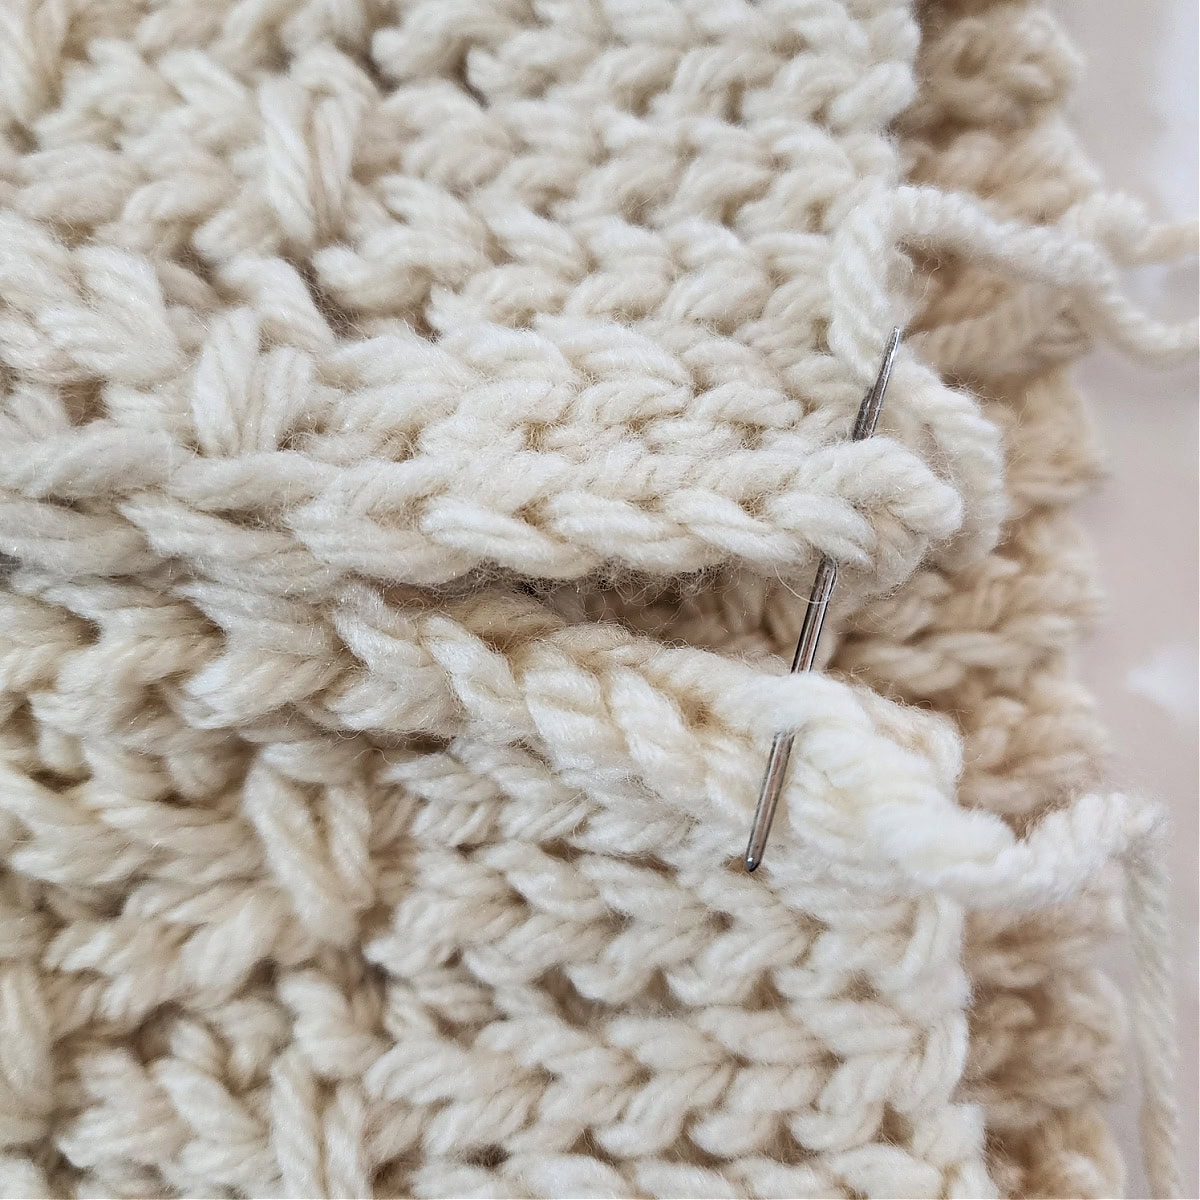
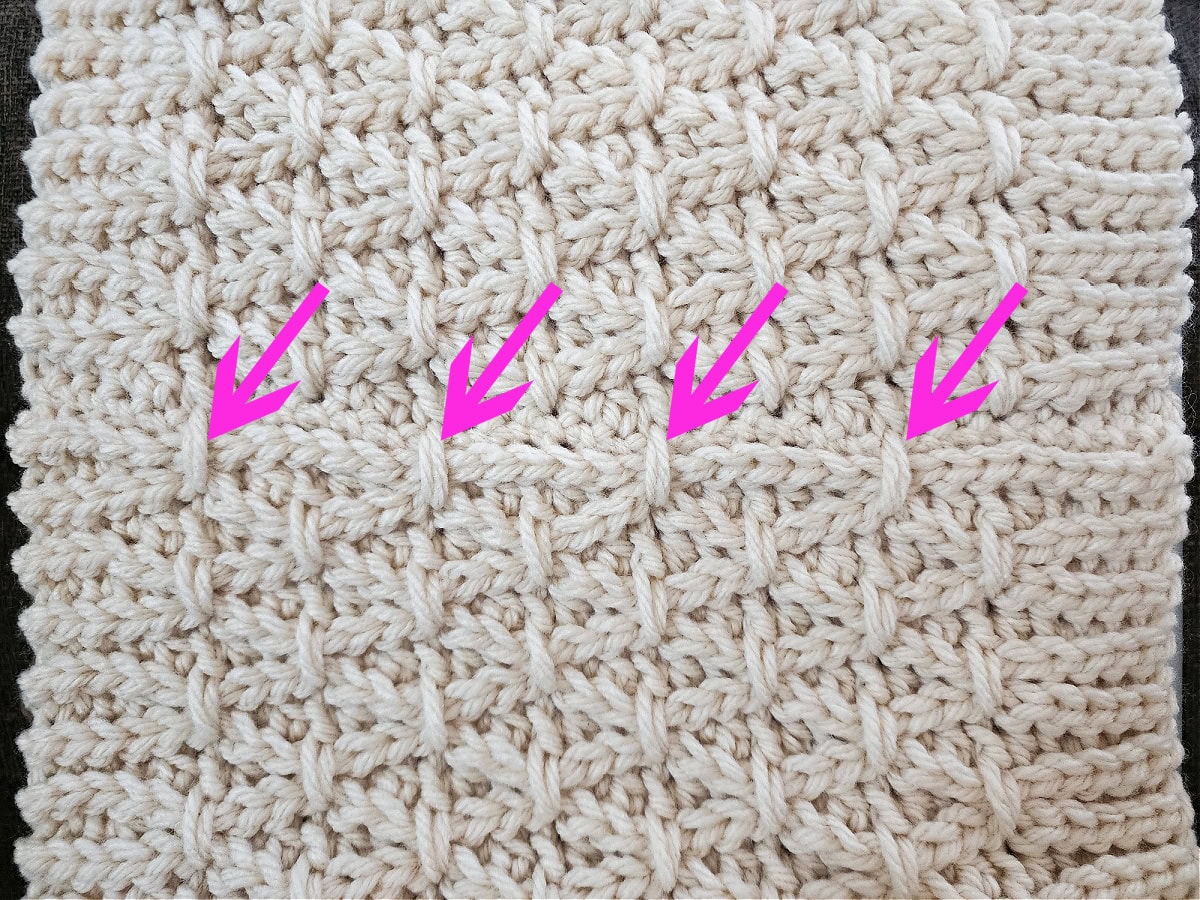
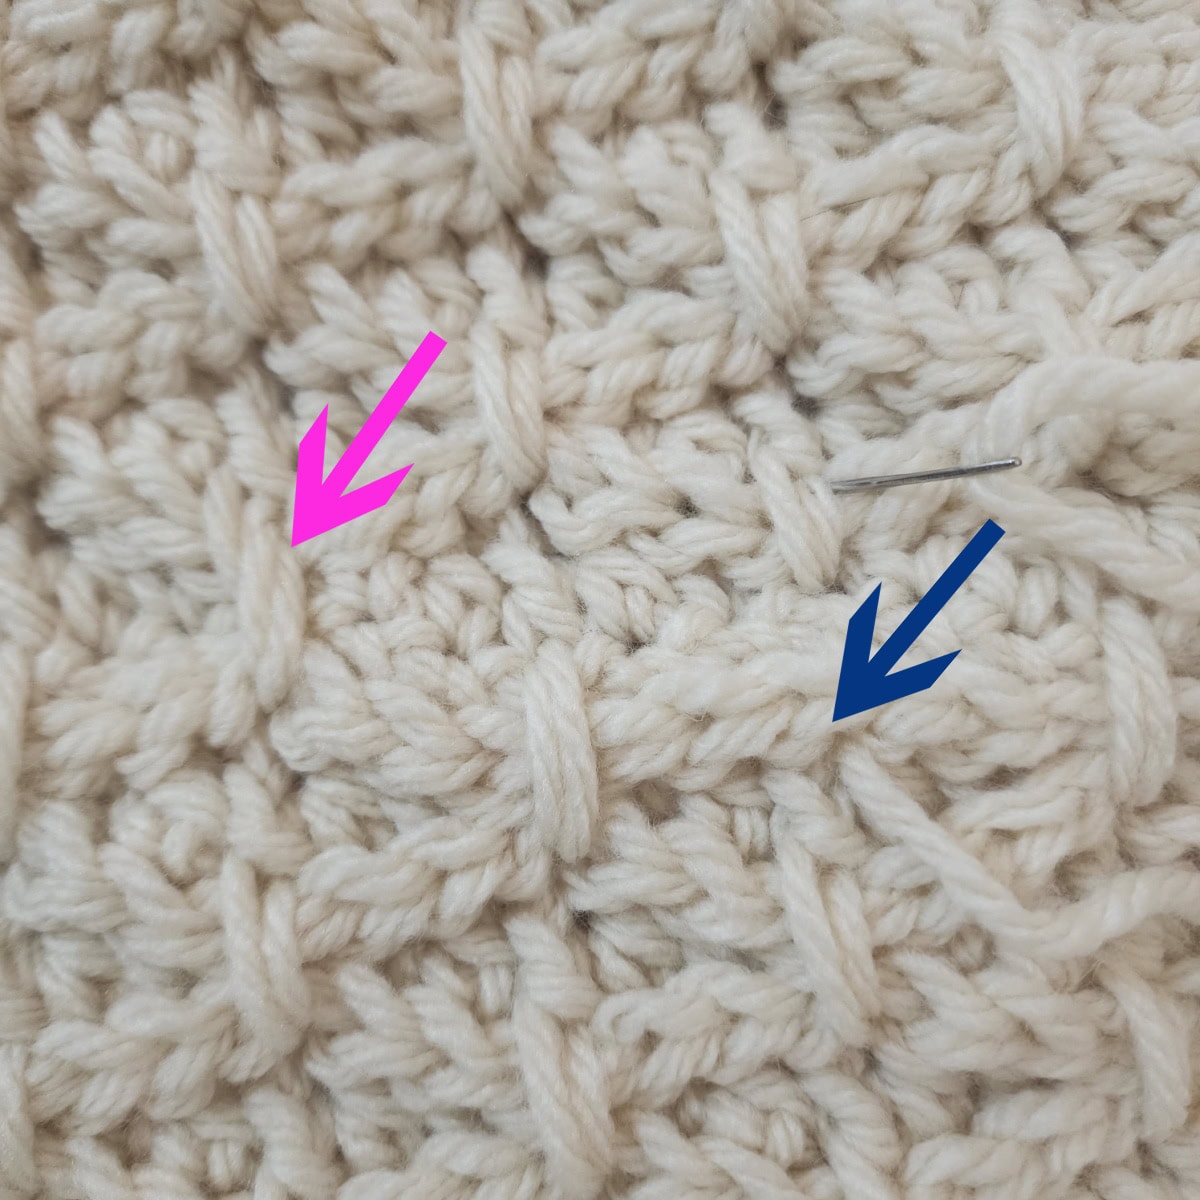
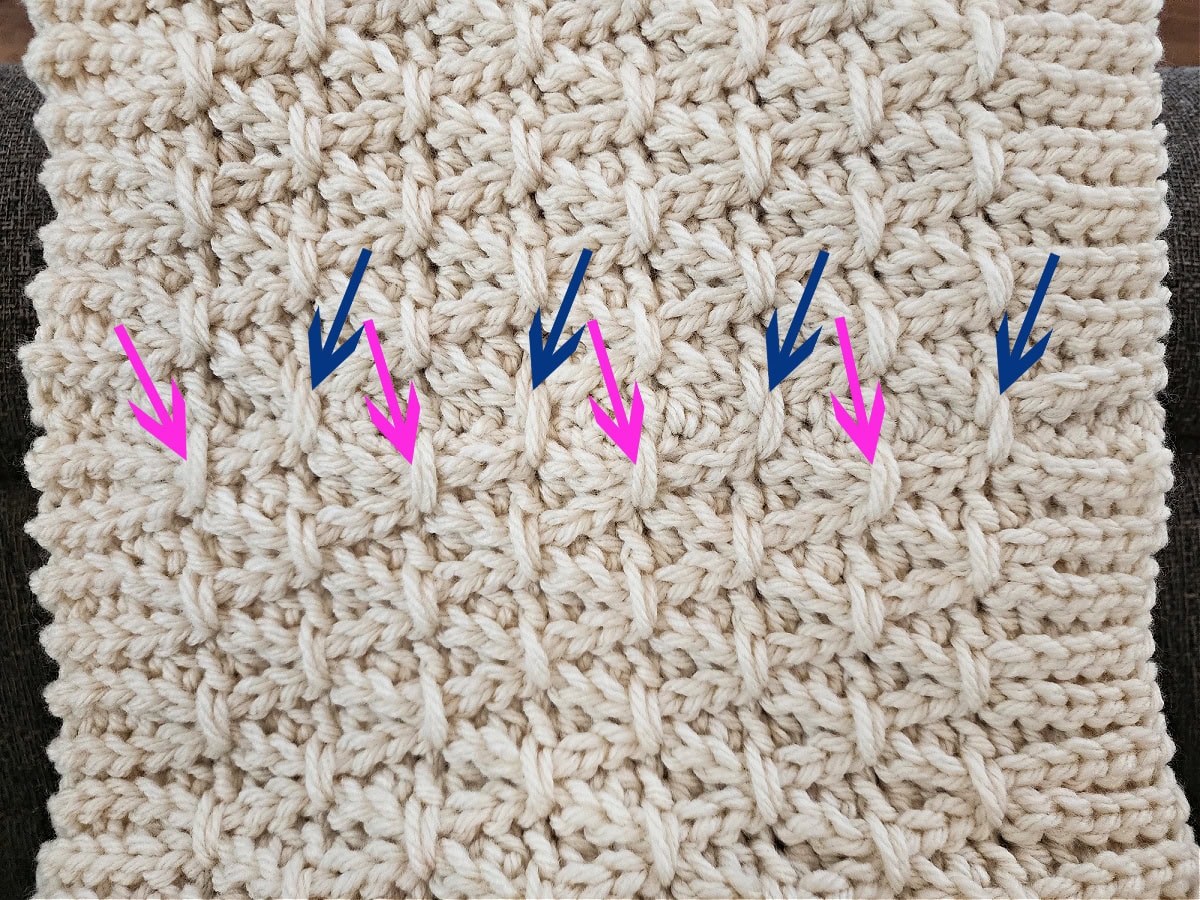
The finishing stitches you’ll be adding are to tie together the first and last rows of the knit-look crochet cowl. They are decorative stitches that mimic the double crochet stitches you worked 4 rows down throughout the cowl. These stitches are made using only a yarn needle and piece of yarn that you will use to connect two rows of stitches.
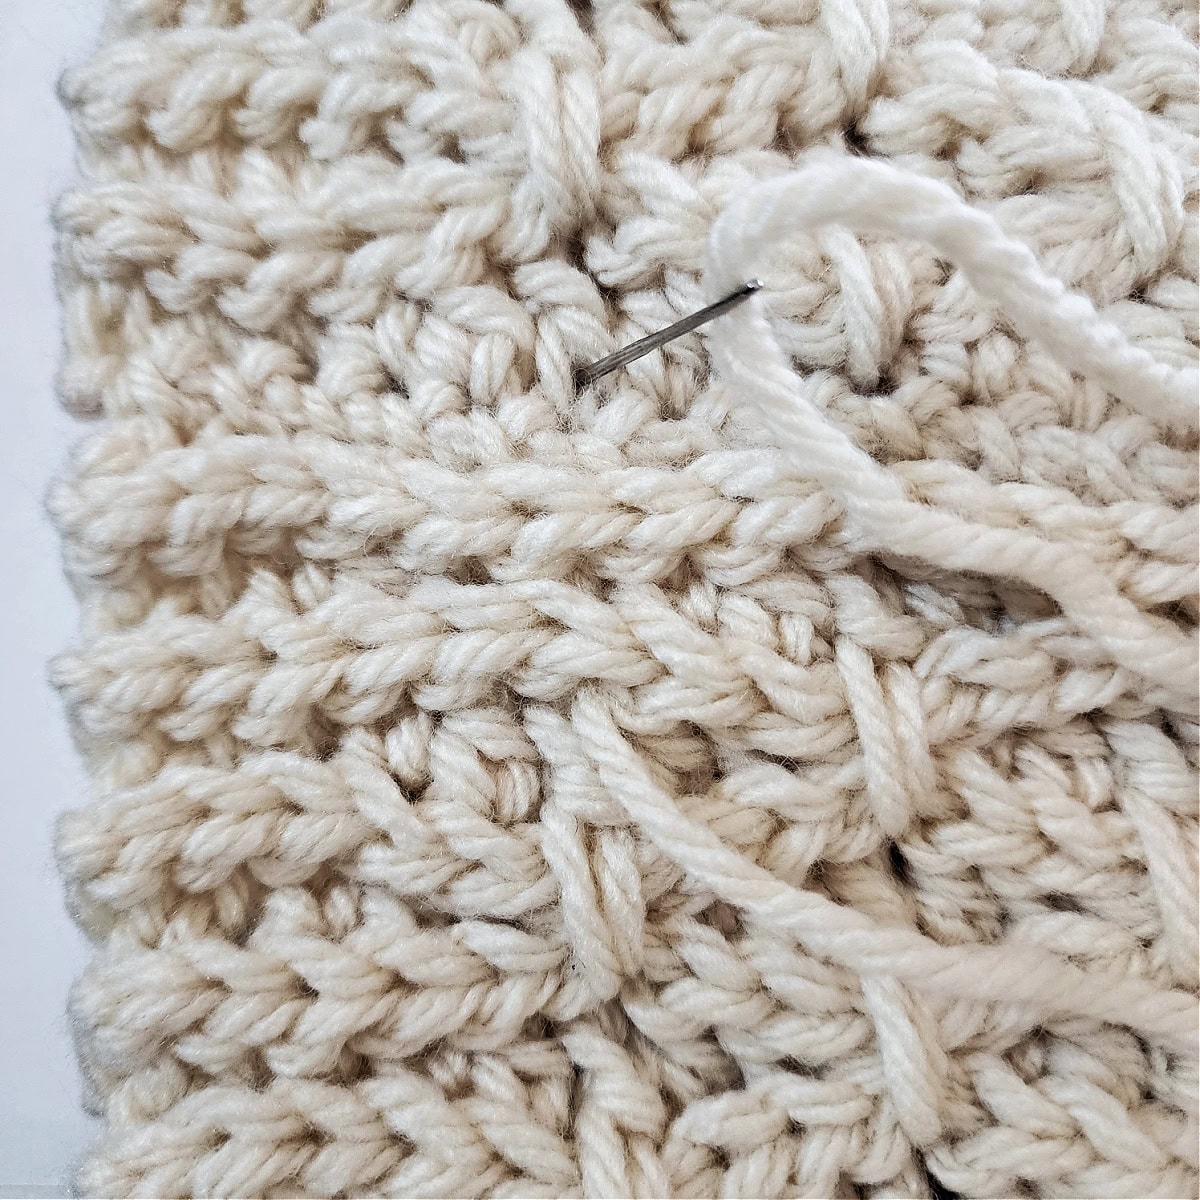

Repeat Photos A – B to tie together each dc from the 4th to last row of the cowl to the dc above it. Weave in ends. Continue on to complete the second set of finishing stitches.
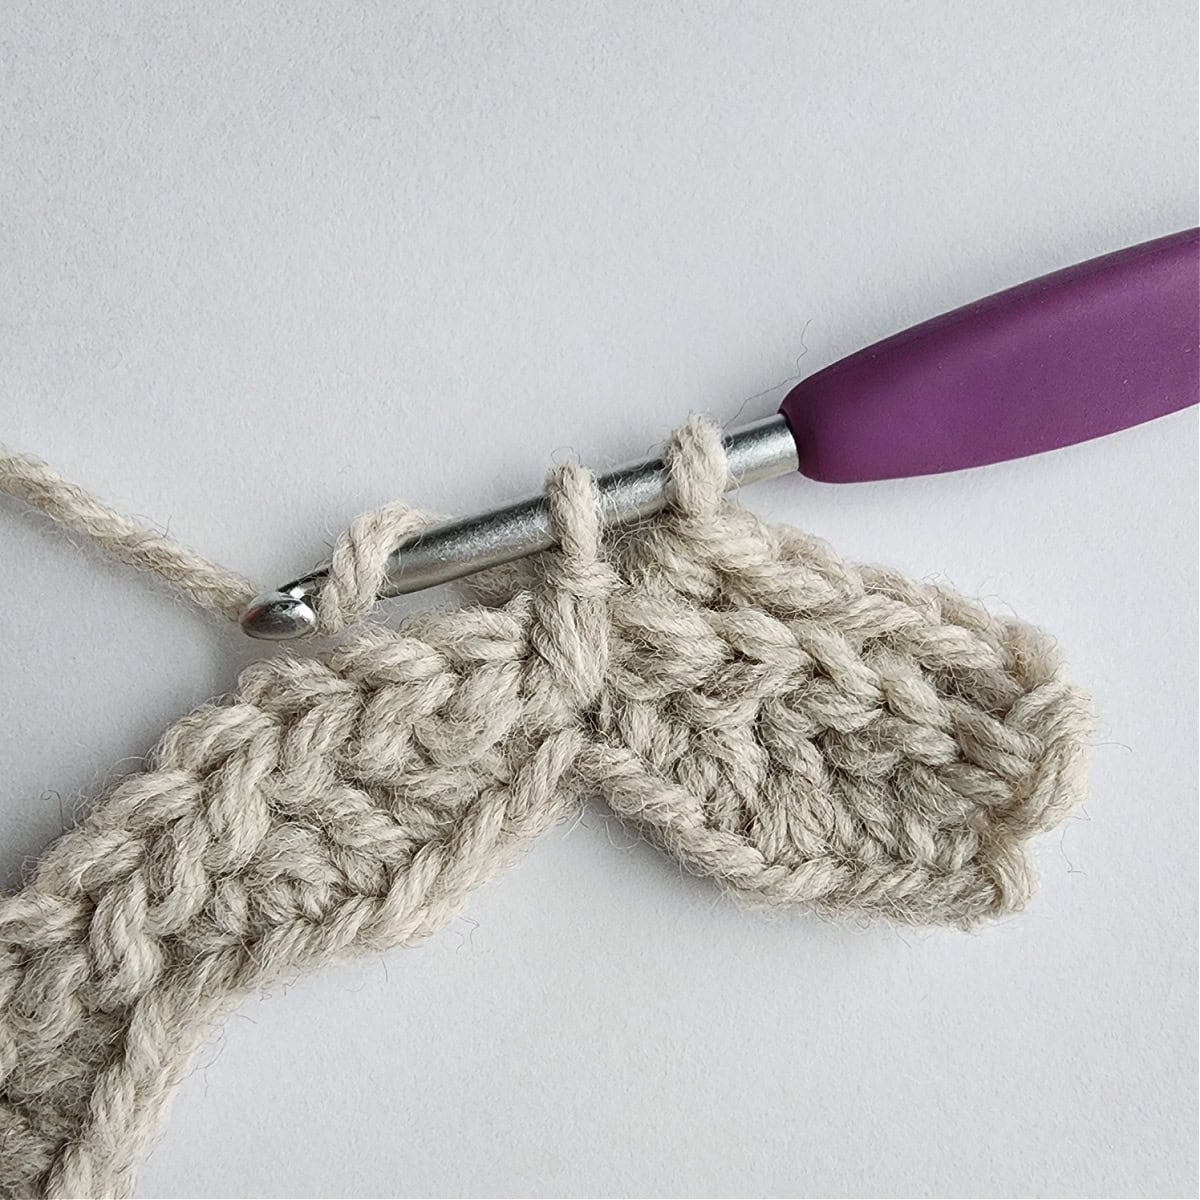
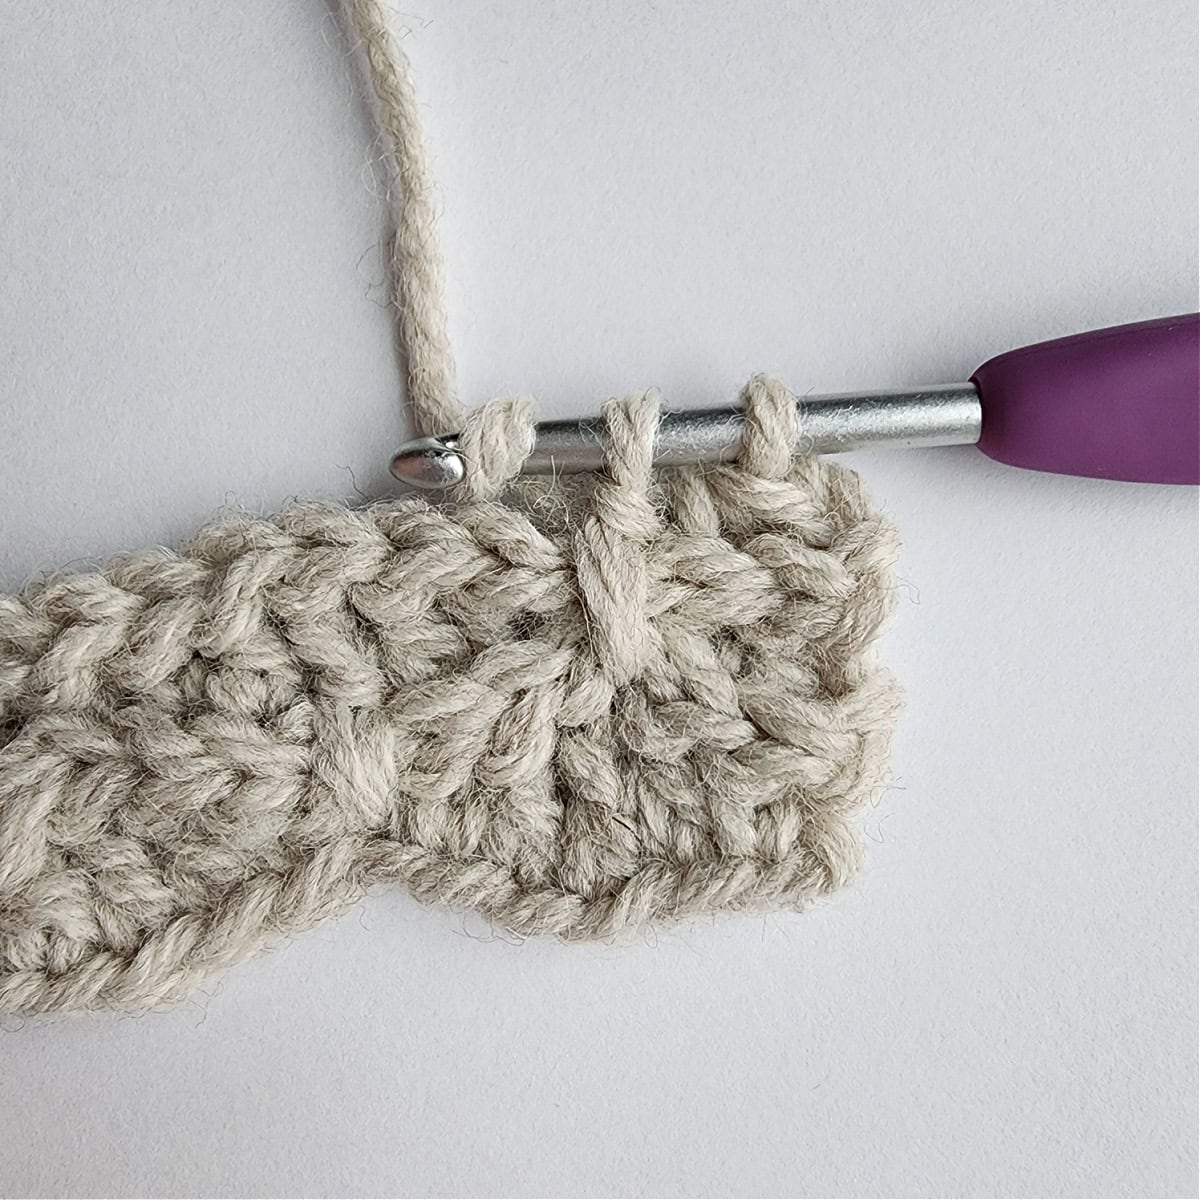
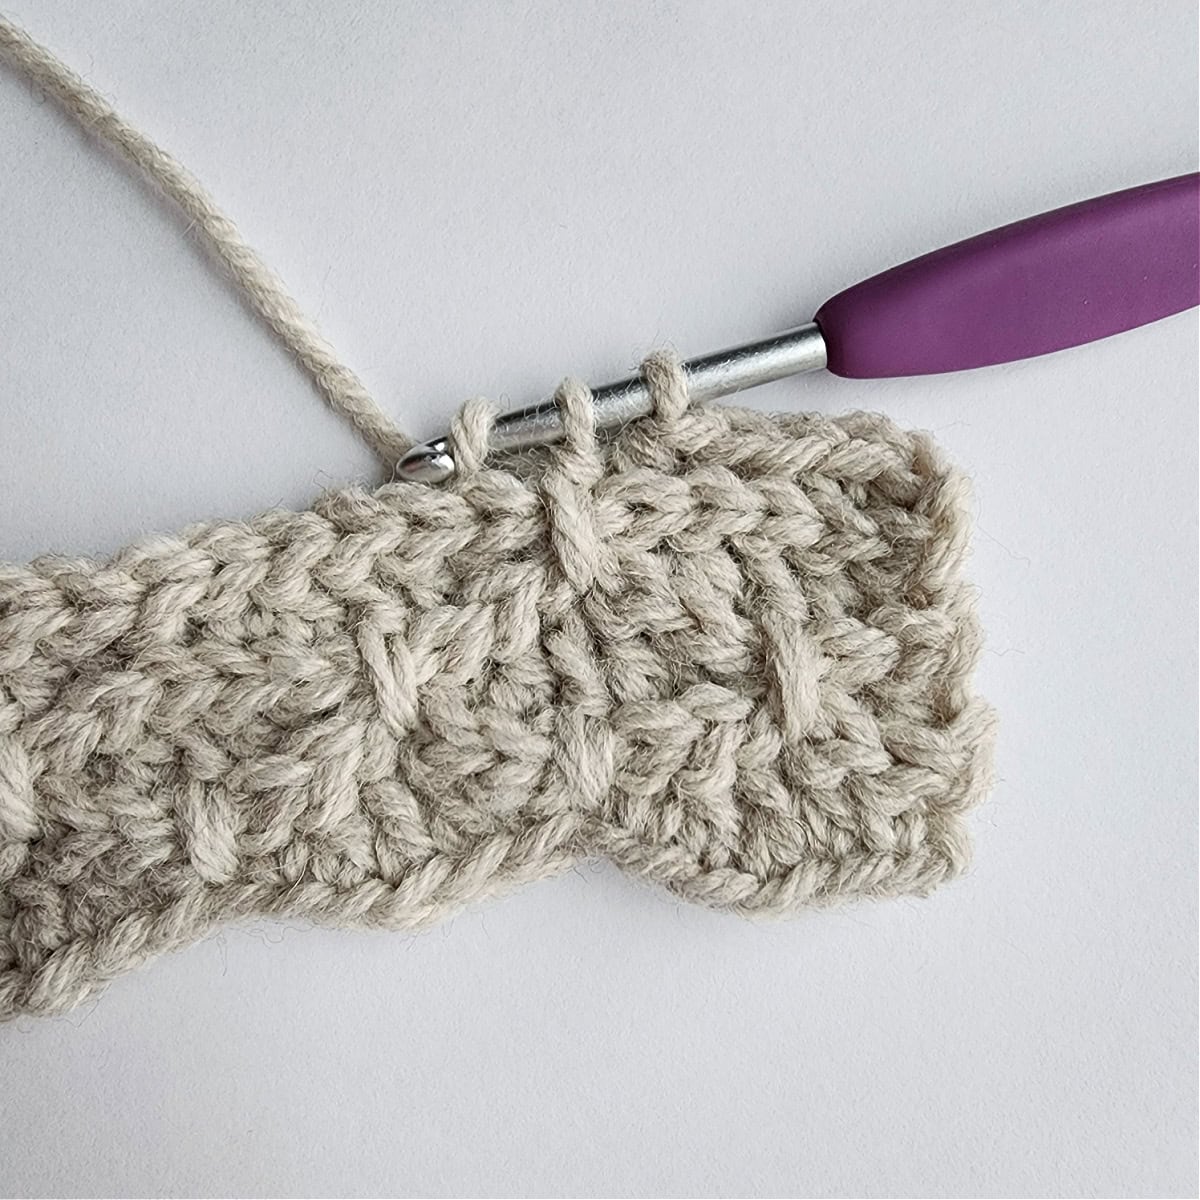
Second Set of Finishing Stitches
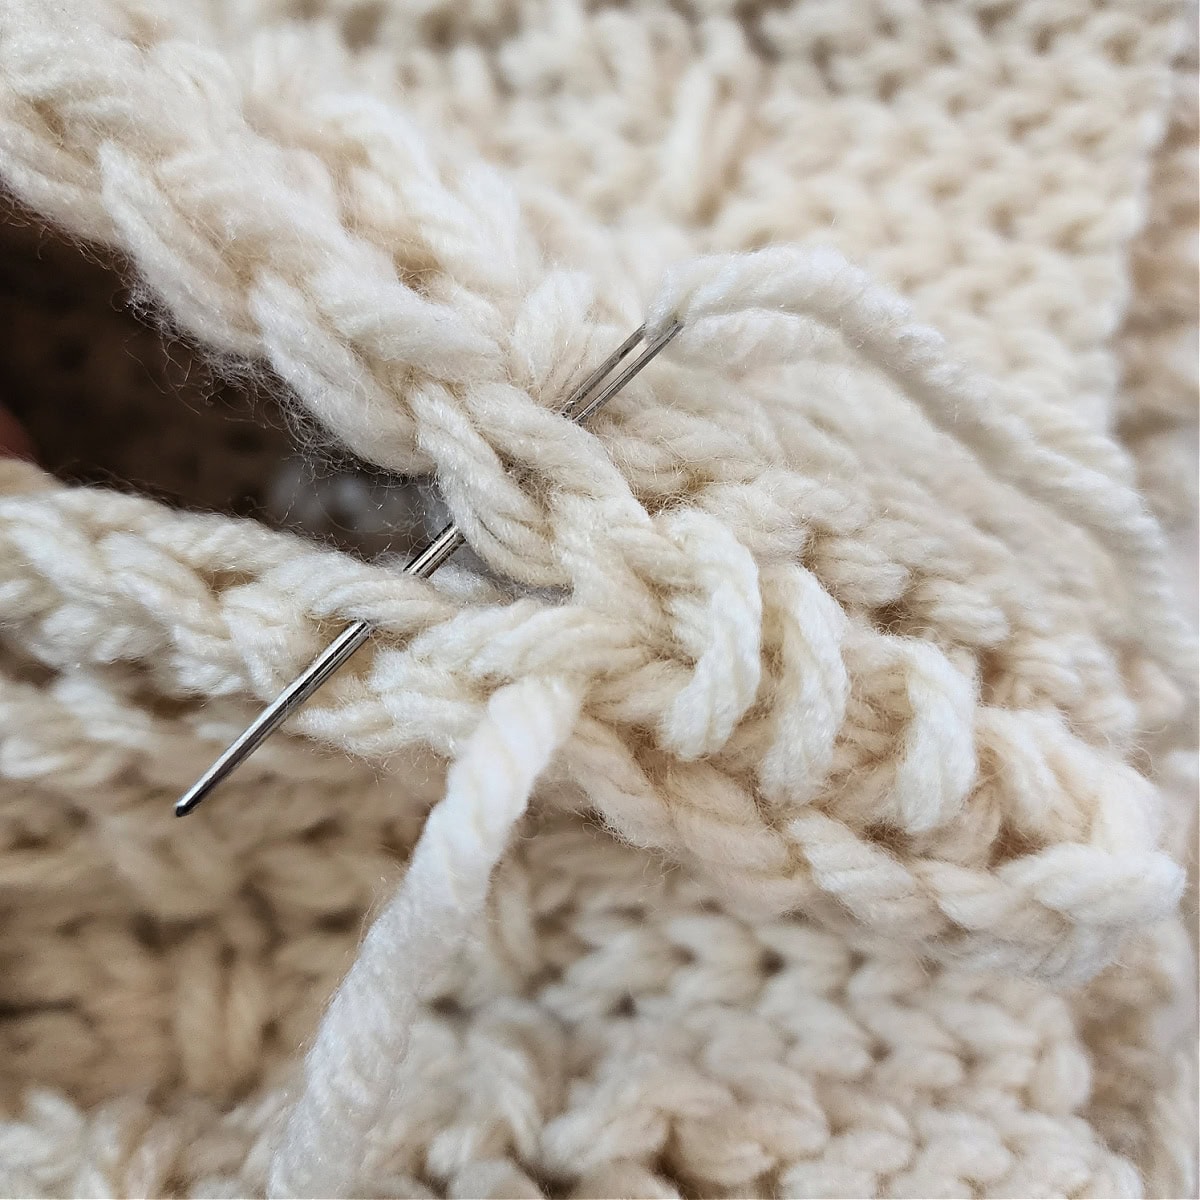
The second set of finishing stitches are worked in the bottom of Row 1 dc’s & the top of the dc’s from the 4th to the last row of your cowl.
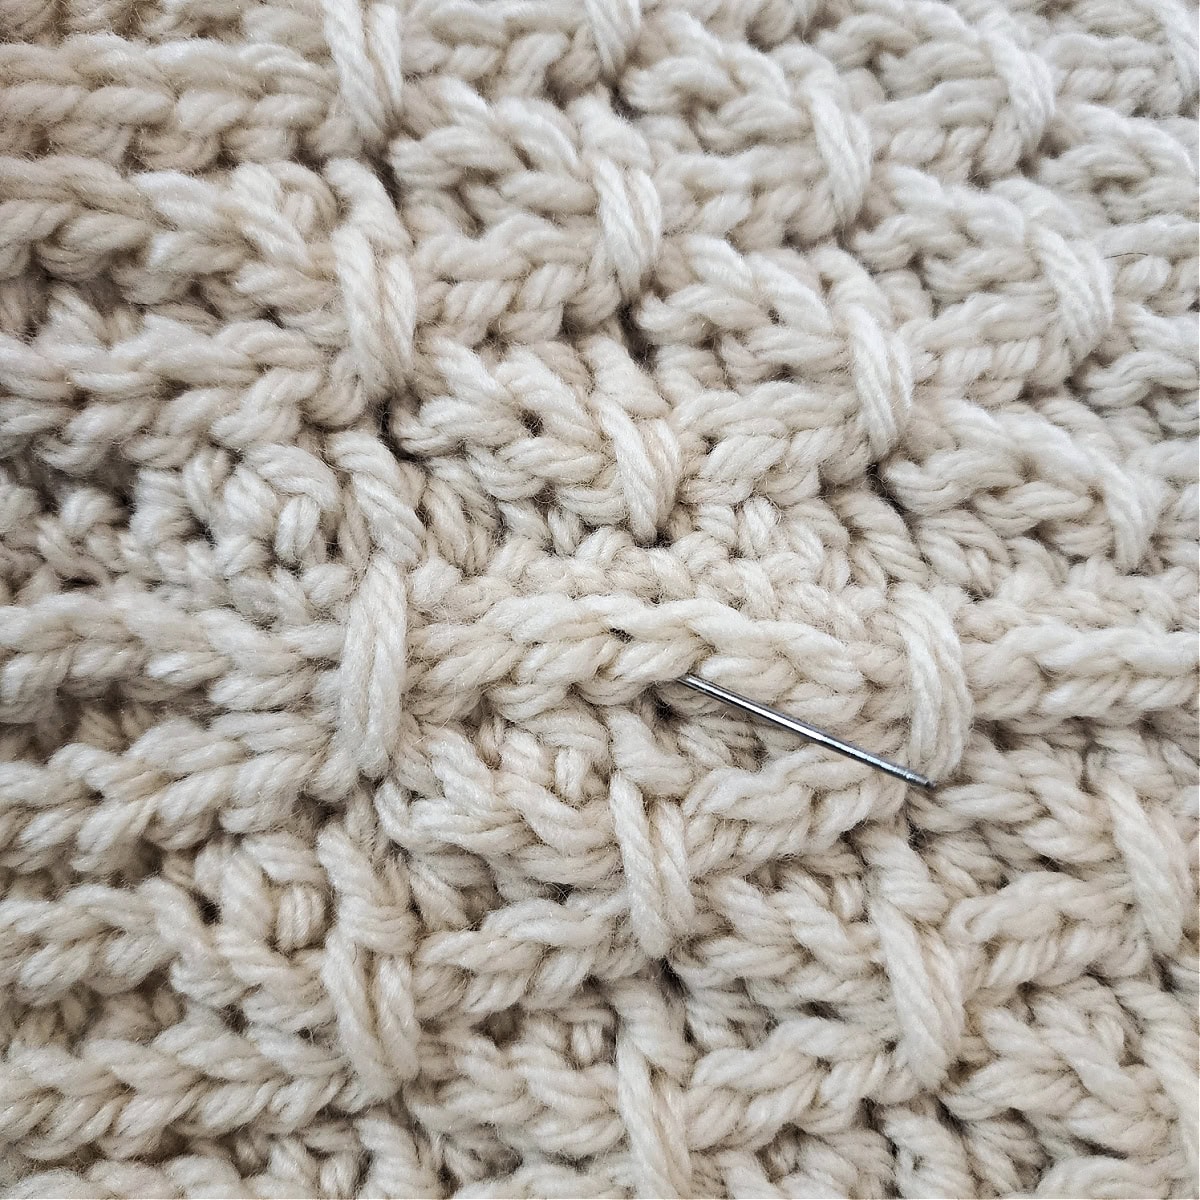

Repeat Photos A – C to tie together each dc from the second to last row of the cowl to the dc above it. Weave in ends.
Weave in ends.
I MADE IT! NOW WHAT?
Pin this post!: Save this free crochet pattern for cowls to your Pinterest boards so that you can come back and make it again.
Leave a comment below: We love to hear your feedback.
Share Your Finished Projects on Facebook or Instagram: I love to see your finished projects! Share with us on social media and tag me @acrochetedsimplicity or use the hashtag #ACrochetedSimplicity so I can find your posts.
Join us in the Facebook Community Group!
Come share your finished projects with us in the A Crocheted Simplicity Crochet Community Group on Facebook. Join us for fun community events such as crochet alongs, join in on crochet conversations, ask questions, get advice, and share your love for crochet!

Different Crochet Cowl Patterns
Are you looking for more winter crochet accessory patterns? We have several more free crochet patterns for cowls you’ll love! From a basic crochet scarf to a c2c scarf and keyhole scarf, to a scarf with sleeves, you’re sure to find one that fits your personal style!