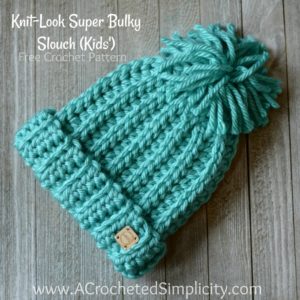
Free Crochet Pattern – Knit-Look Super Bulky Slouch (Kids’)
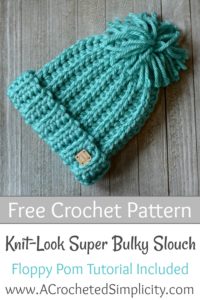
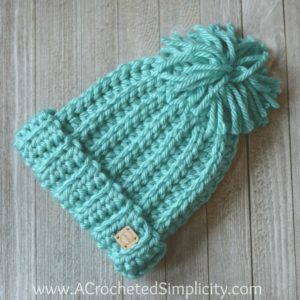
After designing the Knit-Look Super Bulky Slouch for adults, I decided that the kids couldn’t be left out of the fun! I had to stop at the store to grab… yarn, ummmm yeah, we’ll go with that (we won’t mention that the real reason I stopped was for a pint of Ben & Jerry’s ice cream..shhh…). So I popped over to the yarn aisle and grabbed 2 balls of Lion Brand Hometown USA. I grabbed 2 because I wanted to make sure I had enough to make a big, floppy yarn pom and there’s less yardage in Hometown USA than in the Thick & Quick I used for the adult hat. I choose the color Miami Seafoam and it’s an absolutely GORGEOUS color. You really need to see it in person!
While I prefer faux fur poms for my own hats, I think the big, floppy yarn poms are perfect for kids… they add a touch of whimsy to the hats! I’ve included instructions and a photo tutorial HERE showing how I made the floppy yarn pom I added to Claire’s hat.
>CLICK HERE TO SIGN-UP TO RECEIVE OUR NEWSLETTER!<
~DON’T LOSE IT, ADD IT TO YOUR RAVELRY FAVORITES OR QUEUE.~
~DON’T FORGET TO PIN IT TOO!~
*PURCHASE AN AD-FREE PDF OF THIS PATTERN (Including BOTH Adult & Kids’ sizes and floppy yarn pom tutorial) ON CRAFTSY OR RAVELRY*
This post contains affiliate links.
MATERIALS
- Yarn: Yarn used for the sample shown above is Lion Brand Yarn Hometown USA in Miami Seafoam; 6 / Super Bulky Weight Yarn; 81 yards per ball
- Crochet Hook: N/P/10.00mm (my favorite hooks are Clover Amour Hooks, I’ve never had an ache in my hand since switching)
- Locking Stitch Markers
- Scissors
- Tapestry Needle
- Faux Fur Pom (optional)
- Fun Fur Pom – Click HERE for a free tutorial
- BIG Floppy Yarn Pom – Click HERE for a free tutorial
- USA Patches (fabric or faux leather) – I found some on Etsy HERE
Many of the materials are available for purchase through our affiliates:


STITCH ABBREVIATIONS
- ch(s): chain(s)
- st(s): stitch(es)
- sl st(s): slip stitch(es)
- hdc: half double crochet
- FLO: front loop only
- BLO: back loop only
- RS: right side
- SM: stitch marker
- Rep: repeat
GAUGE
- See gauge swatch instructions below.
SIZE
- Fits Child Head Size: 18″ – 21″ head circumference
- For the Adult Size pattern CLICK HERE
NOTES
- Turning chains are not counted as a stitch or included in stitch count.
- The first stitch of each row is worked into the same stitch as the turning chain, unless stated otherwise.
- Yardage: 96 yards (without yarn pom); 100 yards (with yarn pom)
- This hat is worked sideways using my favorite short row method and then it is seamed.
- If you prefer a longer or shorter hat, simply increase or decrease your foundation chain.
- If you need to adjust the circumference of your hat to make it larger, simply begin another short row section and work additional rows, ending w/ an odd numbered row, then seam.
- If you need to adjust the circumference of your hat to make it smaller, simply work fewer rows, making sure to end with an odd numbered row before the seam.
- Video Tutorial – Click Here
Gauge Swatch Instructions
Gauge: 8.33 sts = 4″; 8 rows = 4.25″
Row 1 (RS): Using a 10.00mm crochet hook (or size needed to obtain gauge), ch 10. working into the back hump of the foundation chain, hdc into the 2nd ch from your hook, hdc in each ch across. Turn. (9 sts)
Row 2: Ch 1, BLO sl st in each st across. Turn.
Row 3: Ch 1, BLO hdc in each st across. Turn.
Rows 4 – 8: Rep Rows 2 – 3, ending w/ a Row 2 rep.
Finished Size: 4.32″ W x 4.25″ H
VIDEO TUTORIAL – CLICK HERE
Knit-Look Hat Instructions
Finished Size (laid flat & seamed): 7-3/4″ W x 11-1/4″ L (band not folded up); 7-3/4″ W x 9″ L (band folded up) *Note: Finished length is shorter than Row 1 due to the nature of the short rows.
Row 1 (RS): Using a 10.00mm crochet hook (or size needed to obtain gauge), ch 25, working into the back hump of the foundation ch, hdc in the 2nd ch from your hook, hdc in each ch across. Turn. (24 sts) Length of Row 1: 11-1/2″
Tip: Place a SM in the FLO of the first hdc of Row 1 & every odd numbered row throughout. If you haven’t worked short rows before, this will help you complete Row 8 & the end of each short row section after Row 8.
Row 2: Ch 1, BLO sl st in each of the next 23 sts (leave the last st unworked). Turn. (23 sts)
Row 3: Ch 1, BLO hdc in each st across. Turn. (23 sts)
Row 4: Ch 1, BLO sl st in each of the next 22 sts (leave the last st unworked). Turn. (22 sts)
Row 5: Ch 1, BLO hdc in each st across. Turn. (22 sts)
Row 6: Ch 1, BLO sl st in each of the next 21 sts (leave the last st unworked). Turn. (21 sts)
Row 7: Ch 1, BLO hdc in each st across. Turn. (21 sts)
Row 8: Ch 1, BLO sl st in each st across previous row, BLO sl st in each unworked st to Row 1. Turn. (24 sts) Remove SM after completing this row.
Row 9: Ch 1, BLO hdc in each st across. Turn. (24 sts)
Rows 10 – 15: Rep Rows 2 – 7.
Row 16: Ch 1, BLO sl st in each st across previous row, BLO sl st in each unworked st to Row 9. Turn. (24 sts)
Row 17: Ch 1, BLO hdc in each st across. Turn. (24 sts)
Rows 18 – 23: Rep Rows 2 – 7.
Row 24: Ch 1, BLO sl st in each st across previous row, BLO sl st in each unworked st to Row 17. Turn. (24 sts)
Row 25: Ch 1, BLO hdc in each st across. Turn. (24 sts)
Rows 26 – 27: Rep Rows 2 – 3.
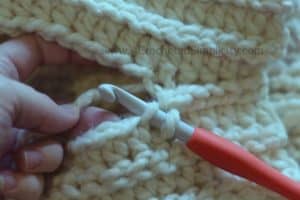
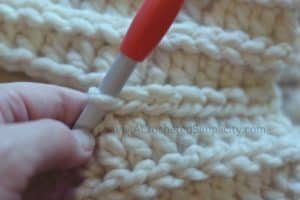
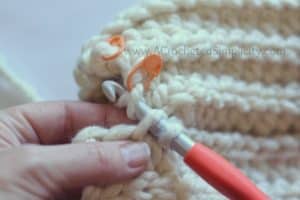
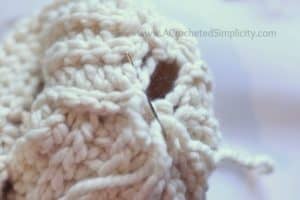
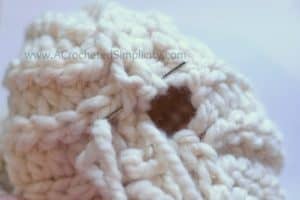
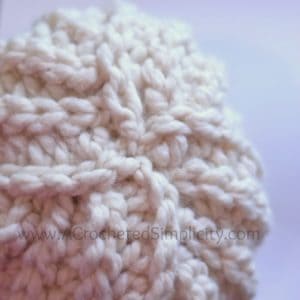
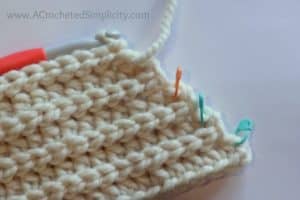
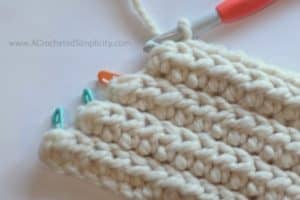
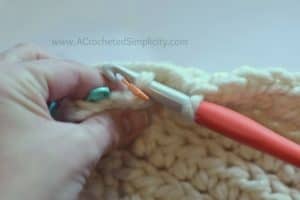
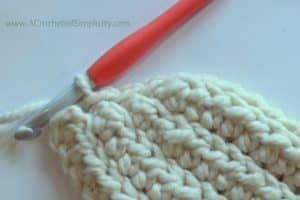
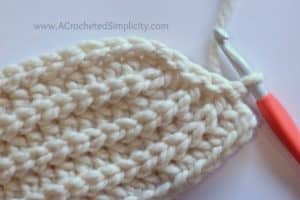
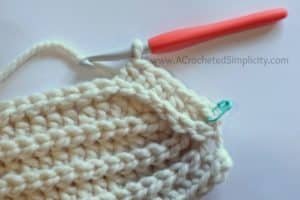
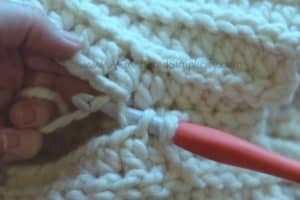
Seam – Row 28: See photos below. With the Right Side of the hat facing you bring the first row up to meet the last row. Position your working yarn so that it’s on the inside of the hat. Slip stitch the rows together using the following method: insert your hook (from front to back) into the FLO of the 1st stitch of Row 1 (first pic below), insert your hook (from back to front) into the BLO of the 1st stitch of the last row (second pic below), yo, pull thru all loops on your hook (third pic below). Continue in this way across the hat to complete the seam. When you get to the unworked stitches of the short rows, continue seaming in the BLO just as you would do to finish up a section of short rows (fourth pic below). You can also see a video tutorial of this seam being working HERE.
Finishing
Click HERE for the BIG Floppy Yarn Pom Tutorial
Add a custom label to your finished projects for a professional touch! I love the custom labels that I purchased from this Etsy shop HERE (affiliate link)

