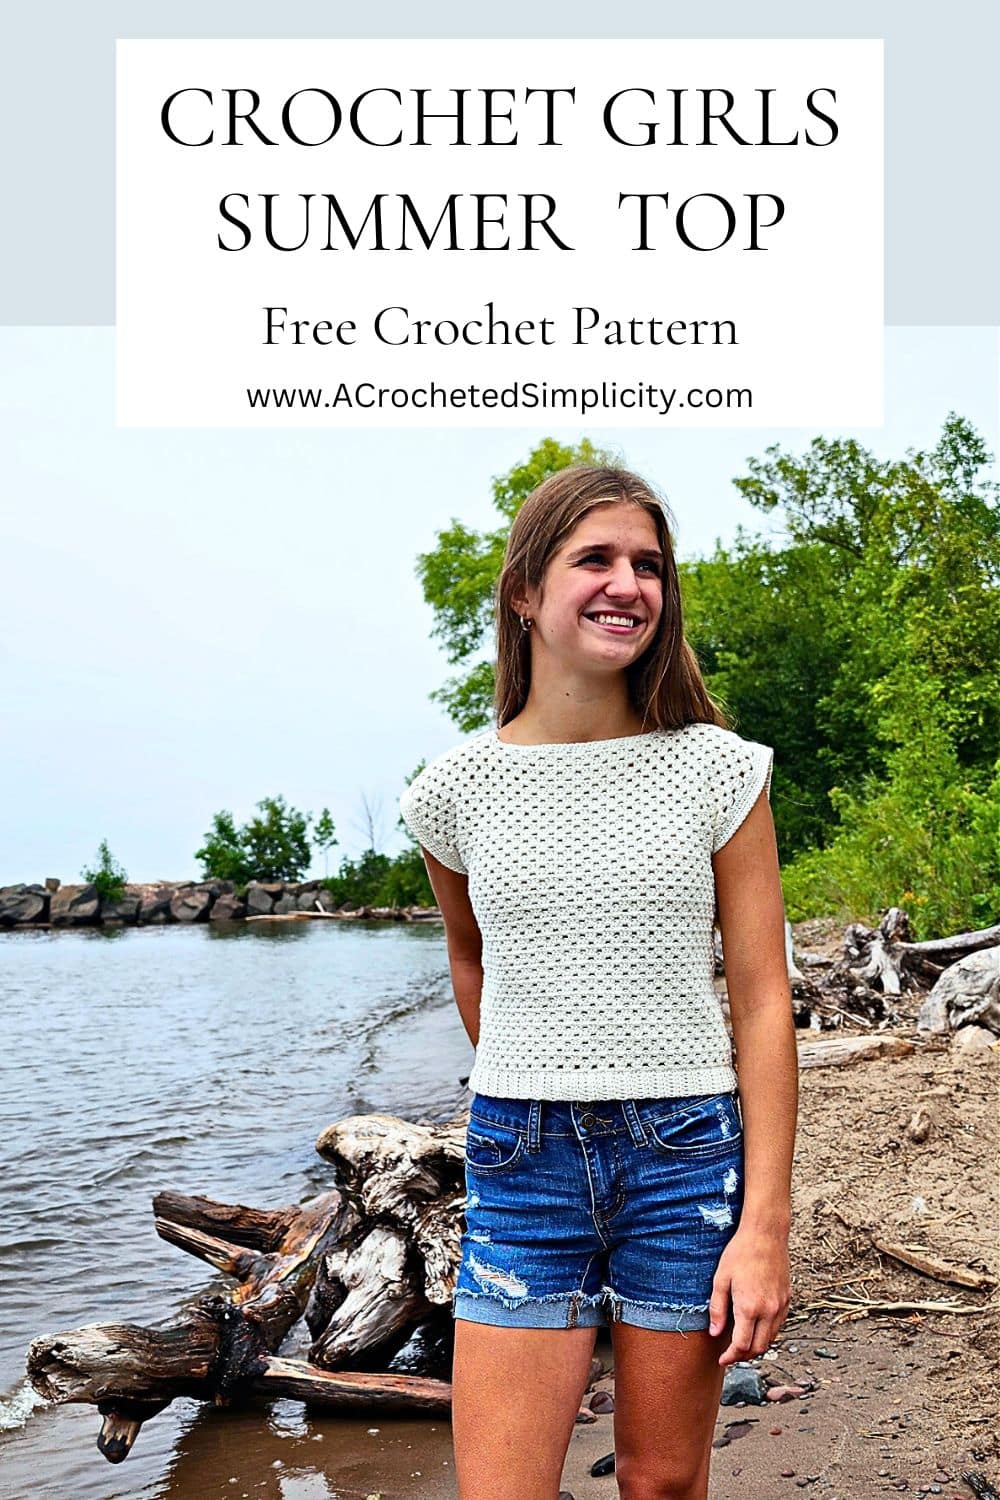
Girls Crochet Top
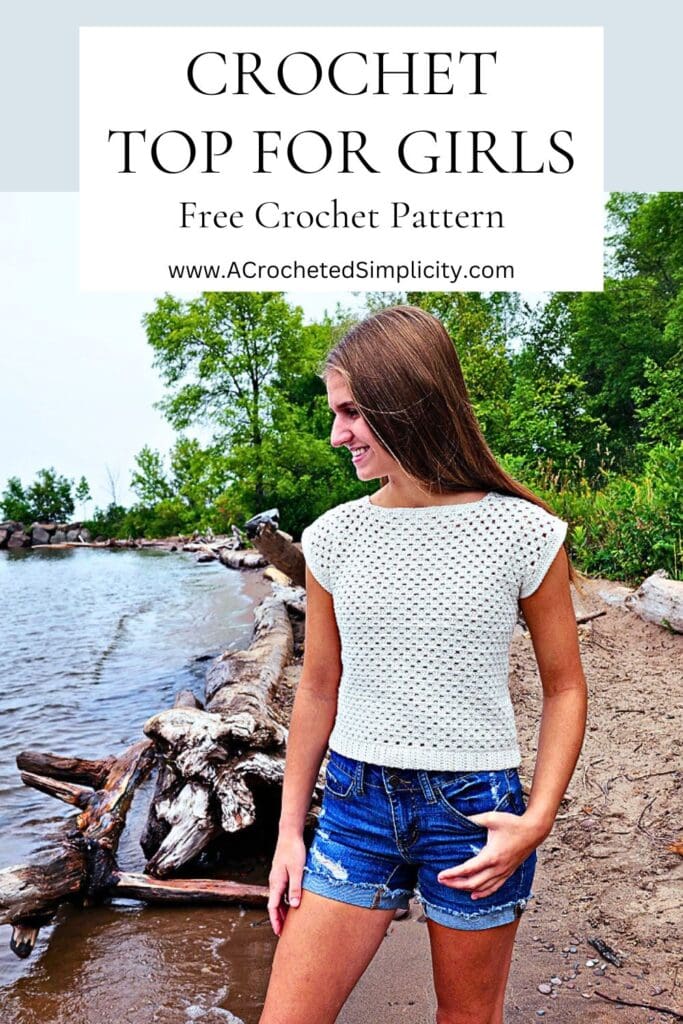

Crochet tops are a lot of fun to make and this Girls Crochet Top is the perfect retro-inspired crochet summer top!
Simply combine the classic crochet granny stitch with a boxy style top and you’ll have a easy granny stitch crochet top that your young ladies will love.
You can find the girls crochet top pattern below for free, or an ad-free print friendly PDF (including all photo tutorials + BONUS garment schematic) on Ravelry, or on Etsy (aff).
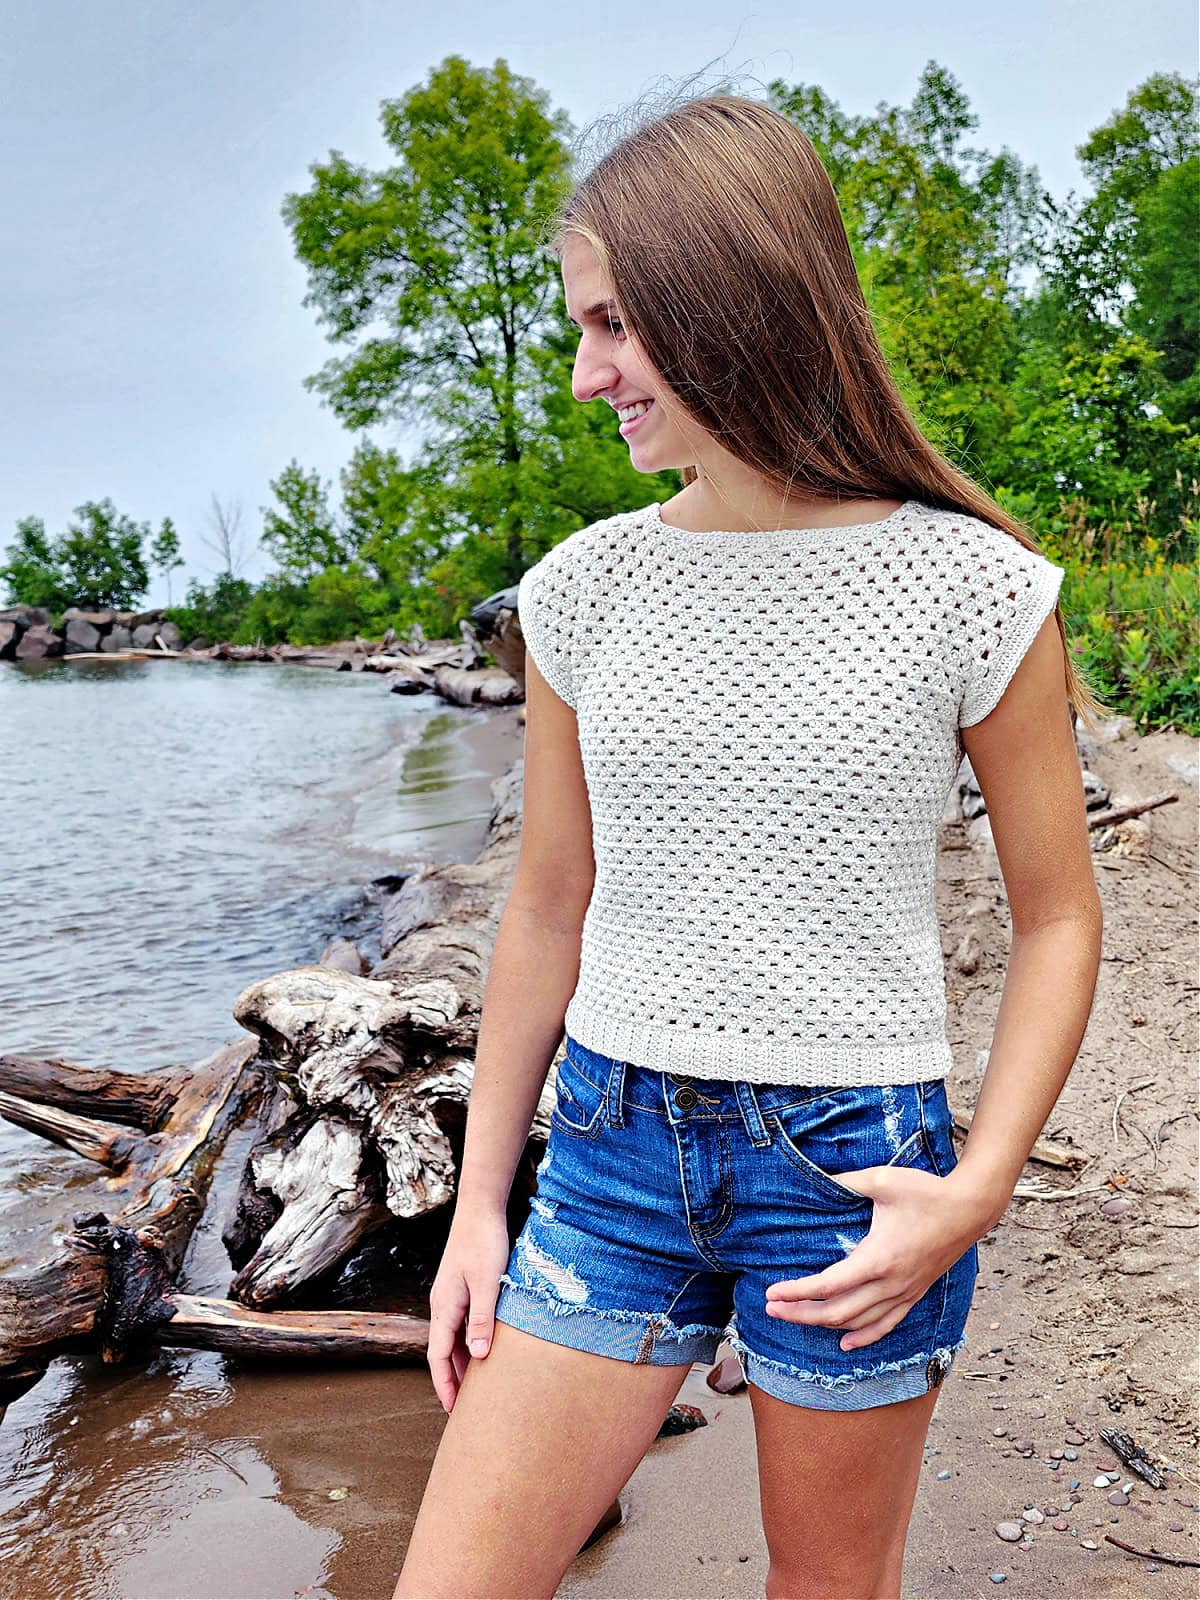
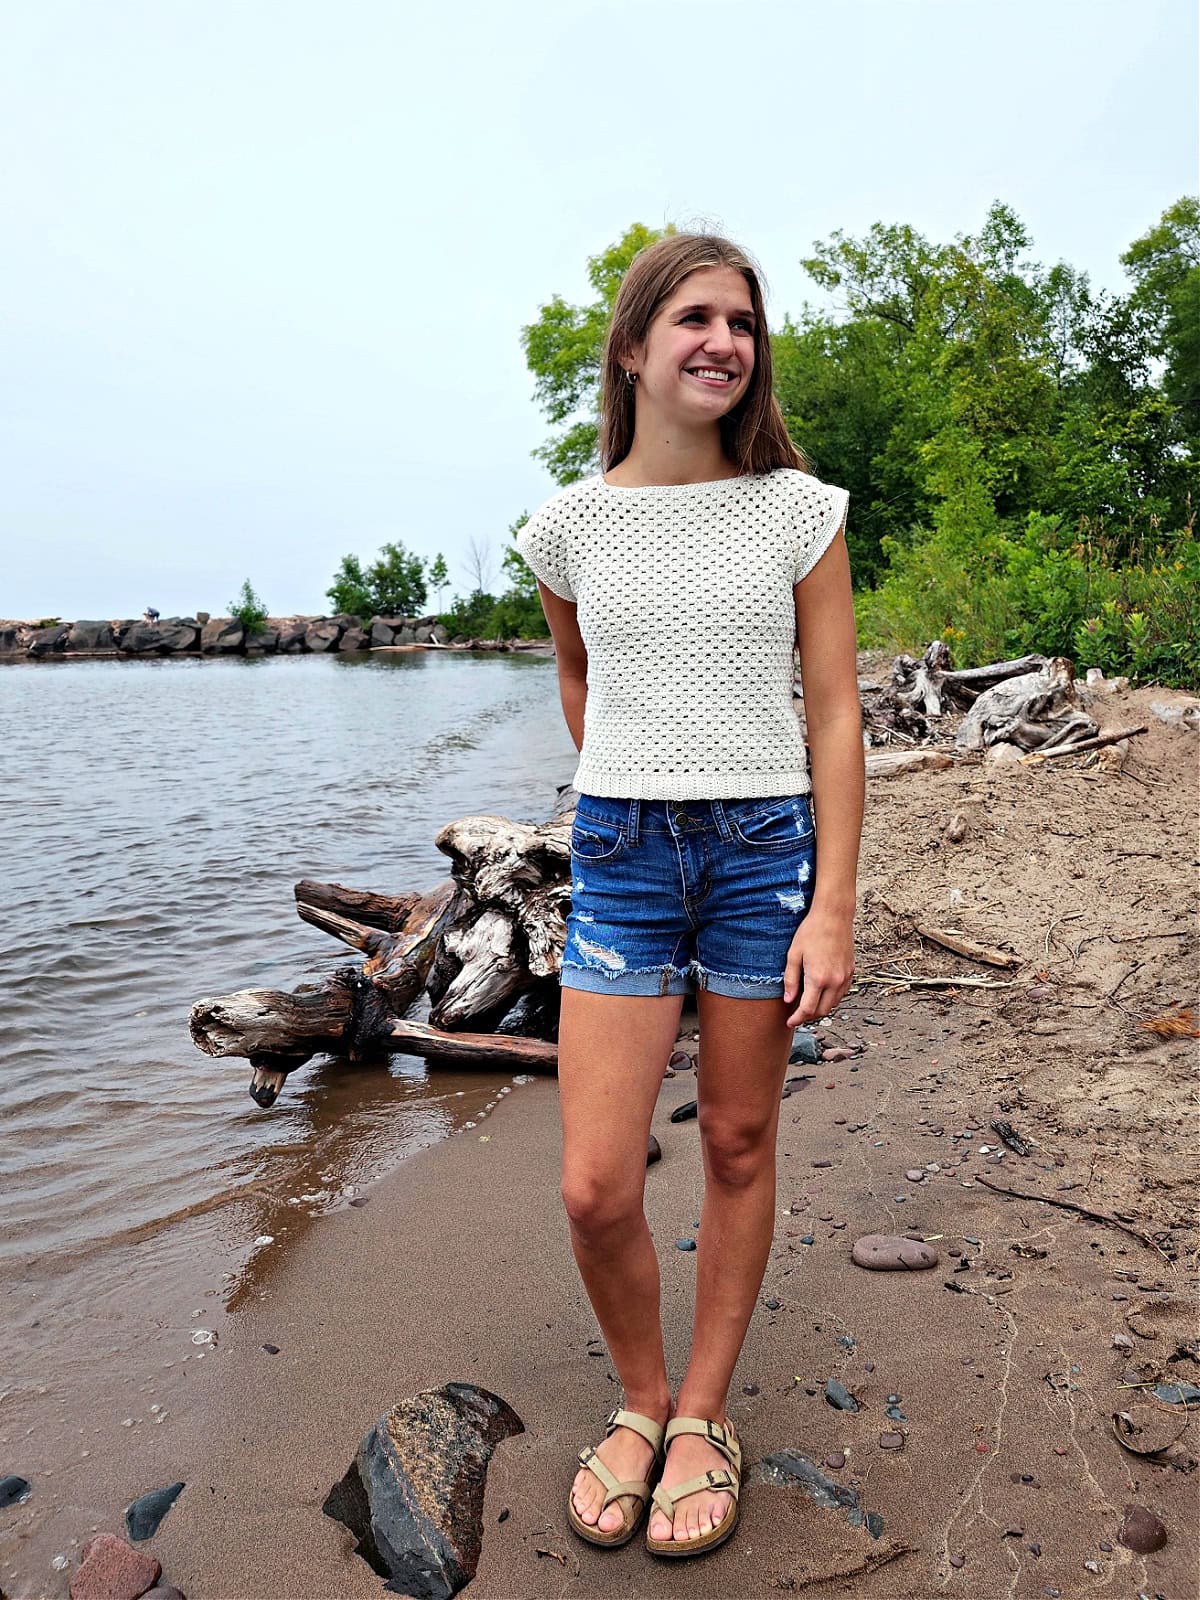
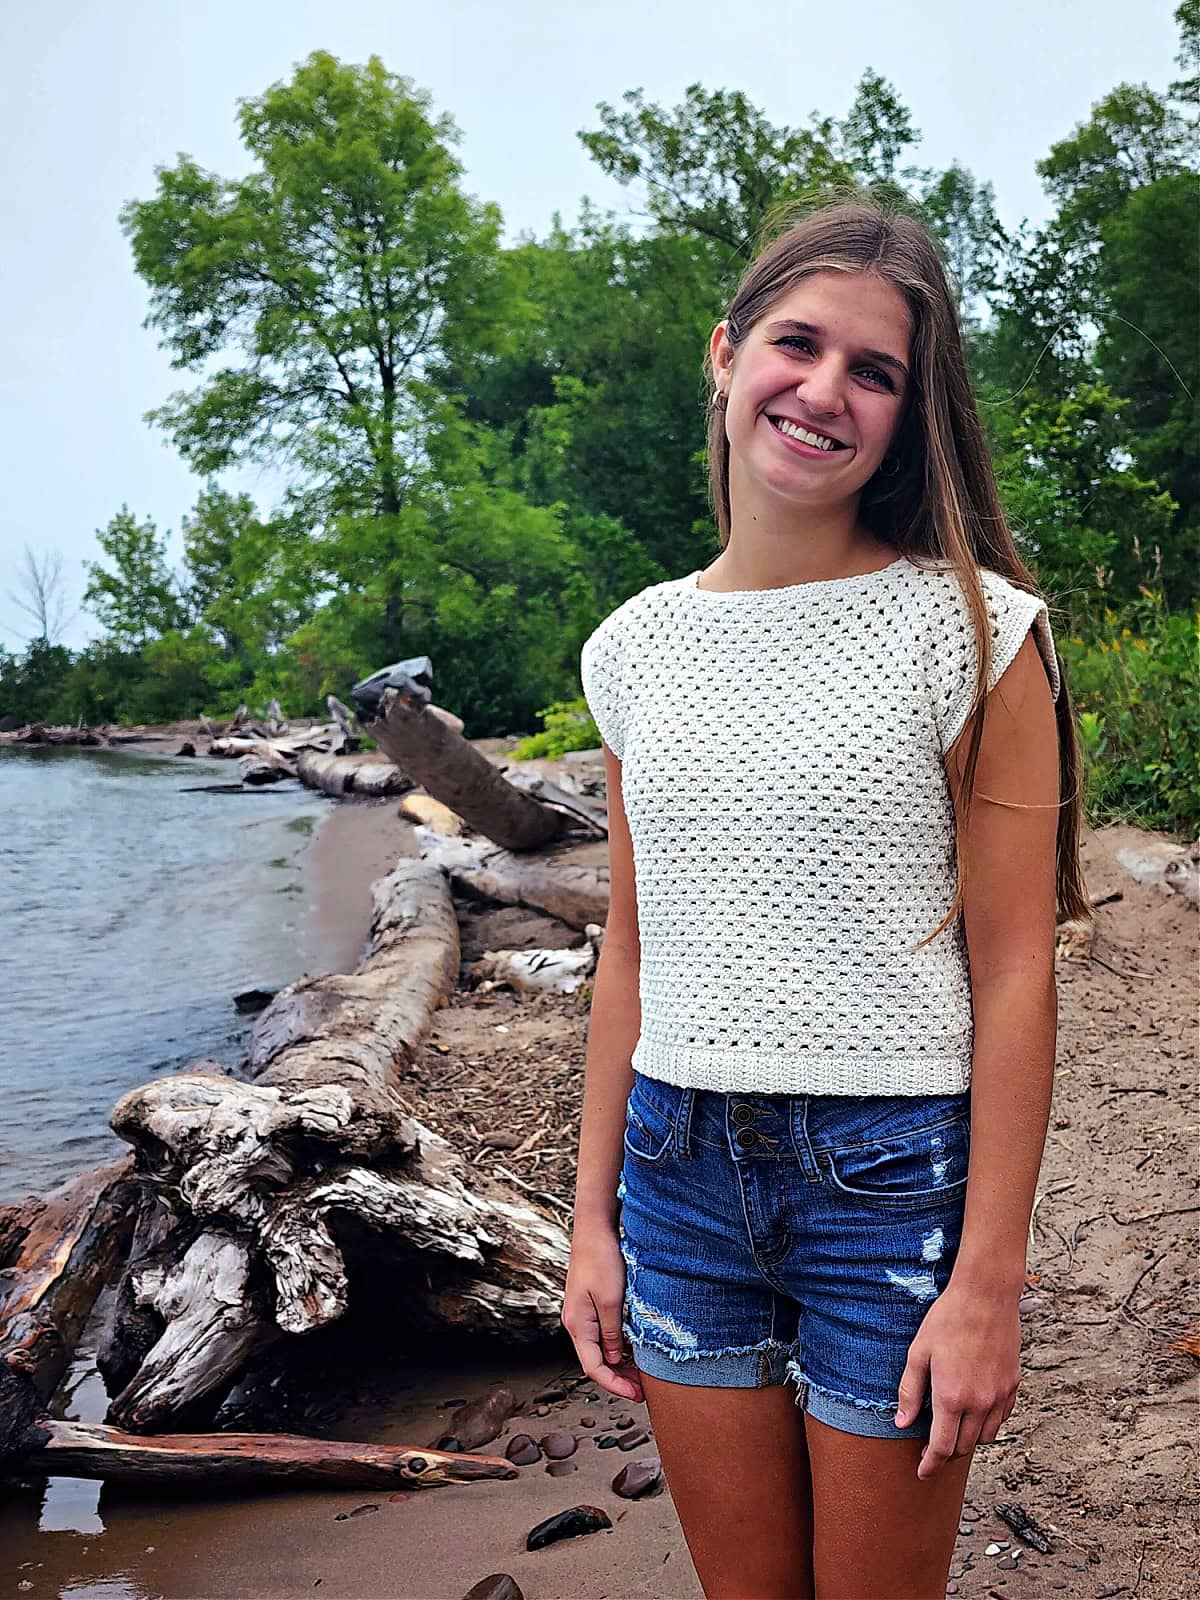
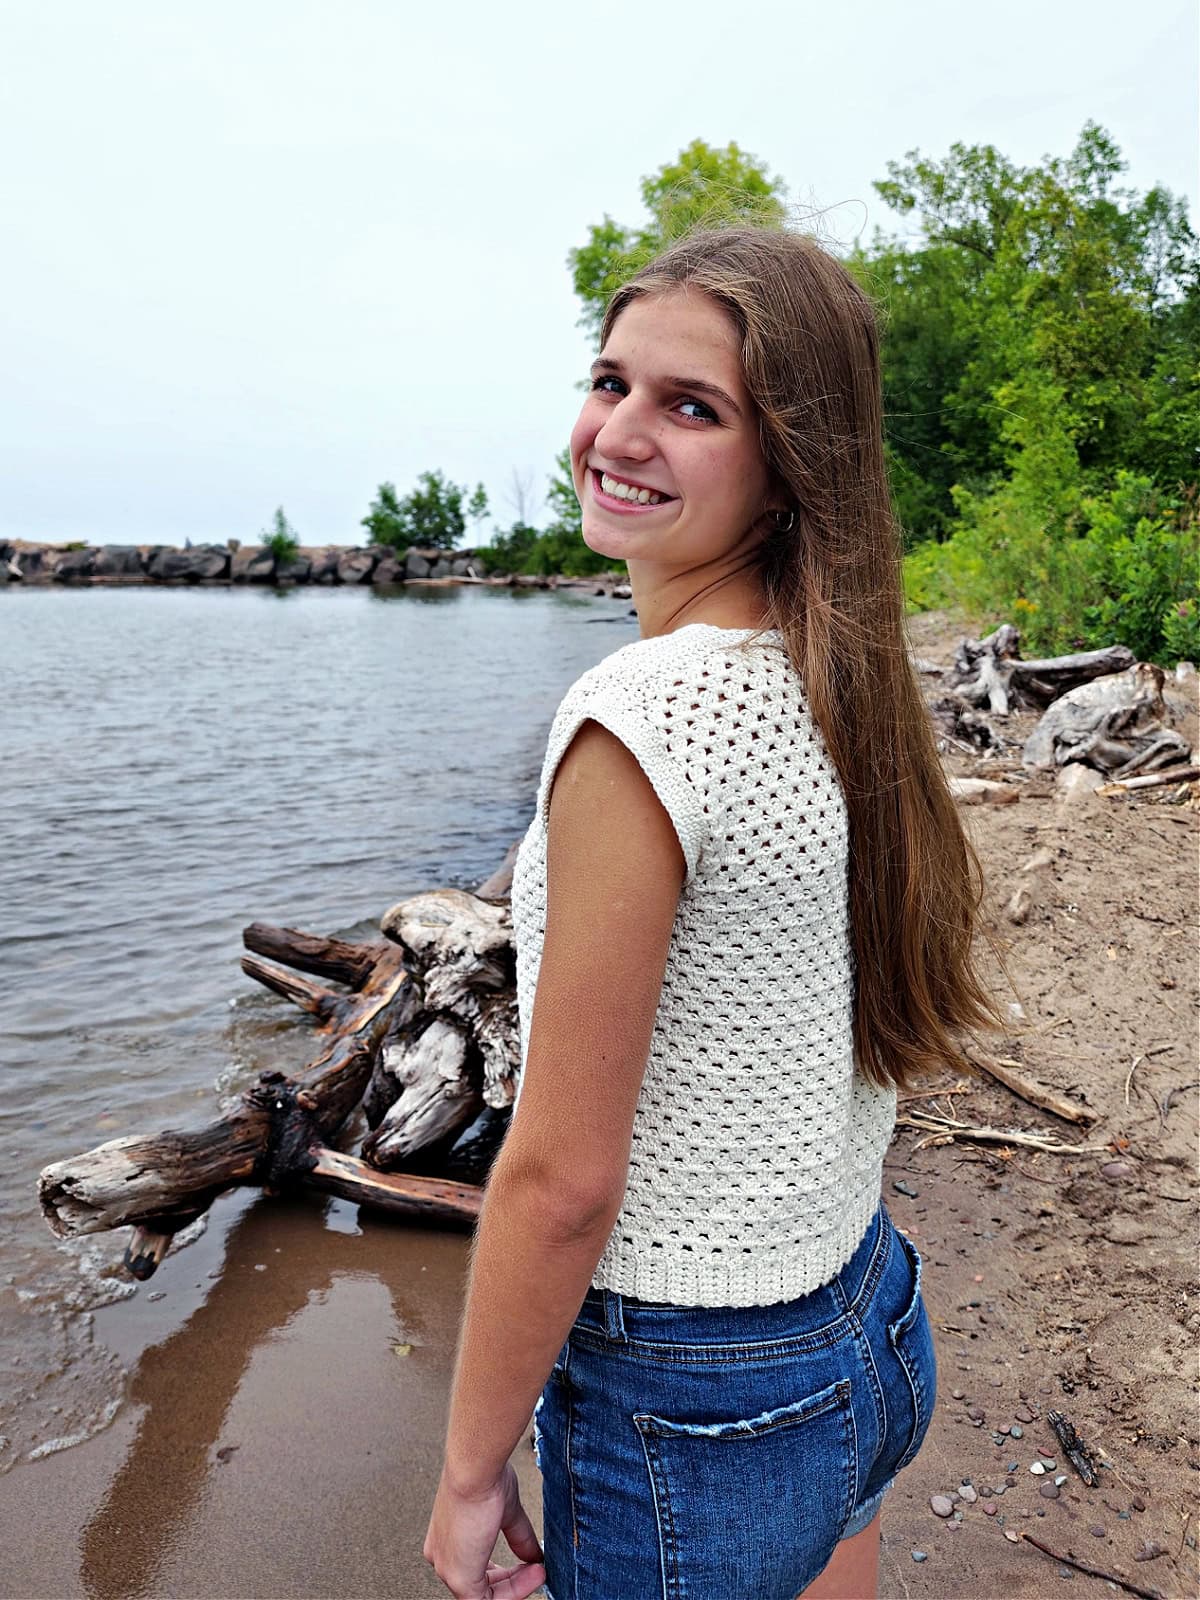
Pair it with jean shorts, a long skirt, or wide leg pants for the perfect boho outfit. With an on-trend boxy shape, the classic granny stitch, and simple ribbing, your young girls (especially teens) will want this crochet top in every color!
One Crochet Top Pattern, Many Styles
This girls crochet top pattern is easy to adapt for several different crochet styles.
- Make it shorter and it becomes a fun crochet crop top.
- If you like crochet tunics, make this crochet granny stitch sweater a little longer.
- A little longer yet and you’ll have a nice cover up crochet for the beach.
- If you prefer a loose crochet top, make a size or two larger than what you normally wear. Refer to the size chart below.
- For fall or winter wear, make a size up and wear it over a long sleeve collared button-up.
Related: A lightweight crochet mesh top and swim cover ups are also great for summer crochet projects.
Trendy Girls Crochet Top
You may have noticed that every where you turn this summer you see a granny stitch crochet pattern. This is because it’s been used for many trendy crochet ideas this year.
Because the granny crochet stitch is a slightly open and airy crochet stitch pattern, it makes a great stitch for a girls crochet top! Crochet tops make great additions to your wardrobe for year round wear.
Related: If you love the crochet granny stitch pattern, I have several other crochet patterns that use this crochet stitch. Projects ranging from crochet bags and blankets to home decor and crochet projects for traveling.
How to Crochet A Summer Top
If you’re searching for easy crochet top patterns for beginners, easy crochet summer tops, or cute crochet tops, this crochet top pattern checks all the boxes.
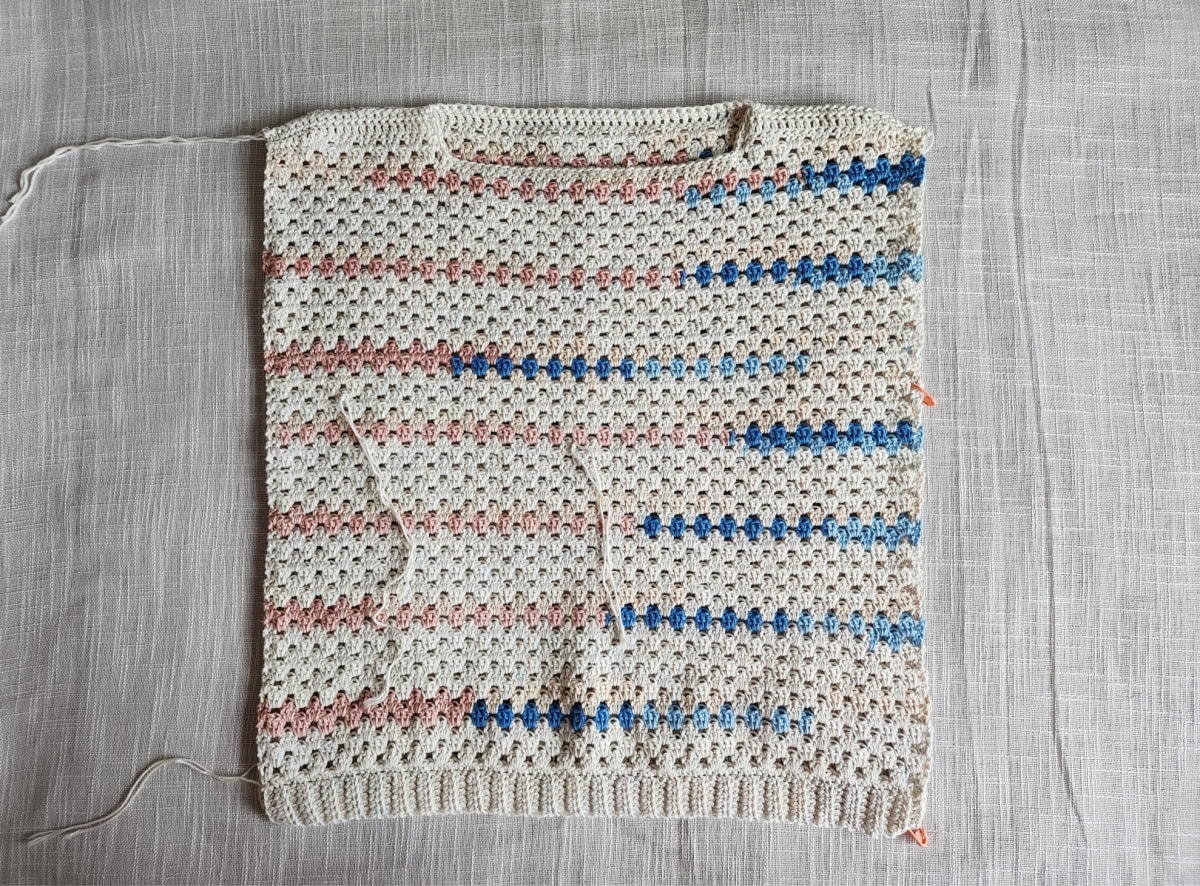
This girls crochet top is worked in rows from the bottom up using a simple two row repeat of the granny stitch.
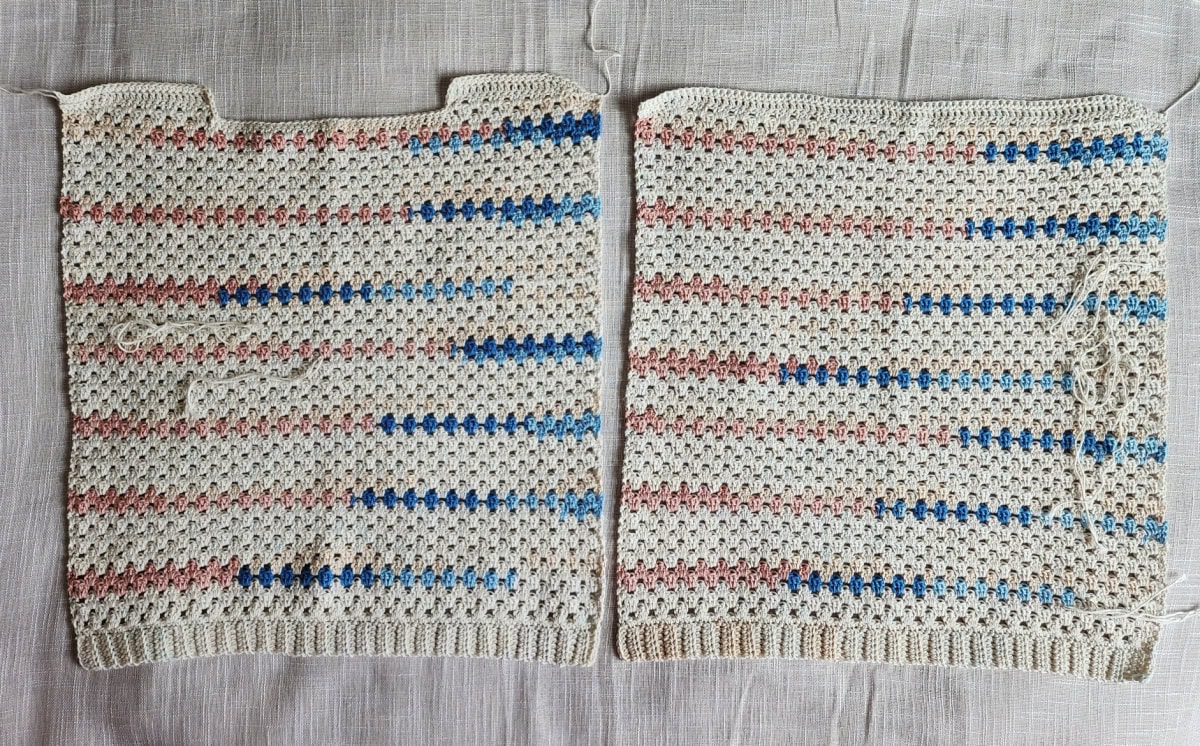
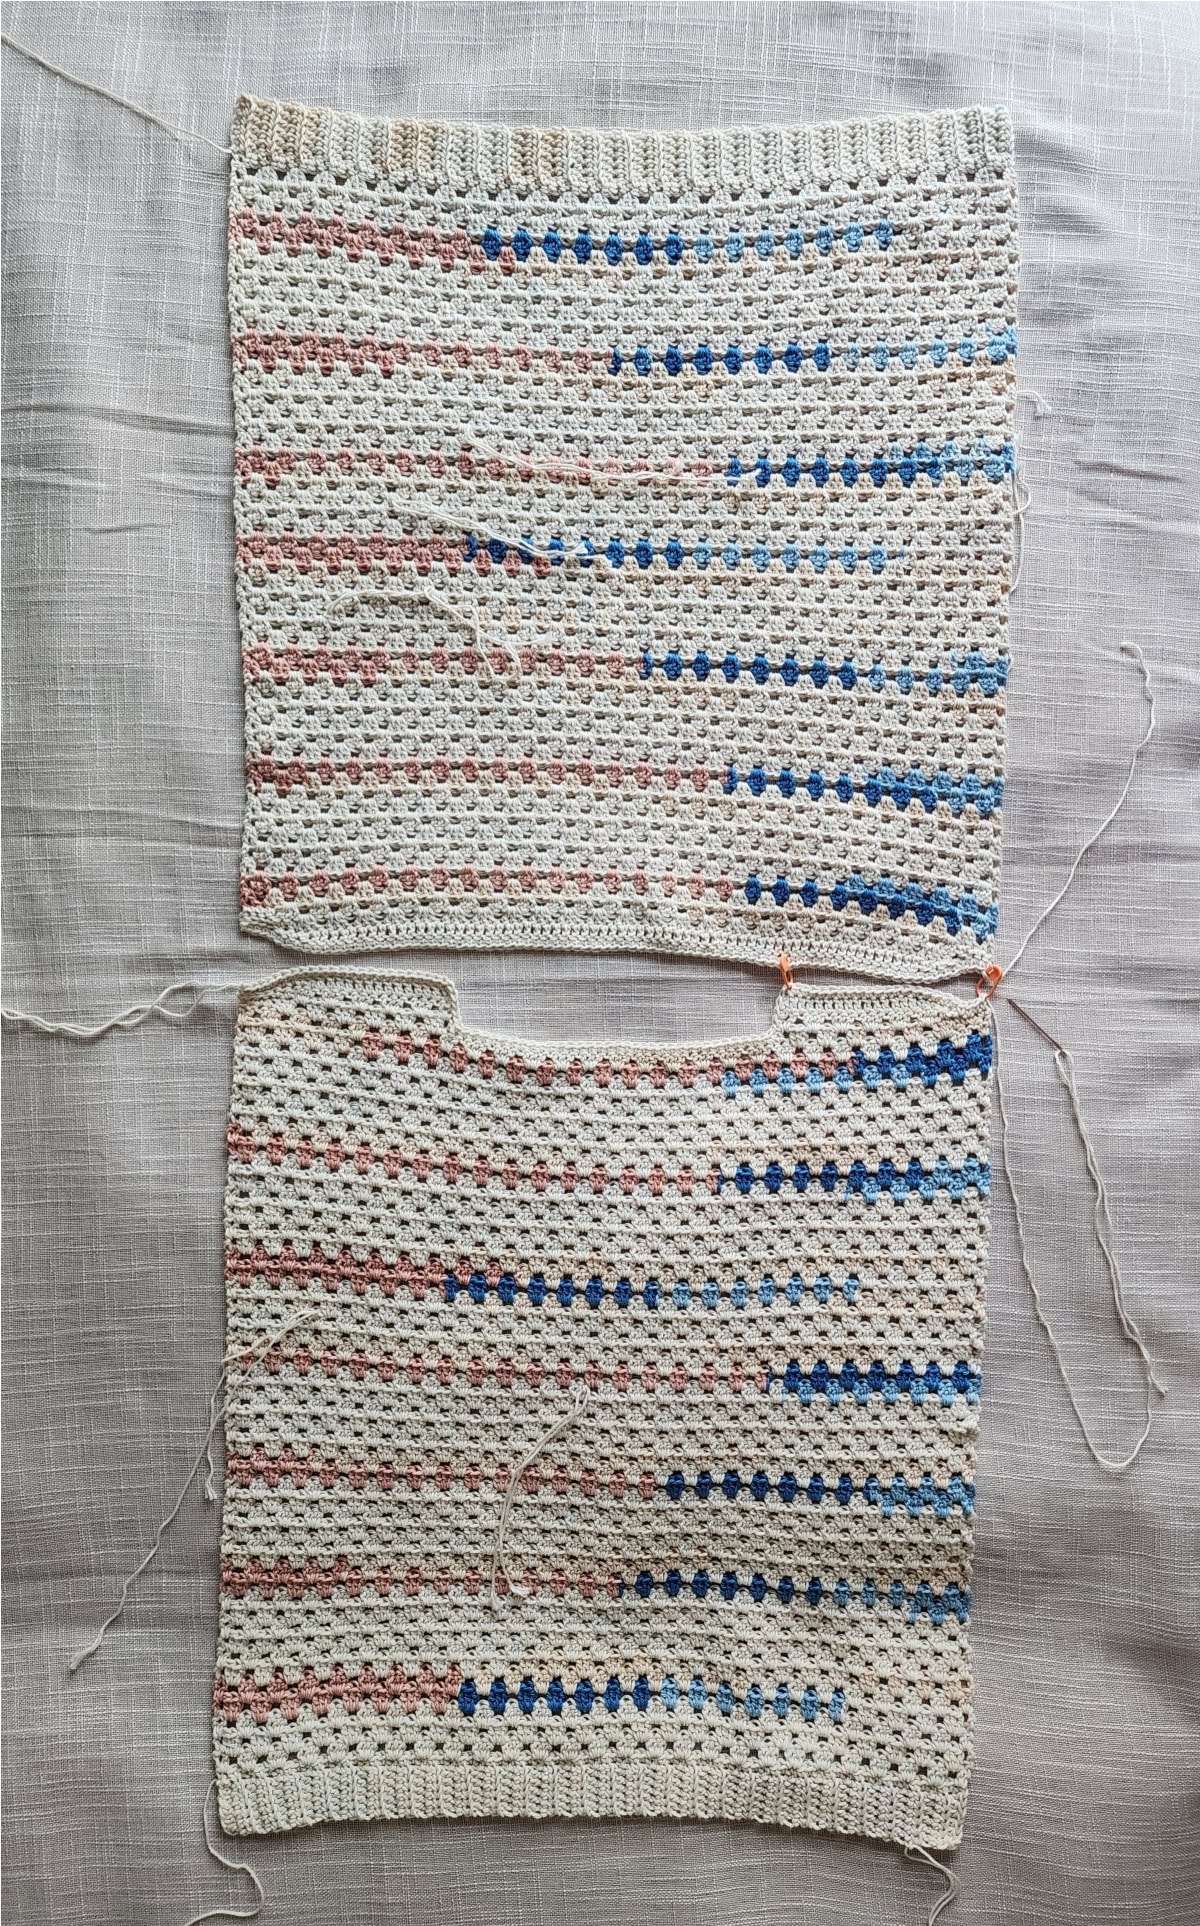
This crochet top is made with two almost identical panels. Each panel has a little shoulder shaping and the front panel has a neck opening.
First, you’ll crochet the bottom ribbing back and forth in rows.
Then you’ll work the body of top onto the long edge of the bottom ribbing. You’ll work the granny stitch pattern from the bottom of the top up to the shoulders. This is where you can adjust the length of your top. You can add more rows to make a crochet tunic, or work less rows to make a crochet crop top. You’ll end each panel with simple shoulder shaping.
After working each of the panels, you will seam the shoulders using the mattress stitch. Then, you’ll seam each side.
Lastly, you’ll add a simple short sleeve cuff to each armhole opening using single crochet stitches.
And there you have it! That’s how you crochet a top!
Why Seams? Some crocheters don’t like having to seam garments, but did you know that seams add stability and keep crochet garments from stretching when worn.
Choosing Which Size to Crochet
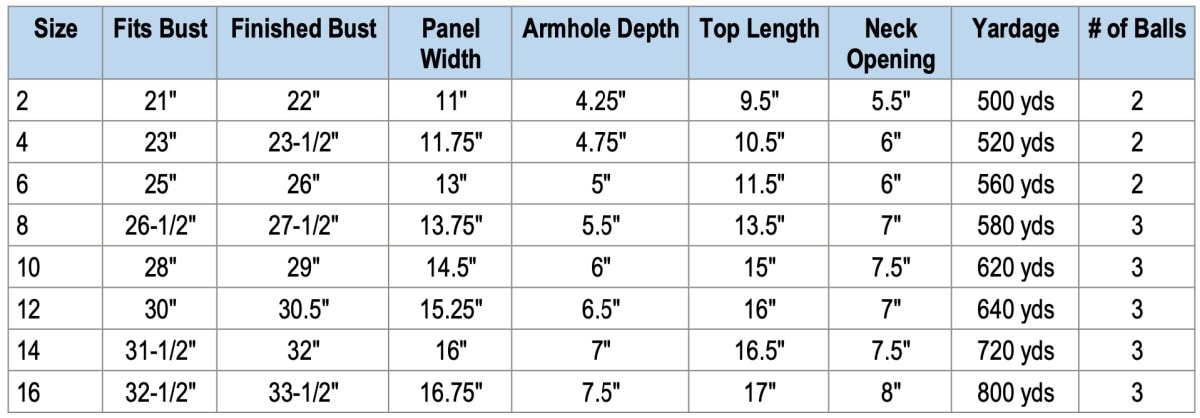
To choose the right size, look over the size chart below. Women’s sizes are also available.
- ‘Fits Bust’ measurement is the measurement of the intended wearer, not the garment’s finished measurement.
- Finished Bust, Panel Width, and Top Length are measurements of the finished garment.
- This crochet top has no positive or negative ease. For best fit, choose your size based on actual bust size.
- If you prefer a more loosely fitted top, I would suggest making a top one size larger than chest size.
- Top length is measured from the top of the shoulder to the bottom edge of the top (including the bottom ribbing).
- Adjusting Top Length: See the notes at the end of the Body of Top section for adjusting length.
- Note: Adjusting the size of your girls crochet top will affect the amount of yarn you’ll need. You may need more or less than what is specified in the yardage chart below.
Yarn
The Girls Crochet Top is a easy crochet top that was designed using Lion Brand Yarn 24/7 Cotton DK Yarn. I chose the cream colorway because Claire loves neutral colored tops.
I chose this yarn because it’s a 100% cotton DK weight yarn which makes it a great choice for summer crochet tops. This lightweight yarn will keep you cool in the warm weather and is perfect for this granny stitch jumper.
Colorwork: I absolutely LOVE how the color pooling turned out for my Women’s Granny Stitch Top, with the 24/7 Cotton DK Prints. I didn’t work any color changes. I just let the color changes in the yarn flow naturally.
Yarn Substitutions
You can substitute other DK weight yarns as long as you’re able to meet gauge and you’re happy with the drape of the crochet fabric.
I personally recommend a DK weight yarn that is a cotton or cotton blend for a summer crochet top. However, if you’re making this blouse to wear during the fall and winter months, it would be heavenly in a nice merino wool. In the LB Collection, you’ll find a Superwash Merino Wool in DK Weight and several tones that are perfect for fall / winter crochet garments.
Girls Crochet Top – Free Crochet Top Pattern
The crochet top free pattern is below, but if you love to work offline, I’ve got a couple other great options for you.
Purchase the ad-free, printable PDF, including all photo tutorials + BONUS crochet garment schematic, on Ravelry, or on Etsy (aff).
This post contains affiliate links.
Materials
- Yarn: DK Weight / 3 / Yarn, (Lion Brand 24/7 Cotton DK in Cream was used for the sample in the photos) (100 g / 3.5oz / 273 yards / 250 m / 100% cotton).
- Yardage: See Size Chart Above
- Crochet Hook: G/6/4.00mm; or size needed to obtain gauge (My favorite crochet hooks are the Clover Amour Crochet Hooks, I’ve never had an ache in my hand since switching).
- Locking Stitch Markers
- Scissors
- Yarn Needle
Abbreviations (US Terms)
- ch(s): chain(s)
- sl st(s): slip stitch(es)
- st(s): stitch(es)
- yo: yarn over
- sp(s): space(s)
- sc: single crochet
- hdc: half double crochet
- dc: double crochet
- Alt-ch3: alternate chain 3
- Alt-dc: alternate double crochet
- Join with a standing single crochet
- Join with a standing double crochet
- SM: stitch marker
- Rep: repeat
- Rnd: round
- RS: Right Side
- WS: Wrong Side
- BLO: back loop only
Experience Level
- Easy
Gauge
- See individual sections for gauge.
Sizes
- Girls 2- 16 years
- See size chart above.
- Women’s Sizes also available
Special Stitches
- Alternate Chain-3: (Alt-ch3): Complete last st of previous row, take loop off hook, insert hook into sp between last dc and last 3 dc of previous row, put loop on hook and pull thru sp, turn, ch 3.
- Alternate Double Crochet (alt-dc): After turning your work, do not ch, instead, insert your hook into the first st, yo, pull up a loop, yo, pull thru both loops, insert your hook between the legs of the st just made, yo, pull up a loop, yo, pull through one loop, yo, pull thru remaining loops.
- Join with a standing single crochet: begin with a slip knot on your hook, insert your hook into the stitch or space indicated, yo, pull up a loop, yo and draw thru both loops on hook.
- Join with a standing double crochet: begin with a slip knot on your hook. YO, insert your hook into the stitch or space indicated, yo, pull up a loop, yo, pull through 2 loops on your hook, yo, pull through remaining 2 loops on your hook.
Pattern Notes
- Turning chains are not included in stitch count unless noted otherwise.
- Lion Brand 24/7 Cotton DK (100 g / 3.5oz / 273 yards / 250 m / 100% cotton).
- Colorway & Yardage
- Cream #769-098W (see yardage in chart above)
- Changes for Sizes are written as follows: 2 (4, 6, 8, 10, 12, 14, 16)
- Stitch Counts are written at the end of the rows as follows: (2, 4, 6, 8, 10, 12, 14, 16).
- Construction: This girls crochet tee is made with two almost identical rectangular panels. Each panel has a little shoulder shaping and the front panel has a neck opening. First, you’ll crochet the bottom ribbing in rows. Then you’ll work the body of top onto the bottom ribbing and crochet from the bottom up to the shoulders. You’ll finish each panel with simple shoulder shaping. After working each of the panels, you will seam the shoulders. Then, you’ll seam each side, leaving an armhole opening. Lastly, you’ll make crochet a short sleeve cuff around each armhole opening. These sleeves are more like cap sleeves when worn.
Granny Stitch Gauge Swatch Instructions
To check your gauge for the Body of Top, use the following instructions.
Gauge: With a 4.00mm crochet hook, in granny stitch: 11 sts = 2.5″; 9 rows = 3″. Row height isn’t crucial.
Row 1: With yarn & a 4.00mm crochet hook, ch 14, sc in 2nd ch from hook and in each ch across. (13 sts)
Row 2: Ch 3 (counts as a st), turn, dc in the same st as ch 3, (skip each of the next 2 sts, 3 dc in the next st) work from ( to ) 3 times, skip each of the next 2 sts, 2 dc in the last st. (13 sts)
Row 3: Ch 3, turn, 3 dc in each of the next 4 sps, dc in the top of ch 3. (14 sts)
Row 4: Alt-ch3, dc in the same sp, 3 dc in each of the next 3 sps, 2 dc in the last sp. (13 sts)
Rows 5 – 10: Rep Rows 3 – 4.
The finished width of your swatch should be 3″. Measure the height of the 9 rows of granny stitches and they should measure 3″, but row height isn’t crucial.
Panel Construction
Front Panel: Work in the following order: Bottom Ribbing, Body of Top, Front Right Shoulder, Front Left Shoulder.
Back Panel: Work in the following order: Bottom Ribbing, Body of Top, Shoulder Shaping.
Changes for Sizes: 2 (4, 6, 8, 10, 12, 14, 16)
Bottom Ribbing
Gauge: With a 4.00mm crochet hook, in BLO hdc: 6 sts = 1.25″; 8 rows = 2.75″
Check Gauge: To make a gauge swatch of the bottom ribbing, simply work the first 8 rows of the bottom ribbing and measure.
Row 1: With a 4.00mm crochet hook, ch 7, working into the back humps of the ch, hdc in the 2nd ch from your hook and in each ch across. Turn. (6 sts)
Rows 2 – 33 (35, 39, 41, 43, 45, 47, 49): Ch1, BLO hdc in each st across. Turn. (6 sts)
Do not fasten off. Continue on to Body of Top.
Body of Top
Gauge: With a 4.00mm crochet hook, in granny stitch: 11 sts = 2.5″; 12.25 rows = 4″. Row height isn’t crucial.
Right / Wrong Side: Right and wrong side isn’t crucial for this top. When seaming, you can choose which side you prefer to be your right side.
Row 1: Rotate to work along the long edge of the ribbing, [ sc in the next st, 2 sc in the next st ] rep from [ to ] across to the last st, sc in the last st. Turn. (49, 52, 58, 61, 64, 67, 70, 73 sts)
Row 2 (RS): Ch 3 (counts as a st), dc in the first st, skip each of the next 2 sts, [ 3 dc in the next st, skip each of the next 2 sts ] rep from [ to ] across to the last st, 2 dc in the last st. Turn. (49, 52, 58, 61, 64, 67, 70, 73 sts)
Row 3: Ch 3 (counts as a st), 3 dc in each sp across to the last 2 sts, dc in the top of ch 3. (50, 53, 59, 62, 65, 68, 71, 74 sts)
Row 4: Alt-ch3, dc in the same sp, 3 dc in each sp across to the last sp, 2 dc in the last sp. (49, 52, 58, 61, 64, 67, 70, 73 sts)
Rep Rows 3 – 4, ending with a Row 4, until body measures approximately (8.25″, 9.25″, 10.25″, 12.25″, 13.75″, 14.75″, 15.25″, 15.75″ ) (including bottom ribbing).
* Make note of how many rows you worked before the shoulder shaping and be sure to work the same number for the Back Panel, before the shoulder shaping.
Do not fasten off. If you’re making the Front Panel, continue on to Front Right Shoulder. If you’re making the Back Panel, continue on to Back Panel Shoulder Shaping.
Adjusting Length: If you prefer a longer or shorter top, here is where you’ll want to adjust. The length stated in the chart above is measured from the top of the shoulder to the bottom edge of the top (including the bottom ribbing).
Note: The shoulder sections will add approximately 1.25″ to the length of your top.
- Longer: If you’d like a longer top, repeat Rows 3 – 4 in multiples of 2 (make sure to end with a Row 4 repeat).
- Shorter: If you’d like a shorter top, work fewer rows in multiples of 2 (make sure to end with a Row 4 repeat).
Front Right Shoulder
Row 1: Ch 1, sc in each of the first 3 sts, hdc in the next st, [ 3 dc in the next sp ] 3 (3, 4, 4, 4, 5, 5, 5) times, then dc in the middle dc of the next 3 dc group. Turn. (14, 14, 17, 17, 17, 20, 20, 20 sts)
Place a SM #1: Place a SM in the 1st st of Row 1. This SM marks where you will join yarn to Edge Top of Front Panel.
Place a SM #2: Before turning to complete Row 2, skip each of the next 8 (9, 9, 10, 11, 10, 11, 12) spaces, place a SM in the middle dc of the next 3 dc group. This SM marks where you will join yarn to begin the Front Left Shoulder.
Row 2: Alt-ch3, dc in the same sp, [ 3 dc in the next sp ] 2 (2, 3, 3, 3, 4, 4, 4) times, then hdc in the middle dc of the next 3 dc group, sl st in the next st, skip the remaining 4 sts. Turn. (10, 10, 13, 13, 13, 16, 16, 16 sts)
Row 3: Ch 1, sl st in the first, sc in each of the next 2 sts, hdc in the next st, dc in each of the remaining 6 (6, 9, 9, 9, 12, 12, 12) sts. Turn. (10, 10, 13, 13, 13, 16, 16, 16 sts)
Fasten off. Weave in ends. Continue on to Front Left Shoulder.
Front Left Shoulder
Row 1: With a 4.00mm crochet hook, join yarn with a standing dc in the st marked with the SM to begin Front Left Shoulder, [ 3 dc in the next sp ] 3 (3, 4, 4, 4, 5, 5, 5) times, then hdc in the middle dc of the next 3 dc group, sc in each of the last 3 sts. Turn. (14, 14, 17, 17, 17, 20, 20, 20 sts)
Row 2: Ch 1, BLO sl st in each of the first 4 sts (do not count as sts), sc in the next st, hdc in the next st, [ 3 dc in the next sp ] 2 (2, 3, 3, 3, 4, 4, 4) times, then 2 dc in the last sp. Turn. (10, 10, 13, 13, 13, 16, 16, 16 sts)
Row 3: Alt-dc in the first st, dc in each of the remaining 5 (5, 8, 8, 8, 11, 11, 11) sts, hdc in next st, sc in each of the next 2 sts, BLO sl st in each of the remaining 5 sts (count as sts). Turn. (14, 14, 17, 17, 17, 20, 20, 20 sts)
Fasten off. Weave in ends. Continue on to Edge Top of Front Panel.
Edge Top of Front Panel
Row 1: With a 4.00mm crochet hook, join yarn with a standing sc in st marked with a SM to Edge Top of Front Panel, sc in each st across the shoulder, work 2 sc into the side of each dc to bottom of neck opening, work 1 sc in each st across the next opening, work 2 sc into the side of each dc to the top of the next shoulder, sc in each st across the next shoulder. Stitch count isn’t crucial.
Fasten off. Weave in ends. Make Back Panel then continue on to Back Panel Shoulder Shaping.
Back Panel Shoulder Shaping
Row 1: Ch 1, sc in each of the first 3 sts, hdc in the next st, [ 3 dc in the next sp ] 14 (15, 17, 18, 19, 20, 21, 22) times, then hdc in the middle dc of the next 3 dc group, sc in each of the last 3 sts. Turn. (50, 53, 59, 62, 65, 68, 71, 74 sts)
Row 2: Ch 1, BLO sl st in each of the first 4 sts (count as sts), sc in the next st, hdc in the next st, [ 3 dc in the next sp ] 13 (14, 16, 17, 18, 19, 20, 21) times, then hdc in the middle dc of the next 3 dc group, sl st in the next st, skip the remaining 4 sts. Turn. (47, 50, 56, 59, 62, 65, 68, 71 sts)
Row 3: Ch 1, sl st in the first, sc in each of the next 2 sts, hdc in the next st, dc in each st across to last 3 dc group, then dc in the next dc, hdc in the next dc, sc in each of the next 2 sts, BLO sl st in each of the remaining 5 sts (count as sts). Turn. (47, 50, 56, 59, 62, 65, 68, 71 sts)
Row 4: Ch 1, sc in each st across, including each skipped st from Row 2. (51, 54, 60, 63, 66, 69, 72, 75 sts)
Fasten off. Weave in ends. Continue on to Seam Shoulders.
Seam Shoulders
Step 1: Lay out the front and back panels with the RS you chose facing out, as shown in the photo below. Line up the stitches from each shoulder with stitches along the back panel. Use locking stitch markers to hold the panels together while seaming.
Step 2: With a yarn needle and piece of yarn that is 4 times the width of a shoulder, seam the shoulder using a mattress stitch crochet. Make sure to seam ALL sts from the front shoulders (including the sl sts and skipped sts along the outside edges). Check out my mattress stitch seam tutorial for tips!
Weave in ends. Seam the second shoulder, then continue on to the Side Seams.

Side Seams
Step 1: With the same side facing out, fold your top over at the shoulders to line up the front and back panels.
Step 2: Mark the armhole openings. Measure down 4.25″ (4.75″, 5″, 5.5″, 6″, 6.5″, 7″, 7.5″ ) from each shoulder seam and place a locking SM through both the front and back panels to mark the bottom of the armhole opening. See photo below.
Step 3: Place a locking SM in the stitches at the bottom of the ribbing. Place a couple more locking SM along the side to help hold the panels in place while seaming. Using locking SM will also help keep your seam even as you’re working.
Step 4: With a yarn needle and piece of yarn that is 4 times the length of the side seam, seam the shoulder using a mattress stitch crochet.
Weave in ends. Seam the second side, weave in ends, then continue on to Sleeve Cuff.
Sleeve Cuff
Rnd 1: With your RS facing out and a 4.00mm crochet hook, join yarn with a standing sc in a st near the bottom of the armhole opening, work 2 sc into each dc row and 1 sc into each sc row around the armhole opening. Do not join. Work in a spiral. Go down a hook size (or two) if your edging becomes wavy. *Stitch count isn’t crucial.
Rnd 2 – 4: Sc in each st around. Join with a sl st at the end of Rnd 4.
Wider Cuff: If you prefer a wider sleeve cuff, repeat Rnd 2 as many times as you’d like.
Fasten off. Weave in ends. Repeat for the second armhole opening, weave in ends, then block, if desired.
That’s it! Block your girls crochet top (if you prefer) and it’s ready to wear!
Related: If you have never blocked a crochet project before, check out my post on 3 blocking methods!
I Made It! Now What?
Pin this post!: Save this summer top crochet pattern to your Pinterest boards so that you can come back and make it again.
Leave a comment below: We love to hear your feedback.
Share Your Finished Projects on Facebook or Instagram: I love to see your finished projects! Share with us on social media and tag me @acrochetedsimplicity or use the hashtag #ACrochetedSimplicity so I can find your posts.
Join us in the Facebook Community Group!
Come share your finished projects with us in the A Crocheted Simplicity Crochet Community Group on Facebook. Join us for fun community events such as crochet alongs, join in on crochet conversations, ask questions, get advice, and share your love for crochet!

More Free Summer Crochet Top Patterns I Think You’ll Love
More Fun & Free Summer Crochet Patterns
Are you looking for your next summer crochet project? We have several more free crochet patterns for summer lovin’.
You’ll find plenty of summer crochet ideas, from an easy crochet summer top and beach bags to summer crochet projects for kids!