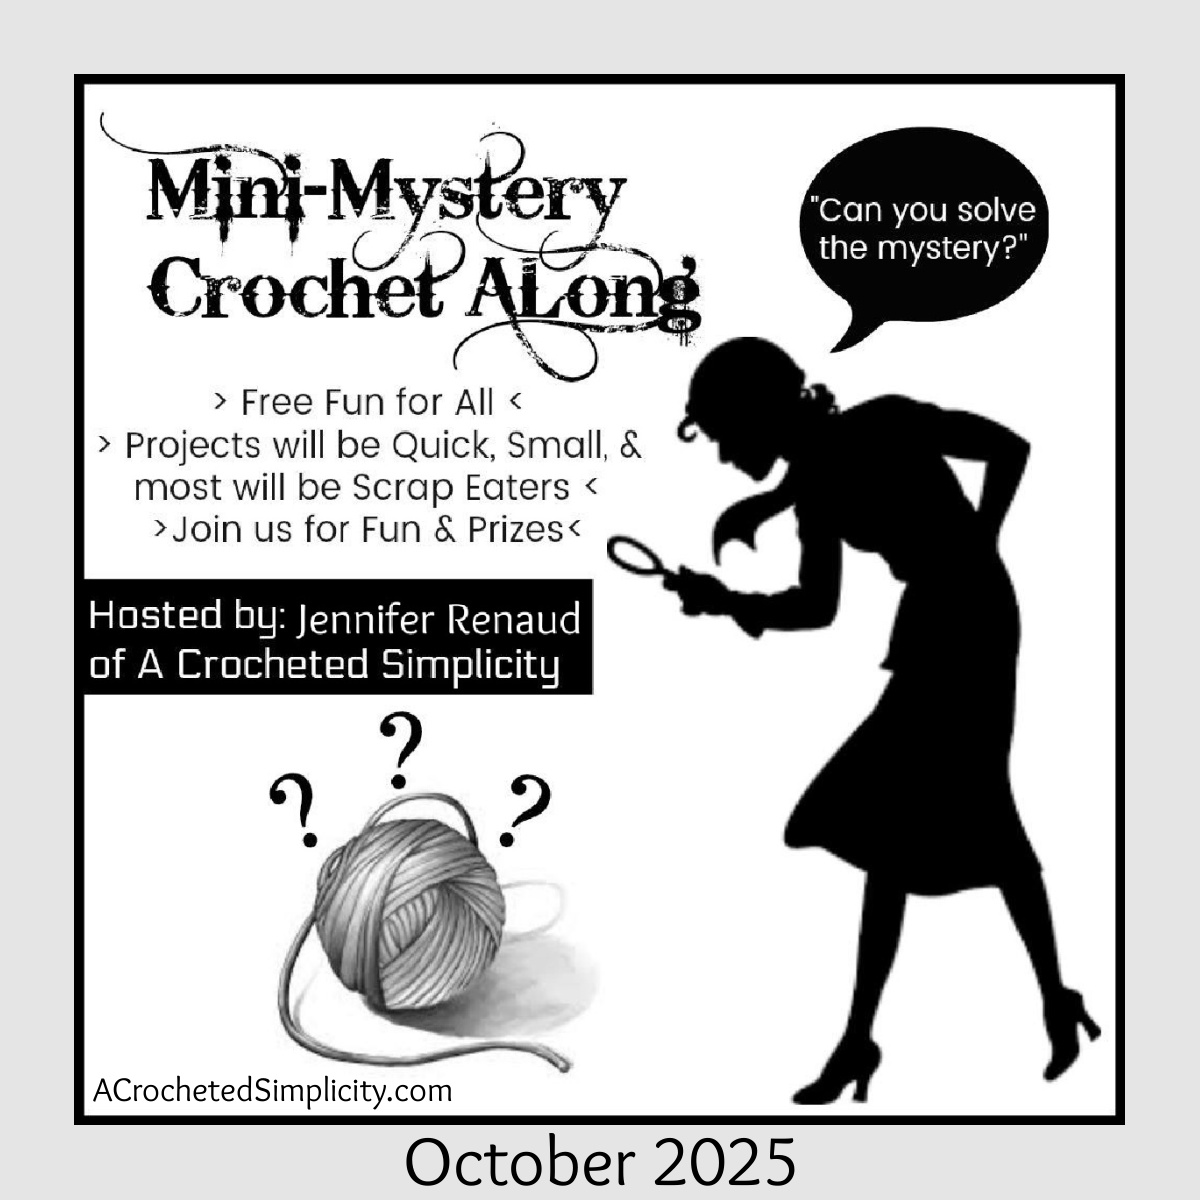
Mini-Mystery Crochet Along – October 2025
Are you ready for another Mini-Mystery Crochet Along (MMCAL)?
Whether you’re a beginner or a seasoned crocheter, Mini-Mystery Crochet Alongs are a fun, free community event for ALL skill levels!
There’s no better way to learn a new crochet stitch or technique than in a community setting with your peers.
You never know what you’re capable of crocheting until you’re crocheting “blindly” (so to speak).
MINI-MYSTERY CROCHET ALONG FAQ’S
“What is a MMCAL?” Check out our Frequently Asked Questions in the Mini-Mystery Crochet Along Information Guide.
Please Notify Me of Future MMCAL’S
If you haven’t already done so, please make sure to subscribe to our e-mail list! Use the subscription form in the sidebar, or on the Subscribe page.
I will send out a newsletter a couple days before each MMCAL begins to give you time to choose yarn from your stash and get everything ready.
NO SPAM – PINKY PROMISE! UNSUBSCRIBE ANY TIME.
How Do I Join in The MMCAL Fun?
- Step 1: Make sure you’ve joined the A Crocheted Simplicity Crochet Community on Facebook, or the A Crocheted Simplicity Ravelry Group (or both).
- Step 2: Locate the black & white MMCAL graphic (shown above) in either the Facebook Community Group or Ravelry Group.
- Comment, ask questions, and post your progress photos on this specific MMCAL post in the community groups.
- Step 3: Crochet Along with us!
- Crochet 1 (or more) MMCAL project. Crochet as many as you’d like and each will gain you more entries!
- Each Segment will be available for free in this blog post below. See the current MMCAL Schedule Below.
- Step 4: Enter to Win Prizes!
- Once you complete each segment, add a photo of your progress to the post in the group for that project. You will need to add at least 1 photo for each segment in order to be entered to win all of the prizes.
- Earn up to FOUR entries for each completed mystery crochet along project you complete and post photos of each segment.
- Photo of Materials = 1 Entry
- Photo of Segment #1 = 1 Entry
- Photo of Segment #2 = 1 Entry
- Photo of Segment #3 = 1 Entry
I will number all photos throughout the weekend. You’ll want to keep track of your numbers as I put them all in a random number generator to draw the winners of the prizes! 🙂
Create a project page on Ravelry, if you’d like. If you’re not sure how, check out our quick tutorial!
Mini-Mystery Crochet Along Schedule, Material List & Prizes
Our Mini-Mystery Crochet Along will be posted in 3 segments.
THIS blog post will be updated with each new segment, according to the schedule below.
MMCAL Schedule
- Material List: SCROLL DOWN – It’s available NOW in this blog post below!
- Segment 1: Friday, October 24, 2025 at 9am CST. **Segment #1 will be posted below by 9am CST Friday**
- Segment 2: Saturday, October 25, 2025 at 9am CST.
- Segment 3: Sunday, October 26, 2025 at 9am CST.
- MMCAL Closes Monday, October 27, 2025 @ noon CST: MMCAL Closes & winners will be drawn. Winners will be announced Monday evening, October 27, 2025.
This post contains affiliate links.
Materials
- Yarn: Worsted Weight / 4 yarn
- Fiber: I used an acrylic wool blend. Acrylic, wool, cotton, and other blends will work well too.
- Yardage & Colors
- Color A (CA): 80 yards
- Color B (CB): 2 yardss
- Color C (CC): 2 yards
- Color D (DD): 2 yards
- Crochet Hooks: G/6/4.00mm; H/8/5.00mm, or size needed to obtain gauge (My favorite crochet hooks are the Clover Amour Crochet Hooks, I’ve never had an ache in my hand since switching).
- Scissors
- Yarn Needle
- Measuring Tape
Abbreviations (US Terms)
- ch(s): chain(s)
- sl st(s): slip stitch(es)
- st(s): stitch(es)
- yo: yarn over
- sc: single crochet
- hdc: half double crochet
- dc: double crochet
- BLO: back loop only
- FLO: front loop only
- Rep: repeat
- RS: right side
- MC: Main Color
- CC: Contrasting Color
Gauge
- In sc with a 5.00mm crochet hook: 12 sts = 3″; 12 rows = 3.125″
TUTORIAL PHOTOS: If you’re stuck and need a visual, scroll down in this blog post (after the segment has been posted) to the tutorial photos. They will be near the bottom of the post to keep from spoiling the mystery for those who prefer to crochet blindly.
Segment #1
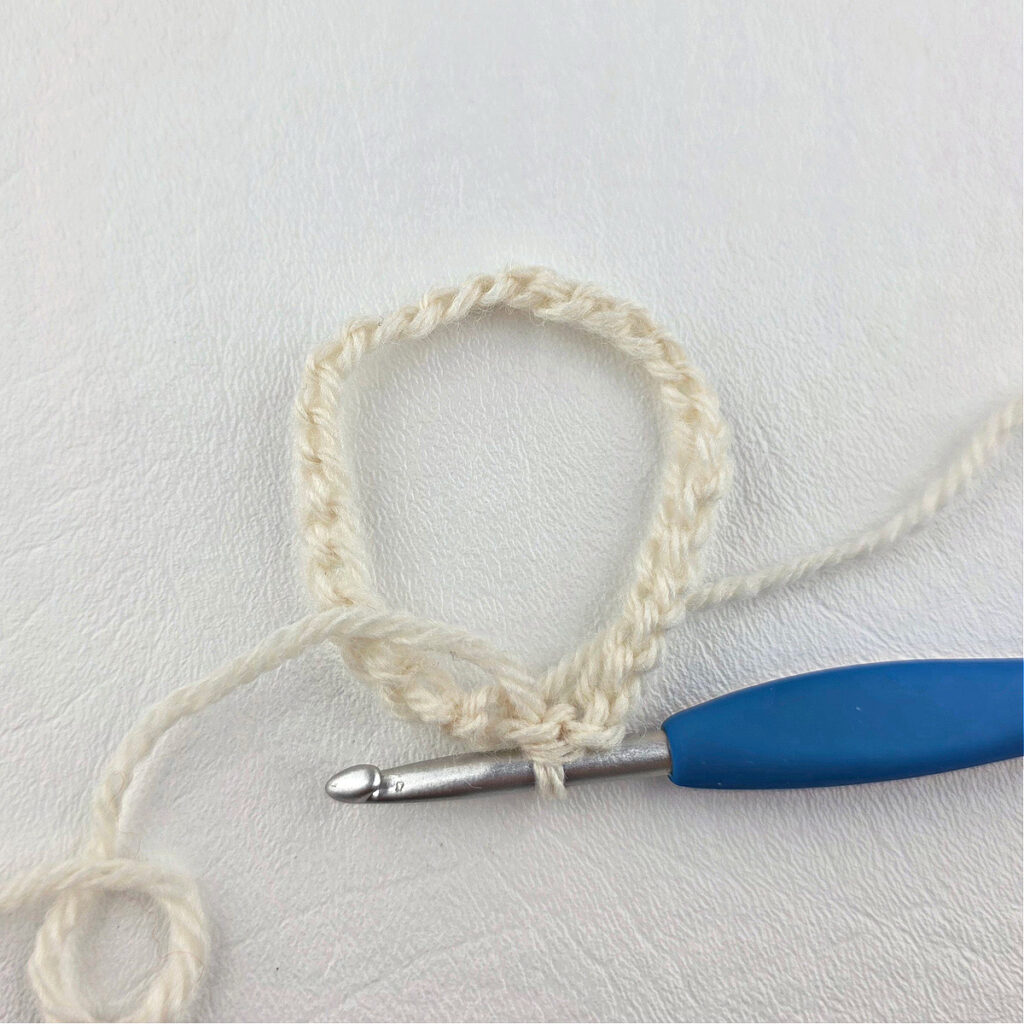
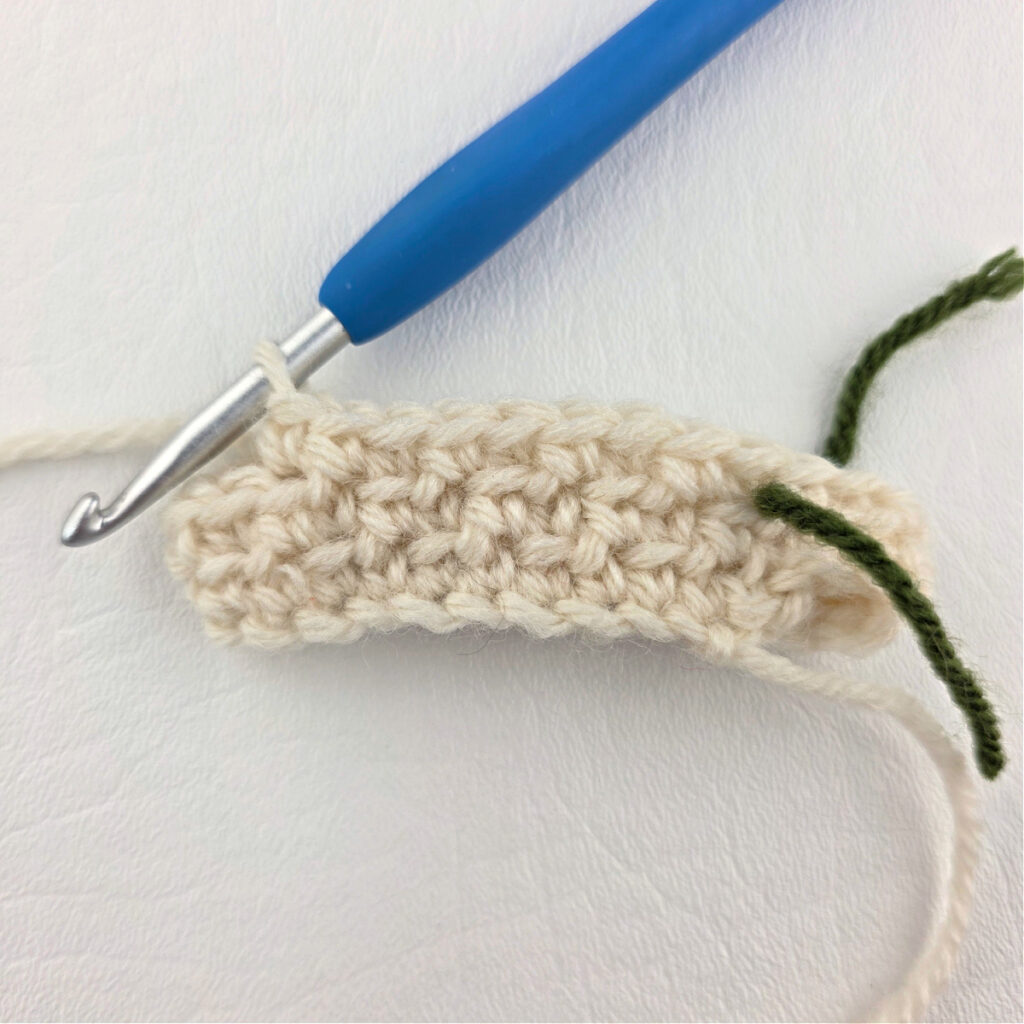
Set-Up: With MC yarn & a 5.00mm crochet hook, ch 29, without twisting the chain, join with a sl st to the 1st ch to form a ring.
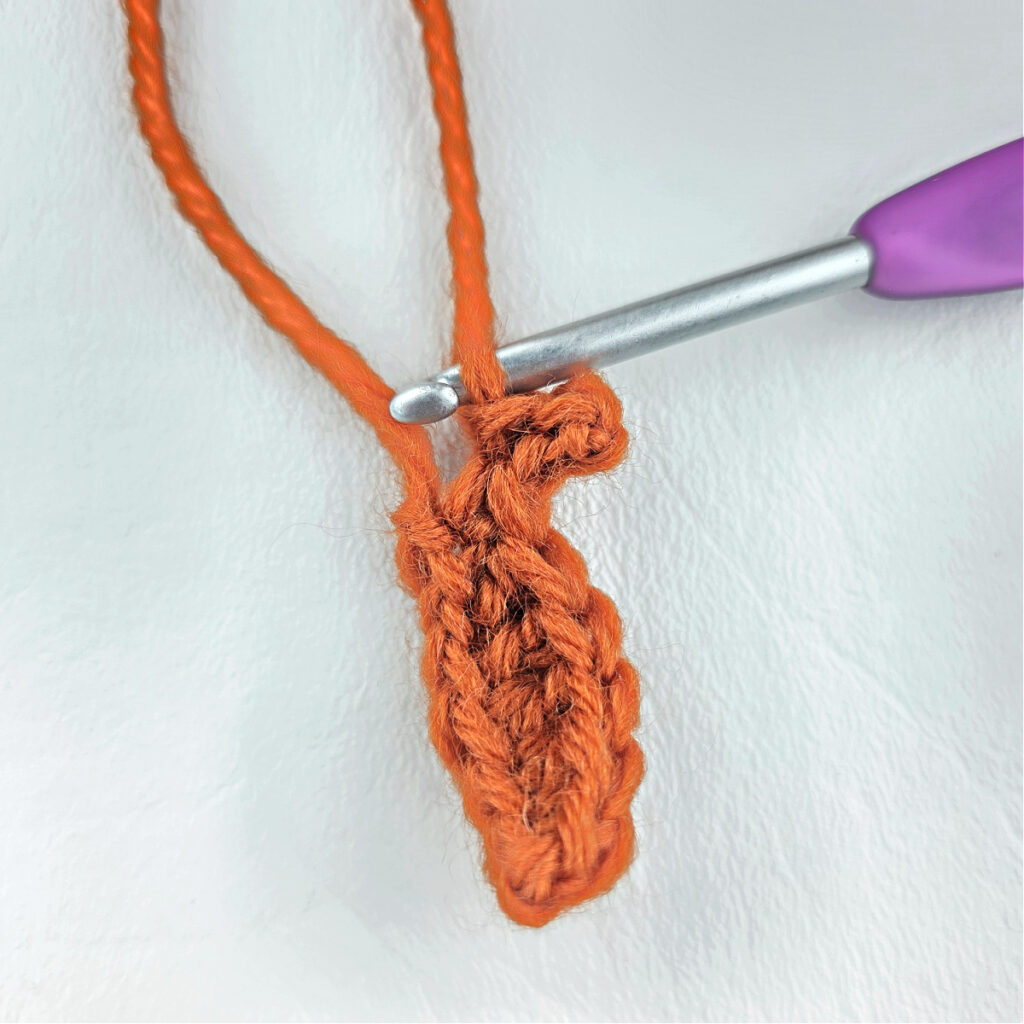
Rnd 1 (RS): Ch 1, sc in each ch around. (29 sts) Do not join. Begin working in continuous rounds (aka a spiral). Use a scrap of yarn to mark the beginning and ending of each round. Move the scrap of yarn up as you complete each round.
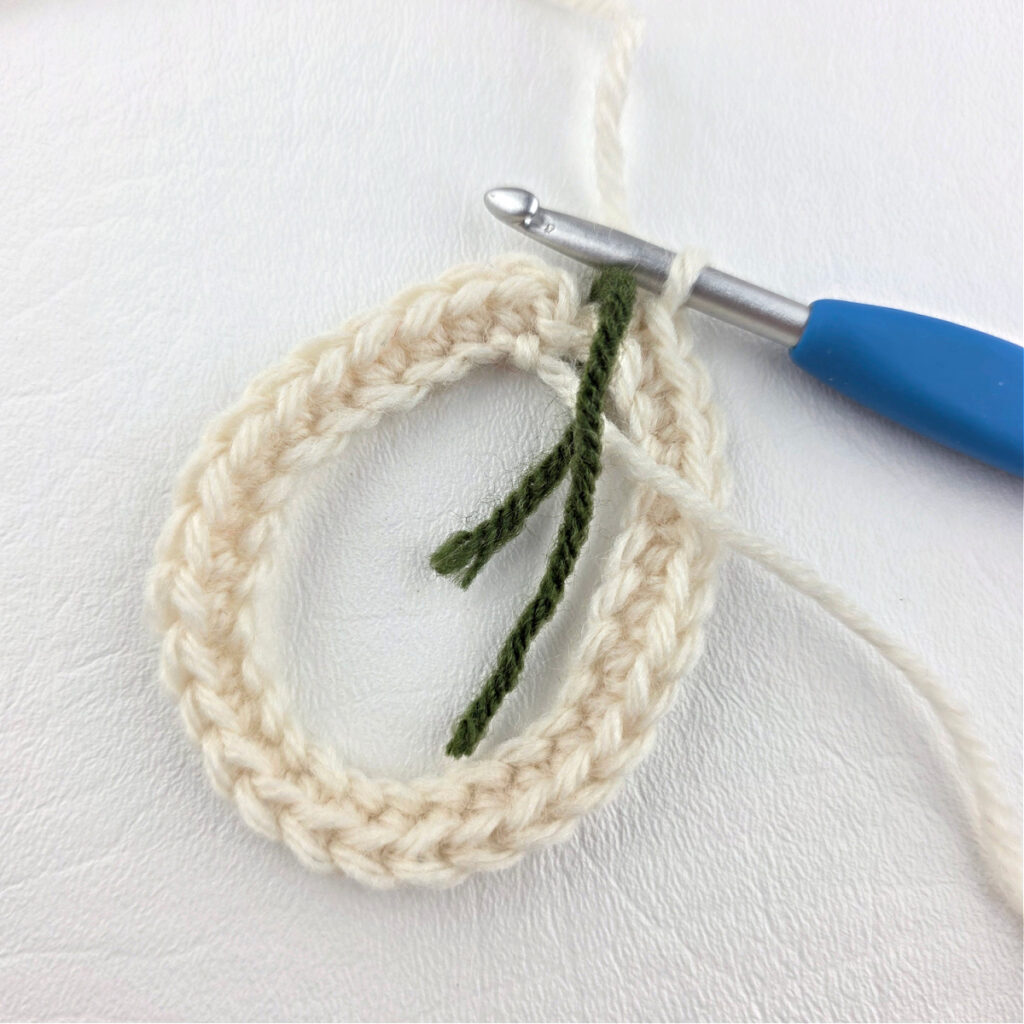
Rnd 2: FLO sc in the first st, * BLO sc in the next st, FLO sc in the next st, rep from * around. Do not join. (29 sts)
Rnd 3: BLO sc in the first st, * FLO sc in the next st, BLO sc in the next st, rep from * around. Do not join. (29 sts)
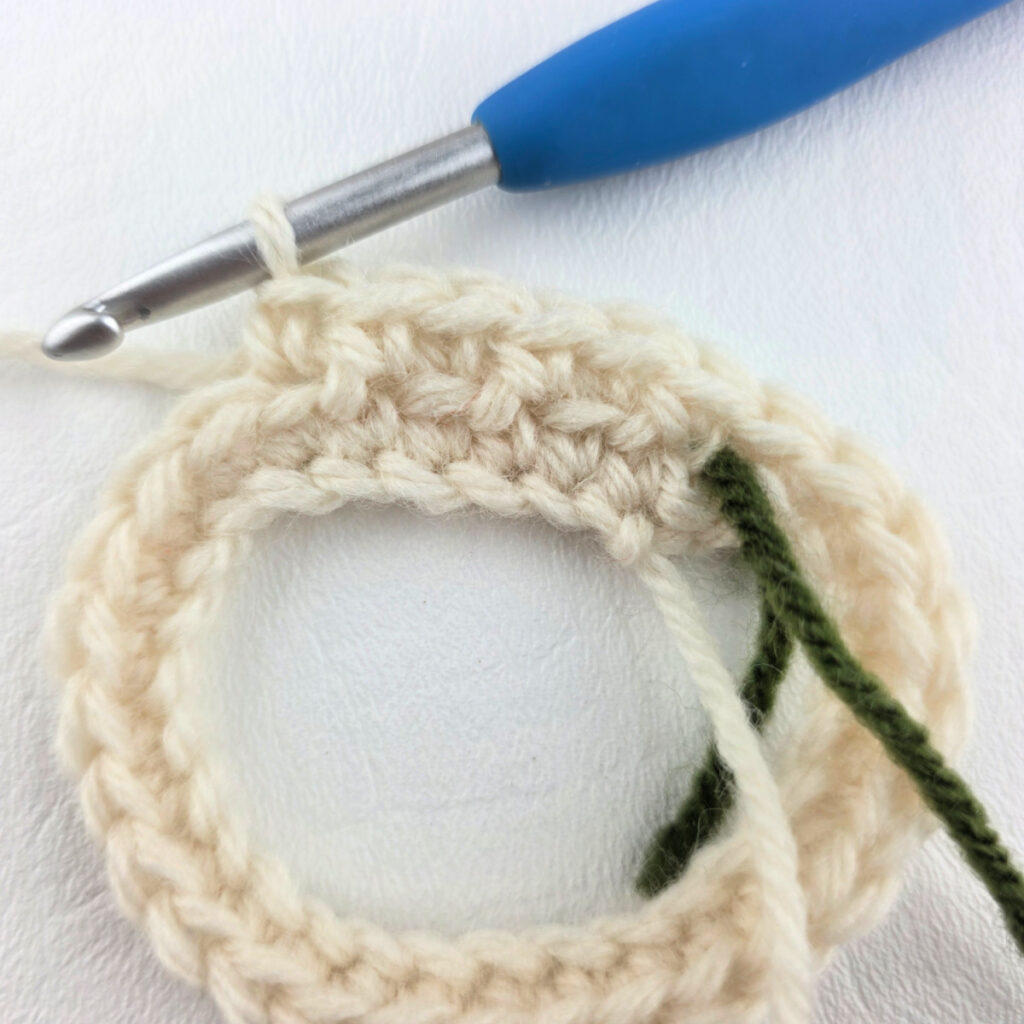
Rep Rnds 2 – 3, ending with a Rnd 3, until your work measures 5″ H.
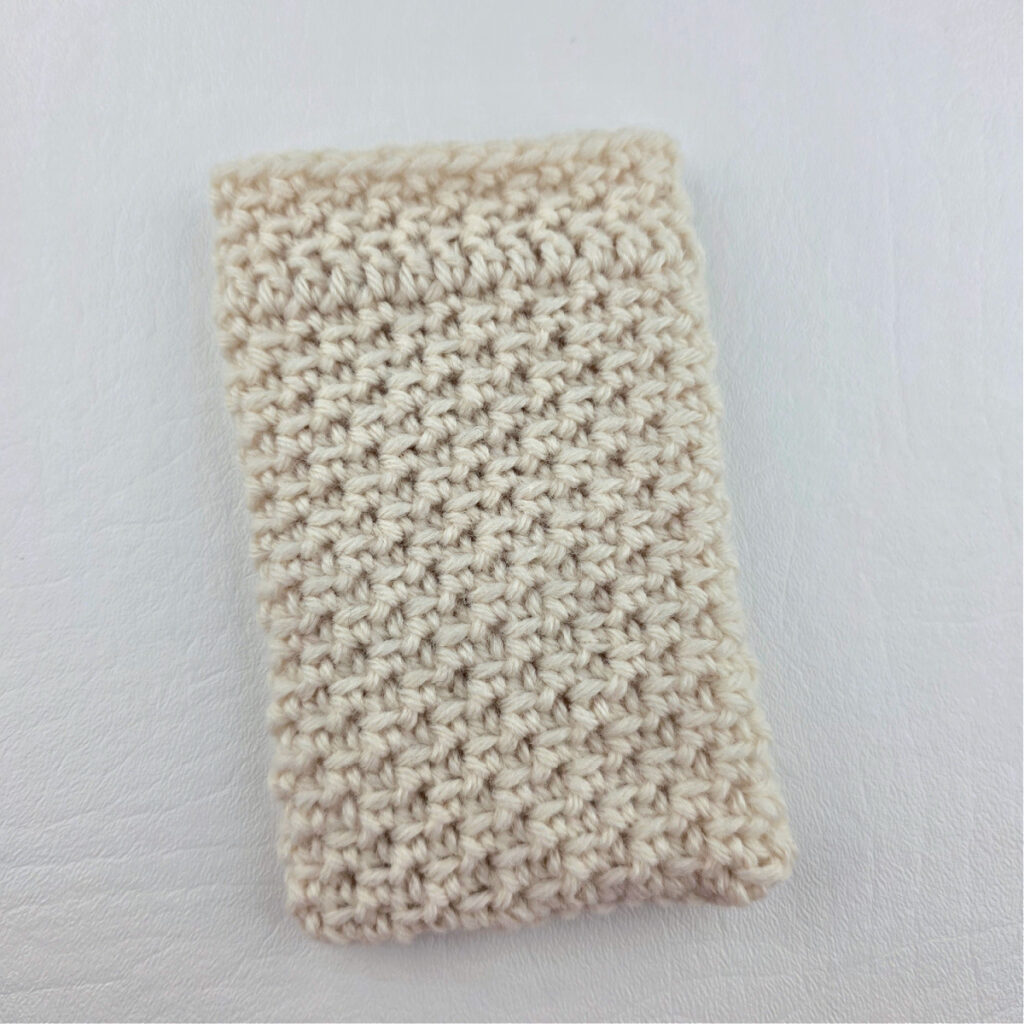
Do not fasten off. Continue on to Segment #2 when it’s available. At this point, your work should measure 3.5″ W x 5″ H.
Segment #2
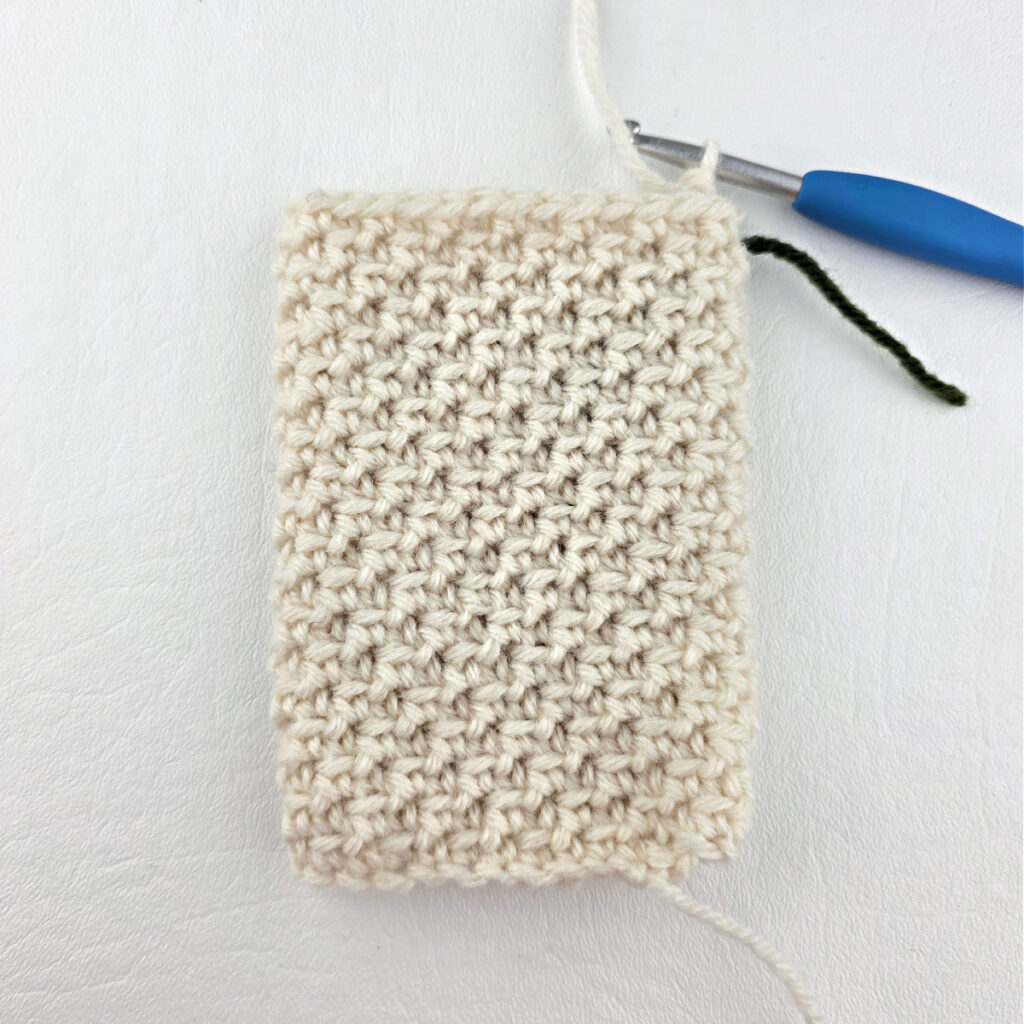
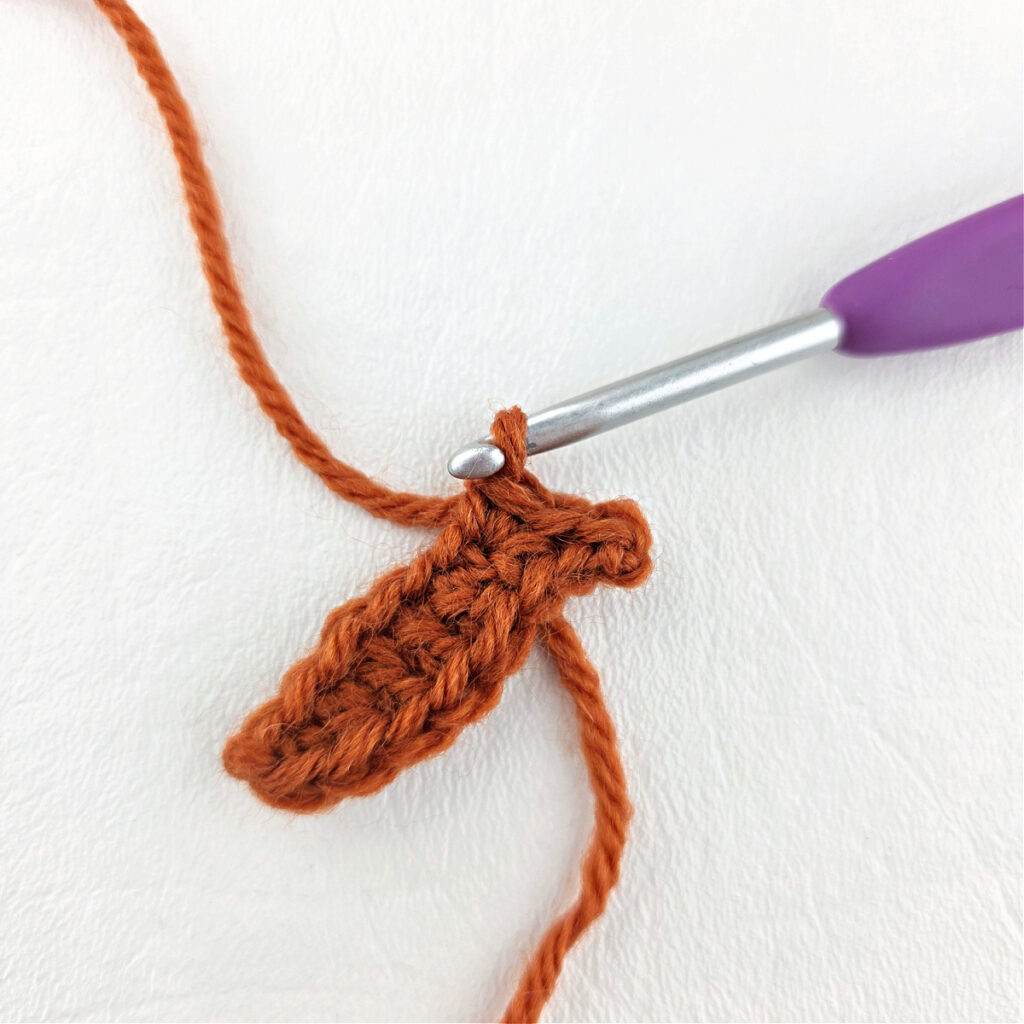
Rnd 1 (RS): Continuing on with yarn & a 5.00mm crochet hook, working in both loops, dc in each st around. Do not join. (29 sts)
Rnd 2: FLO sc in the first st, * BLO sc in the next st, FLO sc in the next st, rep from * around. Do not join. (29 sts)
Rnd 3: BLO sc in the first st, * FLO sc in the next st, BLO sc in the next st, rep from * around. Join with a sl st to the 1st st. (29 sts)
Fasten off. Weave in ends. Continue on to Seaming.
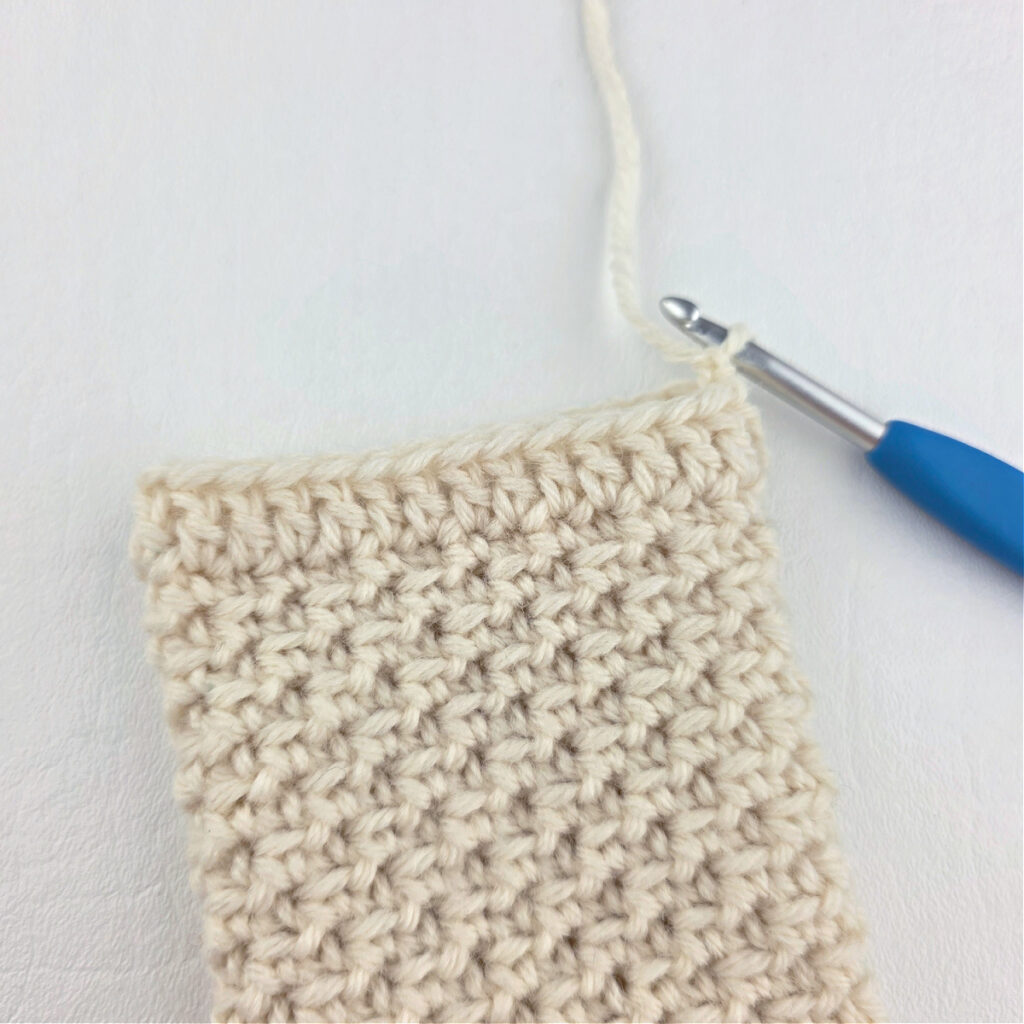
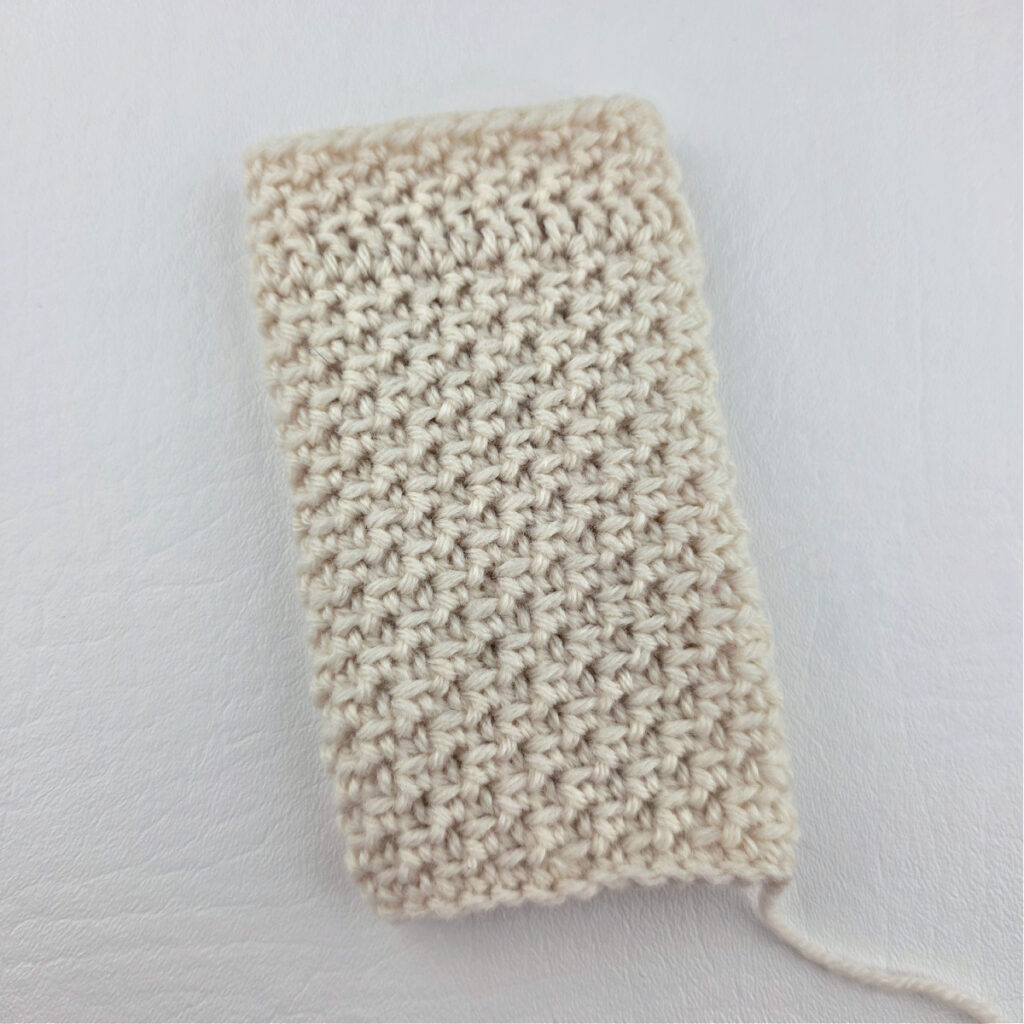
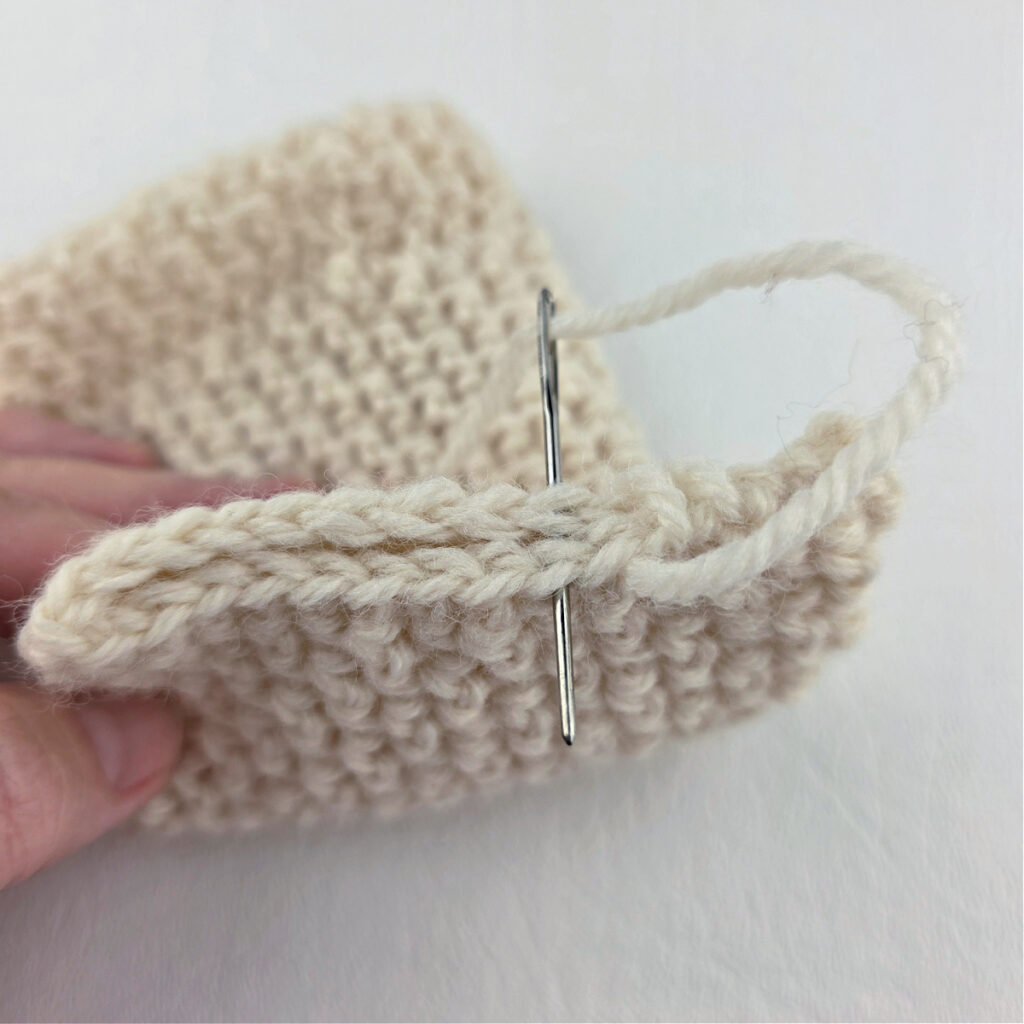
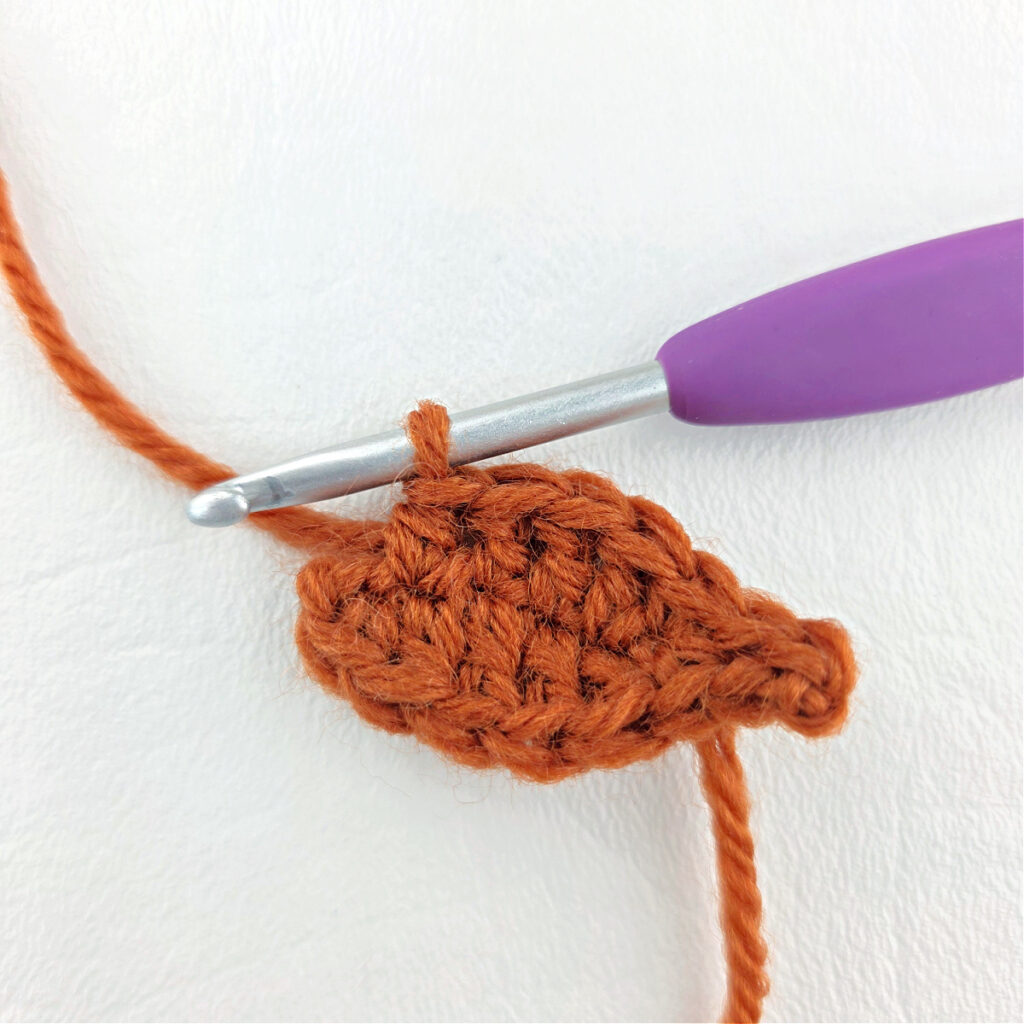
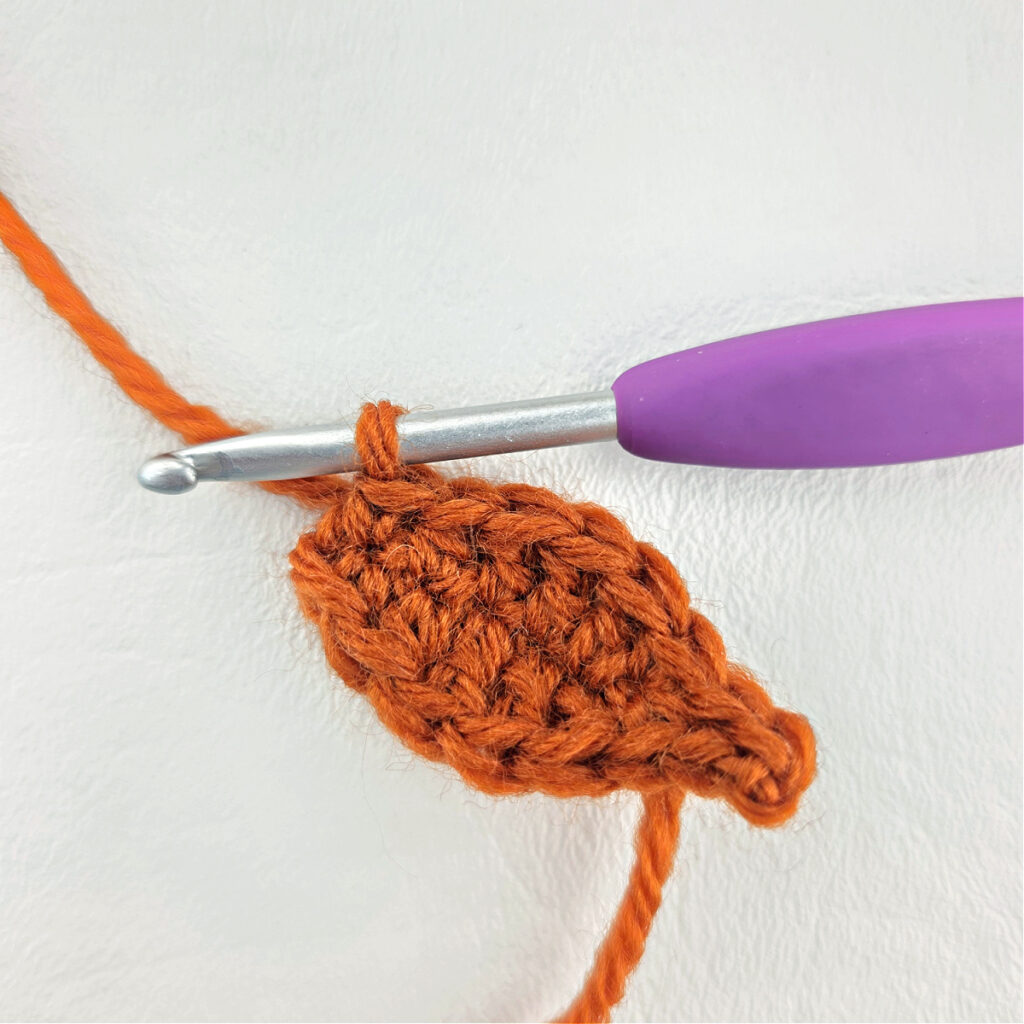
Seaming
Turn your work inside out.
With a yarn needle and piece of yarn that is 12″ – 15″ long, lay your work flat and whipstitch the bottom closed (round 1 stitches).
Weave in ends. Turn your work right side out. Continue on to Segment #3.
Segment #3
Segment #3 – Part 1
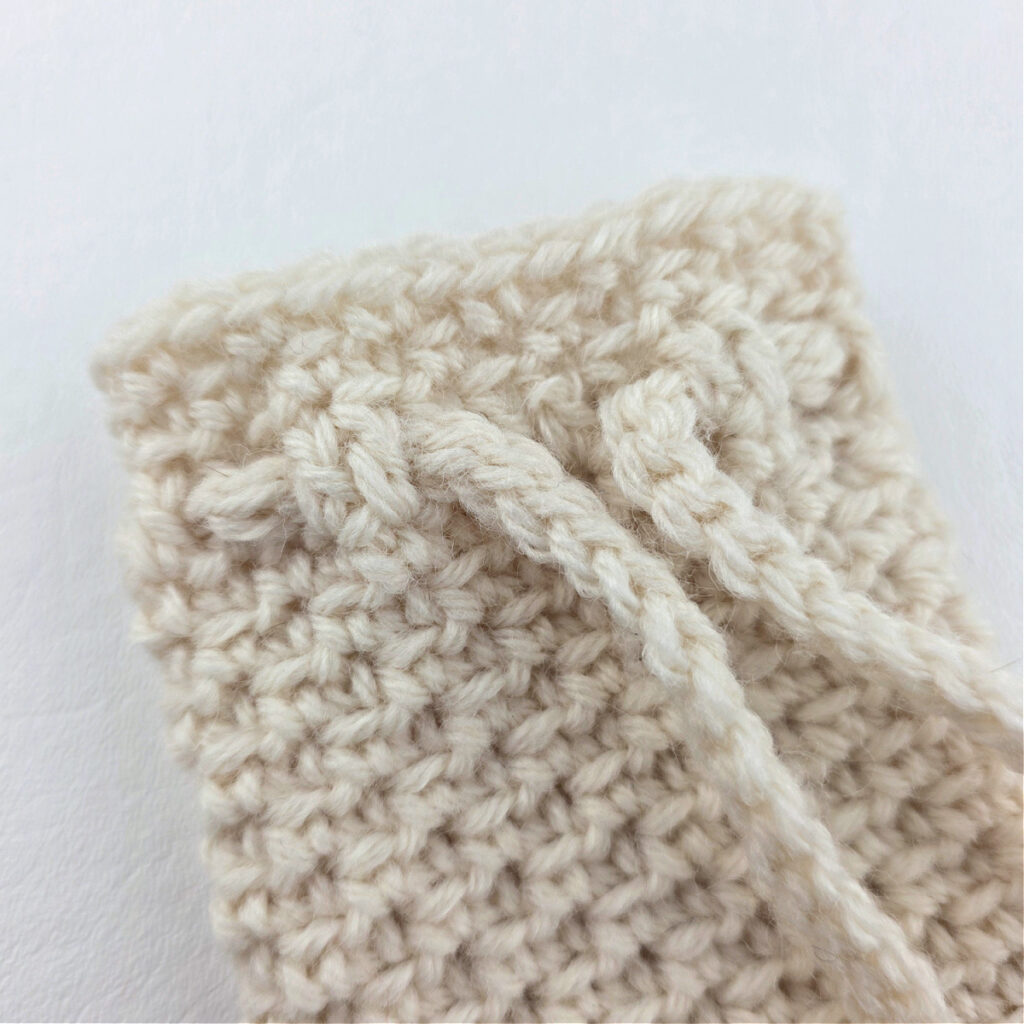
With yarn & a 5.00mm crochet hook, make a chain that is 18″ long, working into the back humps of the foundation ch, sl st into the 2nd ch from your hook and in each ch across.
Fasten off. Weave in ends. Weave the tie in and out of the double crochet stitches in round 1 of the Segment #2.
Continue on to Segment #3 – Part 2.
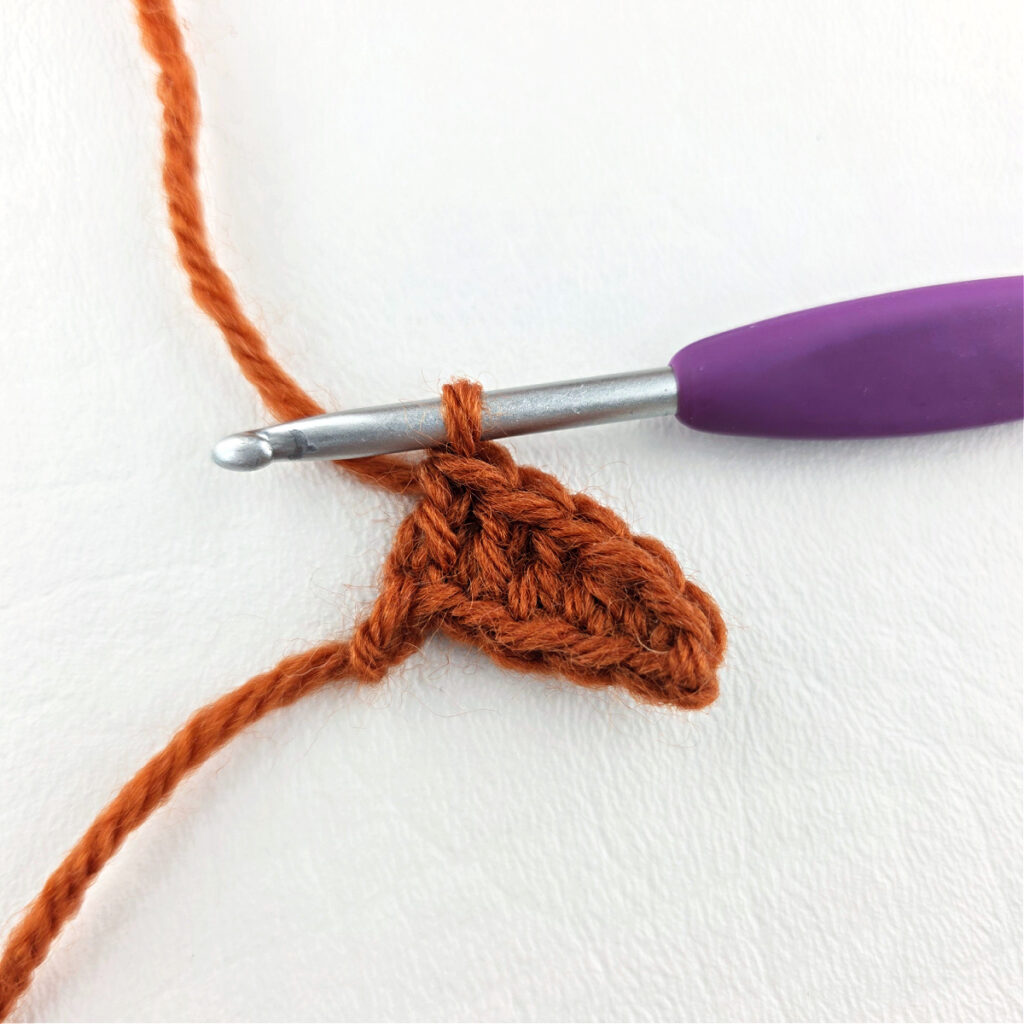
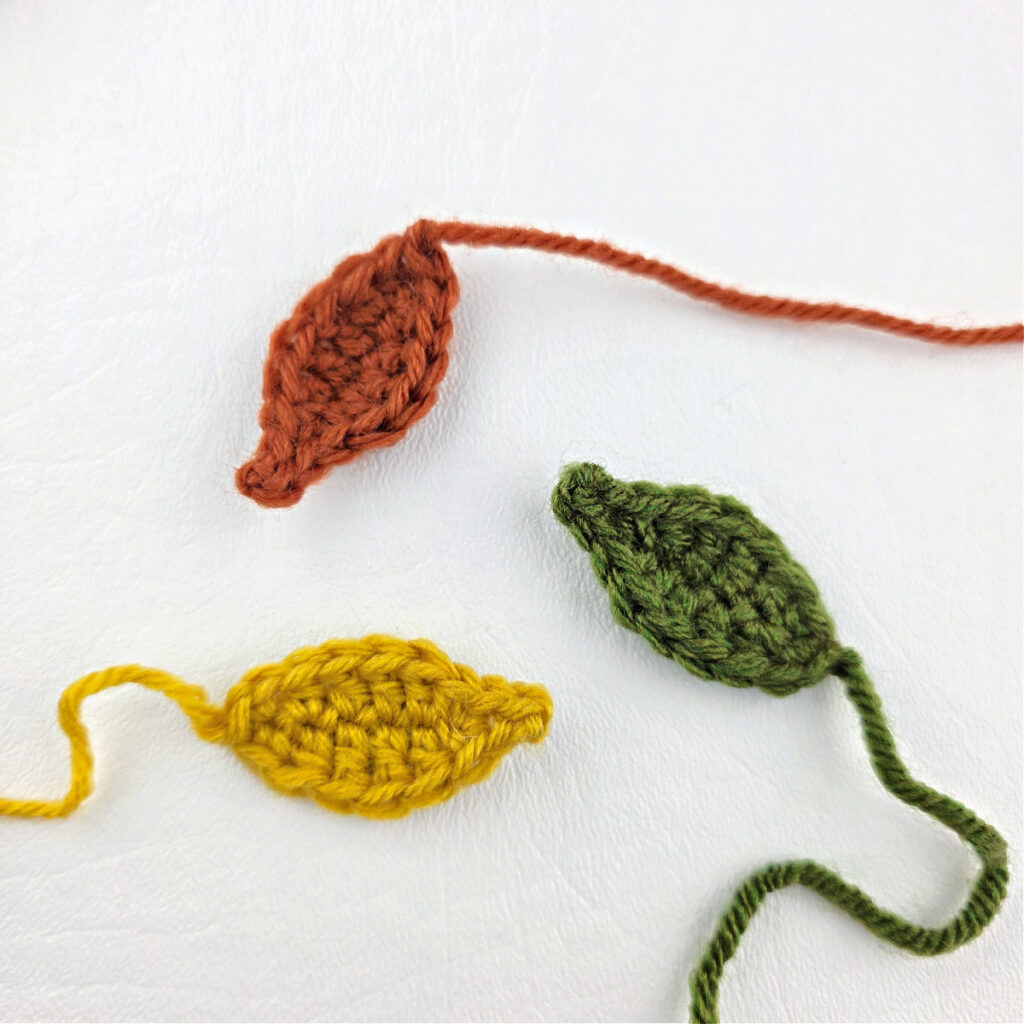
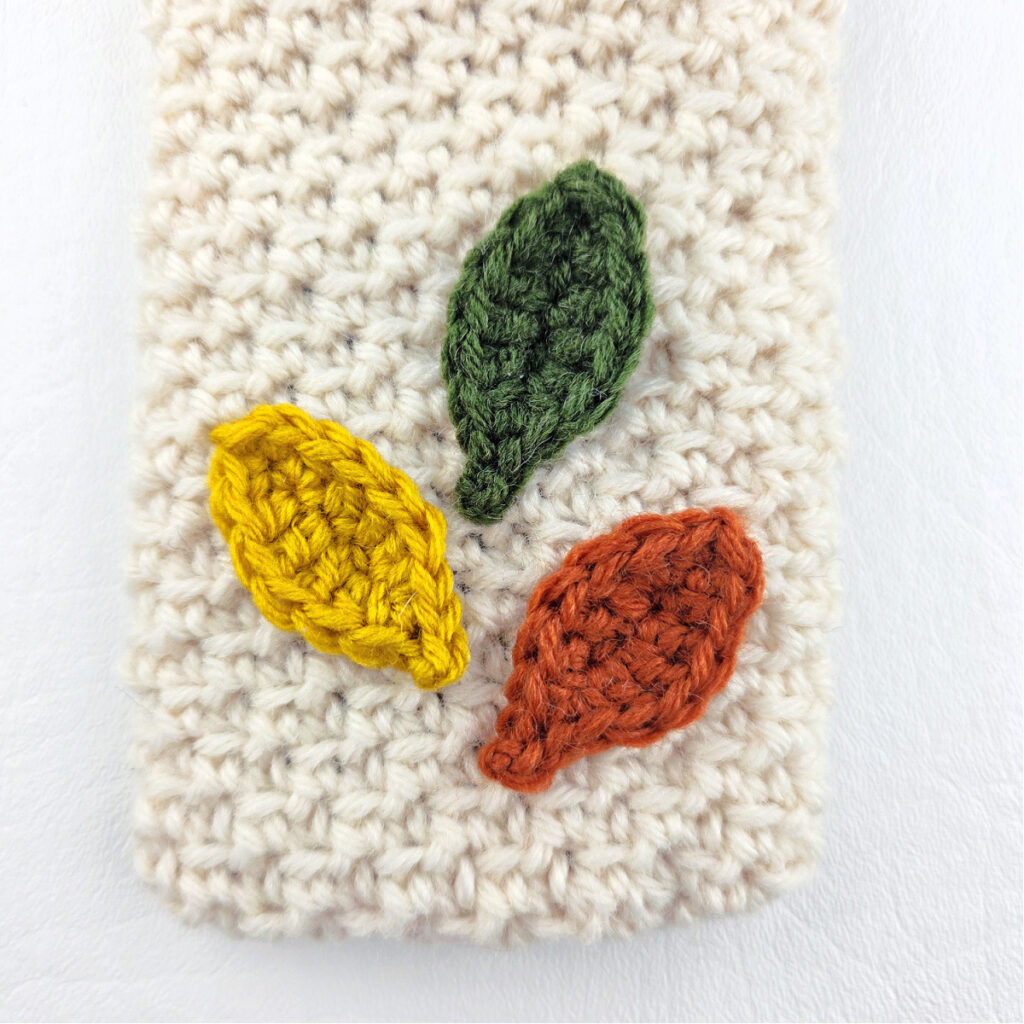
Segment #3 – Part 2 (Make 3)
In this segment, you’ll make three of the pieces, one in each contrasting color.
See progression photos at the bottom of the post.
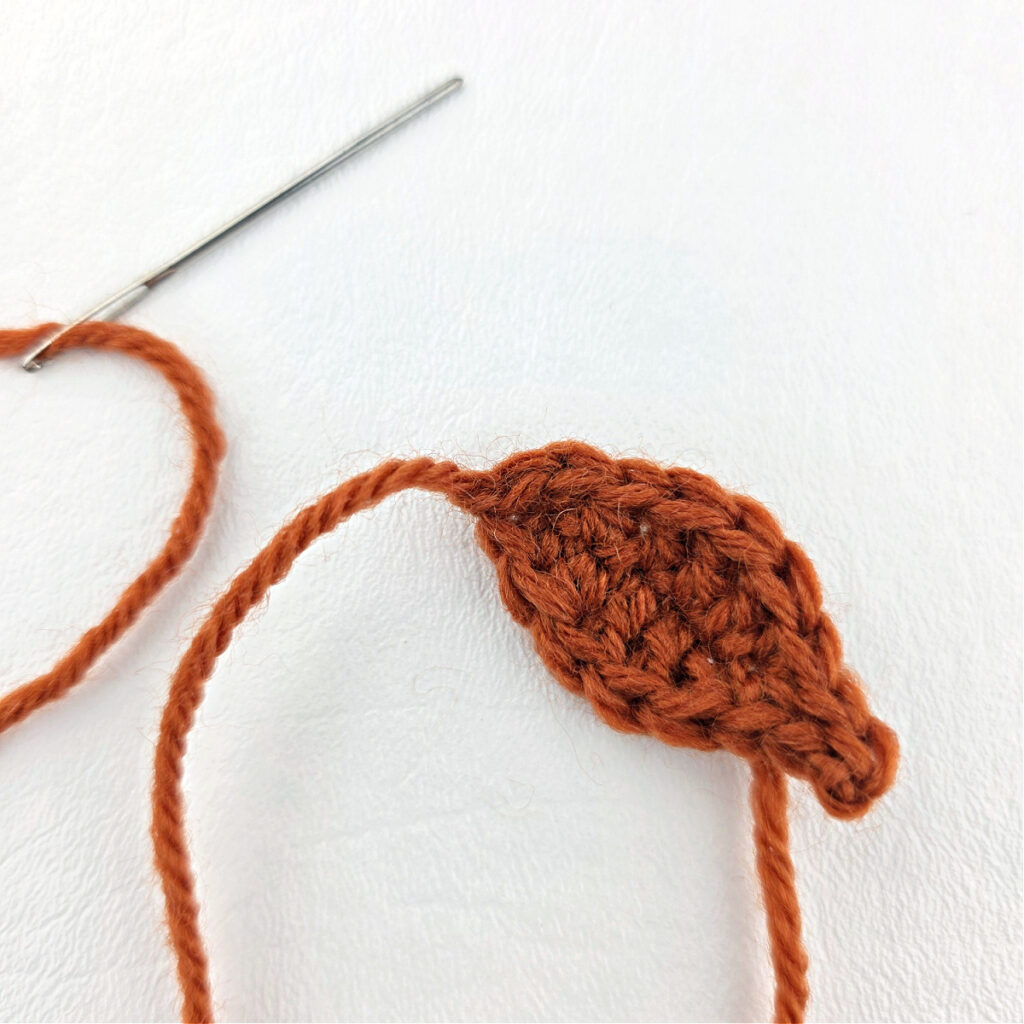
Rnd 1 (RS): With CA, CB, or CC yarn & a 4.00mm crochet hook, ch 7, sc in the 2nd ch from your hook, hdc in the next ch, dc in each of the next 3 chs, (sc, ch 3, sl st in the 2nd ch from your hook, sl st in the next ch, sc) in the last ch, rotate to work in the bottom of the ch, dc in each of the next 3 chs, hdc in the next ch, sc in the next ch. Sl st to the 1st st to join.
Fasten off leaving a tale of yarn large enough to use to attach it to the previous segment. Make 2 more then continue on.
With a yarn needle and tail of yarn, sew them onto the previous segment. Weave in ends. See photos below.
All About the Prizes
- (1) $25 Amazon Gift Card
- (1) Yarn Prize Pack ($15 – $25 value) – Open to crocheters worldwide!
- (3) Crocheters will each Receive 2 Patterns of Choice from my Ravelry or Etsy Shop (aff).
MMCAL Archives
While you’re patiently waiting for our next MMCAL to begin, I’ve dug out a few links from our MMCAL archives to share!
Psst… If you’d like to see all of them, here’s the entire MMCAL Archive.
Do You Love Crochet Video Tutorials?
Make sure to SUBSCRIBE to our YouTube Channel so you don’t miss out on any of our upcoming crochet video tutorials this year!
The crochet beanie shown above is my Easy Short Row Beanie Pattern.
I hope you’ll join us in the Facebook Community Group or Ravelry Group for the Mini-Mystery Crochet Along!!!

Segment #1 Progression Photos
Segment #2 Progression Photos
Segment #3

I van’t wait until Friday. Will be so much fun.
I’m glad to hear you’ll be joining in on the fun! 🙂
Looking forward to the mini mystery. I love a good mystery
We’re glad you decided to join us! 🙂
I like this
My daughter and I are planning to join this CAL. It will our first ever! Very excited!
That’s great to hear! We’re glad you’ll both be joining us! 🙂
This is my first time doing something like this and I’m really having a lot of fun! Thank you for providing this opportunity!
Hi Sandy,
I’m so glad to hear that you’re enjoying our MMCAL! 🙂
Happy Crocheting,
Jennifer
I’m a beginner but am going to try it! How fun! 🥰
This will be my first MMCAL! I’m so excited!
I’m up to date! Thanks for the fun!
You’re welcome! I’m glad to hear you had a good time!
This is my 3rd MMCAL I love these and can’t wait for friday
This is my first crochet a long. I’m excited to try this!
looking forward to this 😀
I did this along with you and was waiting for the reveal! It was exactly what I thought but I used too big of yarn for mine (womp womp) but I made mine into sun flowers
This Mini-MCAL was so much fun! My daughter joined us for this one and we both enjoyed it. Thank you for such a fun project and the cute PDF!
I’m so glad you both joined us and enjoyed it! <3
Thank you! these are so cute…will be adding them to my trick or treat bags for the kids!
Hi Lisa,
I’m so glad to hear this!
Thanks for joining in the fun!
Jennifer