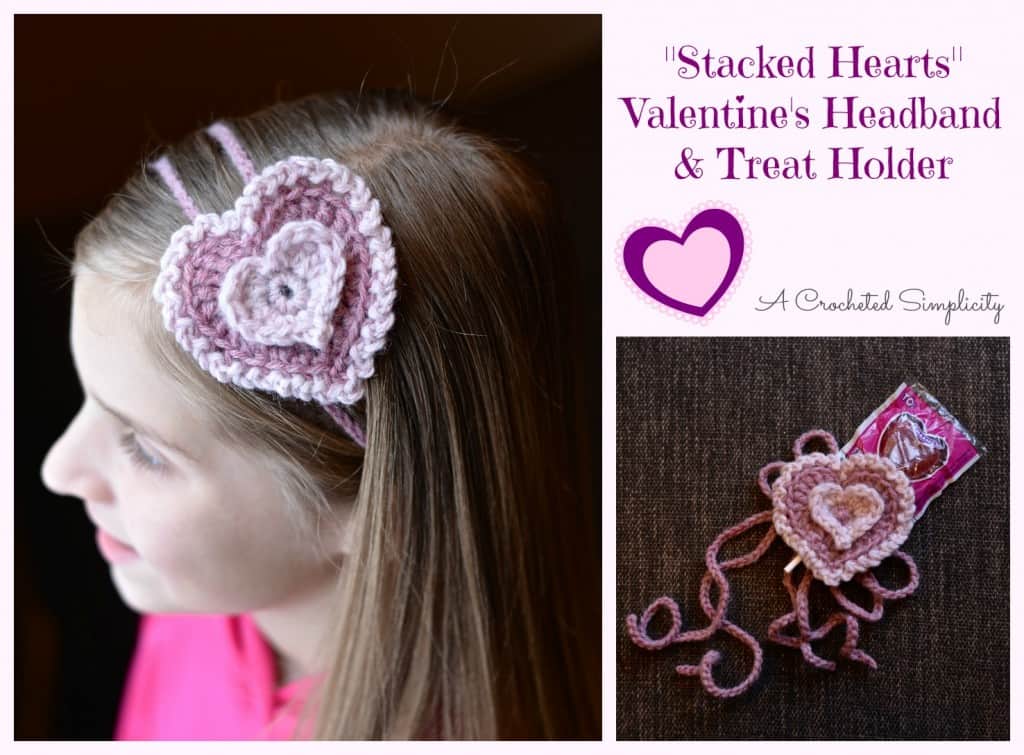
Free Crochet Pattern | “Stacked Hearts” Headband & Treat Holder
This Valentine’s I had been trying to come up with a quick little gift that I could make for the girls in Claire’s class that they could use over and over again. I also wanted to be able to have it hold a small treat (kids + candy = BFFs). This is how the “Stacked Hearts” Headband & Treat Holder came about! (don’t fret, I didn’t forget about the boys…free crochet pattern coming soon!)
This is a super quick little project that requires minimal amounts of both yarn and time!
> Click HERE to sign-up to receive our weekly newsletter <

~Click Here to Pin-It & save it for later!~
Find all of my FREE crochet patterns HERE
Materials: US Size 4.00mm crochet hook (My hook of choice can be purchased through our affiliates: Clover Amour Crochet Hook, 4 mm) (or proper hook to obtain gauge), yarn needle, scissors
Yarn: Light Worsted Weight / 4 (less than 20 yds of each color), Lion Brand Wool-Ease Worsted was used for the headband in these photos (Blush Heather & Rose Heather)
Skill Level: Advanced Beginner / Easy
Size: One Size (adjustable length ties to fit all size heads)
*You can shop for all of your materials in one place thru our affiliates.


Abbreviations
- ch(s): chain(s)
- sl st: slip stitch
- sc: single crochet
- hdc: half double crochet
- dc: double crochet
- tr: treble crochet
- st(s): stitch(es)
- yo: yarn over
- BLO: back loop only
- Join w/ a dc (double crochet) *Click Here for Tutorial
- CA: Blush Heather
- CB: Rose Heather
“Stacked Hearts” Valentine’s Headband & Treat Holder
Instructions
Round 1: With CA, begin w/ a Magic Ring, sl st in magic ring, work 8 sc. Join w/ a sl st to 1st st of the round. – 8 sts

Round 3: *Working in BLO of Round 1*, Join CB w/ a dc (Click here for tutorial) to the BLO of Round 1 (*See photos below), dc in the same st, 2 dc in each st around. Join w/ sl st to 1st dc of round. – 16 sts
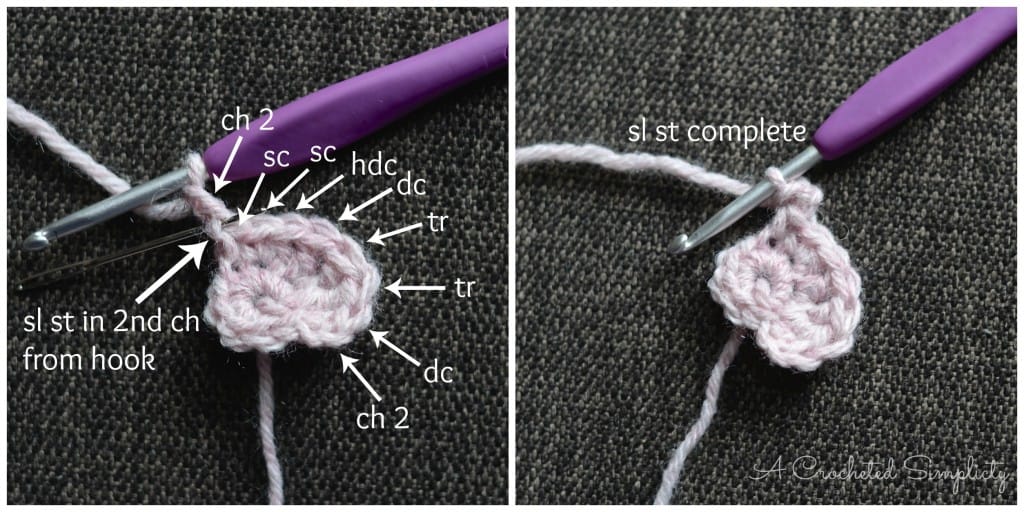
Round 4: Ch 2, *Working in Both Loops*, dc in same st as ch 2, 2 tr in next 2 sts, 2 dc in next st, 2 hdc in next st, sc in next 3 sts, ch 2, sl st in 2nd ch from hook, sc in next 3 sts, 2 hdc in next st, 2 dc in next st, 2 tr in next 2 sts, dc in next st, ch 2. Remove yarn from hook. Insert hook from back to front thru joining st from Round 3. Put yarn back on hook and pull through to the back of the heart (*See photos below). – 24 sts + 3 ch-2 Fasten off. Weave in ends.
Round 5: Join CA w/ a sl st to BLO of 1st ch of Round 4, *ch 2, sl st in BLO of next st, repeat from * around, skipping the BLO of the st at the bottom point of the heart (*See photos below). Fasten off. Using a yarn needle, weave the tail of yarn through the BLO of the 1st st of the round (*See 4th photo below). Weave in ends.
Ties (Make 2): Using your hook and whichever color yarn you prefer, ch the length of the circumference of the child’s head plus an additional 6-8″ (leaving enough free to tie). Claire’s head is 20″ so I chained ties that were 28″ long.
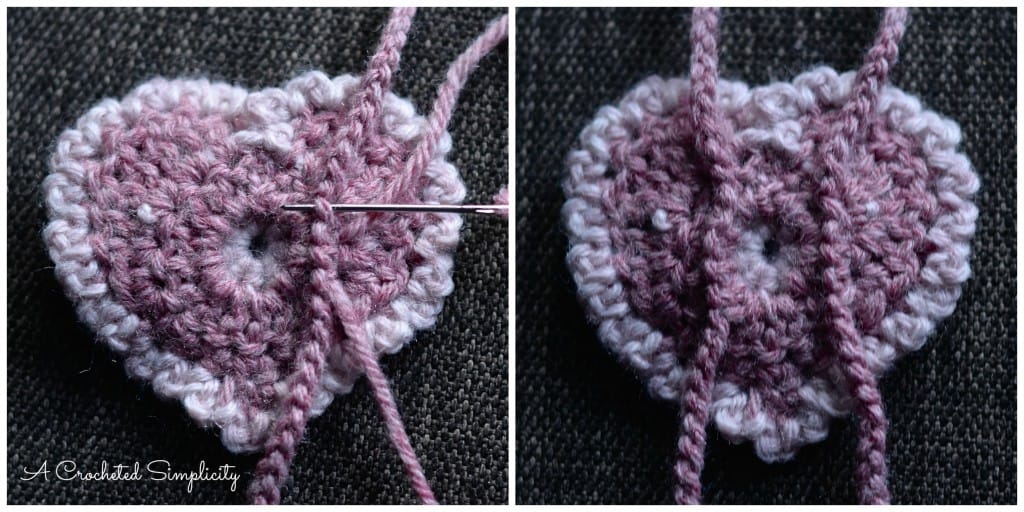
Attaching the Ties to the Heart: Fold your ties in half to find the center then position the heart 2-3″ from the center with the tip of the heart pointing towards the short ends of the ties. Using a yarn needle and scrap of yarn, sew the ties onto the back of the heart as shown above. I laid my ties so that the back hump of the chain was facing up. Sew through at least 6 chs of each tie (*See photos above).
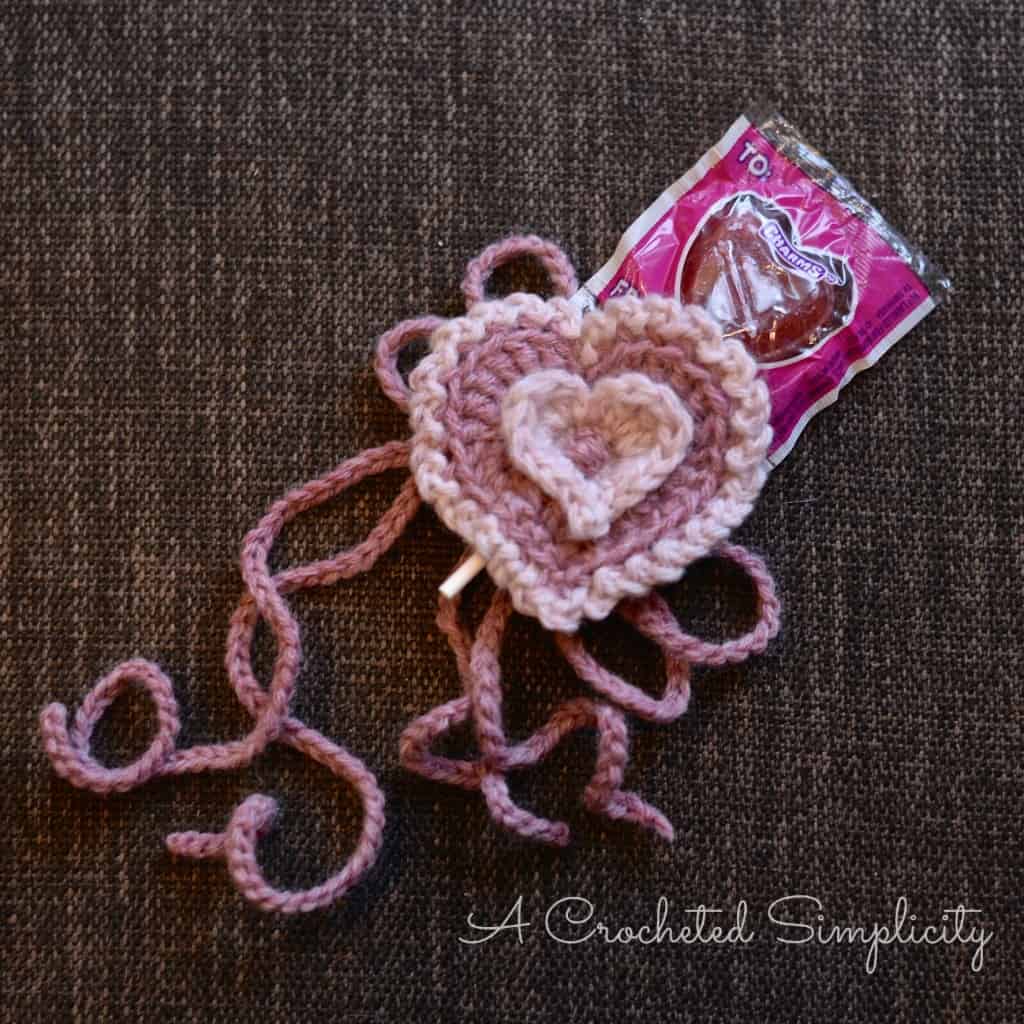
Adding the Treat! (*See photos above)
Using your crochet hook, pull up a loop of two (of the 4) tie ends. Pull up a loop only, do not pull the ends all the way through to the front.
Insert the sucker stick, from back to front, through a stitch from Round 1. Insert the sucker stick thru the loops of the ties and then finally, insert them through another st from Round 1 that is opposite the one you came up through.
Pull the loose ends of the ties to tighten the loops and secure the sucker stick. Flip the headband over to the back and tie the ends in a bow.
Voila! Now you have a super cute little Valentine’s Headband & Treat Holder for your favorite little Valentine. 🙂
Are you intimidated by knit-look crochet? Would you love to learn my tips & tricks? Take an Annies Video Class with me and let me ease your fears and help you increase your skills! Click on the photo below to watch a free preview. You can also see the other 4 video classes I have available!
I LOVE seeing your finished projects! Please share them with us in the A Crocheted Simplicity Crochet Community group on Facebook!
Happy Crocheting!


